dining room makeover...

For years my “dining room” has been little more than a pass-thru from the kitchen and living room into the den.

A few months ago I refinished a little table that is my current love…

You can see the evolution of my dining tables here. The criteria for a table is that it is compact but can expand to seat 8-10 people the one time a year we need a big table…basically Thanksgiving.

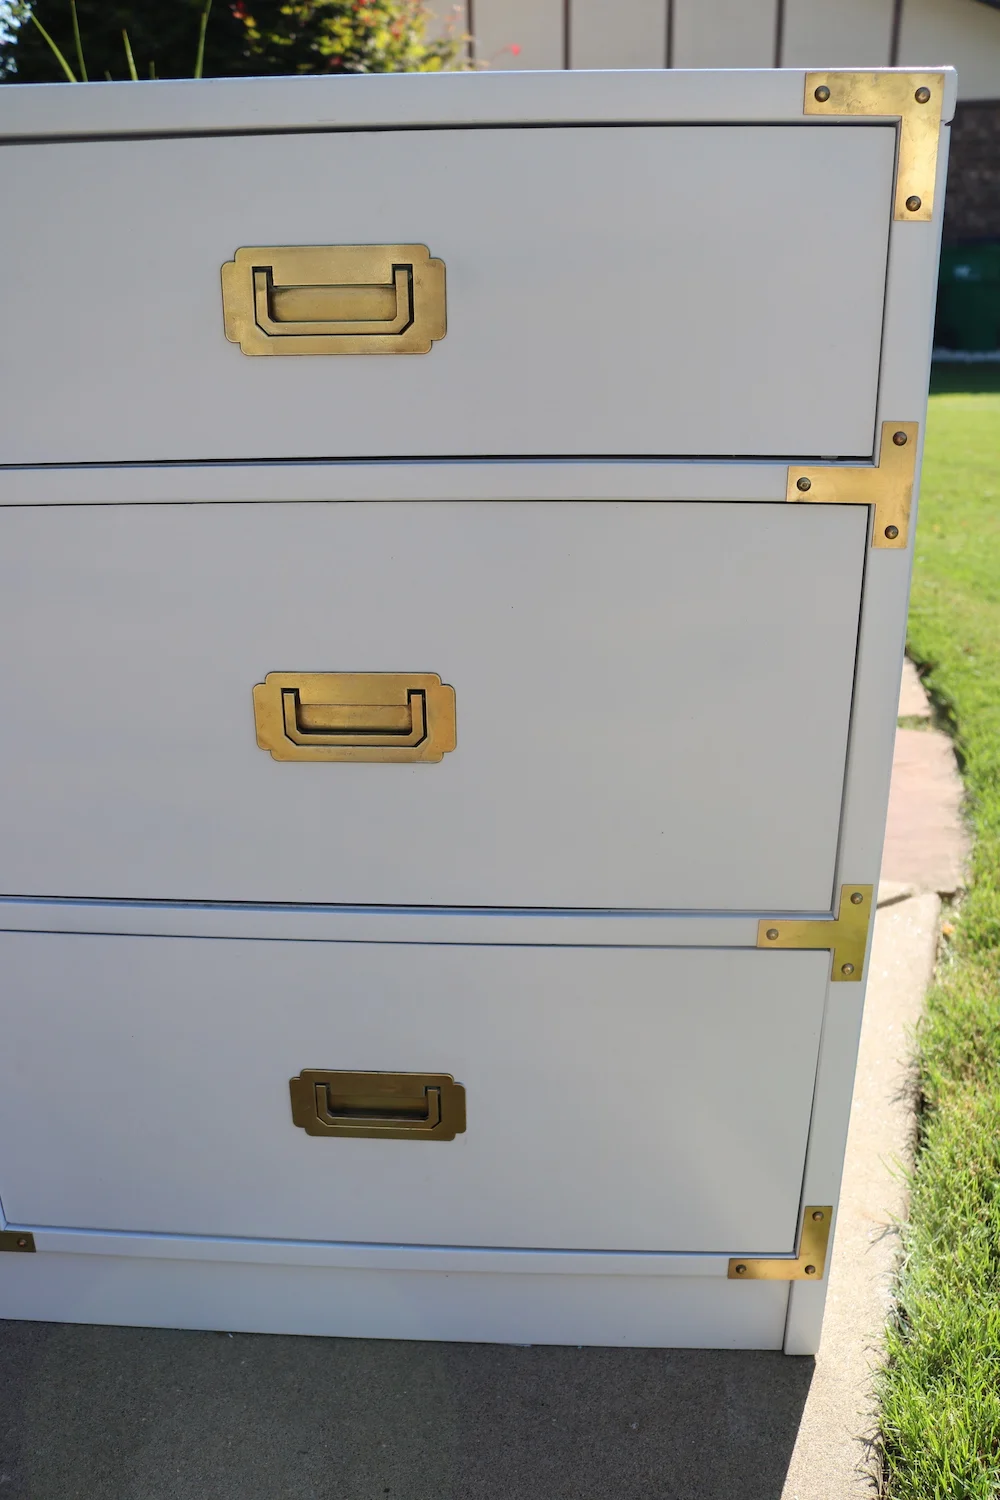
This new table fits the bill but try as I might, I could not find chairs I was really happy with. I knew what I wanted but I couldn’t find them in my normal “thrifty” way…I tried these “mid century” style chairs…

No way Jose’….super ick.

So I bit the bullet and ordered chairs from an actual retail store.

Whoa! Who knew dining chairs could be so stinking expensive!

Other than a revolving door of tables and chairs and a few changes to the art work and a new light fixture…and maybe the addition of ANOTHER buffet, the space never got a full-fledged “makeover.”

It has never really been styled as a “dining room.” Truth is, I have a bar we use regularly so other than our holiday gatherings, this space gets very little use.

I don’t really have an actual dining ROOM…it is more like a dining “space.” And again, it has always just been a thoroughfare from the kitchen to the den. So why bother styling it…

Because it is a very prominent space in my house that has been horribly neglected so it was time it got a little time and attention.

First, the table…I love the little mahogany trestle table. Maybe not specifically the style…or specifically the color…but just the whole of the sum. Don’t know how to explain it any better than that…it’s just pretty and small but easily expands.

The buffet. I love this piece…it only took me a year to figure out what to do with it, but now I love it….the style, the color, the size.

These two pieces alone are as different as night and day…one VERY traditional and antiquey looking and one very mid-century. That pretty much sums up my entire home decor…”eclectic.”

I changed up the buffet vignette a bit…just simplified it a tad…you can see HERE how I turned a candle stick into a lamp.

So, on to the rug.

What a nightmare. I THOUGHT I wanted to use this little space to infuse some serious color into my home.

Hum….not really loving it to be honest.

The first….

Wow…now that was some color.

ALL the pictures on Pinterest show rectangular rugs with rectangular table and round rugs with round tables….but because this space is a bit smallish and because we walk through this space A LOT, I tried a round rug…

Meh….

I LIKE the look of a round rug…but again, not sure I am digging all the color…even though I THOUGHT I wanted to infuse color into this space.

So I took the first one back and picked up another rectangular one with color, but a lighter background…

Hum again…

I LOVE this little scatter rug but alas it doesn’t come any bigger…curses.

I just love the colors and the amazing textures! But it did make me rethink my “color plan.”

This plain ole’ blue one….

I like the simplicity…I like the style…I like the quality. Nothing earth shattering and obviously I gave up on the idea of infusing color by putting down a “wild and crazy” rug. Oh well…I never professed to be a designer.

The wall decor. For a few decades I really liked the look of the two frames I had on this wall. They have “transitioned” over the years…first they went from the “dark and dank” to a chalk painted frame and new matting…then I changed up the matting and added botanical prints. So often I get so use to a certain look that it is difficult for me to see anything different…such was the case with these prints. I loved the pop of red of the matting and I adored the botanical prints. Unfortunately it was obvious two was not going to work…and one just looked so dinky.

Brian and I found these totally awesome mirrors.

IMO they look pretty awesome…not terribly expensive so when I tire of them I won’t feel too bad. But it took me 19 years to get rid of the two large frames so I doubt these go anywhere any time soon!

Fortunately, I LOVE the table, the buffet and the light fixture. Rugs and artwork are an easy change out if I find something I like better.

For now I will keep the little bench off to the side. It is perfect for when I expand the table and need a little extra seating.

I am excited to decorate this space for the holidays!

The only other thing I MIGHT add are curtains on the two flanking windows…or maybe shutters. Who knows…they have had blinds for 19 years…what’s the rush!

This is where I will admit I am like 90% of you out there… I just want Emily Henderson or Candice Olson or Joanna Gaines to swoop in and just do it all! I am always amazed that they can do in one hour what it has taken me 19 years to do!

I have avoided the whole “farmhouse decor” look only because I think it is a fad that will pass in short order…but this dining room gives me a little taste of the “farmhouse look” without going all out. Just a pinch and a dab that can easily and inexpensively be changed out when the time comes.

A few MCM makeovers and a life decision...

Again, I am a baaaad blogger. I jump head-long into a project and fail to take “before” pictures.

Prime example…

No “before” picture. It was in similar condition to THIS dresser…reeeeally bad. But of course I have no proof of that. Just take my word for it…again.

The entire piece was originally the old “natural” finish with a lot of “wear and tear.” I primed and painted the six side drawers and cabinet and stripped and oiled the top and middle drawers.

I absolutely love the wood handle “hardware” and the super nifty black concave and brass hardware. I sprayed the little concave pieces with metal primer and black paint.

The top had some chipped veneer. I originally planned to paint the top so I could repair these areas, but I just can’t resist beautiful walnut…even veneer. So I did what I often do…I just let it be what it is…an older piece with a few blemishes. You can buy replacement strips of veneer…but I would rather have flawed original…just a personal preference!

I did take a before picture of this piece….

I love the brass hardware on these pieces…again, the way to tell if it is solid brass is to use a magnet. A magnet will not stick to solid brass. Important because in order to clean these pieces I have to really scrub them with steel wool. No secret to cleaning brass hardware…lots of Brasso, steel wool and elbow grease!

Now…on to my “life decision.”

I have decided to stop doing the whole “auction/flea booth/resale” thing. I love doing what I do but doing it to “pay the rent” has become tiresome. I am just not enjoying it the way I use to.

So this past week I gave my notice at 410 Vintage and I went on a major “purgefest” in my garage (aka shop). I sold a lot of stuff on Facebook Marketplace, I donated a truck load to our local community thrift store and I took a truck load to the dumpster.

I have a friend who opened an awesome little consignment/flea market (Gathered Goods) so I took a few things to her to sell on consignment.

My garage has been a disaster for some time.

I painted the walls and cleaned all the shelving and cabinets!

I installed a Rubbermaid track system for large items….

…and we installed a nifty metal peg board system for all our tools. I knew where all my tools were but no one else could really figure out where anything was.

I even gave the door between the garage and laundry room a fresh coat of paint.

I am not “retiring” completely. I will still refinish and rehab pieces…I just won’t have to go looking for projects. If I find a project I want to work on, I can always take it to Darlene at Gathered Goods.

So fear not…I will always have a project to share here…and of course there are always my enlightened “muse” posts.

A whole lot of shaking going on!

AGAIN, I have been MIA for weeks. Trust me, I would have loved to have a day to sit and muse.

As I shared here, Matt moved into a new home and Katie moved out of her college apartment.

I laugh at people who think their “parenting” somehow ends when their kid turns 18. Trust me, that is when the REAL work begins. In my case it means helping kids maneuver through life…i.e. move, sell. buy, marry, give birth…in other words, any time they need help, Mom is here to help. The years of “rearing them up” are over, but their lives get crazy and complicated and they still need guidance and a strong back!

Soooooo, what I have I been up to?

The house Matt bought was the home of his aunt’s sister…she passed away in March. So imagine you walk out of your home and die…and everything you own is in that house. Yep…and not only is it a big house, it was PACKED FULL! No one was able to really begin sorting and packing and moving her stuff out until after Matt closed so the week before Katie moved, I was at Matt’s new house sorting and packing!

After a few days of doing that, we loaded up a 16’ moving truck with all of Katie’s belongings and her cat, Simon, hooked her car up to the back, and drove 21 hours to her new home in Delaware.

I made an instagram post about this trip…one of the hashtags was #budgetrentalssmelllikeass…enough said about that issue.

The truck did not have cruise control. I never thought of that feature as being a “must have” on a vehicle. I was wrong.

I will NEVER complain about the condition of Arkansas highways again after driving through Missouri, Illinois, Ohio and Pennsylvania.

NEVER book a motel in a city if you have no idea where their “bad side of town” is….there is a good chance the hotel will be smack dab in the middle of it.

When driving a 16’ box truck towing a vehicle DO NOT get yourself in a tight spot…only get gas where 18 wheelers get gas!

All that being said, we were extremely fortunate to find parking right in front of her apartment. Fortunate as well that she has a friend who had moved to Wilmington the week prior and was available to help unload the truck. We were able to get everything moved into her little apartment the evening we pulled into town.

Then the REAL work began.

The apartment was advertised as 700 square feet…I can assure you it is not! “Tiny living” is a real challenge, even for a recent college graduate who has few possessions. Unfortunately, that is all that is really affordable if you are looking for a safe neighborhood close to downtown in an older Northeastern city.

You have to be very judicious about possessions, you learn to be very organized and you make the most of all the space available.

So for two days we unpacked, purged, built shelving, and arranged and rearranged furniture and “stuff.” It was a challenge but in the end she has a precious “home” that is perfect for her and Simon!

The kitchen was the biggest challenge. Katie loves to cook and she buys in bulk and stores everything in mason jars. Since the kitchen only had two upper cabinets, we spend the better part of one day just building shelves to hold her storage jars, dishes and spices. (All the photos are from my Iphone, and again, I am not a travel blogger!)

The living room wasn’t as big of a challenge since it wasn’t much smaller than her college apartment!

The pen and ink drawings are of the old train depot and old post office in Fayetteville…a little token of her college town.

She finally ordered pillow covers for her throw pillows. She learned from her mama…keep the big stuff neutral and infuse color in the decor…pillows, rugs, art, etc. The pillows she ordered are bright and fun and full of color!

Two days of driving, two days of moving/building/staging/purging and then the fun begins….

NEW YORK CITY BABY!!!!!

Yep, I finally got to take my baby to New York City! We took a train from Wilmington, Delaware to Penn Station in New York City, walked 10 blocks to our hotel and spent 3 1/2 glorious days in New York City!!!

Okay, glorious is a stretch….it rained the first day and they were experiencing their first big “heat wave” of the summer….weather-wise, not so glorious.

So what did we do in the rain and the heat? AS MUCH AS WE COULD!

We saw two Broadway plays….

It was the one thing I regretted not doing when Matt and I went to NYC.

We did the whole “Rockefeller Center” thing…bought a sweatshirt in the NBC shop, went to the Top of the Rock and had coffee in the plaza.

We ate a pastrami sandwich and a HUGE slice of cheesecake in a sweet little cafe off Time Square….

We rode bikes around Central Park….keep in mind it was pushing 100 degrees so we were pretty melted. That being said, when Matt and I road around Central Park two years ago, I had to walk 1/2 the way…I was just soooo out of shape! After losing 20+ pounds and biking for the last year, I was able to ride around the entire park without stopping at all! Yay, me!!!

We ate dinner in Bryant park, took the night bus tour across the Manhattan bridge to Brooklyn, walked across the Brooklyn bridge in the rain, visited the 9-11 memorial, took the ferry to the Statue of Liberty and Ellis Island. We took the extended tour of Ellis Island. We spent a morning in the Museum of Natural History (really should have spend ALL day there), took a bus tour of Harlem, saw Grant’s tomb, visited the Federal Hall where Washington was inaugurated and the little church across from the 9-11 memorial where he prayed after his inauguration. We took a water taxi up the west side of Manhattan. We visited the church were Alexander Hamilton is buried and of course, St. Peter’s Cathedral on 5th Avenue….

Which reminds me…how many Catholics does it take to change a light bulb….

Even in the most reverent places my mind goes places. But seriously, it is BEAUTIFUL cathedral!

I know we did much more…but basically we saw as much of NYC as we could in a few short days.

Then I flew home from Laguardia and Katie returned to her new little apartment in Wilmington.

My baby has officially “left the nest.”

And while I would love to sit and “muse” about this next chapter in my life, I really didn’t have much time to dwell. I had work to do at the apartments, a pile of projects in my garage, and a son who needed help with his yard and garage at his new house.

Man I need a vacation!

Maybe in the pile of projects in my garage I will have a makeover to share next week.

Until then….


Drexel Accolade Makeover...

An entire year…A YEAR!!!! That is how long this Drexel buffet has sat in my dining room in it’s original state because I couldn’t pick a stinking paint color. I may be able to paint and refinish and upholstery…but picking a paint color or fabric is TORTURE!!!!

I LOVE the white lacquer finish on this little side table….

….and I love how the bright brass hardware just POPS on the white lacquer but I really wanted to do something different.

But I could NOT make up my mind. I did a lot of research and most of the painted Accolade pieces are white or black…and honestly I did not want to do black.

Hum….

I found a paint color I am madly in love with!!!! It is actually a Krylon “chalky paint” and I have used it on several pieces and I just LOVE the color…Krylon’s Anvil Gray. While it has “gray” in the name it really is a true deep, rich navy. And it sprays on beautifully!

There was one problem with this paint for this project…it is super flat…like most “chalk” paints. I desperately wanted a “high gloss” finish so I tested a few clear coats over the paint to see if I could find a good gloss. I tried a new product (at least to me), Krylon Triple-thick Crystal Clear Glaze. It SAYS it is a “glass-like coating” and “superior high-gloss finish” and it is as good as advertised.

The finish is super high gloss and exceptionally durable…I am VERY pleased.

So…

I changed up the art in the dining room over a year ago and I still love it. I still love the red fabric I used on the chairs. I love the draw leaf table. If you search “buffet” or “dining room table” on this site you will see few last long around here….but truthfully, I think I am finally loving the “look” of my dining room…so these pieces may actually make it a tad longer.

Again, no secret to cleaning brass….lots of brass cleaner, SOS pads, and elbow grease…but worth every bit of the work!

I have already stocked it with my holiday and seasonal dishes. Pretty with a purpose…my favorite. But as I said, buffets don’t last long around here so we’ll see how it fairs.

I think I have mentioned before that I DO NOT have a green thumb when it comes to indoor plants….so some of you may be shocked by the massive peace lily.

A little side story…we went to an auction…they were selling the plants (yes, they sell EVERYTHING!) Nobody would bid on this big ole’ monster so then they threw in a monster pothos plant…I’m talking HUGE!!!! My youngest daughter has been sprouting “cuttings” for her apartment so I knew she would love the pothos…so I ended up buying them both for ONE DOLLAR!!! No kidding….a dollar for two huge plants. She didn’t want the peace lily so I stuck it in my dining room and other than dump my leftover night time water in it every morning, I pretty much ignore it.

And you know what…it THRIVES. It is growing, it is healthy and it is constantly blooming. Go figure!

Now I want to share a little issue I am having with my beloved Kilz…I had this issue sometime back when I was using white lacquer…so honestly I attributed it to the paint since lacquer tends to be a “hot” finish.

But I had the same issue this time, and I was using plain ole’ spray paint.

I call it “alligatoring.”

I cleaned the pieces, sprayed on the Kilz, sanded smooth, then wiped it down with tack cloth. When I sprayed on the paint, it “alligatored.” Curses!!!

I thought MAYBE the tack cloth left a weird residue, so I sanded the spots smooth after they dried well, reapplied Kilz, sanded and then just wiped it down well with a rag…another coat of paint…same problem, just in different areas. The entire piece alligatored randomly. WTF!!! Temperature…nope…humidity…maybe. But I had the same problem when I painted on a drier day. So who the heck knows. Like I said, I had this problem sometime back on another project.

The Kilz is what is actually crackling…not just the paint. I contacted Kilz and they swear they didn’t mess with the formula and were as stumped as I was.

My solution….well I had to sand the entire piece down, paying close attention to the areas that “alligatored.” After everything was smooth and clean again, I used Bullseye 1-2-3 Primer, let it dry well, sanded, and tacked. Sprayed on the paint and presto-bingo…perfect.

Kilz was kind enough to send me a replacement can of primer. Yippee…somehow I guess that is suppose to make up for two days of grief and cursing.

So now my “KSTP” process will become “BSTP” …eck…not really a good acronym…but I hesitate to use Kilz if it really is the only common denominator in this little disaster. Since no other factors seemed to affect the out come, I can only assume it is the culprit.

Who knows…but from now on I can’t say that Kilz is the be-all end-all of primers when painting furniture.

Sorry guys!

Another MCM dresser makeover!

This is not a dresser…this is a chest of drawers. I think there is often confusion, and I am the world’s worst at referring to a chest of drawers as a dresser.

There is a difference!

But seriously who cares…lol!

Regardless of what you call it, it was A MESS! But oh the potential.

My very first love…MCM pieces. It would take a month of Sundays to link to all the MCM pieces I have refinished…just search MCM or mid century on this site. Truth be told I would have kept every one of them if I didn’t have a fear of being featured on Hoarders. So I find pieces I love, give them a good little makeover and am sincerely happy when someone else gives them a good home.

In spite of all it’s flaws, I loved this piece. It had the normal wear and tear, a seriously cruddy finish, a chipped wood handle (aren’t those wood handles AMAZING!!!!) and what I THOUGHT was some stains around the hardware on the top drawer…turns out it is a beautiful wood inlay. But you couldn’t really tell because the finish was so icky. (The missing knob was in the drawer…yipeee!)

Let’s be honest, we will all have a pretty worn finish after 60 years on this earth!

My first thought was to paint the wood handles an accent color so I could repair the chip. My daughter suggested I just strip them first. So glad I listened to her. I used this process to strip the drawer fronts, handles and legs…the old stain came off the wood handles and revealed a beautiful white wood (oak, teak? Couldn’t tell)….LOVE!!! I sanded the chip down…and you know what, I can live with it….it is obvious it isn’t the way it is suppose to be but HEY…this is a vintage piece and vintage pieces are going to have a few boo-boos!

The drawer fronts and base were stripped and oiled, the cabinet was given a KSTP treatment (Kilz, sand, tack and painted with white high gloss enamel)

(After I took the pictures, I saw the VERY fine over spray on the top drawer…curses…a little mineral spirits cleaned it right off!)

Personally, I love the high contrast of the wood handles and walnut veneer. The Lane Acclaim tables I collect have the same stark contrasting wood detailing when I refinish them…LOVE!

Often vintage pieces would have been stained and finished so all the differing woods and the entire piece had a “uniform” look and the grain detail was toned down a bit. I say LET IT SHINE BABY!!! If you are a “purist” and want vintage pieces to reflect their original state, you probably don’t want to use the processes I use to refinish pieces!

I am all for exposing the grain and the natural color of the wood.

And I am all for bringing the old pieces back to life!

Modifying a Dillingham MCM dresser....

So often I buy mid century pieces fully intending to clean them up and sell them. But then, well, I don’t. Inevitably I fall in love with them or one of my kids does (just search mid century on this site…you will see)

Such was the case with this mid century walnut Dillingham dresser….

It did have a few boo-boos…a broken corner piece I was able to fix with a little wood glue…

A tiny bit of chipped veneer I decided to ignore…

And of course the finish was a little worn and tired looking and needed some freshening. First I tried a little Restor-a-finish….

You can kind of see the difference…the right side has been wiped down with Restor-a-finish.

It helped a tad but in the end I scrubbed it down with mineral spirits and steel wool and applied 2 coats of tung oil finish…brightened it right up and blended all the scratches and wear…after all it is a 50+ year old piece…it’s gonna have a few nicks and dings. But again, nothing terribly glaring.

Even though the issues were relatively minor, I hesitated to sell it. I considered painting the sides to disguise the biggest issue…the broken corner.

Enter my kid! Matt absolutely LOVED it and wanted it for an entertainment cabinet!

The dark walnut matches his vintage Lane tables perfectly and like me he has a real affinity for MCM pieces.

So I went to work modifying it for his needs..specifically he needs a place for his turn table.

(Side note…I get tickled at the newest generation of vinyl lovers. People my age remember how thrilled we were to get away from bulky old record players and vinyl records that scratched and skipped. Cassette tapes and walkmans and boom boxes…life changing! Now the younger generation have circled back around to “vinyl” and think they have discovered the greatest thing since sliced bread…HA!!! See, if you live long enough, it all comes back in style!)

So…how to modify this dresser without changing it too much.

I decided to make the bottom two drawers one deep drawer. That entailed removing the face front of the middle drawer and attaching it to the black face frame and bottom drawer…creating what appeared to be two separate drawers…but is actually just one deep drawer.

Confusing I know…let me see if I can show you what I mean in pictures.

First I had to cut the face frame in half to detach it from the cabinet.

Since it is a laminate material, I knew I needed to tape it first to keep it from “splintering.” ALWAYS tape laminate before you cut it and draw your cut mark on the tape!

I could have used a skill saw with a trim blade to make the cut. But I knew a skill saw wouldn’t work to cut the little shelf inside that separated the two drawer spaces. So, darn, I had to buy a new tool…I hate that when that happens! (NOT!)

I have a small Dremel that has similar functions but this little guy is pretty heavy duty…and it worked like a charm!

Next I used my Kreg jig and glue to attach 1x2 pieces of oak to both edges of the face frame. The drawer fronts and face frame only over lapped by about 1/8”…attaching the oak allowed me to secure the face frame to the drawer fronts with glue and screws.

We used a hole saw to cut a hole in the back of the cabinet to feed electric wires through.

That was pretty much all the modification this dresser needed to turn it into the perfect entertainment cabinet!

In the photos you get a peak of a few of the changes Matt has made to his house since he bought it a year ago…the painted fireplace I shared here and the new tile I haven’t shared yet.

I have promised for A YEAR to share a few of the projects he has completed on his house…he opened up the entry, painted his kitchen cabinets and installed glass cabinet doors, built open shelving in his kitchen and laid new tile in the entry and around the fireplace. He has even built a little storage shed! I am so proud of his “projecting” so while I was there taking pictures of his new entertainment cabinet, I snapped a few of his entry and kitchen and I PROMISE to share those next week.


A mid century chest of drawers makeover...the reveal!

When last we spoke, I shared a little “step by step” tutorial for repairing and prepping this “less-than-desirable” chest….

I can not stress enough the importance of “prep work” on any project. Again, if you don’t take the time to make repairs and properly prep (regardless of whether it is a dresser or a wall or a floor) all the “pretty” is going to be wasted.

(BTW, while cruising Pinterest I found this super awesome tutorial for repairing chipped corners with wood filler! Great suggestions!)

Make proper repairs, sand patches smooth, use the right tools and materials! Do the repairs and prep or you are wasting your time and resources making it pretty.

After all the patching and repairs, the next step is properly priming! (I had already stripped and oiled the drawers and set them aside!)

I primed the cabinet of the chest with Kilz. That is usually my go-to primer since it sands smooth and holds up well. Primer is a SUPER important step on most paint projects…unless you are chalk painting! Since this was a relatively small project I used the spray Kilz…one can.

TIP: I know a lot of paints SAY they are a “paint and primer” in one…I may eventually change my tune but I don’t believe them. I ALWAYS use a primer…always!

After the Kilz had dried well (usually overnight but several days is best), I sanded it smooth with 220 grit paper.

After sanding I checked all the areas I had repaired…there were a few little spots that needed additional putty and one I missed on the first go round…

…no biggy….I just filled them again, let it dry, sanded smooth, spritzed on a little more primer and then sanded it again after that had dried.

Tack cloth…it is an absolute necessity on any paint job. I see tutorials all the time that recommend wiping the piece with a damp cloth or even mineral spirits. Forget about it! USE TACK CLOTH! It will pick up the finest grains of whatever and will make a huge difference in the final look and feel of your paint job!

I’m kind of obsessed with white lacquer these days. i just love the high gloss finish. Spray paint is always a great option for smaller projects and you can find a multitude of colors and sheens! Just make sure you use a quality brand! You can also brush and/or roll alkyd (oil based) or latex (water based) paint. ALWAYS use an additive and use a high quality brush and 4” foam roller to apply the paint. Pay attention to the manufactures recommendation for temperature and application…it matters!

Regardless of whether you use a spray paint or lacquer, latex or oil, always apply 2-3 THIN coats, allowing dry time as recommended. Thinner is better. If you try to get a one coat finish, you will likely be disappointed and make a HUGE mess!

Spray, roll, and/or brush on the paint…a thin coat…let it properly dry, lightly sand the boogers AFTER it has properly dried with a fine grit paper (IF needed), tack and recoat. Regardless of whether you need to sand between coats, always use tack cloth before applying additional coats. I usually apply at least two coats and sometimes three.

Most paints do not need a top coat but if your piece will be getting a lot of use, I recommend a light coat of polycrylic. Polyurethane is some good stuff but it tends to “yellow” so polycrylic works great.

So…before….

…and the oh-so-better after….

You may have noticed one little missing element. The hardware! Why? Well because I didn’t pay attention when I ordered new brass cone knobs and they are coming from CHINA!!! So I should have them someday…maybe…who knows! The hard work is done…knobs are no biggy!

One of the patched areas after paint…

Dry time…IT MATTERS. I cringe when I watch DIY shows and they immediately stage all the pretty pieces they just painted. There is a huge difference between “dry to touch” and “dry to USE.” Truth is, paint and finishes need time to cure before you put all your pretties on it. You can move it in place, but give latex paint AT LEAST a week or two to cure and oil based paints a good 3-4 weeks. Otherwise you may find that your heavy lamp or knick-knacks will stick to the finish or leave a mark!

This is another dresser I finished up a few weeks ago. It didn’t have near the issues the first had, but the refinish process was the same…KSTP the cabinet and refinish the drawer fronts…presto-bingo…

Again, I know this sounds like a daunting and time consuming task…but if you take the time to do it right, you will have a piece that will last another lifetime and one you will be proud to use in your home!

Next week I hope to share my bathroom remodel. In the meantime, you can check out Cristina’s master bath…it will knock your socks off!

Until then….

Mirror, mirror, on the wall....

I gave up trying to come up with clever blog titles a loooong time ago, but I just couldn't resist!

Mirrors are the simplest way to add wall decor, light and depth to a room. In other words, if you have a small dark room, hang a mirror!

My master bedroom is a pretty large room and it gets tons of natural light but I am in the process of making a few changes. I have a really awesome antique mirror hanging out in my garage that may fit into the plan.

I use mirrors in just about every room of my house....

The living room (featured here)....

The den...

My home office....

And this fun little mirror hanging in a small corner of my room...

The change? Well, I am finally getting around to buying new chairs for my master bedroom. I originally intended to reupholster the chairs I have...

But as you can see, they are very large...and they are "matchy-matchy" which is something I am moving away from. Truth be told, I just don't like them any more!

While I was hunting for a new couch for the living room, I looked at a few chairs that might work in this space.

First, let me explain "this space." When the kids were younger, I added the den so we would have two living spaces. When they got a bit older (and louder), I added a large master suite with this awesome sitting area so we would have someplace to escape to.

Of course, now the kids are gone and we have this amazing sitting area in our bedroom and two living spaces. Um, no, we don't need all this space. Truthfully, we rarely use the sitting area in the master bedroom these days...but my oldest daughter really wants these two large club chairs...and well, it's just time to make a change!

So the hunt for the perfect chairs commenced.....

Two caught my eye, so this week I went back to the store and ordered them both....

This one is a leather recliner. A little bit of information about myself...I DO NOT do recliners. First, they are usually very bulky and unsightly. Second, I have an unfortunate history with recliners...hence, they seem to set off a form of PTSD. I don't really want to share, but suffice it to say, I swore there would never be a recliner in my home.

But I kind of like this one...it is very different from your typical barcalounger recliner and I really didn't find it the least bit offensive. It has a USB port and Brian thinks it is super comfy, so this will be "his" chair.

My chair is actually a "feed me a grape" kinda thing....

Perfect for those nights when my back won't let me lay in bed any longer or cold winter afternoons when I just want to curl up with a blanket and a good book!

I really didn't need an ottoman since Brian will have the recliner but I wanted to be able to stretch out.  This one fits the bill...and it is super comfy!

Which brings me to the mirror in the garage (see, I eventually get around to my point!) 

Months ago I bought a MCM dresser with a mirror. It had obviously been exposed to heat from a fire because the finish had a little bit of "bubbling" and it was covered in soot. I took off the mirror, cleaned up the dresser and sold it. 

These days dressers WITH mirrors just aren't the "in thing" so I kept the mirror and gave it a little makeover with the intent to sell it. The finish was damaged...and of course it was pretty "dark and dank."

I chalk painted it with an off-white paint and distressed it a bit. But I really didn't like the look of it...it just seemed too "white."

So I decided to give it a little "glaze" treatment with some stain. I wiped on pecan stain and then wiped it off. It gave the finish a nice "aged" look. After glazing the entire frame of the mirror, I sealed it with polycrylic and reattached the little medallions.

The mirror is "not my style" (again, whatever the heck that is! Eclectic?) and of course I will have to hang it higher...right now I just stuck it up where the old picture was to see if I MIGHT like it there...don't know. Truth is, I will have to wait until the new chairs are in place.

But my whole rambling point is this...you don't have to live with "dark and dank." Mirror frames can easily be painted. Even if the frame isn't quite "your style" a little paint can go a long way to making a simple cast off mirror a nice statement piece for your room! And trust me, if you have priced mirrors lately, you might want to rethink that thrift store gold framed mirror or that old dresser mirror!

Whether you paint it a bright, solid color or give it a little "aged look" treatment, mirrors are easy to change to fit any decor!

More painted furniture projects and how you can get perfect paint results!

I know I share a lot of painted furniture projects. There was a time when I was a "paint snob." If it is wood, no paint.

But I have learned in my resell business that paint is often the best way to "enhance" a piece and give it new life. 

We all have "that piece." The one mom gave us or maybe we bought at a thrift store or garage sale because we needed a dresser or side table. A maple dresser from the 60s or one of those fake wood "cherry" tables from the 80s. We still need it for the storage or even to fill a space and buying new just isn't an option.

As I have said before, life is too short to live with ugly furniture and even the ugliest piece can benefit from a little "makeover" 

Updating an old dresser or bedside table isn't difficult. Yes, Pinterest is filled with precious stenciled and glazed projects...and we all envy. But simple is easy and the impact can be huge.  I have shared hundreds over the years and every week I complete at least 2-3 pieces that often do not get shared...either I forget to take pictures or they sell so fast I think "why bother." 

So today, again, I'm going to share a few simple little projects and how to get the best results.

Mini makeovers that can make a huge impact in any room!

This campaign dresser had seen it's better days....

As you can see, it had been seriously abused. But even the ugliest piece has potential....

Not the best "after" picture, but I didn't think to take a picture before I took it into 410 Vintage so I snapped one with my phone...but you get the idea. (If you haven't been to 410, GO!)

It sold the day I took it in! These "upcycled" dressers are perfect for a bedroom or even a tv and storage cabinet in the living room.

You might have noticed one piece of the hardware was missing. I happened to have one of the pulls from this project so I used the same method to retrofit it. You don't have to do anything that complicated...most home improvement stores have tons of hardware options. All the hardware was solid brass so I cleaned it up with some Brasso, steel wool and elbow grease. The point...the hardware doesn't have to be all matchy-matchy. 

This little bedside table had seen it's better days!

A simple little makeover...paint and new hardware....new life....

This is a typical hard rock maple dresser you can find for next to nothing at thrift stores and garage sales...

Usually sturdy as the day they were built, but seriously ugly and dated!

They obviously can benefit from a little love and attention...nothing fancy just a little paint and hardware update....

An inexpensive little "fake wood" side table......

And AGAIN...

I liked the brass hardware on this one so I just cleaned it up!

Sooooo...what do all these projects have in common. 

KSTP...Kilz (or any good primer!), sand with 220 grit paper, wipe down with a tack cloth and paint.

The two dressers were painted with latex paint using a 4" foam roller and paint brush. I used spray paint on the two little side tables.

So, here are a few TIPS for getting the best results when painting furniture.

1) Always clean the piece of any dirt or debris. Just wipe it down with a damp cloth and make sure you get all the "ick" off! If the piece is super grungy, you might want to clean it with ammonia or wipe it down with mineral spirits! (If it has a lot of flaking paint, you can sand it down a bit or better yet, strip it using this process...just make sure the existing paint or finish is stable!)

2) Make repairs. DO NOT waste your time making it pretty if it needs repairs. And remember, glue and clamps are your friend!!!! If you don't know how to repair something, google it or email me. MOST furniture repairs aren't that difficult...but if you do it wrong (or not at all) you will be wasting your time making it pretty! 

3) Primer....always a must if you are going to paint with spray paint or latex or oil paint. I swear by the oil-based Kilz. If you want your paint to stick and not chip or peel, prime. For smaller projects I use spray Kilz. For larger projects I roll on Kilz with a 4" foam roller. Even if your paint says "all in one paint and primer"...use primer.

4) Sand smooth after the primer has thoroughly dried. A 220 grit paper should do the trick...FEEL the surface...if you can feel it, the paint won't hide it. 

5) Use tack cloth. Most tutorials will tell you to wipe the piece with a damp cloth. That won't cut it! Tack cloth will pick up the finest grains of dust and debris you can't see until you paint the piece! Use it!

6) If you are going to brush on latex or oil, use a quality brush AND TAKE CARE OF IT! I have brushes I have owned for years because I am religious about cleaning them thoroughly after use. And don't even think about using those cheap disposable brushes (chip brushes). They are great for many things, but not for getting a smooth paint finish on furniture!!!! 

7) ALWAYS use an additive....Floetrol for latex, Penetrol for oil based paints. 

8) Use quality paint. Especially spray paint. I know it is cheaper at discount stores but pay the extra few dollars and buy a quality spray paint at your home improvement store. Cheaper will NOT be better if it doesn't hold up to wear and tear! I do 2-3 light coats (spray or brush) rather than trying to get solid coverage with one coat...trust me when I say, there is NO paint on earth that will get good coverage with just one coat!

9) Cure time is important. Seriously, I know they style their pieces on those HGTV shows within hours of painting a piece of furniture. Just don't! Just because the paint feels dry to the touch DOES NOT mean it has cured. Latex...a few days...oil...a week. Give your paint time to cure or it is going to peel or chip if you try to use it right away! Put the piece in place and chill!

10) Spray vs. Brush/roller. For me, it all depends. I have learned that large flat areas are tough to get an even coat of paint on with spray paint...and of course there is the expense factor for large pieces. A dresser can take 2-3 cans of spray paint. So it really depends of the piece. Sometimes I will spray the drawer fronts of a dresser and roll the top and sides. 

11) Keep a little spare paint for chips and dings...if you use latex or oil, just put a few tablespoons in a little container and stick it in the back of the drawer...just in case! If you are using spray paint, keep a can with a little paint. Manufacturer's change paint colors and you might not be able to find that awesome color in the future. Keep spare paint in the house...not the garage or storage shed!

Regardless of whether you spray or roll/brush, you have to follow the first rules of KSTP....Kilz (primer), sand smooth, then tack....then paint!

If you follow these simple guidelines, you can update a dated piece with just a little time and effort. 

Again, life is too short to live with ugly furniture...

Drexel Accolade Nightstand makeover....

I cringe when I even think about painting any MCM piece but occasionally I bite the bullet and paint. Painted this MCM dresser and chest and have never regretted it...yet.

These little Drexel Accolade campaign "nightstands" are described as "MCM" but my research shows they are from the 1980s...so at best they are "vintage." (I cringe even more describing anything from the 80s as "vintage" since I graduated from college in the 80s!)

These little tables vary in "value." Originally my intent was to sell both as-is. But one had some serious "splash marks" all over it and as much as I tried I could not get it off. My only option was to completely strip and refinish the piece...or paint. 

Since I am AGAIN working on the final stages of my den makeover, I decided to paint the one with the serious flaws and use it as a side table. I started to strip and stain it, but I really need a painted piece rather than stained....just my preference. I believe it is important to have a balance of paint and natural wood in any decor and in this case the scales tipped toward paint.

(I will remind you to use extreme caution when painting "vintage" or "antique" pieces...do your research and know what you have FIRST! Make an informed decision before you refinish or paint...you don't want to find out later that you slathered paint on a 1796 colonial side table or spray painted a Hans Wegner chair...just watch "Antique Roadshow")

You can use ketchup or lemon based cleaners to clean brass. Just Google!

The brass hardware on these little tables needed some serious attention!

One interesting tidbit I ran across was how to determine if you have solid brass or brass plated...a magnet...magnets won't stick to solid brass...if it sticks, it is plated...interesting. Mine are solid so that determined how "aggressive" I could be cleaning them.

I'm not sure if a "clear coat" was sprayed on this hardware or age had taken a toll (maybe both), but even my 1/2 and 1/2 mixture didn't cut it. In the end I used a toothbrush, 0000 steal wool, a heavy duty brass cleaner and a ton of elbow grease.

Then I gave the entire piece a little KSTP treatment...Kilz, sand, tack cloth and then paint. 

I really like the look of "high gloss" so I went with a high gloss lacquer white...I think the brass really pops against the gloss white and hopefully it will look good with whatever couch I finally set my sights on!

One word of warning I hope all will take seriously...give paint time to "cure." Nothing is more frustrating than spending time and effort making a piece pretty with paint, only to mess it up by putting doo-dads on it too soon! Cure time IS important!!!! 

I cleaned up the other and it may be sold...I may hang onto it for the time being to see if I can use it in the den...but I am not really into "matchy-matchy" so I may not use it...who knows. And besides, that brass is a booger to shine up so I'm not really looking forward to doing that again any time soon!!!

You may notice I have a mix of MCM and "traditional" in my den...and that is honestly how I would describe "my style"....eclectic or maybe "transitional"...a little of this and a little of that. It allows me to add elements I love without having to worry too much about the actual "style" of each piece. 

Until next week....