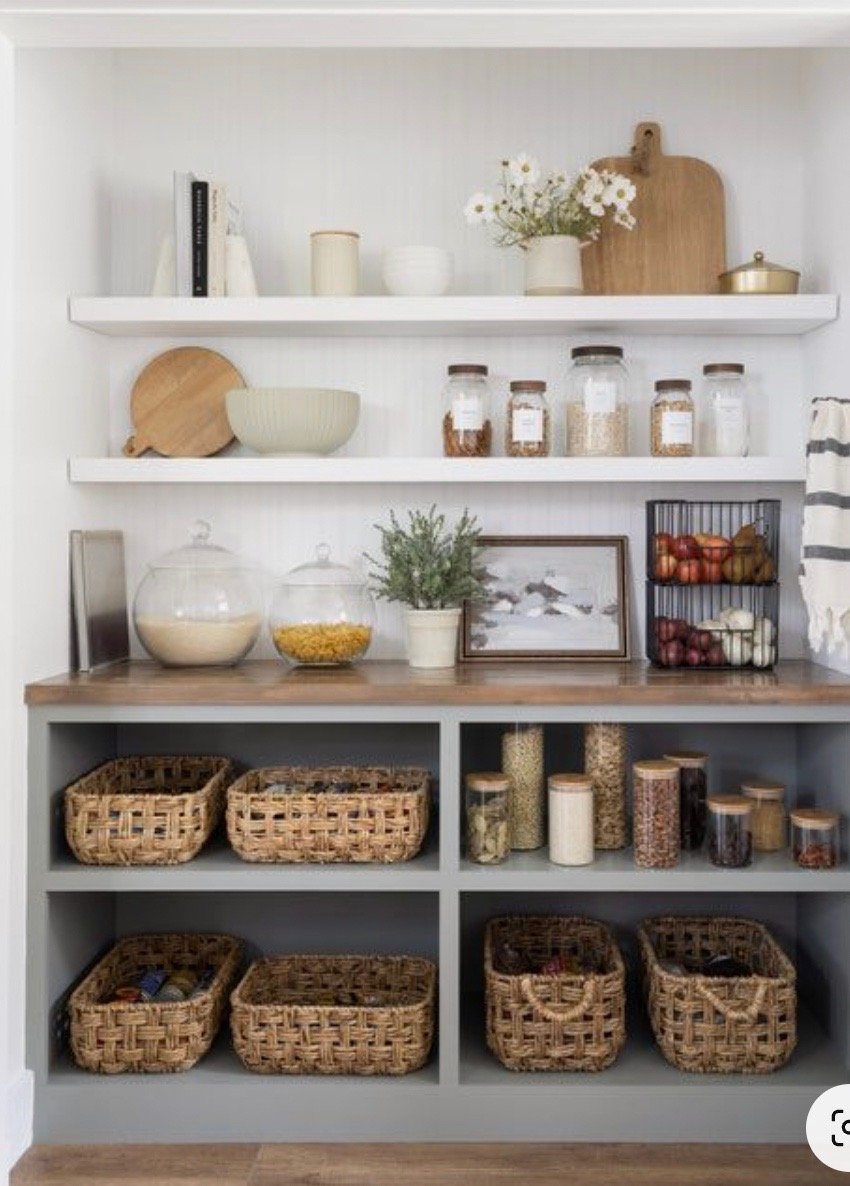
Another pantry makeover....

There was a time when I loved DIY projects and was constantly working on something…everything from room makeovers to furniture rehab.

Unfortunately the time came when my back and fingers just couldn’t take the daily beating. And truthfully I’ve pretty much done everything to this house that can be done. Except the yard…I’m still out there designing and planting and digging…when it is not 100+ out!

One of my favorite DIY projects are pantry makeovers and those I can’t resist.

HERE I shared my pantry.

HERE I shared the pantry I revamped for my son and daughter in law.

Some serious reconfigurations can make a huge difference in the functionality of the space.

My stepson and daughter in law have talked about giving their walk in pantry a makeover for years…actually since they bought the house.

Over time, it became a disorganized disaster….

The shelving was the typical “builder grade” shelving…bull-nosed MDF spaced a good 16-18” apart which leaves a ton of wasted space. Few pantry items need more than 14” head room and a great majority of it just need 10-12”. Just by reconfiguring the shelf layout you can often gain at least 2-3 additional shelves.

Okay in all fairness and in her defense she has a very rambunctious 17 month old and a 2 week old, 5 week premature baby.

So she is a little preoccupied.

Which is all the more reason to get this space in order. With a growing family, having an organized pantry is just a must.

So when they announced a few weeks ago that they were finally ready to get serious about revamping their pantry I jumped on the opportunity to go to work!!!!

First things first…find your inspiration. I did what I always do…searched “pantry” on Pinterest. Here are a few that caught my eye…. (again, no links…I cut and paste pictures and put them in an “inspiration” folder on my computer.)

Of course it all had to be approved by the home owner. (I hate it when other people think they should have an opinion…lol!)

Fortunately, she liked many of the same looks I liked.

The most appealing thing in all the inspiration photos is the appliance tower. LOVE!

She loves the counter top look with natural wood tops. She loves the look of the floating shelves in the last picture…but she wants natural wood shelving and will paint the base black. I think it will look awesome!

So time to roll up my sleeves and go to work.

First up…take measurements and make a plan….

My plan is to make the cabinet and shelving across from the door “pretty.” This is where she would like a black base cabinet and natural wood floating shelves. They always have the door to the pantry open so we think it would be perfect to make it aesthetically appealing….pretty.

The shelving and the cabinets to the left will be “utilitarian.” A place for all their “food stuffs.” And then of course the coveted appliance tower to the left of the door. Since they have 10’ ceilings we were able to add a ton of shelving space just by reconfiguring the spacing of the shelving.

While this paper plan may make absolutely NO sense to anyone but me, it is what I need to figure out how I can reconfigure the space and what materials I will need.

After I got plan approval from my daughter in law, Brian and I went to Lowes and bought all the materials and had my son precut all the plywood for shelving and base cabinets with his table saw.

The construction of the shelving and bases will be very similar to what Lindsay did in her pantry space. She has a great tutorial for building everything so again, I am not going to reinvent the wheel. As I always say, find a tutorial that makes sense to you and use it.

Day 1….demo!!! I had my DIL empty the entire pantry and my stepson and I went to town with sledge hammers and crowbars and took out everything from top to bottom!

When you remove the existing shelving you may find sheetrock damage and you will notice that you have “lines” where the existing trim (shelf supports) was…primarily because the trim was caulked then the walls are painted…and the walls behind the trim are raw. So you will need to skim those areas with sheetrock mud, sand smooth, then spray with canned wall texture. If you don’t do this, you WILL see the lines where the old shelving was…so do it right… fix the walls, then repaint the walls before installing the new shelving.

TIP: If I am going to paint the shelving I usually paint the walls and shelves the same color…it makes it easier to paint the shelving without having to tape everything off. I use a different grade on the cabinets and shelving vs. the walls, but the same color.

I always prime and sand all the new wood before I cut and intall it…that way I don’t have to do major sanding in the house.

Right now I am still priming, cutting and installing so we have a few more days of work!

Hopefully I will have a big reveal in a week or so!!!!

Lego table project!

One of the “littles” in our family LOVES Legos. Course I am all for any child’s entertainment that doesn’t involve electronics.

Believe it or not I managed to raise four intelligent, college educated children without video games or smart phones…imagine that!

When I heard she has to commandeer the family room coffee table to build her Lego sets, I decided she needed her own personal space!

I looked at buying a Lego table as a Christmas gift…but as with much of the furniture today, they were all cheaply made and didn’t seem very sturdy…certainly not pieces a child could lean on for hours.

So I decided to build one!

First thing I had to do was locate “Lego flats.” I found these on Amazon…perfect!

The package SAYS they are 10x10 but when I laid out 3 wide I discovered the measurement was actually 30 1/8” …good to know! I decided to build a table that would hold 3 wide and 2 deep…and knowing the exact measurement of them laid out is important. The inside measurement of the trim on the top will be 20 1/4” x 30 1/4” so there is room for 6 total interchangeable flats.

I constructed the table out of 1/2” plywood, 14” furniture legs, 1x3 pine boards and 3 1/4” trim.


I bought a piece of 24” x 48” 1/2” plywood and cut down the width to 34”.

When cutting plywood with a skill saw, make sure you “score” the line you will be cutting with a utility knife…

…then cut on the OUTSIDE of the scored line…this will keep the plywood from “splintering” when you cut it with a skill saw.

After cutting the plywood 24” x 34” I “banded” the entire board with 1x3 pine… then added the leg brackets to each corner. The legs just screw into the brackets.

Banding the plywood top with 1x3 pine does several things…it increases the width and length of the table by 1 1/2” …remember 1”x3” boards are actually 3/4” x 2 1/2”. It also strengthens the plywood and the “skirt” it creates will hide the leg brackets.

Also remember…glue AND nails. ALWAYS USE GLUE!!! The glue is what actually holds everything together!

After the base of the top was constructed, I flipped it over and added the trim to the top…cutting it so that the opening on the table top would be 30 1/4” x 20 1/4” to accommodate 6 flats with a smidge of wiggle room so they can easily be changed out.

Once it was all constructed, I puttied all the holes and caulked all the joints. I primed it with primer, sanded everything smooth, tacked and painted it with Krylon satin white.

A few of the tables I looked at had storage drawers or the tops lifted for storage…cute idea and something I could have incorporated into the design…but truthfully if you have a “lego kid” you know the table would have to be the size of Montana to hold all their pieces…so you are better off finding bins or stackable containers that suit your needs!

This table is strictly so the little doesn’t have to clutter up the family coffee table when she wants to build and tear it all down when it is time to put it away…she can just remove the legs and slide it under the couch or bed!

Super cute and hopefully sturdy enough for hours of leaning.


China hutch makeover...part 1..and paint tips!

Since I have “semi-retired” from DIY for resale, I have a little more time to take on projects for my family.

As I mentioned here, Matt and Hannah got married last month. This past summer he bought a larger home and went from a 1600 s.f. home to a 2200 s.f. home. When he bought his first home we stocked it with a few nice DIY pieces…this dresser and chest setthis oak trestle tablethis breakfast table.this dresser-turned-entertainment centerthis little vintage chair…and of course all the other pieces we have refurbished and built over the years.

A bigger house means more space and in his case he has a large dining area that has nothing but the trestle table…so it feels pretty empty.

This past week I found this “could be awesome” french provincial style china hutch on Facebook marketplace.

I can’t wait to shine up these solid brass pulls…even though I know they probably won’t make the cut!

They really need a “tall” piece in their dining room so I think with a few modifications this one would be perfect.

Of course the froo-froo doors HAD to go…when I sent a picture of the piece minus the doors and hardware, Matt messaged and wanted to know if “the pole things” could come off!

Yes they can…

…which of course means finding a way to “fix” the gap…oh well! Minor issue.

So the question then becomes….solid paint or chalk paint with distressing.

The reason this decision is important is because if you intend to paint the piece with latex or oil-based paint, you HAVE to prime it. If you are going to chalk paint and distress the piece you don’t have to prime.

It is a personal preference and one I left up to Matt and Hannah.

For chalk paint, I usually mix up a batch of homemade using flat latex paint and Plaster of Paris. The recipe I find works best for me is 5 tablespoons of Plaster of Paris, 3 tablespoons of water, mixed well then add 2 cups of flat paint…any color, any brand. I have also used a few different brands of chalk paint and found all of them to be acceptable. I use 220 grit sand paper to HAND SAND after the paint dries well and then I seal the paint with a flat clear coat. I never wax…personal preference.

Here are some paint tips I posted a few years ago for painting with latex or oil based paint. The first two tips apply to chalk paint as well!

1) Always clean the piece of any dirt or debris. Just wipe it down with a damp cloth and make sure you get all the "ick" off! If the piece is super grungy, you might want to clean it with ammonia or wipe it down with mineral spirits! If it has a lot of flaking paint or old finish, you can sand it down a bit or better yet, strip it using this process...just make sure the existing paint or finish is stable!

2) Make repairs. DO NOT waste your time making it pretty if it needs repairs. And remember, glue and clamps are your friend!!!! If you don't know how to repair something, google it or email me. MOST furniture repairs aren't that difficult...but if you do it wrong (or not at all) you will be wasting your time making it pretty! 

3) Primer....always a must if you are going to paint with spray paint or latex or oil paint. If you want your paint to stick and not chip or peel, prime. For smaller projects I use spray primer. For larger projects I roll on primer with a 4" foam roller. Even if your paint says "all in one paint and primer"...use primer.

4) Sand smooth after the primer has thoroughly dried. A 220 grit paper should do the trick...FEEL the surface...if you can feel it, the paint won't hide it. 

5) Use tack cloth. Most tutorials will tell you to wipe the piece with a damp cloth. That won't cut it! Tack cloth will pick up the finest grains of dust and debris you can't see until you paint the piece! Use it before you paint and between each coat!

6) If you are going to brush on latex or oil, use a quality brush AND TAKE CARE OF IT! I have brushes I have owned for years because I am religious about cleaning them thoroughly after use. And don't even think about using those cheap disposable brushes (chip brushes). They are great for many things, but not for getting a smooth paint finish on furniture!!!! 

7) ALWAYS use an additive....Floetrol for latex, Penetrol for oil based paints. 

8) Use quality paint. Especially spray paint. I know it is cheaper at discount stores but pay the extra few dollars and buy a quality spray paint at your home improvement store. Cheaper will NOT be better if it doesn't hold up to wear and tear!

9) I do 2-3 light coats (spray or brush) rather than trying to get solid coverage with one coat...trust me when I say, there is NO paint on earth that will get good coverage with just one coat!

10) Cure time is important. Seriously, I know they style their pieces on those HGTV shows within hours of painting a piece of furniture. Just don't! Just because the paint feels dry to the touch DOES NOT mean it has cured. Latex...a few days...oil...a week. Give your paint time to cure or it is going to peel or chip if you try to use it right away! Put the piece in place and chill!

11) Spray vs. Brush/roller. For me, it all depends. I have learned that large flat areas are tough to get an even coat of paint on with spray paint...and of course there is the expense factor for large pieces. A dresser can take 2-3 cans of spray paint. So it really depends of the piece. Sometimes I will spray the drawer fronts of a dresser and roll the top and sides. 

12) Keep a little spare paint for chips and dings...if you use latex or oil, just put a few tablespoons in a little container and stick it in the back of the drawer...just in case! If you are using spray paint, keep a can with a little paint. Manufacturer's change paint colors and you might not be able to find that awesome color in the future. Keep spare paint in the house...not the garage or storage shed!

If you follow these simple guidelines, you can update a dated piece with just a little time and effort. 

Now, back to the china hutch…at this point it is on hold…we are in a deep freeze here and there is really nothing more I can do. I did strip the top and shelves because Matt wants those stained. But it is too cold to prime or paint so I will patiently wait…not something I do well…lol! But I have learned that temperature matters so I will not rush this project!

Hopefully the weather will cooperate this week and I can share the finished project next week!

Until then….


Vintage car handle hardware...

I am trying desperately these days to be a bit more “creative” and get out of my “everything white” funk.

I saw a really cute idea on Pinterest….vintage car handles as hardware. Naturally I jumped on Ebay and began searching for vintage car handles. I looked back at my Ebay history…I ordered them in JANUARY!!! Didn’t have anything in the works, just thought is was a cute idea.

Did I save the link to the “inspiration?” Um, no. Did I have a plan in mind as to how to attach them to a drawer front.? Um, no. Did I have a table to even attach them to? Um, no.

Just thought it was a super cute idea.

The first thing I had to do was figure out how to attach the handles to a drawer front…the hole in the backside is not threaded. My original plan was to find a bolt that fit snuggly in the handle hole, then just use JBWeld…love that stuff. The problem with that is it would make it darn near impossible to remove the handles in the future. Not MY problem, but as I have said before, I want buyers to be able to makeover the piece again in the future.

Thought maybe I could JB Weld a light fixture bolt (threaded on both ends) into the handle, then just add a nut and washer…hum….that could work and still allow for removal in the future.

While I was at Lowes scouting bolts one of the nice associates showed me this nifty brass insert thingy….

Because brass is “soft” you can screw this little plug into the hole (using a flat screwdriver), then get a bolt that will fit the inside of the plug…in this case a 5/16 hex bolt. I slipped a washer onto the bolt so that it would sit snuggly against the back of the drawer.

Problem 1 solved.

Problem 2 is finding the perfect little table…fortunately I found a cute little solid wood side table at a garage sale for a few bucks….

Problem 3….as you may have noticed, the handles have a 1” “bump” on the backside which would make it impossible for them to sit flush on the drawer front.

I removed the little wood handles on the drawer fronts and puttied the little holes.

I took a 1 3/8” paddle bit (I couldn’t find my 1 1/4”) and made a hole in the front of the drawer front deep enough for the handle to sit flush. Then I used a 5/16” drill bit to make a hole in the center of that hole for the bolt.

TIP: To make sure you don’t drill your large hole all the way through the drawer front, wrap a piece of blue/masking tape on the paddle bit to indicate the depth you need to drill. (Not pictured)

Now I was able to set the car door handle flush on the front of the drawer and run the bolt (with washer) through the backside and into the little brass plug.

Since I knew the bolt may “loosen” and there is only one bolt holding the hardware in place, I added a dab of construction mastic (liquid nail will do) to the hole just to give the handle some stability.

Before applying the hardware, I primed, sanded, tacked and painted the table a high gloss red (See HERE why I can no longer call it my KSTP process.) The insides of the drawers were a tad cruddy so I primed those as well and painted them black…not necessary but kinda cute!

I found some “L” shaped metal floor trim and decided to add it to the front corners of the little table….installed the new door handle hardware….and presto bingo….

Too stinking cute!!!!

And now that I have figured out all the logistics to turning vintage car handles into hardware, grab a few and have some fun!!!

I have a few of these door handles left…now I just need to find another little table or small dresser!!!!