Hiding the wart...

There are times in any relationship when “compromises” must be made.

This is one of those times.

It is why our TVs are above our fireplaces and why we have a pergola behind the shop to shelter the humungous zero turn lawnmower we use MAYBE 5-6 times a year to pick up leaves.

This time Brian was hell-bent on having a “whole home generator,” while I was perfectly content to cruise along with the little generator that, in the event of an emergency, only runs the furnace and kitchen outlets.

In 2009 Northwest Arkansas experienced a “once in a lifetime” ice storm. Some parts of our community went weeks without power. We lost power 2-3 times for MAYBE a few hours at a time. Got a little chilly in the house but nothing a few blankets and warm socks couldn’t handle.

Yes, I had two fireplaces I could have used as a heat source…one in the master bedroom and one in the den. Unfortunately there was a tree on the bedroom roof and another tree dropping massive limbs on the den roof. I didn’t think it was real safe to light a fire in either room.

Anywho…Brian is now convinced we need a whole home generator to light up the entire house in the event of a power outage.

While I hope I never loose power for days on end, we will certainly be prepared and he will most likely tell me “I told you so.”

Again…compromise.

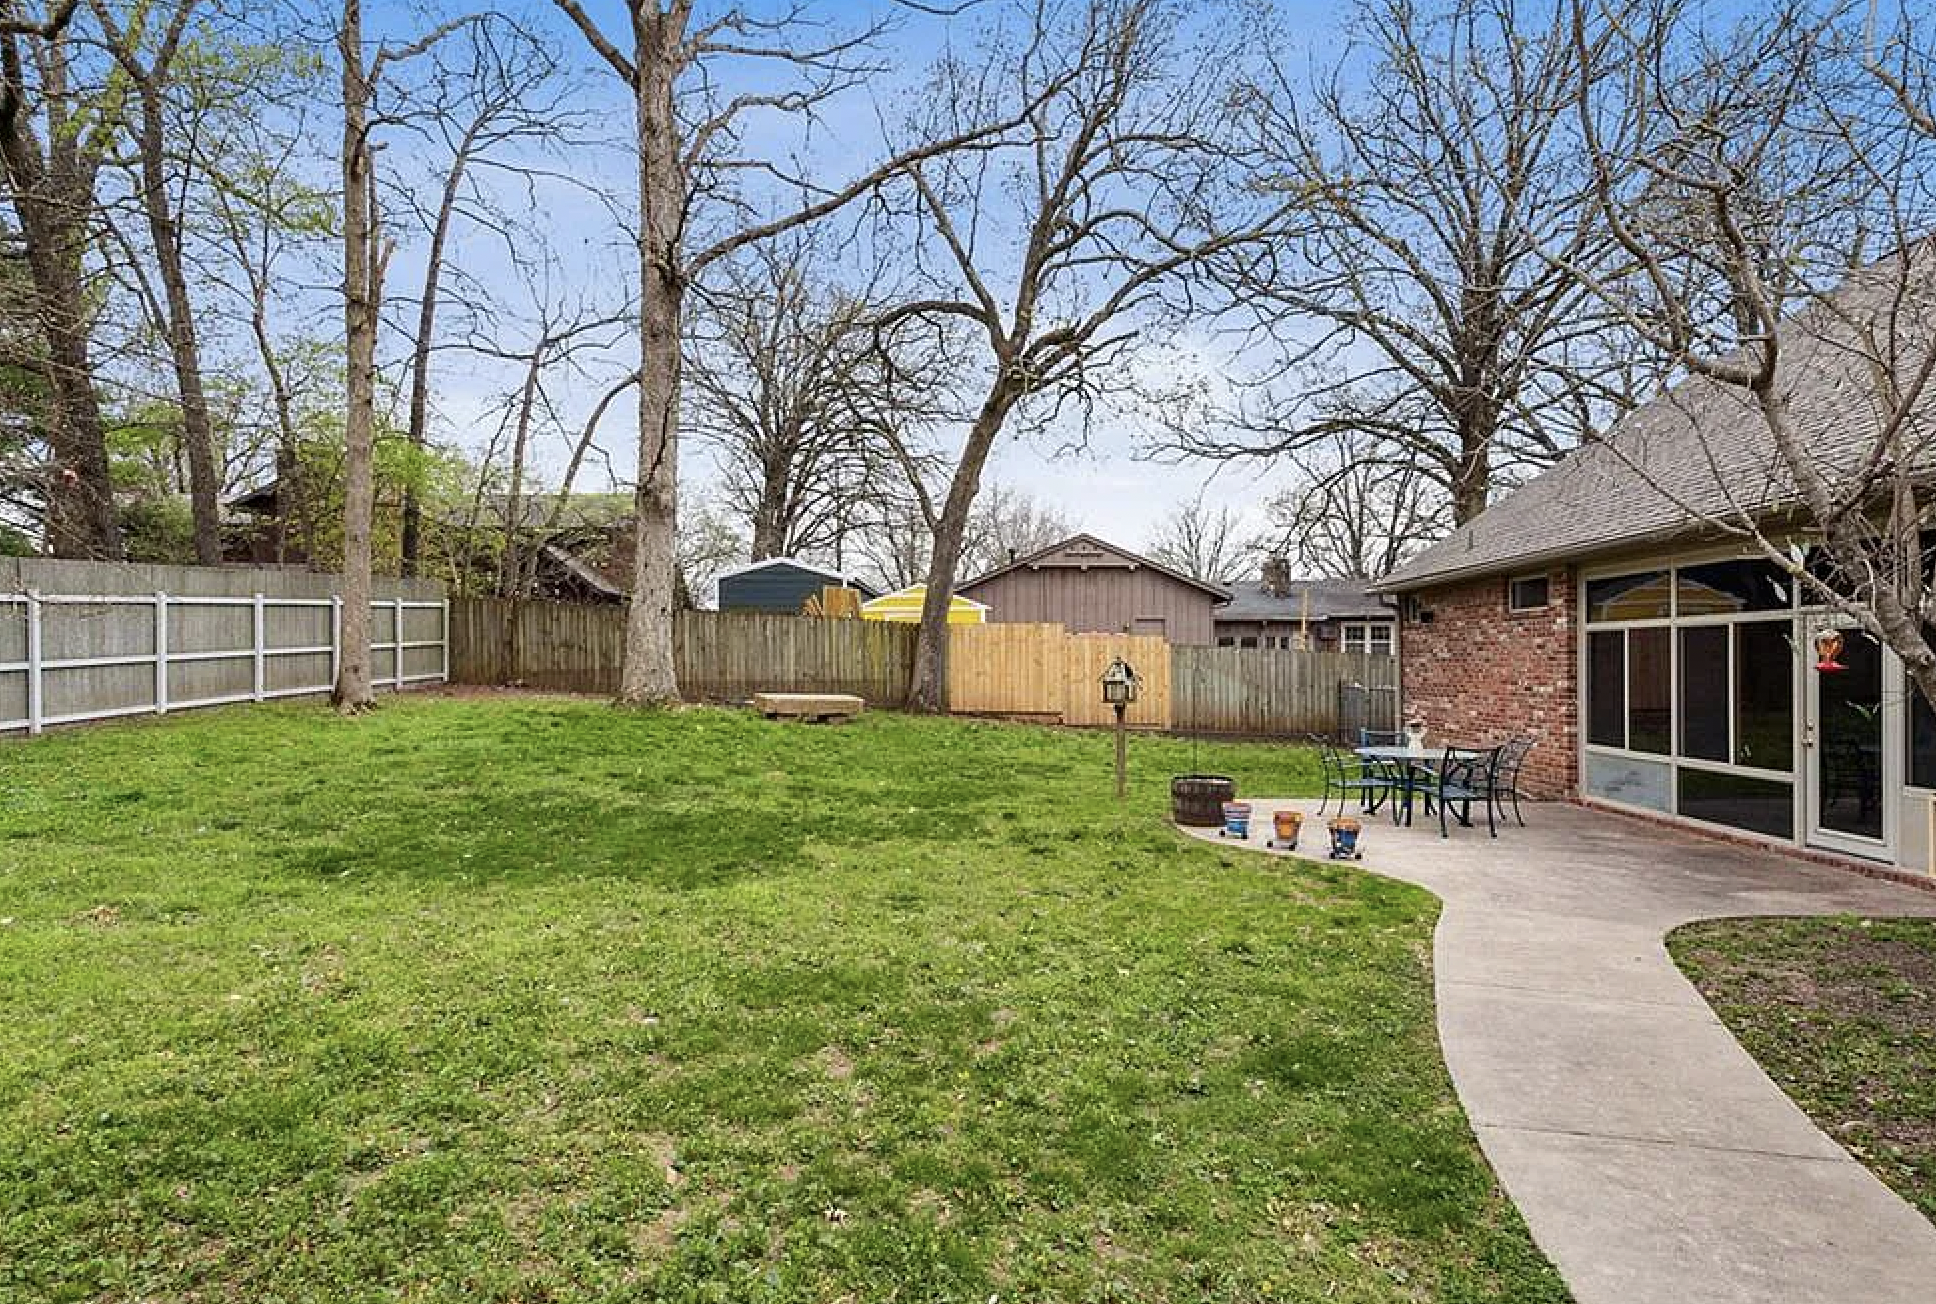
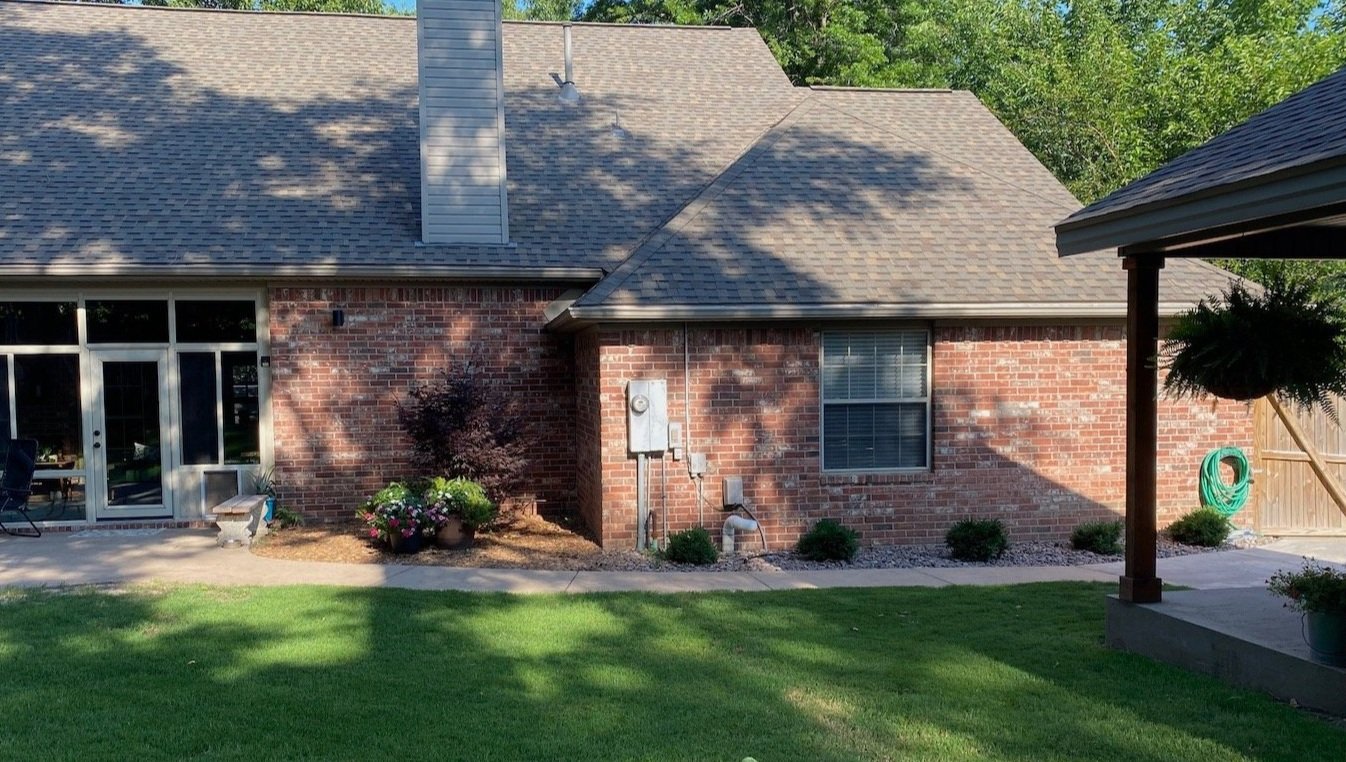
So why the compromise? Well, the only reasonable and affordable place to put the giant “wart” (as I affectionately call the massive eye sore) is in the flowerbed next to my back patio.

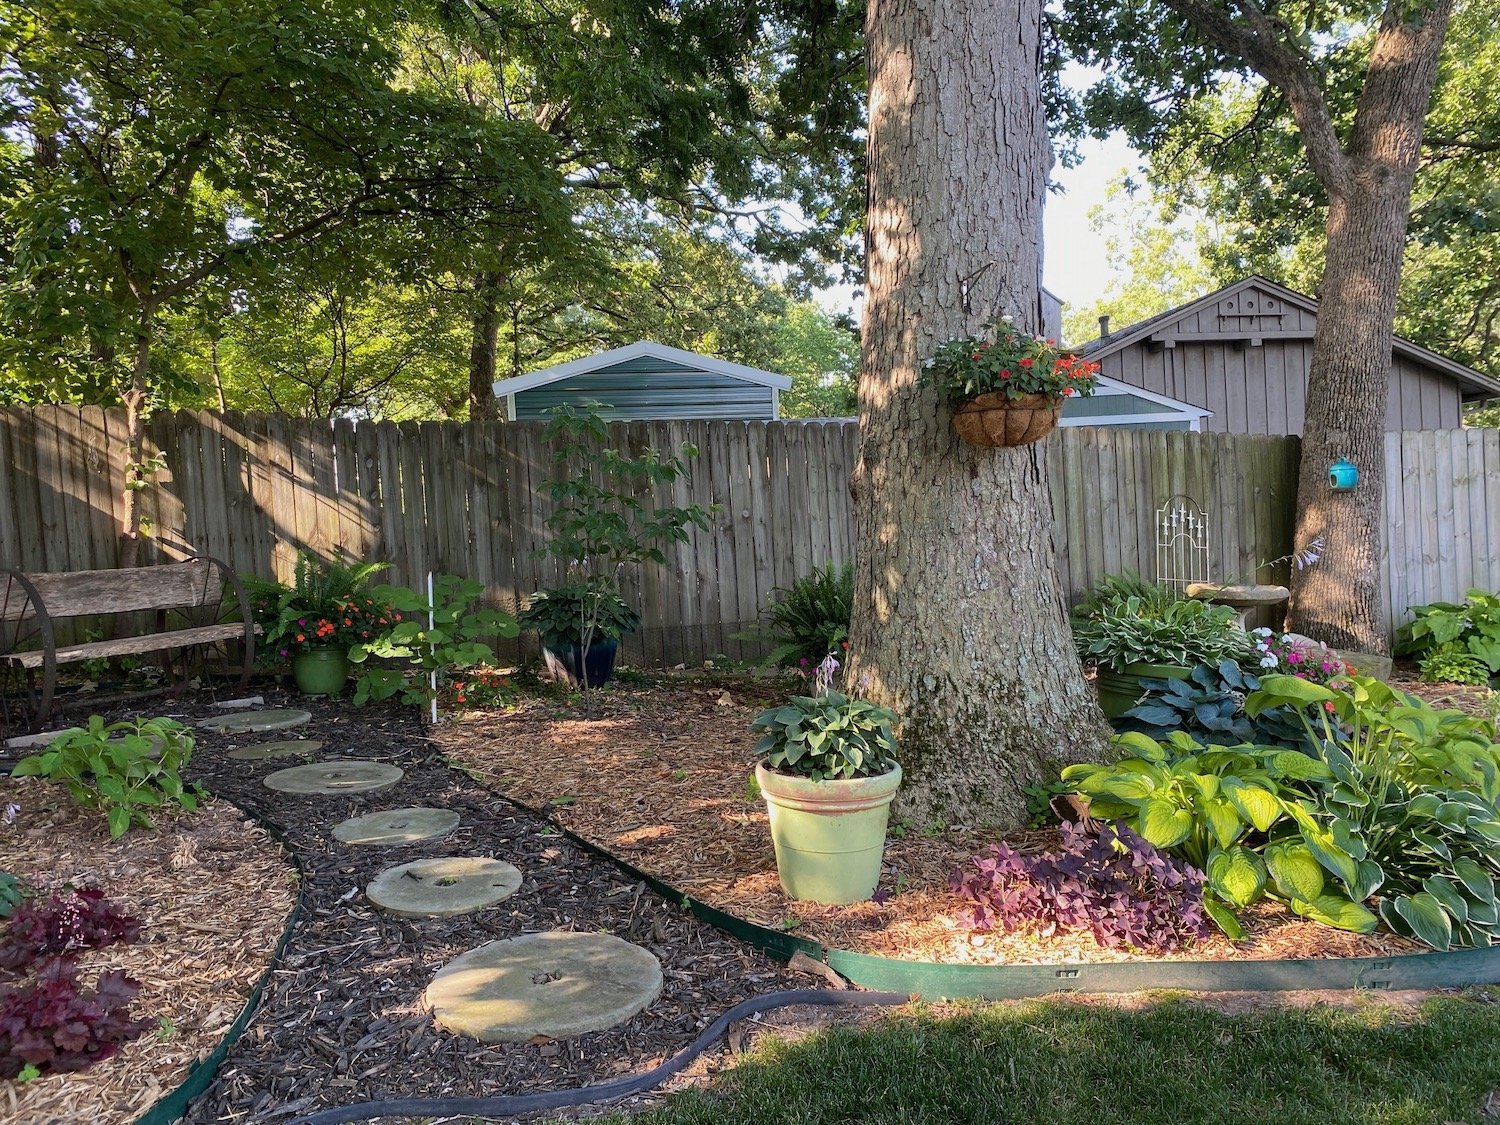
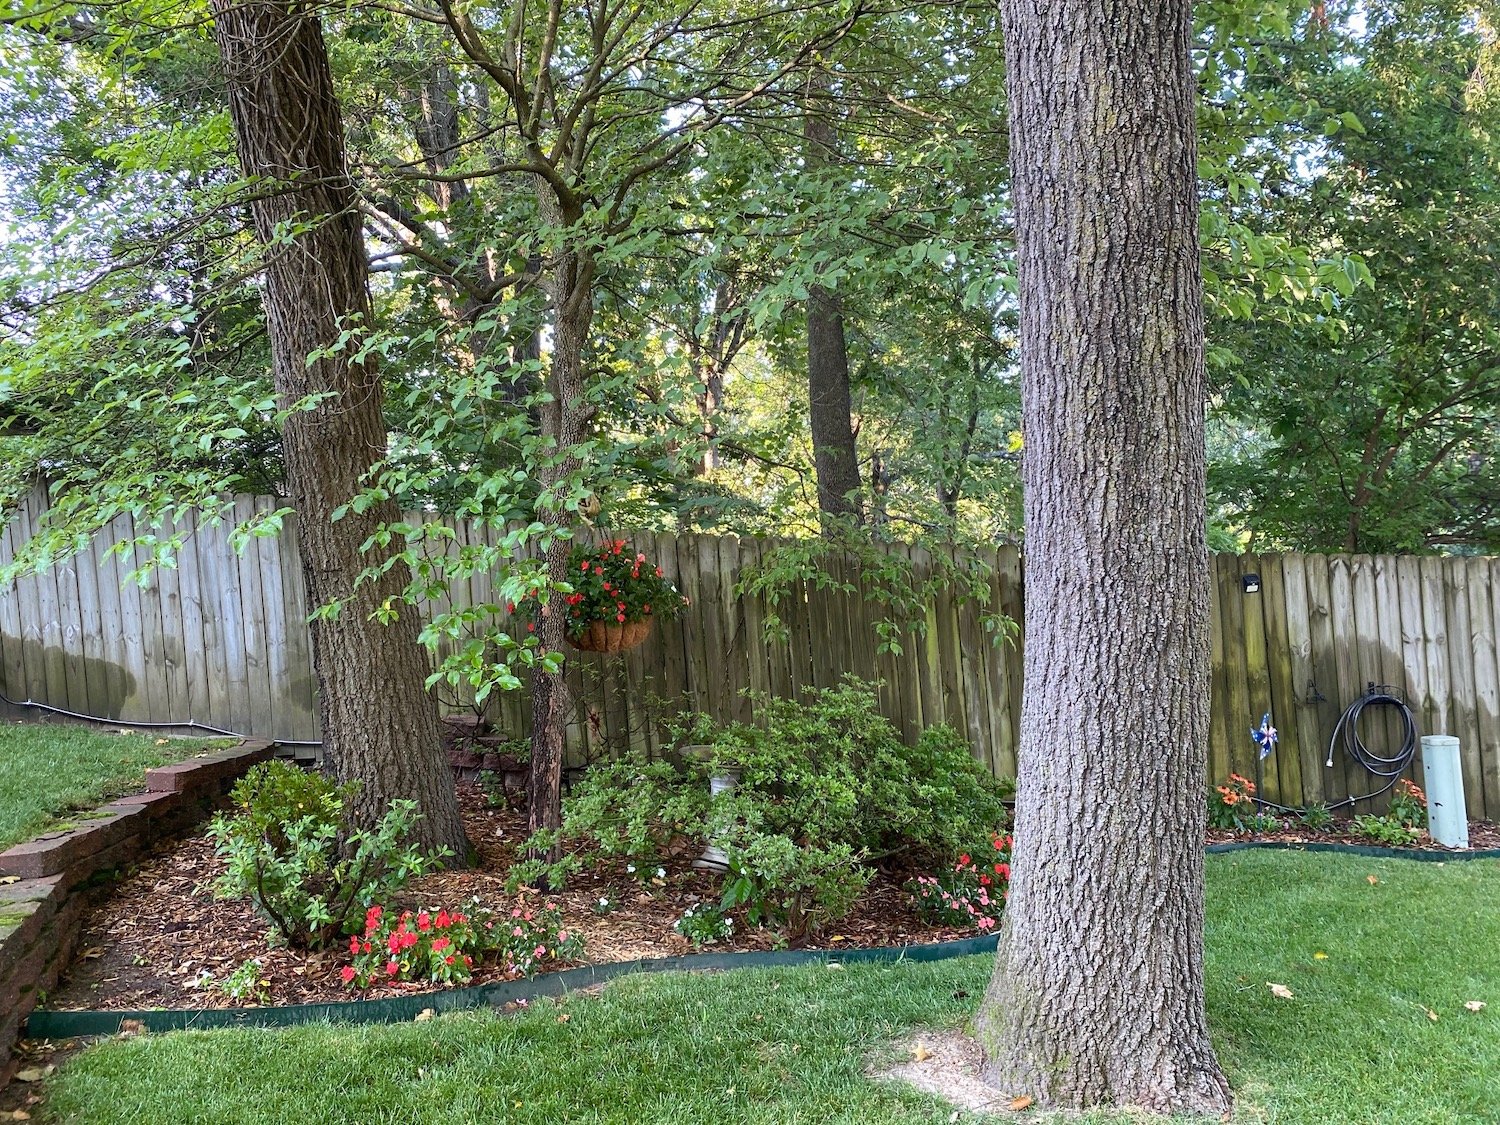
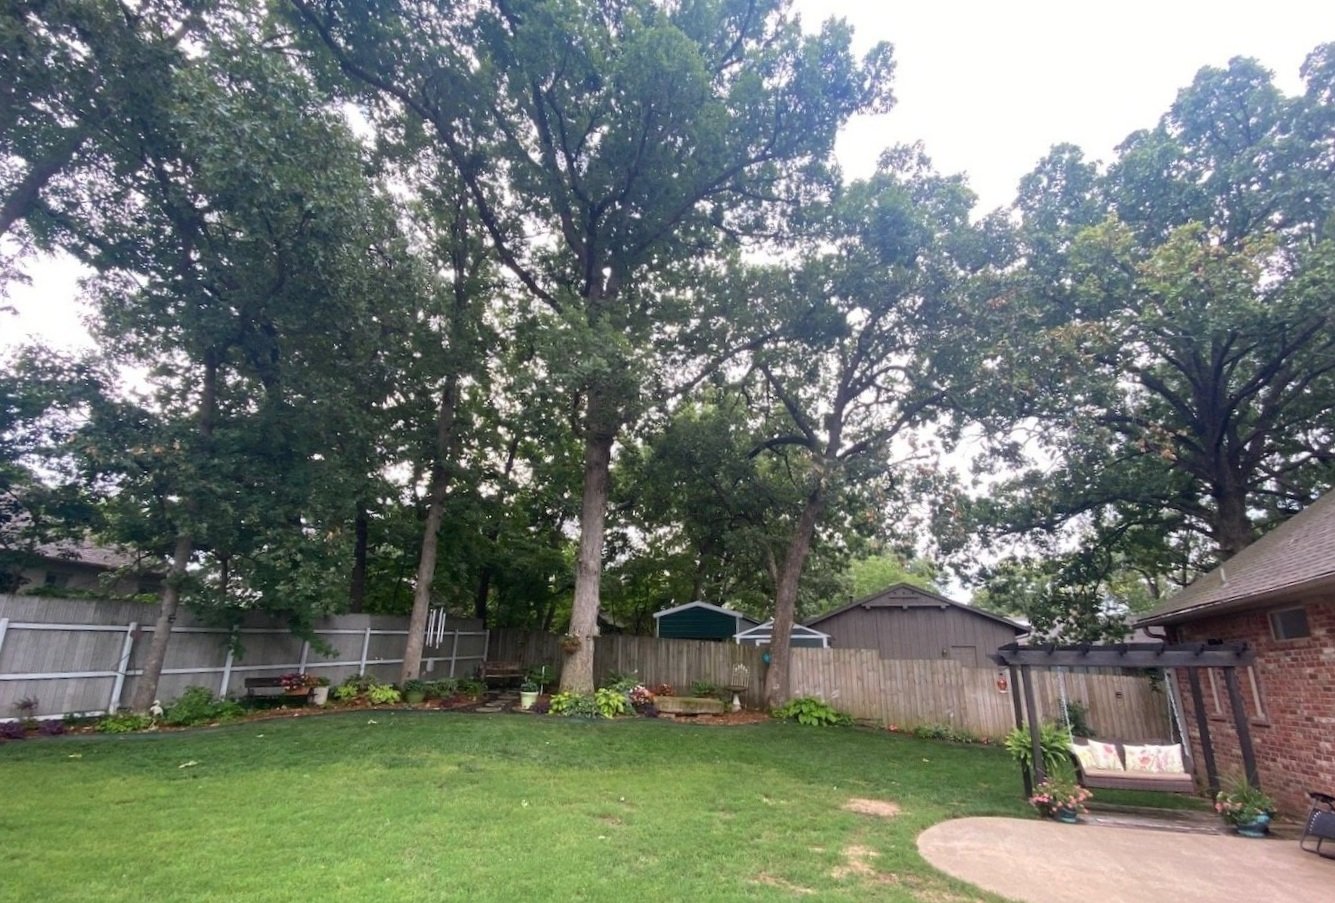
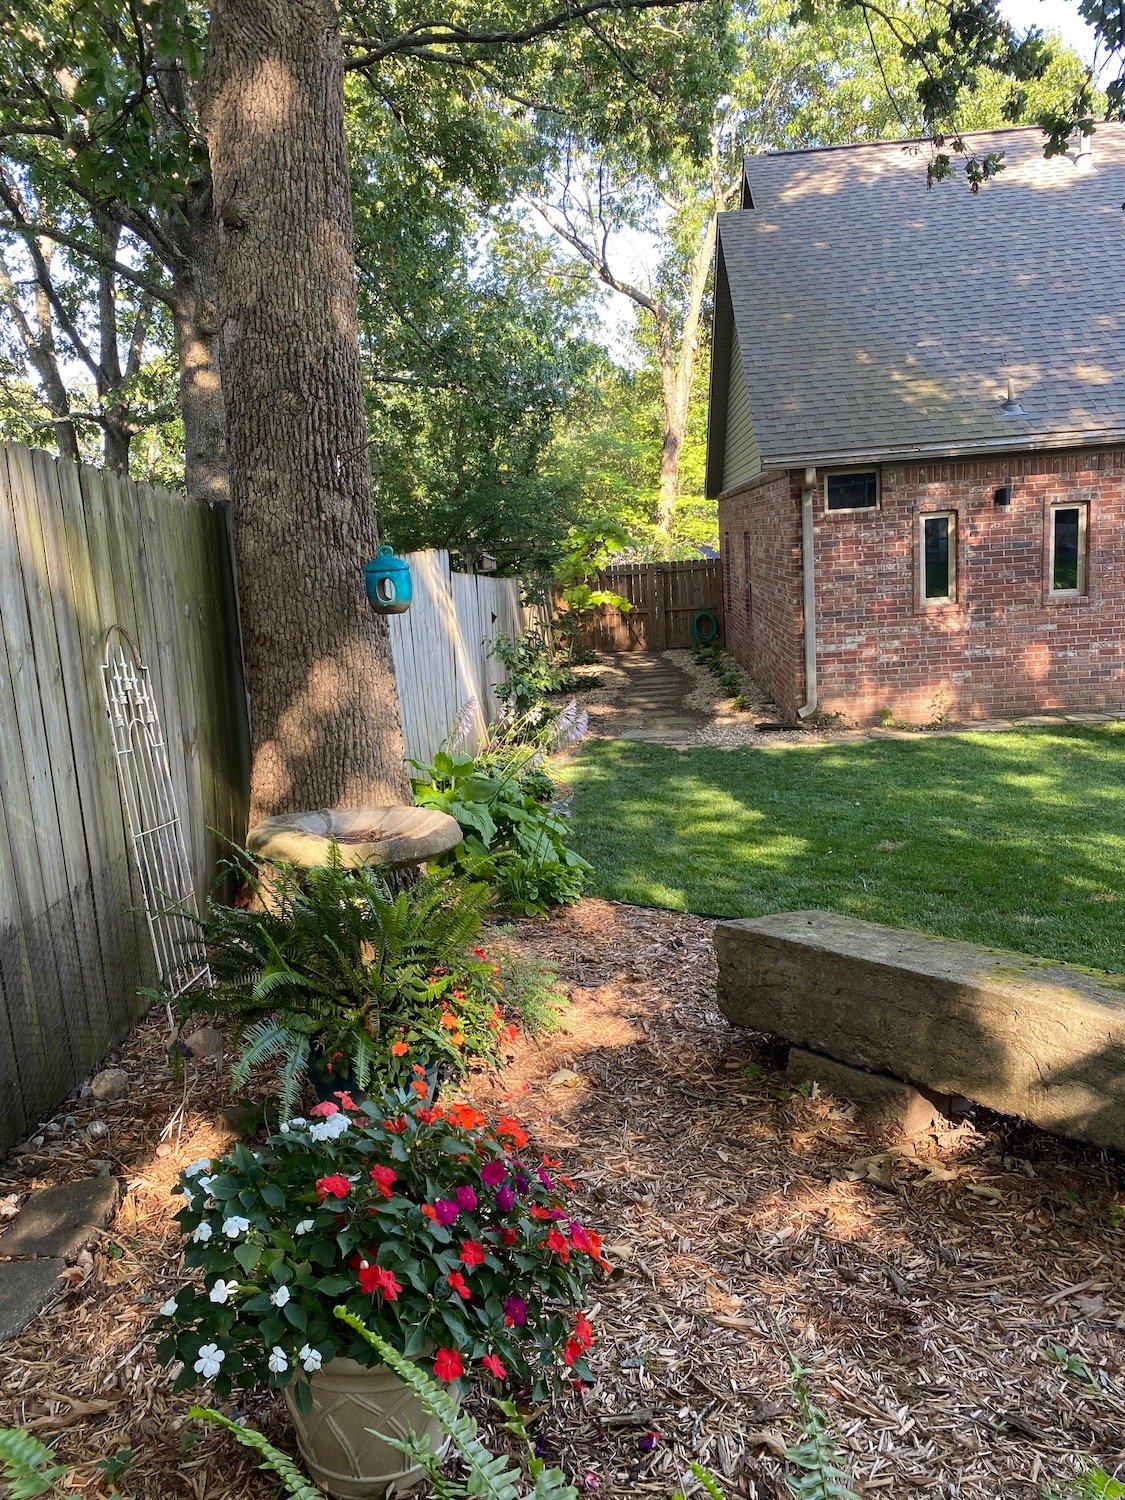
If you check out the swing pergola I built HERE, and the back yard landscaping I shared HERE, you may note that I take great pride in my yard and I spend a great deal of time enjoying my outdoor space.

So putting a “wart” in the middle of my “happy place” did not make me happy.

Compromise. With a smile..

One of the many things that make a relationship work.

SOOOOO….the wart was placed and my creative brain had to come up with a way to “hide” this monstrosity.

The vision…first screen the darn thing. Keep in mind it must have adequate airflow so I can’t just encapsulate it in something.

I have helped a few neighbors build screens… one around an air conditioner unit and one for a hot tub.

So I know it is doable…I just need to find something I like.

So I did what I always do…I went to Pinterest and found a few things I thought I might like.

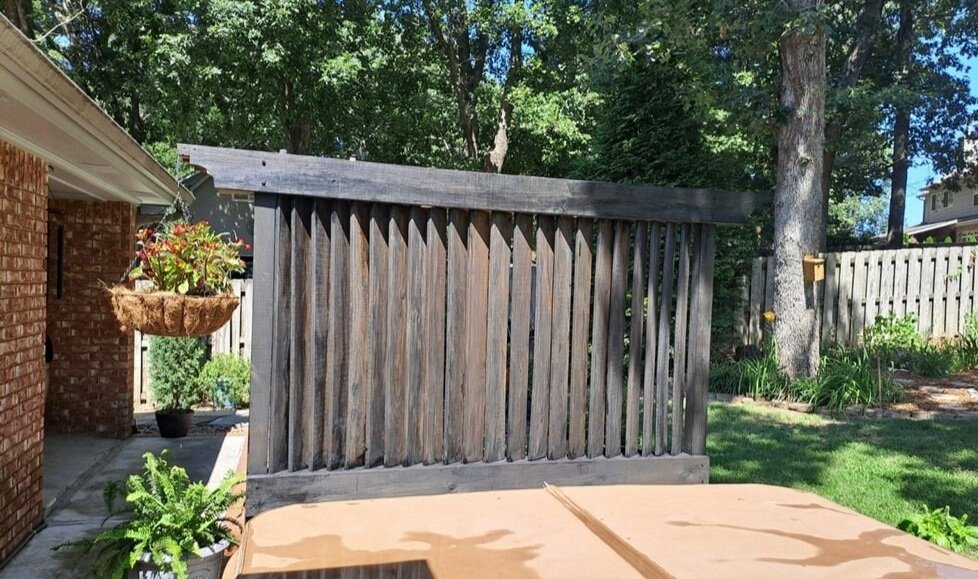
I like the look of the more “modern” horizontal boards like we built around my neighbor’s AC unit. But because of the need for really good airflow around the “wart” I keyed in on these “louvered” panels. (HERE is a good tutorial for one)

Utilizing this “louver” look will give me good coverage but also allow for plenty of airflow.

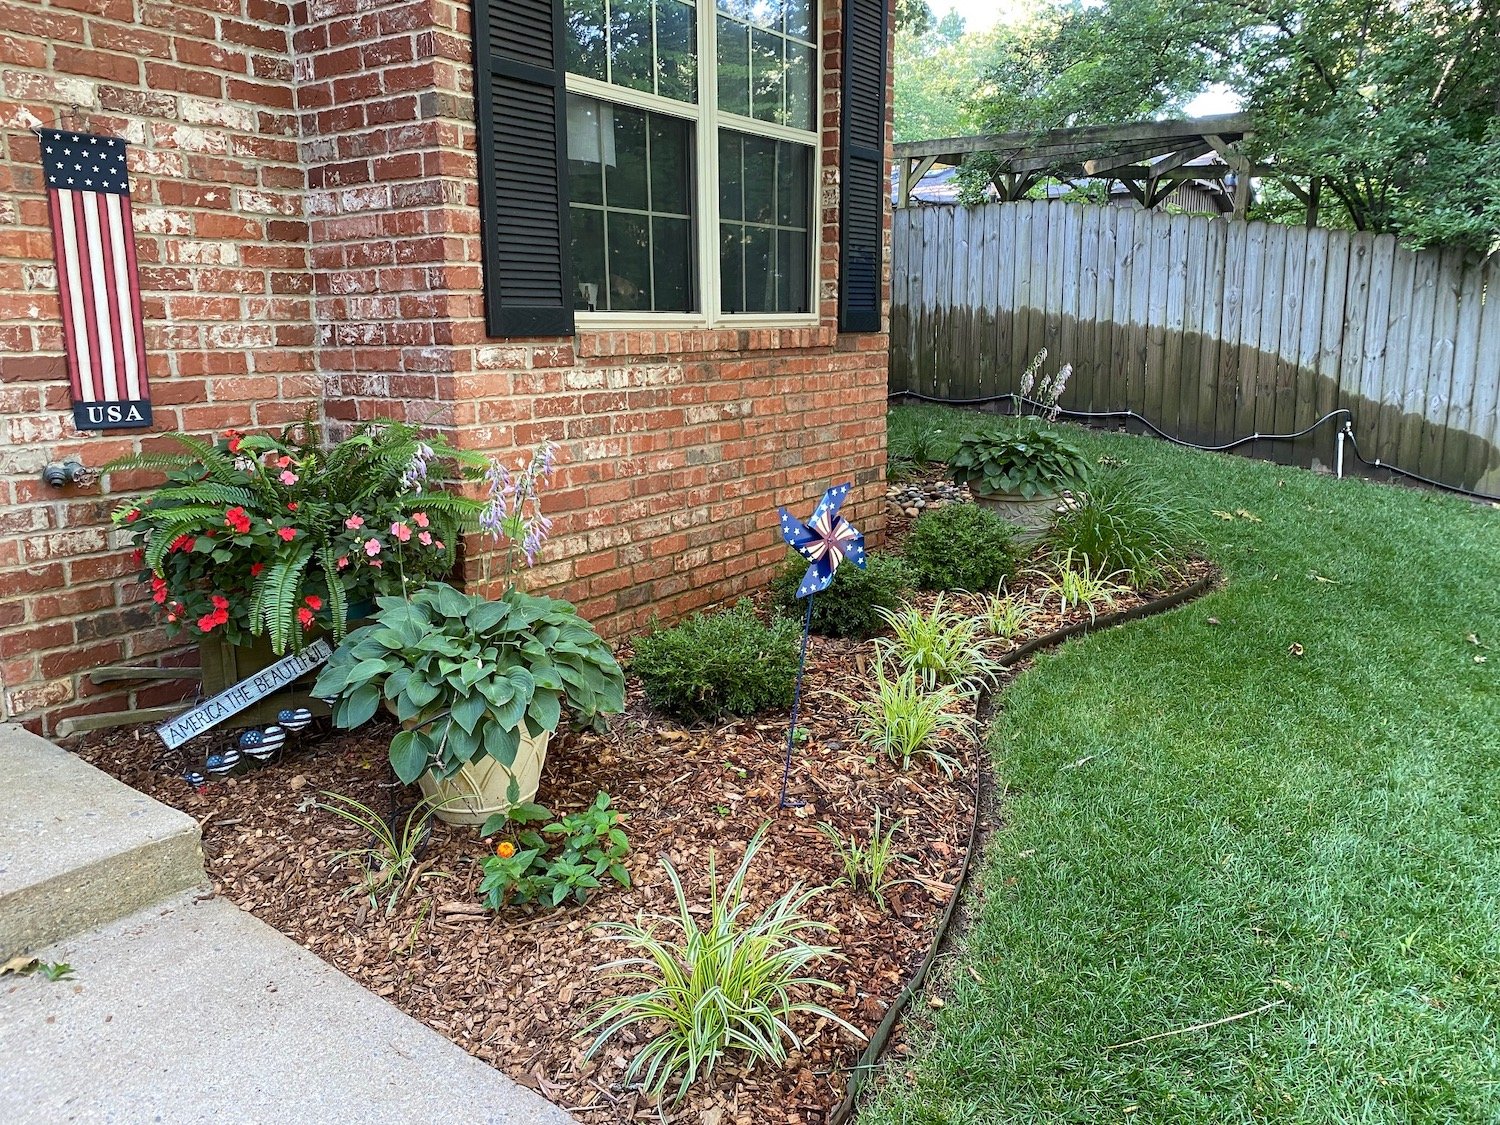
So the plan…first I had to remove the Japanese maple I put in this flower bed three years ago.

I moved it to the front and hope like heck the darn thing survives!

I raked up all the old mulch, then I dug out the 4” of compost I put in there a few years ago with the plan to turn this into a massive flower garden (that never materialized!) I will save that for another project.

I dug out another few inches of soil then set three 4x4 posts for the screen. Then I put down a few inches of sand for the flagstone. I put that down now so that it has time to settle and compact well!

My “plan” at this point is to add flagstone like I did HERE at the other house…kind of create a little “patio” area in front of the screened wart.

After I get the flagstone down I will build a screen around the wart, then decorate the area with potted plants and maybe a little bistro table.

I think it will be easier to lay the flagstone before I build the screen. But honestly it may take a few months to get the flagstone done so I may have to put the screen up first…just don’t know how long I can stand to look at that thing.

Compromise…with a smile.

We've come a long way baby...

So often I share the inside of this house and all the work we have done. This week I finished up another landscape project and realized I have never shared how far we have come OUTSIDE!

I didn’t even comprehend the amount of work we had done outside until I looked it up on Zillow again. The pictures are from when we bought the house three years ago. Sooooo much has changed…both inside and out!

The landscaping was basically a blank slate. I pulled out a few shrubs here and there, moved some azaleas, cut down an overgrown tree in a flower bed and pulled up some edging. But basically it didn’t have a lot of landscaping. I guess the lady who owned it for over twenty years before us really didn’t do a lot.

Fine by me…just that much less to demo!

So let’s start with the front…and keep in mind I didn’t do any “editing” on the pictures i took so you can see how things really look around here. Shade and all!

Before….

The first picture is the Zillow listing. The last two are the street views from Google Earth.

You can probably tell from the Zillow picture and the Google street view pictures…clever photography and heavy editing can really make a difference!

On the house I removed the ugly wood arch things to open up the front porch, changed out the front door, replaced the dated light fixtures, added some minor detailing on the garage door and changed out the arch transom windows.

Trimmed up all the overgrown trees…a must for aesthetics but also for safety…a big dead limb can do a lot of damage.

Removed a few flower beds and then composted and mulched the others.

We brought in new top soil and sodded the entire front yard with fescue. I removed some blocks from the block retaining wall. I really wanted to created a new retaining wall with native stone but that is another project for another time.

I moved four large azaleas that were planted by the front entrance to the side yard where I created a shade garden.

Nothing was going to grow under these trees and it features a huge dogwood …the space really needed to be highlighted! The azaleas and dogwoods are spectacular in the spring!

I planted new plants in the flower beds to the left and right of the entry. Again I am transitioning to perennials so I planted small boxwoods, chokeberries, tick seed, lirope and Stella D lilies…and of course a few potted hostas.

The bed on the left is filled with beautiful daffodils and tulips in the spring…I left those. (This is where I added a simple water feature…stay tuned and I’ll share how easy it is!)

I fill in with a few colorful annuals and I have a few pots I add ferns and impatiens to every year.

Dressed up the beds on the north side of the house with a little rock and planted a few easy plants…hydrangeas, lirope and some astilbe.

Prime example of why you should really research plants…originally I planted some Stella D lilies here and they did not get enough sun. This side yard only gets a little morning sun which is perfect for the hydrangeas and astilbe.

A few weeks ago I finished a little makeover on the side yard where grass would not grow. I added a little flagstone, some decorative rock around the air conditioner, planted some lirope my neighbor was thinning out in her yard, planted a redbud and added a little birdbath.

When I was at the livestock store picking up supplies for my water feature project, they had their azaleas 50% off. I snagged a few and planted one here and two in the side shade bed incase the older ones eventually croak!

The entire back yard slopes towards the house and to each side. This side of the yard gets a pretty heavy water shed because of a downspout. It is one reason this side of the front and back yard would not grow grass. I have to be VERY careful about any changes I make.

HERE I shared the changes I made to the side yard behind the fence.

The back yard has probably had the most dramatic changes.

These are the “before” pics from Zillow…when we bought the house….

If you are wondering what that big concrete bench thingy is, we don’t know. It was there and it is HUGE so it’s not going any where. We have been told it is part of the old farm house that was once here before this area was developed.

One of the first things we did was take out the shrubs along the back of the house and cut out the old pawpaw tree. I loath to cut down any tree but this one was just too big for the space and was on the siding and roof. We replaced it with a little Japanese Maple and someday I MIGHT figure out what I want to do with this bed. In the meantime, potted flowers will have to do!

We added a little rock and planted smaller boxwoods long the back.

I’ve never been a big fan of rock beds…I always preferred mulch. The ease of these beds the last few years has really made me a fan. Truthfully it is easy to plant in and of course pretty much maintenance free.

I added the large flower bed in the corner when we first moved in. Again, it was NOT going to grow grass under the humungus trees. I knew I was going to grow mostly in pots so I put the edging down around the trees along the “shade line,” applied some Roundup on what little grass was there, then just topped everything with about 4” of compost.

(Feel free to be envious of my spectacular wind chimes. I showed them to Brian last spring at a local garden shop…he remembered and gave them to me last Christmas. The man is amazing!)

I have always heard you should be very cautious around oak trees so as to not “smoother” their root system. We have a HUGE white oak and several large red oaks. I made sure to keep the compost and mulch thin around the base of the trees. When I plant in the bed, I dig a big hole then add a mixture of garden soil and compost before planting the plant…that way I didn’t have to amend the soil in the entire bed. With all the rocks and roots in this area it would have been dang near impossible. And again, I didn’t want to do anything to disturb the tree root systems.

HERE I shared the pathway I made with my grandad’s old grind stones.

I shared HERE the extension of this little back bed. Just what little digging I had to do for the edging and planting destroyed my elbow (don’t ask, I don’t know!)

Around this entire back bed is my next “want to” project. I “want to” extend the entire bed about 4-5’, add a flagstone walk and more plants…in other words make the entire thing bigger. Hum…maybe someday when I don’t have a bum elbow.

I shared HERE the construction of the swing…and HERE when I stained it.

HERE I shared my shop and the changes I made to it to make it more appealing. The inside is still a shop full of tools, supplies and garden stuff…but the outside had to be dolled up!

I added this bed last fall for the hostas. I split off the potted hostas this year! Everyone of these hostas are splits!

Two years ago I added a little “pergola shed” onto the back of the shop for Brian’s zero turn mower and our larger garden tools (shovels, racks, wagon, etc.) Everything else goes inside the shop.

We didn’t completely sod the back yard but over the last few years I have sodded and seeded here and there…it is a work in progress. Someday I hope to have a perfect back lawn. With the shade and sun combo it is a struggle.

I was fortunate this yard had an irrigation system. It had been neglected for years so it took several years and some back breaking days to get everything repaired and in working order but it has been worth every effort. I don’t know that I could keep everything alive without it!

I keep thinking that SOMEDAY I will get it all done and then I can just sit around my park-like setting and enjoy. But truth is, I like working in the yard…I like digging in the dirt…I like planting new plants.

There are days I just walk around with my coffee and enjoy. But in my mind I am always looking for new ways to get my hands dirty.

It is my therapy.

The newest swing pergola....

One of the first things I did before moving in was paint all my doors black. It just made our new house feel like “home.”

One thing about my old house I have aways missed…the swing pergolas.

I had one in my front yard and one in the back. I loved them and I used them all the time!

Working on my neighbor’s deck gave me a “bug.” I have wanted another swing pergola and now I want to do a little manual labor outside.

Okay, so I didn’t REALLY want to do manual labor. My poor old body was still recovering from the deck build. But like everything else, I want what I want and I know to get it I have to put in a little time and labor…and sweat and tears and pain and agony.

HERE I posted a pretty good tutorial for building a swing pergola. And as I said HERE, if you want one, JUST DO IT!!!

I have built a few of these so for me it was a labor intensive breeze. I will say I use to be able to build these for around $200…thanks to inflation, this one cost upwards of $350 (not including the swing). And it was 8x4 vs the 8x6 I usually build.

But again, I wanted it, so I built it.

And if you want one, I know you can build it!

So a few pictures…..

I just love it…THIS is a link to the swing. Super comfy, perfect for napping!

One major change from my other swings.

Usually I put flagstone under the swing. Quite an expense…roughly $150-200 just for this little space.

Last year the City of Lowell tore out an old one-lane bridge near a house I built and we lived in when my boys were young. They removed HUGE 2” thick 16’ wood planks. My son managed to wrangle a few of them, cut them down to manageable (relative term) 8’ lengths and brought me a few. They have been stacked behind my shop…just waiting on inspiration.

And “inspired” I was. I used the planks to create a “deck” beneath the swing.

I put it down just like I would rock. I excavated about 4” of soil, put down a 2” sand base, then cut and laid the boards just like I would rock. I filled the gaps with sand and soil.. The boards are “rough” and that is okay…gives it character.

The flower pots are ones I have had for eons…they use to be “teal” when teal was all the rage. I spray painted them black and filled them with flowers. Lovely.

i am contemplating staining the pergola black. I have seen a few pictures of black pergolas and I really like the look. Fortunately treated wood needs time to “dry out” before you stain or seal, so I have a few months to mull that over.

In the meantime I have a perfect spot to sit and ponder!

That was last week’s project…this week’s was my living room fireplace. I mention HERE that I wanted to make changes. The changes are made and I am very happy with it. I had to make a few “design changes” due to issues I’ll discuss in the reveal.

So until next week when I HOPE to have the fireplace reveal….

Another flagstone path...

HERE I shared a flagstone patio I did at my last house. I loved that area. I am grateful I have a covered front porch in this house, but I didn’t at the Lankford house and this little “patio” really opened up the front of the house.

I also shared how to repair flagstone HERE.

HERE I shared how to set a grinding stone walk way.

These were just a few of my stone walk projects. The Lankford house had a good 10-15 tons of flagstone walks and gardens…I love it!

One thing I don’t love is small rock…unfortunately there is one area in our yard that I decided I have no choice.

It is on the south side of the house but it is completely shaded by trees and I think our neighbor’s garden pond leaches into the area keeping it damp.

When it rained or there was a snow melt, water would pool in this area.

No sun, constant damp = no grass.

Out of sight, out of mind. So I have done little here, other than attempt to seed and grow grass, to no avail.

I have two big dogs who like to run and play and always seem to gravitate to this area and inevitably their muddy paw prints end up all over my house! I HAD to so something.

I decided to do a rock pathway.

AGAIN, there are hundreds of great tutorials on how to lay rock pathways. Find one that works for you!

I started by scraping down the area about 1-2” and compacting it well with a garden tamper, paying close attention to the grade. I wanted to make sure there was a gradual fall from the back of the house to the front.

This is where a lot of tutorials suggest putting down “garden fabric.” I do not. I don’t like it and I am willing to spray a little roundup on any weeds that may pop through from time to time.

Some also suggest putting down a firmer base. In some areas you may definitely want to do that. I did not do that here because I didn’t feel like it need it.

The next thing I did was put down sand where the flagstones where going to be set.

This is a super important step in my opinion. First, you want the large stones (whether flagstone or paver stones) to sit on a “clean” base…no rocks or pebbles. If a rock were to work its way into underside of the stepping stone and you put pressure on it by stepping on it, it could break. Second, it gives you a soft “pliable” base…so when you set your rock, it is easy to make adjustments by adjusting the amount of sand…just pick up the stone and easily remove or add sand as needed.

I usually add about 1-2” of sand. After putting down the sand I wet it down well then I used a long 2x4 and dragged it over the sand several times to level it out, again paying close attention to the grade of the area…you DO NOT want to create low spots where rain water and snow melt won’t drain!

Since I was creating a “path” I “walked” the path to see where I wanted each stone to set. I wanted the stones to kind of match my stride.

I leveled each stone as I set it, starting from the lowest area by the front gate and working my way back to the highest point by the corner of the house. There is only about a 6” drop in this 22’ span so I had to be very careful and pay close attention to that grade.

This is where you want to make sure you are not doing anything to impeded the natural flow of any water shed.

For example on the other side of the front gate is the side yard of the front of the house. It is already has a good grade and I wanted to make sure that what I did was not “lower” than that grade, creating a dam.

I also wanted to make sure I wasn’t altering the grade so that water actually flowed toward the house…that could be a major issue! So each stone needed to either be perfectly level or slant slightly away from the house, never towards the house.

Once all the pavers were set and leveled, I hosed down the area so that the sand leached under the rocks, filling any voids that might have been created by all the movement.

Next up was the gravel. You may wonder where I got all this rock. At the rock store, of course…lol! I was talking to my daughter when I went to pick out my rock and mentioned I was going to the rock store…she laughed at the fact that there really is a “rock store.” I picked out my rock, determined how much I needed, then paid them to deliver it. I had hoped they could deliver it to my back yard, but their little machine couldn’t fit through the side gate so I had to wheel barrel four thousand pounds of rock around my back yard! Yes, I hurt like heck this week!!!!

I decided I wanted a “path look” to the rock…so I picked out two different rocks. A small brown rock and a larger multi colored.

I used a 6’ piece of garden edger between each rock to create a crisp line. Put it in place, lay rock on both sides, walk on the rock a bit to bed it down, then just pick up the piece of edging. I used the garden tamper as I went to bed the rock a bit more.

I think this looks super awesome…course the first things the dogs did were run back there and scatter rocks so I am not sure how long this “crisp” look will last.

So far so good…

We have had one light rain and of course it is spring so I am sure we will get some heavy rains in the next few weeks. I held back a few buckets of rock so if there is any settling or pooling I can add more if needed.

Eventually I may add some shade loving plantings…someday. Again, out of site out of mind.

While I was digging around and creating pathways I decided to tackle another area as well. This one will highlight the grindstones that were my grandfather’s. I shared those HERE when I made a path at my other house. It was one of the things I made sure did not convey in the sale…yep, we dug them up and moved them here. They have been sitting under potted plants for over a year but Brian had a wonderful suggestion for using them and I will run with it…when I can run again.

I will share that at another time…maybe when I get further along in the process. I rarely leave a project half finished but after days of digging and hauling I was just too pooped to finish up Sunday. Fortunately it is it has rained for a few days so I a good excuse to stay inside and work on my quilt project.

Until next week….

How to set stone in your lawn...

My first love is flagstone…I share HERE how I created a little flagstone patio in the front of the house…

This was a massive project and required “excavating” a large area.

My project this week is the same process but “small scale.”

My mother offered my Granddad’s grindstones that my dad had set in their yard as a pathway.

There are a few things I have that make me see “old ladyish”…my grandmother’s china and hutch, an old camera collection, a few knick knacks here and there…and certainly a grindstone pathway in the yard would qualify. Truth be told, I can not pass up anything that is a family heirloom.

If you don’t know what a grindstone is, google it.

Nifty stones that were originally used to sharpen tools. I have no idea if my grandfather actually used them for their intended purpose but I believe they were set in his yard as stepping stones…and my dad got them and did the same.

So now I have moved them to my house…and this past weekend I set them in the yard.

I had already set a few of them when I realized it would be a great way to show you how I create a path set in the ground…no worries about having to mow around it.

Whether you use grindstones, slabs of wood, bricks or flagstone…this is the way to property set them individually to create a “stepping path.” I have found that this method creates the least destruction to existing turf. You can even do it before you seed or lay sod.

The first thing you want to do is lay them out where you want them.

Look at them from every angle…maybe walk on them to see if they “step right.”

Once you have them laid out where you want them, it is time to get down to the REAL work. (I will refer to “stone” because that is what I used…again, you can create a path with just about any durable material!)

First, take a shovel and go around the stone… about 1'“-2” from the edge of the stone…keep the shovel straight and go into the ground at least 4”. (My stones were about 2” thick and I want at least a 2” bed of sand and soil to set the stone on.) You are basically using the stone as a template.

Once you have gone around the entire stone, just flip it out of the way for the time being.

Since my yard was sodded, I wanted to salvage the sod and use it to fill in a few bare spots here and there…so I used my shovel to carefully remove the sod…

I used a little hand rake to remove the bulk of the dirt off the piece of sod and relocated it to the bare spots.

Then I used the shovel and my hands to remove all the excess dirt in the hole. I put it in a bucket and used it in an area of the yard that need a little fill.

I made the hole about 4” deep, then I added sand.

You can buy bags of “play sand” or even “paver base.” Just make sure you put some kind of sand or base in the hole to create a stable, level bed free of rocks and debris. .

I would suggest hosing down the sand just to make sure it is packed well…your goal here is to create a level, compact bed for the stone to set on.

Once the sand is leveled, replace the stone and make any adjustment by lifting and filling where needed.

I used the dirt I removed from the hole to fill in around the stone.

Once all the stones were set, I saturated them…this forces the dirt around the stones to seep under the stones and also lets you see which ones may need to be lifted and additional sand toss under.

Step on them and make sure they seem “firm.” I had one that “rocked” so I lifted it and added sand. As the dirt around the stones seeped underneath I added more and plugged in a few pieces of sod.

With a little water and sun I expect the grass to fill back in nicely over the next few weeks!

(You can see HERE how I dolled up the storage shed a bit!)

I saved a little dirt in the bucket because I know some of the soil around the stone may compact a bit. Also, this part of my yard is fescue so I may have to over-seed a bit…but that is okay! I like the look and even though it may be a little “old ladyish” I have a walking path that has a little bit of sentimental value.

Perfect!

My happy place....

This month has been crazy busy. I started painting the older buildings at my apartment complex…the weather hasn’t been very cooperative so only 1/2 is done. I have had to tear out and replace rotted flooring in an older unit and I have had a few vacancies which is always a lot of work. My daughter graduated from college week before last and everyone came home (I shared that here) and my grandson graduated from high school this past weekend.

Crazy busy!!!

One thing I am eternally grateful for is my yard…it is my happy place and I am so glad I got all the mulch down and the planting done before life got too hectic.

One of my favorite ways to unwind is sit in my backyard and just breathe….

Not much changes in the front and side yard but since my neighbors murdered their trees, my swing pergola in the front gets too much sun in the afternoon to really enjoy….

…but again, visitors may not see your backyard but they will see the front…so keep it pretty! (I shared the construction of the window planters HERE)

I do have a few moles causing a bit of stress….HERE I talk about what I have learned about moles and how I deal with them (it ain’t pretty!)

But since I now plant all my “tender annuals” in pots, they really do little but annoy me. Truth is they are nature’s little tillers for flower beds and if they didn’t run through the yard to get to the flower beds, I probably wouldn’t give them a second thought.

I am grateful I have the ability to do the work I do…but I am even more grateful I have a place I can go to recharge….

The death of the rose bushes....and a peak at the rest of my landscaping!

Que sad music...the knock out roses finally bit the dust.

They were beautiful little additions to the side yard when I first planted them....

I walked around the yard and took a few pictures a few months ago and they looked halfway decent then!

I built this flower bed and planted the knock out roses because it is an area of the yard I rarely tend to...

Rarely...as a result they were looking REALLY pathetic!

Two bushes died last year so I removed them and planted another. This year the another died and two were near death.

In their defense, knock out roses tend to stop blooming in the heat of the summer...but they obviously had other issues!

So this past weekend we decided to pull them all out...except for the one little bush I planted last year. It may eventually get transplanted when it is cooler if I decide to go another direction with this bed.

I'm not sure what caused their demise. Age, disease, neglect...maybe a combination of all. I did throw a little fertilizer down on them occasionally but I can honestly say I probably didn't tend to them like I should have...a weed eater is probably not the proper tool to use to prune rose bushes.

Knock out roses don't make the best "cut flowers." Cute in a little ironstone creamer...but certainly not something you plant for the purpose of creating indoor arrangements....

Que sera...

I think I will leave the bed "vacant" for the time being...let it winter just incase it is harboring disease or fungus.

Besides, I can't decide what I want to plant in their place and honestly, it is really too hot to plant right now.

I would love to plant hydrangeas but evidently they don't take well to direct afternoon sun...and that is exactly what this bed gets...hot afternoon sun. Curses. I like crepe myrtles but they get very full and bushy and are probably not ideal for a narrow bed against a fence. 

When planning your plantings pay attention to what sunlight and care the plants will need. Do your research!

Maybe I will just resort to more potted plants...those tend to do well but they certainly can't be neglected this time of year. Right now I am watering every day.

I will leave you with a few pictures of areas of the yard I don't neglect...

After YEARS of struggling to landscape this front bed, I finally resorted to flagstone and potted annuals..I love it!

Hostas are a super simple perennial that require little maintenance! They can easily be split every spring which explains why I have TONS of them in my yard! I have even started planting some in containers!

Planting in containers has become my "thang." I'll scatter a few annuals around in the ground, but just about all annuals go in containers these days!

Make your yard an extension of your home...

BTW, last year I shared here the new fescue sod...I thought the "difference" between the fescue and bermuda would bug the heck out of me...not so much! I see the difference...but I can live with it! As you can see, it made it through the winter and that is a good thing!

Until next week....

Flagstone....check!

That is one project I can check off my "to do" list! It is done...the project I started here. It took three trips to the "rock store" and two trips to Meek's for sand...and two trips to Lowe's for topsoil. But whatever...it is DONE!!! 

Well, until it "settles." Seems no matter how well you pack the sand base, a few rocks always "sink" after a little rain and wear. No biggy...just pull it up, put a little sand under it and then reset it. 

We had a 90% chance of rain Thursday (didn't happen!) so I wanted to get this project finished so the sand wouldn't wash away and the rock could begin "settling." 

I had a bench sitting in one of my flower beds in the side yard...thought it would look great in the corner. The terracotta pot is one I bought at an auction last year and was just sitting around. I decided it would look better with a few plants! 

This is another area that still needs a little "something." In time...for now, I LOVE, LOVE, LOVE IT!!

Get ready for a BUNCH of pictures!!!

IMG_1765.JPG

Again, there are hundreds of tutorials online for laying flagstone...it may seem laborious, but it really isn't that difficult and you won't regret it! 

I will offer a few little "tips" for laying flagstone. Make sure you have a good sand base, well packed. After your rock is down, water the sand and rock well so the sand will wash down under the rock. After that, dump a mix of top soil and sand on top of the rock and sweep it into the joints. Then lightly water it again. Rain may wash it away a tad the first few times, so you may have to add a little more sand and soil over time....just dump the soil and sand on the rocks and sweep...eventually it will pack and stay put.

If a rock "sinks," lift it up (just pry it up with hammer), toss a little more sand under the rock to build it up and level it out, reset the rock and then fill the joint with the sand and soil mixture. 

I have a tiny front porch and I love how this has opened up the front of the house a bit! It's still not that wrap around front porch I want, but it is a lot better than it was before! It eliminates an eye sore AND the need to crawl around every year filling it with plants! I just plant the pots and I'm done! Super simple to maintain! 

I use to decorate the front of the house in the fall with hay bales, corn stalks, pumpkins and scarecrows. I quit doing it because I had to deal with mildewy hay bales after Thanksgiving...but I may have to start it again this year...this area would just be too cute with all the "harvest" decor! 

Hum...guess we will see...fall will be here before you know it!