Simple "before and afters"...

Some of the simplest "befores" turn out to be my favorite "afters."

Which explains why I often don't have decent "before" pictures...I think "oh, that's no biggy" and dive right in to giving them a simple little makeover. Then they turn out so stinking cute I wonder why I didn't take time to take "before" pictures.

They are a reminder of why do this blog...to show you how easy it is to take a simple, boring, out-dated, dark piece of furniture and turn it into something you will want in your home rather than in your yard at the next garage sale!

We DIYers live for those hidden treasures...pieces of furniture that people want to get rid of... they drop them at their local thrift store or sell them for pennies in garage sales or just set them out on the curb...we take them home, clean them up and work a little DIY magic. 

The worst...you live with the ugly, dark furniture because you can't afford to replace it!

I get it...you paid a small fortune for your "matchy-matchy" bedroom furniture so you can't bring yourself to get rid of it.

I've shared "makeovers" hundreds of time...too many times to link ALL the pieces I have "upcycled" over the years. But I would bet money you still have a few pieces lurking around your house that serve a purpose or are "family heirlooms" or you paid too much to get rid of it...so you just live with it.

Don't fret...take the plunge...buy some primer and some paint AND CHANGE IT!

LIFE IS TOO SHORT TO LIVE WITH UGLY FURNITURE!

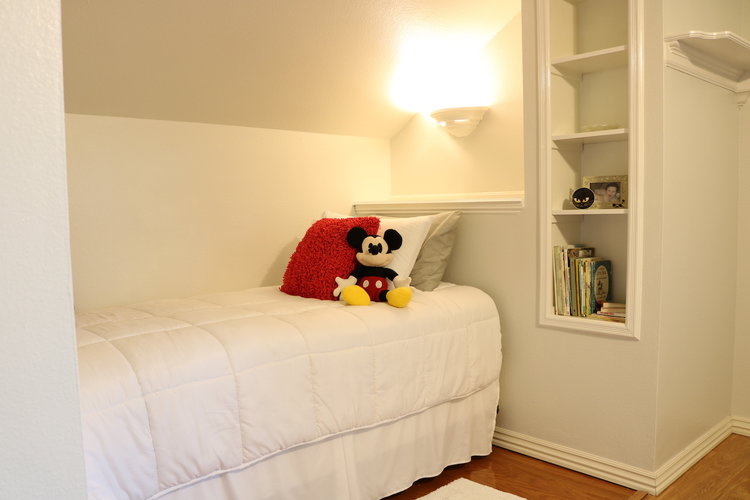
This shelf was your typical Target cheapo...dark finish...no I did not take a picture of it "before." Honestly, I think it was a piece someone left at the apartments so I loaded it up and brought it home.

I removed the back panels...primed and painted the frame and shelves with one of my "sample" pots of white (KSTP). I painted the back panels with a sample pot of teal and then reattached them.

Super simple and too stinking cute!

This little bedside table came with a set I bought at an auction. Someone bought the dresser, chest and bed but didn't want this little table.

Meh....

Simple makeover! I removed the drawer and simply brightened it up with some Restorafinish. I primed the cabinet, sand, tack and white gloss paint. It was missing a knob so I ordered two new ones...

....again, SUPER SIMPLE and so stinking cute!

This old oak dresser...the finish and the little applique' really dated the piece.

I popped off the appliques using a chisel...lift carefully...chances are they are applied with a little bit of glue and a few tiny nails.

... sanded the old glue, stained the top with gel stain (no need to strip the old finish) and chalked painted the rest of it....distressed and sealed the whole thing with poly...

Too stinking cute!

Simple...simple...simple! 

Nothing earth shattering on any of the pieces...just super simple little makeovers that updated the pieces and gave them new life! 

Walk around your house...what simple little piece can you haul out to the garage and work a little "DIY magic." Trust me...if you don't like it when you are done, you won't get any less for it at a garage sale! 

Essentials for a cozy guest room...

I did not realize how unprepared we were for guests until I began my quest for the perfect "guest room."

Sarah and her family are our most frequent "guests." She doesn't have her own room in this house since she had moved away for college the year I bought it...19 years ago! (Wow...where does the time go!) When her family visits they have no problem digging through my bathroom or closet when they need a Q-tip or soap or an extra blanket! I don't mind that they do, but you probably don't want most "guests" scrounging around your bath or closet!

The three youngest babies who grew up in this house have moved on with their lives and I am left with three bedrooms upstairs.

Now, this is where I tell you that when your children first go off to college, do NOT think you can immediately turn their room into "a naked room." (Again, you have to see the movie!) Because truth be told, they do eventually come home...at least for frequent and sometimes extended visits. And the worst is all the "stuff" they leave behind...clothes, books, trophies, high school momentos. Stuff they obviously can't take with them but don't want to get rid of (okay, so MOM doesn't want to get rid of their t-ball jerseys and "Where The Wild Things Are" books...but that's a whole nuther issue!)

But eventually the time comes and you know they will not be moving back.

For me that time has come.

I decided it was time to pull together a real "guest room." It all started here

I finally got Matt's room painted and all three rooms purged. For the most part...there are still a few framed momentos and childhood books scattered about!

Katie's room will be our official "gym"...there is a twin bed and room for the portable cot for the grandsons and it has the large tv so it is perfect for their "game room." 

Mitchell's room has been the unofficial "guest room" but right now it still has a lot of "stuff" in it that I just don't have the energy to deal with. And truthfully, the bed in his room isn't real comfy.

When Matt moved into his new home, he left only a bed and dresser...

...that room has the least to deal with so that will be the "official guest room." After the new paint and purge, it was time to start working on "this list"....

In the bedroom I made sure there where the essentials...comfortable bedding, a bedside table with a lamp, an alarm clock with USB ports (love that little thing!), a scented candle, a flashlight, reading materials, a notepad, a trash can, etc. (I moved the bedside table from Mitchell's room and the lamp from Katie's...it "pays" to shop at home!)

I gathered all the extra blankets and pillows and bought new hangers and put them in the closet....

I put white inexpensive pillow cases on all the spare pillows! Just a reminder that I am a huge fan of white bedding and towels!

In the bathroom I purged all the outdated products (used toothbrushes, old deodorant, expired meds) and stocked it with everything on the list...toiletries, ample towels and washcloths, a blow dryer, personal and oral hygiene products, a first aid kit and basic meds. 

I made sure I checked everything off the list!

I wanted a new bed frame and found the PERFECT one through a friend. 

Okay, so it wasn't really perfect. I added some height to the side rails because I don't like the box springs showing. I used my Kreg jig and wood glue to attach a 1x6 board to the side rails....

...then nailed a piece of trim across the joint...caulk and putty...

Then I painted it! First the KST...kilz, sand, tack...

Then paint. I went with my go-to off white...SW Swiss Coffee. I thought about doing the whole chalk paint and distress thing, but I know that will eventually fade out of favor and I want clean and classic...in other words, something I don't have to repaint in a few years.

I found an inexpensive "indoor/outdoor" rug that works perfect with a neutral color pallet. 

I'm not big on piles of decorative pillows on the bed, but since I don't have to make this bed every day I picked up some pretty decorative pillows!

I replaced the blue and brown curtains with fresh white panels. 

I found this message board in the craft section at Hobby Lobby.

Chalk painted it and then hand painted the wording on it, distressed a tad and sealed. Super simple and just a touch of "farmhouse." 

This little "message board" is the perfect spot for the wifi password info and our home address info. Keep in mind, if you don't have a land line and someone uses their cell phone in an emergency, emergency responders may not know your exact location. Guests should have your physical address! It is also the perfect spot for hanging spare charging cords for I-pads and phones! 

Fresh flowers are on the list, but it is a bit unrealistic to keep fresh flowers in a room I rarely enter...these were from Sarah for my birthday! 

If you do not have an extra bedroom specifically for guests, put together a guest basket...a little basket with all the "essentials" that can be stored in a closet until it is needed! I stocked this one with little "sample size" products. I also pulled items from my hotel stockpile...yes, I am one of those people who takes all the little shampoos, lotions and soaps from my hotel room!

Having a room ready (or even a little guest basket on hand) sure makes it easy to prepare for overnight guests...last minute or scheduled.

I have a large matted frame I intend to hang above the bed if I can find a print I like. The frame was a "silverish" color...not the least bit pretty. I have it primed and ready to paint (and share) when I finally put it all together. Wall decor is something that can take time...like Matt, I don't want "stuff" just to have "stuff." 

I put my dad's walnut chair in the corner and eventually I want to add a mid century dresser...Katie is using this one and I may get it back when she moves so I may hold out for it! I also want to find a luggage stand. When I get that all in place I will share that side of the room!

The "froo-froo" takes time but the absolute must-haves are in place! 

Que "sigh of relief!"

Bedside table makeover....

I spent several days this week projecting on a few pieces I picked up at auctions, as well as a little project here at the house.

I can't wait to share the home project...but I will have to. Even veteran DIYers flub every blue moon! In this case, I neglected to get a quote and delivery time frame on a "simple" piece of glass. Let's just say one should not fall in love with something if they have no idea how much it REALLY cost. I should know better...but by the time I called and got an estimate, it was too late. The vision was set and the damage was done!

I will have to wait until next week to share this AWESOME project....and in the meantime I will have to live with a big hole in my utility room door...stay tuned! (no it is not a doggy door!)

So this week I will share one of the little projects I managed to get done. I usually wait until I have 3-4 pieces to work on before I drag out the stripper and paint! Normally it is easier but it is just soooo hot! Working all day in the garage can really be draining!

Last week I bought these two little bedside tables at an auction.

Dark, dated and the drawers were a little wonky. But overall they were in pretty sound shape. 

The drawers were an easy fix...the metal glides were a tad bent so I took a pair of pliers and straightened them out...perfect. 

Usually I paint the tops of these pieces, but this time I decided to try stripping them...what harm could be done? Sure enough, the old poly finish just melted off (using this process!) leaving a beautiful wood veneer top perfect for a little walnut stain and tung oil finish.

I painted the existing brass hardware with a gold metallic paint. I gave the drawers a little KSTP treatment with a pretty "teal" spray paint, chalk painted the cabinets and distressed them a bit before sealing with a spray poly.

Cute as a bug's ear!!!!

These little tables fit perfectly in my commitment to stay "small." They still take a little time and energy, but they are MUCH easier to move around than the bigger pieces! 

And this is just ANOTHER example of how you can take a dark, dated, wonky piece of furniture and give it new life!!!