Chair before and afters!

It was 80 degrees today...spring is HERE!!!

So today has been a day of MAJOR projecting. I have 7 chairs and who knows how many frames piled in the garage that all need "make-overs." A little repair here and there and lots of paint!  I may even make a few frame shelves because the others sold pretty quickly.

A few chairs need a little upholstery but nothing major so hopefully I will be able to share these projects next week! Sometimes I get so caught up in the BIG projects that I forget to share the little ones. 

Today I am going to share a few chairs I finished. I got the frames painted, but they aren't distressed or top coated and I didn't have time to build any frame shelves!

I scrubbed all these pieces with ammonia and then let them dry out for a few days. After all the nastiness was washed away, I found some amazing wood!

I am always in awe when I find solid old furniture made with woods like mahogany and walnut...you just don't find solid pieces like that any more! 

I knew the top on the little bench was pine...but once I got all the gunk cleaned off I found that the base was mahogany.I couldn't bring myself to paint over it, so I just chalk painted the top of the bench. I chalk painted the chair but left the seat natural and put a few coats of tung oil finish on the seat and legs of the bench.

I used a mix of latex "off-white" paints I had on hand and made a home-made plaster paint. These little oak chairs were ideal for the distressing because of the detailing on the back and legs!

I picked up a pretty "yellow" at Lowe's the other day. It just made me happy...and after the chair was painted and I started taking pictures I figured out why...

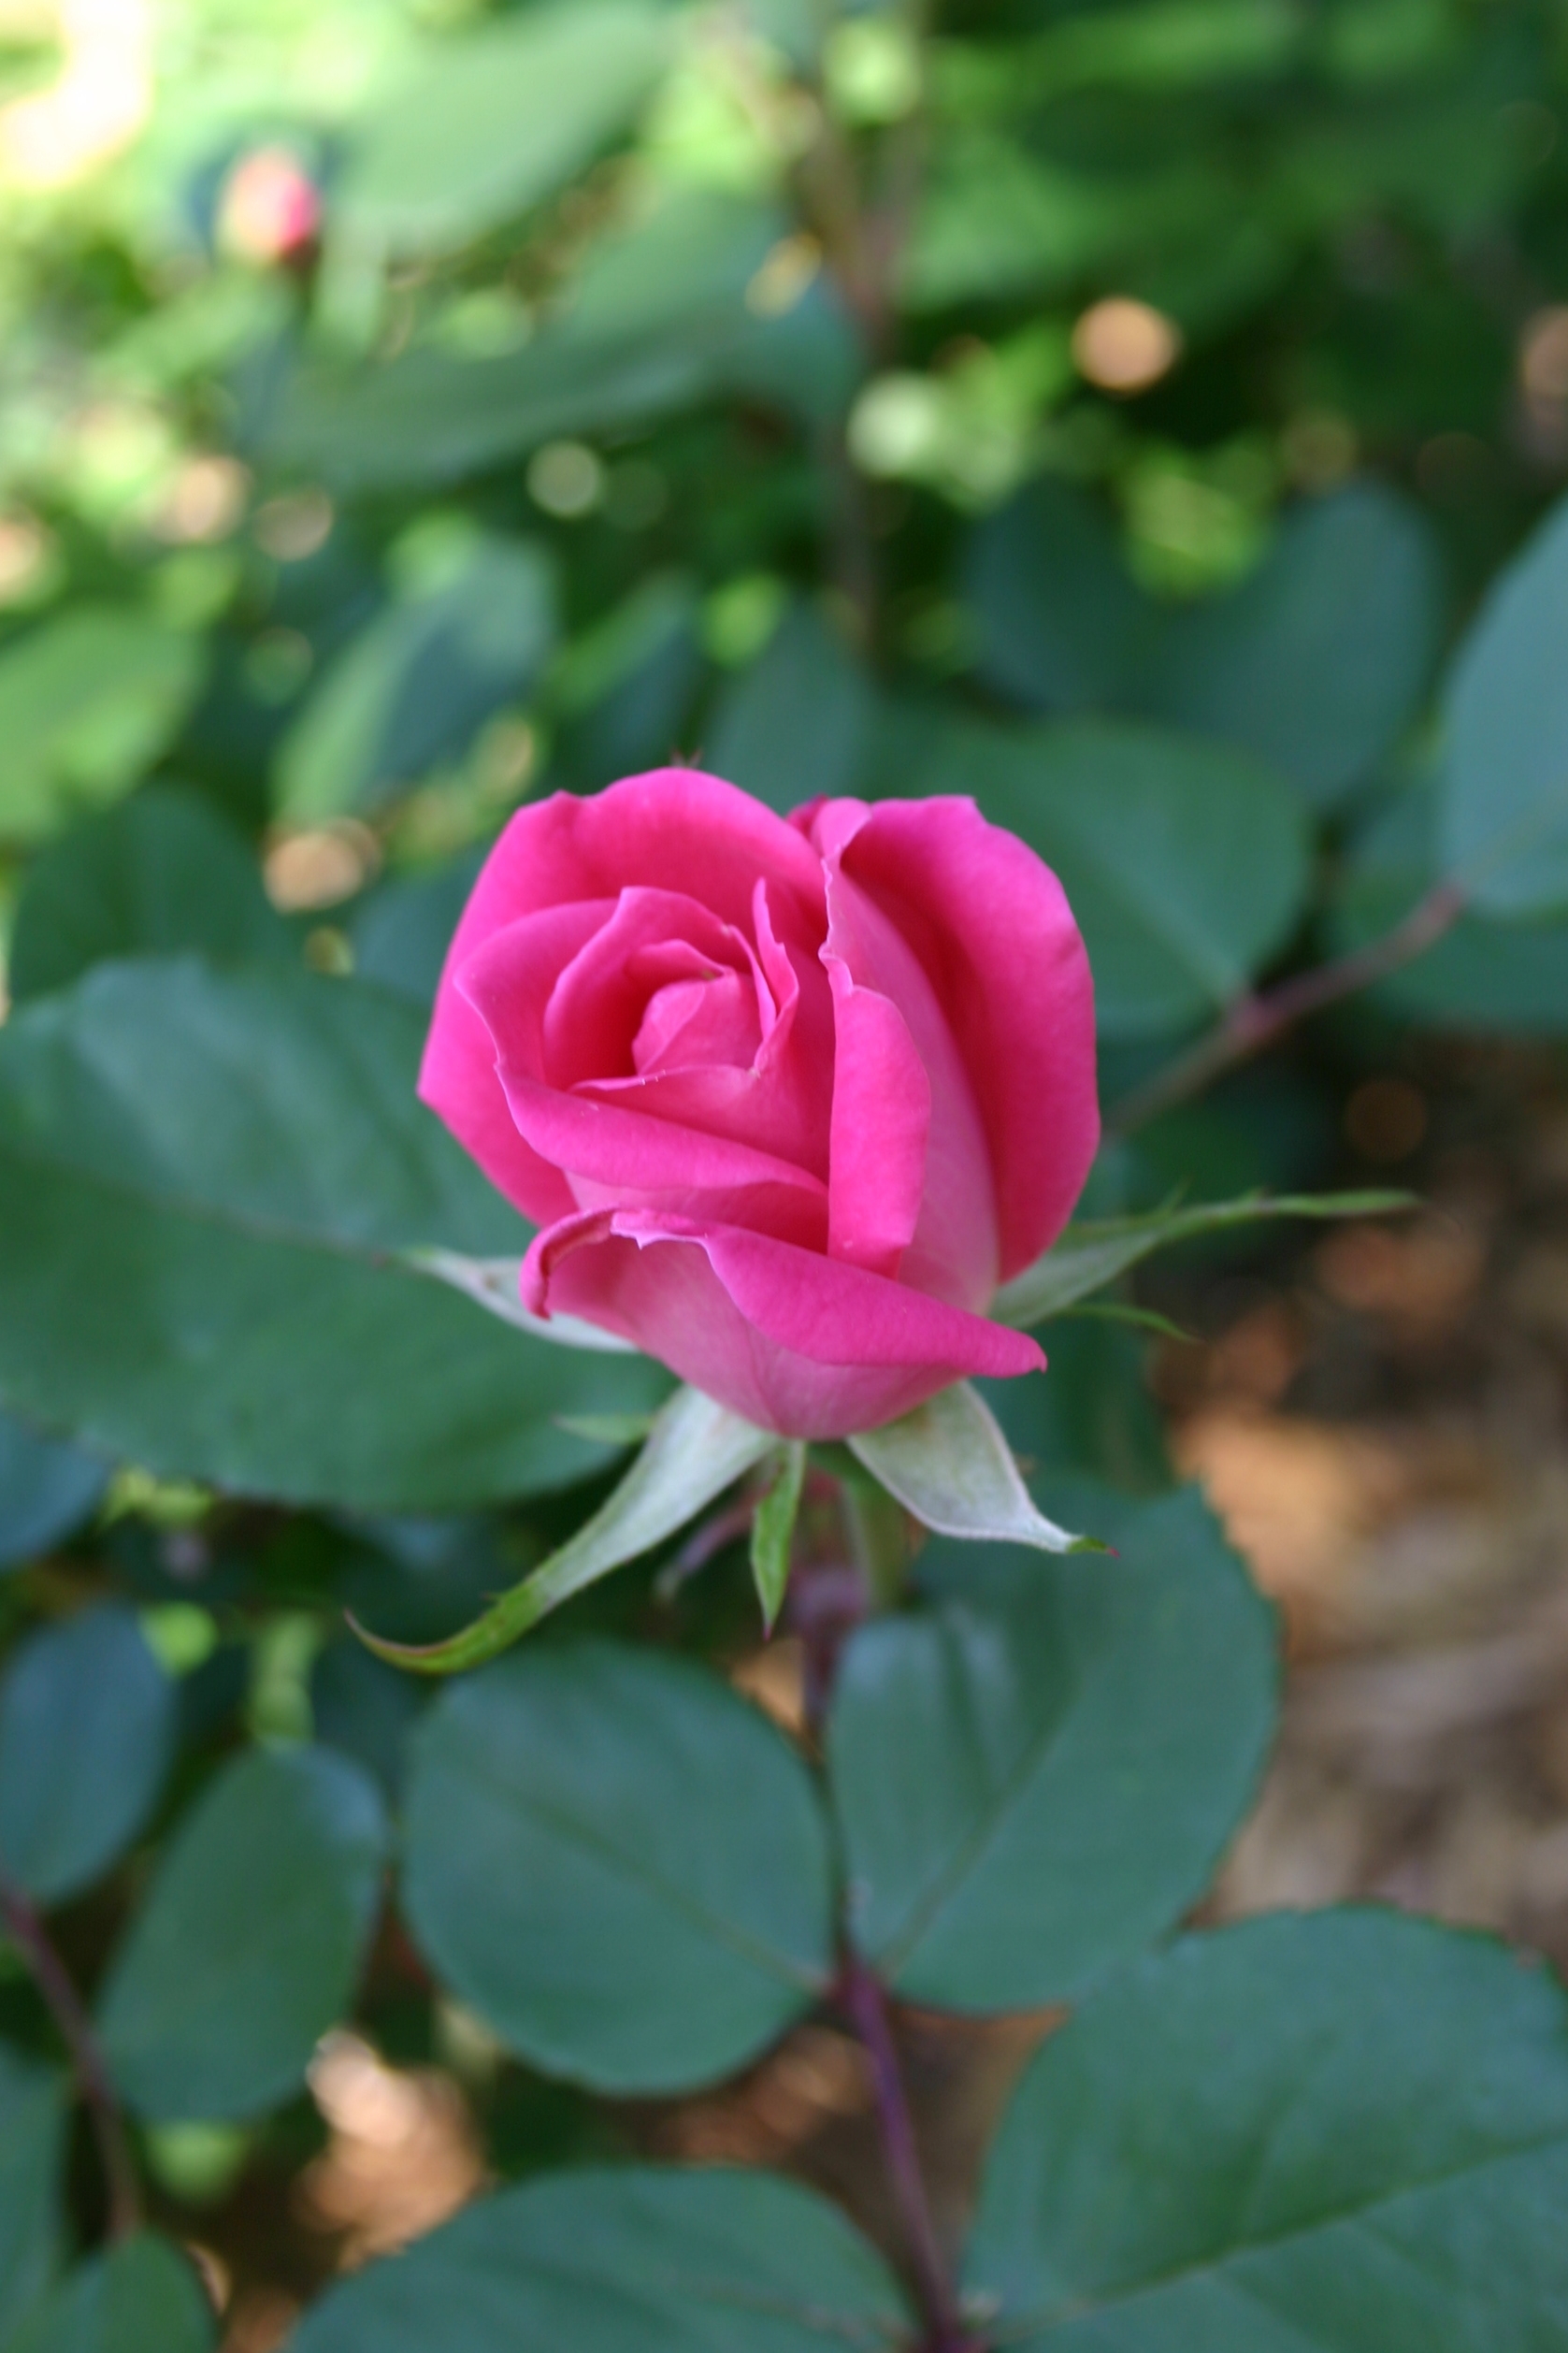
...it looks like SPRING!!!

Tulips!  The always arrive the week of my daughter's birthday!

HAPPY BIRTHDAY SARAH!!!!

Sarah and her family (and new puppy, Duke) will be coming for a visit tomorrow! Her favorite cake is my Grandmother's lemon cake. A.M.A.Z.I.N.G.  I will have to remember to take pictures and share the recipe next week. Super simple but will knock your socks off! 

Don't neglect the little things!!!!

Last year I gave my little storage shed a much needed makeover!

You can see the complete transformation here.

This is the perfect time of the year to complete this kind of project...too early in most places to plant flowers but warm enough most days to paint!

Let's be honest...storage sheds can be a real eye sore. But with a tiny bit of imagination and a little "oops" paint from your local home improvement store, they can easily be transformed. They have paint for every type of material...plastic, metal, wood! Hose it down first, then use a good exterior primer and GET CREATIVE!!!!

Is your storage shed one of those ugly "barn" shaped things? Paint it to look like a REAL barn. (Barn red with white trim! Google it!)

No windows in your shed? Paint fake ones...seriously, just paint a fake window. Maybe some shutters...real or painted!  Attach a little flower box and put some flowers in it

Same with the door...paint it to look like mine! Or a pretty atrium door. Hang a grapevine wreath on it...anything to doll it up a bit!

Attach fake light fixtures or hang lanterns! (Mine are real light fixtures, but they don''t work!)

Again, google "garden sheds" or "storage buildings" and find something you think is cute and "fake" it! Pinterest has some awesome pictures of dolled up storage and garden sheds!

Anything to make it look like something other than a boring old storage shed.

This is a great weekend project for the entire family. Who cares if you drip paint all over the yard...PERFECT project for the kids! (Kids always think they want to help paint...always!) 

Turn your ugly old storage shed into something other than an "eye sore!" You won't regret it!

AND YOU CAN DO IT!!!!

Front porch "remodel" and getting ready for the summer!

Spring is in the air. When the daffodils bloom, that is my cue to start working on the yard and getting beds ready for the summer bloom. (My hostas are already popping their little heads. I hate it when they do that before I get mulch down!)

It is also my cue to start sprucing up the porch and patios!

One of the things I wanted to do was change things up a bit on the front porch. It's a tiny little porch so I try to dress it up as best I can without "cluttering."

Last year I decorated with one of the old wood windows that have been all the rage....

I like the look, but a few weeks ago I bought a wood and iron wall deco at an auction. To be honest, it was one of those times I paid a little too much so I knew I probably couldn't sell it for more than I paid for it! Oh darn, guess I'll have to keep it!

I like it in it's "natural" state, but it kind of faded into the dark brick...

I had a little sample container of a "no formula" greenish colored paint ( 50 cent clearance!) so I mixed up a batch of homemade chalk paint and gave the wood a little "makeover." Distressed it and sprayed it with a clear coat poly.

Simple change but one I think makes a huge difference! I can't wait to get some bright flowers in the planters...but I will because our freeze date is still a week away! It's bad enough I have to drag every blanket and sheet into the yard just to save my hostas!

IMG_0675.JPG

Don't be afraid to give a piece a little makeover if you are bored with it or just isn't quite right. Spray paint it, chalk paint it, WASH it! So you still don't like it...big deal...it's not going to fetch any more or less at a garage sale! And you might just end up liking it again!

This was a weekend of WORK! Lots of yard work! Saturday morning I took my trailer to the dump to toss some old furniture so I could haul mulch! Four yards (8 tractor scoops) at my apartments and then I loaded three yards of natural cedar for my house. 

I want to repeat something I mentioned in an earlier post. RED MULCH...leave it be. Don't use it if you plan to plant anything in the bed. I use to grow impatiens 2'-3' tall...seriously...if you know the plant, you know how amazing that is! Then I started using that pretty red mulch. All of a sudden I was lucky to get my impatiens and other annuals through the summer. They "failed to thrive." 

I did some research and many were pointing a finger at the red mulch. And honestly it is the only thing I can think of that I was doing differently. 

Anywho, I was standing at the mulch store (seriously, they just sell mulch, rocks and dirt) and a couple was debating which mulch to get. I piped up and told them to avoid the red. The guy standing next me was a landscaper and knows his stuff...and he whole-heartedly agreed. He said I am the first person he had ever met that knew NOT to use the stuff. His experience had been like mine...plants that wouldn't thrive and beds that were sucked of nutrients after using the red mulch. 

So, there is all the confirmation I needed...someone else who had a bad experience with red mulch. Plain ole' cedar or hardwood it is! 

You will make a few mistakes flower gardening...maybe you plant something in a place that get's too much sun, or not enough. Maybe you under water or over fertilize. 

Flower gardeners are a lot like DIYers...we love to share our successes and failures. If you see flowerbeds or plants you love in a yard, stop and ask the homeowner about them! Trust me, they will be happy to talk to you! If you get lucky they might even send you home with a few clippings or cuttings...but more importantly, they will send you home with a wealth of information! 

Pond cleaned and running...check! (EVERY yard should have a water feature!)

Wisteria trimmed...check! (Save yourself some grief...just don't plant it...just don't!)

Mulch down...check! (A must for any flower bed!)

Pots cleaned out and ready for new soil and plants...check! (Don't forget to look for containers for planting! The more unusual, the better!)

And then the rains came...before pictures, so you will have to wait. But honestly, it's just mulch. I will say the white on the Bradford pears, the blue on the vinca ground cover and the yellow of the daffodils sure is beautiful! If only for a few weeks!

Lots done...much more to do! I still need to power wash the patio and decks...hang my exterior "summer decor"....clean the windows (must-do chore twice a year!)...service the mower...clean out the storage building. And of course plant my pots! Lots of work in the month of April, but it is SO worth it when I can sit back and truly enjoy my yard. 

Remember, your yard should be an extension of your home! Don't neglect it! Even if you just plant a few pots like I suggested here, you won't regret it! You may even learn to love it!

Another repurposed grandfather clock...

I sold the antique grandfather clock I  repurposed and featured here! There is only one downside to repurposing pieces for resale...they sell. It makes me sad that I work so hard on a piece, only to have it go away AND leave a big hole in my booth...darn. 

The super upside is someone else loved and appreciated the piece enough to take it home with them! That makes me super happy!

The problem then becomes filling the "hole" in my booth. It just so happens there was a "cheap" knock-off grandfather clock for sale at Midtown. Certainly not anything like the true antique piece I repurposed, and it had a few structural flaws. But nothing that couldn't be fixed with a little glue, clamps and wood putty.

So I loaded it up and brought it home. And yes, it was in need of some serious "shoring up!" 

This piece is what I call a "fake" grandfather clock. The clock is actually an inexpensive battery operated thing, so the chains and pendulum serve no purpose. That leaves the cabinet part of the clock open and begging for shelving! PERFECT!!!! 

I could have taken the clock part out and turned that into a display area as well. But I like the idea of having a working clock AND a display cabinet all in one. I think it makes a more "useful" piece!

I did remove the door and all the decorative "do-dads." Just too much froo-froo for my tastes. I added decorative trim on the edge of the main shelving area...just to dress it up a bit and cover where I had patched the cuts for the hinges.

The question then becomes what kind of paint treatment? Light? Dark? Distressed or no? Maybe a Razorback red cabinet? That sounds fun! I thought about doing a Disney motif...my teenage daughter thought that would be awesome! 

But no...simple is always best when you are repurposing something for resale. So I did all my glueing and clamping. Then I added two shelves, kilzed the entire piece, sanded, tacked and painted!

Super simple but a great improvement. If someone wants to dress it up with a transfer or some-such, I think that would be awesome!

I love it when bloggers "stage" their pieces with pretty knick knacks...and I would do that as well IF the darn stuff wasn't so heavy and difficult to drag in and out of the house...20 years ago, I would have been all over it. Today...I'm lucky to get it in and out of my truck! I do stage the pieces once I get them in my booth, but do you really think I remember to take a camera...ha!

Another Great Day at the Auction!!

We went to an awesome auction Saturday and I picked up some really wonderful pieces. The clock and my newest finds are already at Midtown ready for someone else to fall in love with them and take them home.

When I go to auctions I try to find unusual pieces that you don't find every day...or at least pieces that I think people will really love. These are just a few of the items we brought home.

The head board is twin size...I bought two. They would be precious painted and distressed...but I decided to let someone do their thing. The retro clock/lamp WORKS!!! That was a tough one for me to let go...but I honestly just don't have a place for it right now! The typewriter is a Royal Junior dating in the mid-30s. Even came with a case.

IMG_0679.JPG

The antique wood and cast iron school desk is an Andrews. I had to glue and clamp the back and then I scrubbed it with varnish remover and wiped the wood down with a little danish oil finish just to nourish it and clean it up a bit. I decided to leave the little doll rocking chair "as is." Just cleaned it up. That is going to be a precious piece for a little girl!

And this is just the stuff I have ready to go...I still have 5 chairs (including one similar to this one), a little stool, pictures, and a few other knick knacks that need some attention before they will be ready to sell! 

Lots of projects to work on in the next few weeks!!!


Mid century chair makeover...another WOW!

A guy I met at one of my old flea market haunts had some furniture and knick knacks he was clearing out of a storage building so I went to check out what he had.

He had a few pieces of furniture I was willing to make a deal on. Most immediately went into my booths after a good cleaning.

But one chair...my oh my. Mine. Had to keep it! (Again, to see the "before and after" just scroll to the bottom...you know who you are...just go!)

This chair is ALMOST as good as my coffee table score (here). Not quite, but it is still a "wow" piece! 

I have a hard-fast rule for my home...if I bring something in, I have to take something out. Cats, furniture, appliances...makes no difference! I don't NEED anything else, so if I want something, I have to give up something. It is my personal rule that keeps me from becoming a full blown hoarder!

So I decided the new one would be my new office chair...and this one had to go...

I love my old office chair...I love the wood and the color and the style. But I love the mid century style more and I knew with a little bit of time, a lot of elbow grease, and a little DIY magic, it would be beautiful! 

It does have a few little "issues" in the cane back. It is difficult to find 50-60 year old cane chairs that are in perfect condition. I found two herebut that is rare. For now I have decided to just leave it be! The breaks are very minor and hardly noticeable. And this chair will get minimal use since it is in my office. I watched a tutorial on replacing caning and I have no doubt I could do it. But whenever I can I try not to do anything too terribly invasive. There will come a day when I may have to replace the caning, but not now. 

So I was so pumped and could hardly wait to start on it! Usually major projects like this will sit for at least a few weeks (if not months)...this one only had to wait a day or two. Besides, I immediately took my old office chair up to Midtown and I will need a chair at my desk when bookwork day rolls around on the first. God forbid I pull in one of the others I have sitting around...lol! 

I think this chair is walnut...a lot of mid century pieces are but they also used a lot of teak and rosewood. I am not sure but the grain looks like walnut.... but honestly I don't care. The style is amazing and as with most mid-century pieces, it is as structurally sound as the day it was built! Always amazes me! 

The first thing I did was remove the seat. Four little screws, no biggy. Then I stripped it with the Formby's varnish remover. I will tell you that was a chore!!! This chair had some serious finish on it. But after 4-5 hours of scrubbing with the Formby's varnish remover and pad, I finally got it all off! I gave it a mineral spirit wash, a light sanding, tack cloth and four coats of tung oil and the wood is beautiful as new! 

Now I am going to try to show off the wood detail...

It is really hard to appreciate the difference in photographs...but trust me, it is HUGE! These pieces are so worth the time and effort to strip and refinish. And while it is indeed a bit of a process, it is a relatively easy DIY project. Why people are afraid of refinishing furniture is beyond me!

It was obvious that a stain was originally added to the finish coat. I like the color of the wood with just an oil finish applied so I rarely add stain. You can apply mineral spirits to the piece after all the old stain and varnish is removed to get an idea of the color if you just apply a clear finish.

Now on to the seat cushion. It came to me with a tan vinyl seat cover. When I stripped that off, I found white Naugahyde. I have no doubt that would have been the original upholstery. Naugahyde was all the rage during the 50s and 60s and if you google "mid century furniture" images you will see a lot of it on original pieces. 


My old desk chair had the same fabric as this wingback chair. I love this fabric even though I am not a huge "floral" fan. It is bold and funky but not too out there with the color scheme. 

I'm thinking the white Naugahyde might be the route to go!

I really want to take my time to find the perfect upholstery...I need something to "speak to me." Sometimes that takes time! 

Right now I am just admiring the beauty of the wood...

I would like to take a minute to comment on the "tones" of my decor. As you can see from the final finish on this chair, as well as the other wood pieces I have refinished, I tend to be very partial to "warm" tones. Rust, cream/yellow, orange, brown...warm. Even my hardwood flooring is "warm." I can get away with it in this house because there is so much natural light!

I was craving blues and whites and "bright" but I was very hesitant to add "cool" tones to my decor...blues, mint greens and whites. But you know what...it works. I have so much "warm" wood tones throughout my house that the cool tones really "pop."  I have even transitioned my trim color over the years...from a white with a "cream" base to one that is more "true white." I love it.

Truthfully, I like the warm with the cool...too much "cool" and, in my opinion, your space can feel washed out...too much warm and it can become a tad dreary.

Don't hesitate to mix it up...do what you love. You will never regret it!

Making frame shelves...

One thing I always buy at auctions and garage sales when I find them is frames...frames for photographs, framed pictures, framed paintings. Don't care what is IN the frame...I just want the frame. I usually remove the backing and glass and either chalk paint and distress or spray paint them.  

A few weeks ago I went to an auction and bought TONS of frames...all types and sizes. Several were the perfect size for "frame shelves." 

I have never made and sold these so I only made a few to see how well they do. 

I picked 3 sturdy frames. Since I am going to chalk paint and distress the frames, I wanted a little "detailing."  I had both pine and MDF 1x4 material on hand...made no difference since I was going to paint it!  

I basically built a box for the shelving. I wanted the box to sit on the meatiest part of the frame so when I glue and nail them together it is sturdy. The first thing I did was measure for the box...make sure you account for the 3/4" thickness of the 1x4 (remember, it is not REALLY 1" thick!) 

I cut three horizontal pieces...top, bottom and middle shelf...and two vertical pieces for the sides of the box. I placed my horizontal pieces between my two side pieces. You can see in this picture what I mean...of course this is after it is built and painted and I have already put the glue on it...getting ahead of myself a bit, but at least you can see how it is constructed. (This is the MDF shelf)

One thing I want to address when working with real wood on ANY project...whether you are building shelves or installing a deck...CUP DOWN!

What does that mean? If you look at the cut end of any piece of would, you should be able to see the grain pattern...think tree rings because that is what they are. They may be big or small, but you should be able to see the "curve" of the grain. When nailing a piece of wood to another piece of would, you want to make sure that the curve, or the "cup," is down. Wood naturally wants to "cup" (bend) as it ages and dries out and if the cup is facing up, it is likely to pull away from your glue and staples.

After measuring and cutting the 5 pieces for each frame, I glued (super important!) and nailed them together, caulked, puttied the nail holes and then primed. After the primer dried, I sanded the box and painted it BEFORE attaching it to the frame.

A reminder. ALWAYS glue your joints before nailing them. Remember, the glue is what REALLY holds it all together! 

I use wood filler to fill the nail holes and latex painter's caulk for the joints. DO NOT use a caulk with silicone in it to caulk anything you are going to paint. Paint will NOT stick to silicone! Just run a small line of caulk in each joint and then run your finger (the one with the broken fingernail) along the joint to smooth the caulk out. Keep a wet rag handy!

After the paint has dried, run glue along the outside edge of your box, lay the frame on the box, and then use small trim nails or a trim nailer to nail the frame to the box. (Okay, I will admit I initially ran the glue on the wrong side of the box...this is the back side...I figured it out, wiped the glue off and then flipped it over! You want the painted edge of the middle shelf to show through the frame!)

Keep in mind these are small shelves. I do not intend to put anything heavy on them...so I didn't feel the need to put bracing under the middle shelf. I think the glue and nails will be enough. If I was building a big bookshelf, I would put bracing under the shelf to provide more support!

After my frame and box were constructed, I chalk painted the frames, distressed them a tad, and then hit the entire piece with a spray clear poly to seal it all! Then I added hangers on the back.

The small white shelf is painted with spray paint...I did not distress it. It is a cheaper plastic frame so I didn't think it would look good distressed. But it shows that you can take the cheapest, simplest frame and turn it into a functional shelf! 

I have a "frame collage" of simple white frames on my guest bath wall....

I have never been a huge fan of this wall but I was thinking I might take 2-3 of the frames and make frame shelves out of them just to give the entire feature a "three dimension" affect. 

We'll see...today I am working on a AWESOME mid century chair for my office. I am soooo super excited about this chair and I just can't wait to get it stripped, oiled and recovered! And of course, share! It is a tad too cold to paint but if I come in and run my hands under hot water every thirty minutes or so, I can get some stripping done! Stupid hands. 

Anywho...there is a simple little project that can make a HUGE statement. Before you toss that old picture frame, think about giving it a simple little "repurpose." 

IT'S OFFICIALLY SPRING! Start collecting your planters!

It's official!  IT IS SPRING!!!!!  

Warm weather is on it's way. It will be here before we know it!

Since I have been doing this blog thing for over a year now, I will be revisiting a few posts from the past. Especially my "gardening" posts.

It is entirely to early to plant flowers in the ground! But it is not too early to start planning. As I mentioned in my post here,  I plant little in the ground except for perennials. Most of my annuals planting are in containers. (Perennials are plants that come back every year...annuals have to be replanted every year!)

When most think "container" or pot planting, they think along the lines of traditional flower pots. Not so...you can plant ornamentals (flowers, ferns, even hostas, etc) in just about any type of container, as long as you can get decent drainage (tiny holes in the bottom).

So NOW is the time to start hunting for containers at thrift stores and flea markets....old crocks, tin buckets, old grill bases, etc. And don't forget our old friend, spray paint. You may think the pot or container is an ugly color...no biggy, just hit it with a little spray paint.

I acquired some old pots from a neighbor...kind of ugly and worn. I sprayed them with some bright spray paint I had on hand and they are perfect. After a few years of water and weather, they have begun to chip again...but you know what, I kind of like the look! 

Even if you don't have a lot of space for flower gardening, plan on one or two "statement" pieces for your patio or porch.

This is my all time favorite...

This pot is made up of one Kimberly fern, 3-4 impatiens and a few caladium bulbs. A beautiful display costing less than $15! And if you have smaller pots you can always cut the fern into 2-3 sections at the root and make several pots.

Here I discuss creating an inexpensive and easy "base" in containers and window boxes for planting. Rocks from the yard and cheap soil topped with potting soil! Potting plants doesn't have to be expensive. And truthfully, they are easier to maintain in the heat of the summer...less watering and NO weeding! 

Even if you have existing flower beds that you have planted in the past (like I do) you can scatter a few pots here and there in your beds...plant those with colorful annuals! The affect is the same and the work is minimal! Your knees and back will thank you!

Window boxes are awesome...this is one I put in my bedroom windows last year. It was really beautiful...for about a month. It just dried out to quickly and the plants didn't thrive. This year I am thinking about filling it with small potted plants.

Live and learn....

A few things I have learned over the years...

1) ALWAYS repot plants your buy. Those plants where started many months ago in a greenhouse and chances are the roots are a bit crowded...so repot it. If you can't put it in a larger pot, at least break away some of the root system and repot it with some good potting soil. And whether you are planting in the ground or in a container, add a slow release fertilizer. I like Osmocote.

2) Plant in containers. Obviously that is my thing now because of the "age factor." But even if you are young and spry, find a few unusual containers and fill them with a mix of flowers...it really does make a statement! And if you honestly don't have a green thumb but want a little "pop" on your porch or front flower bed, try the fern and flowers in a container...beautiful and super easy to maintain!

3) DO NOT ignore your regional "freeze date." And if you are really smart, add a few weeks to it...in other words, be patient. Two reasons...one, you risk loosing or seriously damaging everything you have planted if you get a late freeze...two, home improvement stores and even a few nurseries will have "damaged" plants from late freezes. SUPER cheap way to get some flowers...especially perennials which can be expensive! Trust me...a little time and they will be good as new.

4) Ask questions of someone who KNOWS about plants. Not the kid standing there watering them! Sun? Shade? How much water? When will it bloom? These are all things you really need to know. Most plants come with little informational tags...read them!!! 

5) Mulch. I have so many flower beds that I buy in bulk...like by the trailer load. I learned the hard way to use only natural hardwood or cedar. I loved the colored mulches but I read it has a negative affect on the quality of the soil and the growth of the plants. May or may not be true but I did start having trouble with my annuals after I began using it...so I don't use it! 

Gardening is trial and error. Not every planting with thrive...not every flower bed will turn out the way you want it to! I have lived here for 14 years...I still can't figure out what to do with my front flower bed!

Gardening is a great way to get out and enjoy a beautiful day. And like any DIY project, it is "trial and error." Best advice I can give is JUST DO IT! You may find you like it! 

Your yard should be an extension of your home!

IMG_9193.JPG

I'm so excited for spring this year...but our "freeze date" is mid-April and I know better than to get in a hurry. It is bad enough that I have a bazillion hostas that inevitably have to be covered at least once or twice because of a late spring freeze.

Be patient...but plan ahead! You just have to "think outside the pot." (HA! Get it...outside the pot...I amuse myself!)

Spring? Hello? Are you there?

I just can't let myself get too excited yet. I always do this...get all fired up after a few days of beautiful weather...only to get hit with another round of snow!

But I was going back through some old posts and I stumbled across a reminder of things to come...that very soon spring really will be here to stay and before you know it I will be watering every day and grumbling about the heat!

I am so grateful for the four seasons...but winter is officially over this week so I'm ready to start digging in the flower beds!

Bloglovin'.....lovin' !

I'm kind of newish to the whole "blog" thing. While doing a little research I discovered I am again only a few years behind with my newest discovery. So if you are like me, new to the blog thing or short on time or just old and forgetful (not me, a friend) my newest discovery is perfect for you! Granted, I am probably the LAST person on earth to know about this, but just in case there are others living under rocks somewhere out there....

I am like many...looking for inspiration for anything from DIY projects to a new recipe for dinner! I am always amazed at how much information is out there on the internet and how many women share all their wonderful ideas and endless knowledge! Back in "the old days" we would have to sit and watch every morning and afternoon show or endless hours of HDTV just to get a smidge of the information that is at our fingertips now! 

Pinterest is easy, but like most, I have a few favorite blogs I like to follow...and that list seems to be growing every day. When I only had 2-3 blogs I liked to look at it was easy to just pop in and look around. But as my list of favorites grew, I found myself forgetting to check out certain blogs...and inevitably I would miss something really awesome.

Then I discovered bloglovin.com.  I hate to "toot" a website for fear it will put horrible bugs on your computer...or collect your personal information and feed it to the CIA.  But so far, so good.  I haven't seen any annoying pop-ups or unsolicited emails as a result of signing up! 

All I did was go to their website, search my favorite blogs, and "follow." I even get a daily email that shows me all the newest posts on the blogs I am following! When I log into bloglovin.com I can immediately see "My Feed" which is a summary and link to all the newest posts for the blogs I am following. If I find a new blog I absolutely love, I can add it to my feed and then I don't forget to check it out in the future (I kind of do that a lot!)

You can use the drop down menu labeled "Popular" and see a list of blogs featuring your favorite subject. Then just click on the blogs you want to follow.  Or type the blog you want to follow into the search function and it will find it for you...it doesn't have to be a blog that has "signed up" for this site...if it is out there, this site will find it and you can follow it!

Simple.

As I said, SO FAR I haven't gotten a bunch of crud cluttering my computer or email from using this site. I find it soooo annoying to order something on the internet only to get slammed with a bazillion emails as a result. Since I switched to an Apple laptop, I don't have the annoying popups, but email is another thing. I can't remember what I ordered or signed up for the other day, but within minutes my email started getting hit with "crap."

So far, that is not the case with Bloglovin and it really does make it simple to keep track of all my favorite bloggers! I still sign up to get email alerts from a few of my favorite (it's super simple to subscribe to my site...just enter your email address and click "subscribe"...every post delivered to your door step!)...but bloglovin let's you keep up with as many as you like without getting a hundred different emails from a hundred different sites! One email...as many blogs as you would like to keep an eye on!

Simple! 

"Follow" me on bloglovin.com and never miss an awesome DIY project, before and after, tutorial or recipe!


BTW, not that I would mind, but I did not get paid to toot this website...I just think it is a neat deal!