Ode to Joel....

I try to come up with clever post titles....Lindsey at Betterafter.net ​always has the most clever titles for her blog posts.  Just too much brain effort on my part.  Sometimes I am funny, but it is just because I say and do stupid things...not because I am necessarily "witty."   Besides, if you aren't over the age of 45, you wouldn't get the title of this post.  (Ode to Billy Joe....not so great song...even worse movie)

Anywho, it was one of those days I had a million errands to run, one of which was to Hancock Fabrics to pick up some piping for the pillows I am making (another post for another day...if I ever get around to it!) Always on a hunt for a bargain, (i.e. digging around on the back shelves)​ I found some 90% Christmas clearance.  CHRISTMAS IN MARCH!!! LOVE!!!   I love Christmas...I love decorating for Christmas.  And every single year I proclaim "THIS IS IT!!!  Not another thing!"  But then I find the bargains....

IMG_8640.JPG

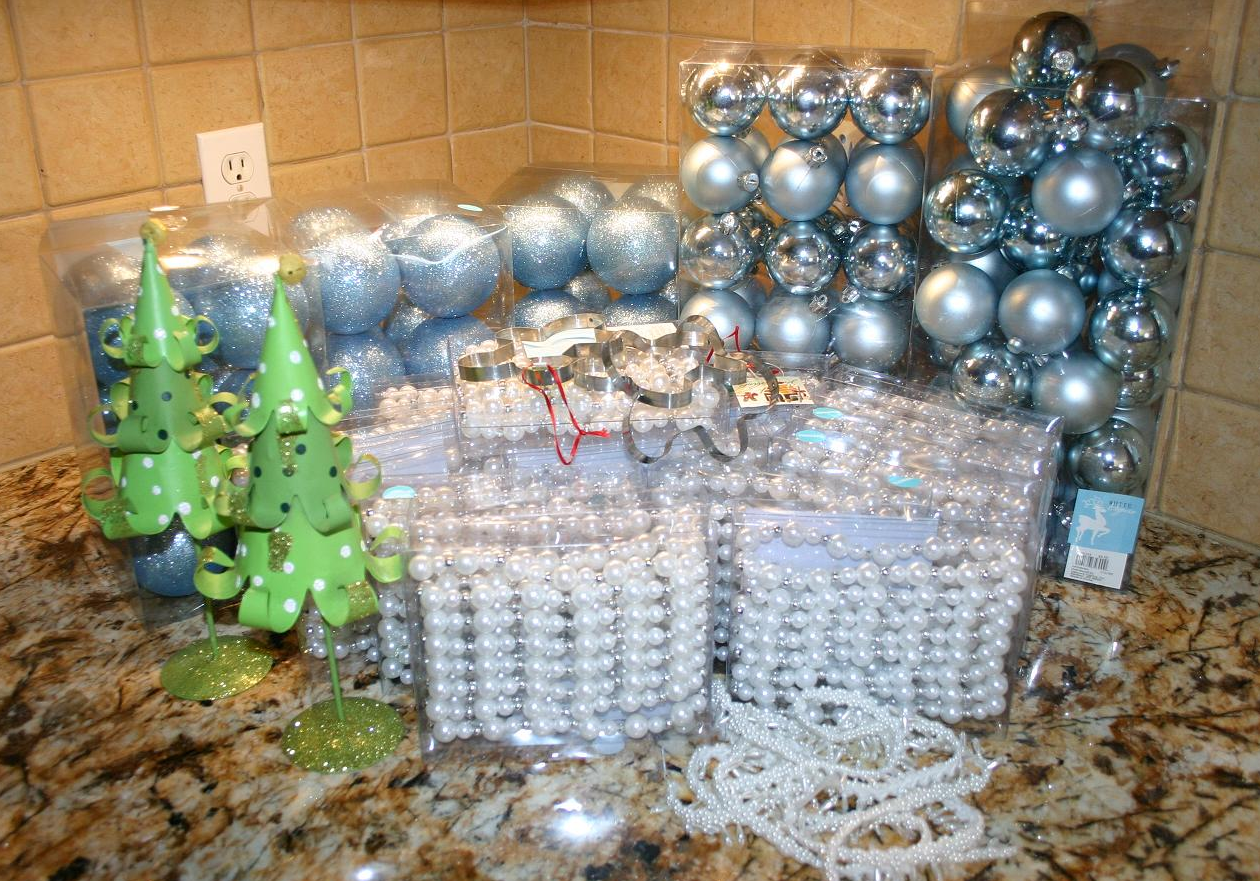
Seriously, who wouldn't love boxes of ornaments and gingerbread cookie cutters for .59 and strings of silver beads and pearls for 1.49 a strand!!!  And those cute little metal trees for 1.69!  Seriously, who wouldn't love finding this stuff in MARCH!!??? If I didn't love spring and fall so much I would be antsy for the Christmas holiday!!!

Anywho, taking this picture reminded me of how much I LOVE MY UNDER COUNTER LIGHTING....which brings me to my "Ode to Joel."  My FAVORITE son in law in the whole wide world.  Now, he will be quick to remind me that he is my ONLY son in law, but honestly, that is not the point.  He is my favorite.​

And not just because he is an electrician who is gracious enough to work during his visits.  See, I always have some electrical issue that is just a tad over my head...or rather one that I know would take him 4 hours to complete when it would take me 2 DAYS!  And who has time for that during the holidays...seriously! ​

So for YEARS I have wanted to put can lights in my kitchen.  I just thought they were so cool looking AND my kitchen felt a bit "dark" and "smallish" because of the lack of decent lighting.  But the "in" can lights right now are a little pricey and I knew I wouldn't be happy with the ones like I  have in my den...because, after all, those are not the "in" lights right now.  The "in" can lights are like the ones Joel installed in ​my bathroom last summer...that I love...but rarely turn on because you could land a jet in there now when both the vanity and can lights are on!

So last fall,  I went to Lowes (again, my fav) and started looking at lighting options.  I have never been a fan of the little "pot" lights that go under cabinets...kind of thought they were silly looking...but I did like the LED strip lighting they had...and while an 18" strip was around $60, I only needed three!  ​And they last "a lifetime" and you never have to change the bulbs.  Hum....that is right up my alley. 

So that is what we bought.  Long story short, we created a new switch next to the disposal switch (that required adding a larger box and second switch and some unanticipated tile repair....good thing I keep spare everything!) The lighting was hardwired to the switch and Joel was able to run the wires behind the microwave and refrigerator so the wiring wouldn't show.  ​

Oh, My. Goodness!  I swear my kitchen doubled in size!!!​

IMG_5011.JPG
IMG_5009.JPG

It is just sooo difficult to appreciate what a difference this makes with pictures.  Joel installed them the day before Thanksgiving last year, and I swear my kitchen prep space doubled in size!  It made a huge difference in my usable space because the two corners were just always so dark and impossible to use as prep space. ​

Again, he only installed three...one over the coffee pot (far left), then ran the wiring behind the microwave to the left corner cabinets and installed one there, then ran the wiring behind the refrigerator to the corner in the right.  AMAZING!!  ​

I installed new granite counter tops two years ago (talk about the steal of a lifetime...for another time!) and these new lights just made them POP!!!  Seriously, it has "sparklies" in it I didn't even know were there.  Like little pieces of quartz all through it...I knew it was beautiful granite...but with the added lights, it is breathtaking...seriously! 

But the biggest difference, again, was the amount of usable counter space, which in a small kitchen is a huge plus!!!!​

So....Ode to my SIL Joel...not only is he a wonderful husband and father...but he is a pretty handy dude to have around when there is some serious electrical work to be done!  Is this a "DIY" project?  Yes...it very easily could be and I have no doubt I could have done it myself.  But honestly, he did it in a quarter of the time it would have taken me to do it, at a time when I was a bit busy making pies and stuffing.​

So in my book, that makes him the BEST SON IN LAW IN THE WHOLE WIDE WORLD!!!​

IMG_1204.JPG

Little house projects...

When you get your miter saws this year, let me know and we will start on the bookcases and fireplace surrounds.  I built all these over the years and have NO doubt you can whip one up in a matter of days....lol!  Just kidding...I would never expect the average person to tackle this size of a project...but my point is, if I can do THIS, you CAN do the smaller, simpler projects! 

And I will let you in on a little secret...when I had to do the "inside corners" of the large crown molding on the den fireplace, I went over to a house being built down the street and paid the trim guy to do it.  I know there is a trick to cutting inside corners on crown molding...something about backwards, upside down, stand on you head...but I haven't ever gotten the hang of it.  Outside miter cuts on crown...no problem.  So when I do the tutorial on building up your door trim, not a problem.  But maybe we can get a "guest"  to help us learn the art of cutting inside corners on crown molding!  Or better yet, I'll just teach you how to build those cool little corner doodads that look so classy!

In the next few days, I will post some pictures of my staircase...stripped the carpet and put in new treads and risers...seriously, it isn't THAT hard.  And when you get your new tools, you CAN do it.  I will also posts pictures of my master bath...with just a teeny effort, you can completely change the look of your bathroom.   And I promise to show you before and afters on my kitchen under counter lighting...seriously, you can't imagine the difference it makes in your kitchen!  

Until then....

My den...I painted this wall 12 years ago when I built this room...perfect example of "paint it a color you love and you will always love it!"  It is true!  I've never had any desire to change this color!   Now the TV stand...that's another story and a project I look forward to doing in the VERY near future...just have to find a piece that speaks to me...


IMG_5015.JPG

I built these built-in bookcases in my living room when the house was under construction.  Originally, there were just two walls with weird windows.  Had NO idea how to place furniture or decorate around them so I did the next best thing...just built some bookcases around them! Perfect spot for the Christmas tree, and I love decorating the arch window in the fall and at Christmas!

IMG_5021.JPG

Can you tell I read...A LOT...these are just a few!     

IMG_5025.JPG

Someday I MIGHT get around to putting up curtains...they are all the decorating rage. For now, I just enjoy waking up to the view...and the sun, if it is up before me...rare! 

My nasty little secret....

I have a nasty, dirty little secret...my friends and family know nothing about this and I never share.  It is embarrassing and something I try to ignore...once a year, I try to deal with it. Just minimally...but honestly, nothing has solved my problem. 

For a person with a touch of cleaning OCD, this is a distressing thing to have to admit.​

The tops of my kitchen cabinets are NASTY.  I don't mean "a little dirty"...I mean greasy, dirty, nasty.  And honestly, usually around the holidays I make an effort to take all the stuff down, clean it or run it through the dishwasher, and wipe down the tops.  But the gunk and grime is so bad I usually just say forget it and put the clean stuff back up on the nastiness.  Gross, I know.  Now keep in mind, I am the kind of person who pulls my stove, fridge and dryer out every so often and sweep and scrub beneath!  Seriously!  (The washing machine is a front loader...that sucker doesn't budge...God knows what is under there!) But the tops of my cabinets...well, lets just say...oh, what can I say to defend myself....nothing really.

​So when I saw a nifty little tip on Pinterest, I said to myself (and my cats) "Hey, I can do THAT!"  Clean and put down WAX PAPER!  And every so often, just change out the wax paper and the grime is gone!  SWEET!

The PROBLEM was getting the serious coating of grime OFF the cabinet tops before I put down the wax paper.  That took rubber gloves, straight ammonia, a mask, several rags and some serious elbow grease.  But I'm pretty sure I got 99% of the grime (and scorched my lungs) before I put down the wax paper.  ​

(BTW, being a "couponer," I bought several jugs of ammonia at Target for .12 each...yep, you read right... TWELVE CENTS.  Target's website has Target coupons...right now you can print a $2 off 2 Up and Up cleaning supplies.  Print one, make 4 copies and take it to Target.  Their jugs of ammonia are only $1.12.  So you can buy 8 jugs with your 4 coupons for .96!  Sweet deal...especially considering it took well over a jug just to clean my cabinets!! I don't use ammonia a lot, but when I need something to cut some serious grime, it's my go to..... ​)

Anywho, here are a few pictures.  Honestly, it took me less than an hour....and I know it will save me some embarrassment in the future. (I have this fear that my family will find this stuff when I die and think poorly of me...it is one reason I make my bed EVERY day...God forbid I have an accident and my house is a mess when the family comes in...forget clean undies...seriously, who's really going to notice that! But a dirty house...oh my!)

IMG_8635.JPG
IMG_8636.JPG
IMG_8638.JPG

Seriously, the camera flash does not do justice by the dirt on the rags...it was seriously nasty!​

IMG_8639.JPG

How pretty is that!  And when the holidays roll around and I climb up on the counters to get my turkey platter (ohhhh, I forgot to put that in "my favorite things"...it was my great grandmother's and we use it every year!) or the crystal tea pitcher, I will just take up the dirty wax paper, put down some clean and PRESTO...I am good to go!  ​

Come to think of it, I might even have one of my kids climb up there to get the stuff...just so they can see what a clean person Mom is  ;)​