Drexel Accolade Makeover...

An entire year…A YEAR!!!! That is how long this Drexel buffet has sat in my dining room in it’s original state because I couldn’t pick a stinking paint color. I may be able to paint and refinish and upholstery…but picking a paint color or fabric is TORTURE!!!!

I LOVE the white lacquer finish on this little side table….

….and I love how the bright brass hardware just POPS on the white lacquer but I really wanted to do something different.

But I could NOT make up my mind. I did a lot of research and most of the painted Accolade pieces are white or black…and honestly I did not want to do black.

Hum….

I found a paint color I am madly in love with!!!! It is actually a Krylon “chalky paint” and I have used it on several pieces and I just LOVE the color…Krylon’s Anvil Gray. While it has “gray” in the name it really is a true deep, rich navy. And it sprays on beautifully!

There was one problem with this paint for this project…it is super flat…like most “chalk” paints. I desperately wanted a “high gloss” finish so I tested a few clear coats over the paint to see if I could find a good gloss. I tried a new product (at least to me), Krylon Triple-thick Crystal Clear Glaze. It SAYS it is a “glass-like coating” and “superior high-gloss finish” and it is as good as advertised.

The finish is super high gloss and exceptionally durable…I am VERY pleased.

So…

I changed up the art in the dining room over a year ago and I still love it. I still love the red fabric I used on the chairs. I love the draw leaf table. If you search “buffet” or “dining room table” on this site you will see few last long around here….but truthfully, I think I am finally loving the “look” of my dining room…so these pieces may actually make it a tad longer.

Again, no secret to cleaning brass….lots of brass cleaner, SOS pads, and elbow grease…but worth every bit of the work!

I have already stocked it with my holiday and seasonal dishes. Pretty with a purpose…my favorite. But as I said, buffets don’t last long around here so we’ll see how it fairs.

I think I have mentioned before that I DO NOT have a green thumb when it comes to indoor plants….so some of you may be shocked by the massive peace lily.

A little side story…we went to an auction…they were selling the plants (yes, they sell EVERYTHING!) Nobody would bid on this big ole’ monster so then they threw in a monster pothos plant…I’m talking HUGE!!!! My youngest daughter has been sprouting “cuttings” for her apartment so I knew she would love the pothos…so I ended up buying them both for ONE DOLLAR!!! No kidding….a dollar for two huge plants. She didn’t want the peace lily so I stuck it in my dining room and other than dump my leftover night time water in it every morning, I pretty much ignore it.

And you know what…it THRIVES. It is growing, it is healthy and it is constantly blooming. Go figure!

Now I want to share a little issue I am having with my beloved Kilz…I had this issue sometime back when I was using white lacquer…so honestly I attributed it to the paint since lacquer tends to be a “hot” finish.

But I had the same issue this time, and I was using plain ole’ spray paint.

I call it “alligatoring.”

I cleaned the pieces, sprayed on the Kilz, sanded smooth, then wiped it down with tack cloth. When I sprayed on the paint, it “alligatored.” Curses!!!

I thought MAYBE the tack cloth left a weird residue, so I sanded the spots smooth after they dried well, reapplied Kilz, sanded and then just wiped it down well with a rag…another coat of paint…same problem, just in different areas. The entire piece alligatored randomly. WTF!!! Temperature…nope…humidity…maybe. But I had the same problem when I painted on a drier day. So who the heck knows. Like I said, I had this problem sometime back on another project.

The Kilz is what is actually crackling…not just the paint. I contacted Kilz and they swear they didn’t mess with the formula and were as stumped as I was.

My solution….well I had to sand the entire piece down, paying close attention to the areas that “alligatored.” After everything was smooth and clean again, I used Bullseye 1-2-3 Primer, let it dry well, sanded, and tacked. Sprayed on the paint and presto-bingo…perfect.

Kilz was kind enough to send me a replacement can of primer. Yippee…somehow I guess that is suppose to make up for two days of grief and cursing.

So now my “KSTP” process will become “BSTP” …eck…not really a good acronym…but I hesitate to use Kilz if it really is the only common denominator in this little disaster. Since no other factors seemed to affect the out come, I can only assume it is the culprit.

Who knows…but from now on I can’t say that Kilz is the be-all end-all of primers when painting furniture.

Sorry guys!

VW Bus chest of drawer makeover....

This, I believe, is my favorite dresser (technically a chest of drawer) makeover!

I first found my “inspiration” here….I knew the minute I saw this I had to do one! All I had to do was find perfect waterfall chest.

I bet I have passed on a few hundred over the years. They aren’t terribly “sturdy” dressers and because of that they tend to be in pretty bad shape after a few decades of use.

Just so happens a friend who owns a vintage store posted one on Facebook market place. It was a tad higher than what I wanted to pay but I wanted it NOW!

Most of the decorative doo-dads on waterfall pieces are painted on but this one had actual carvings…

…which meant I had to fill the carving….curses.

But whatevs….

I usually use the wood filler I pick up at Lowe’s and have always been happy with it but I saw this product on another blog and decided to give it a try…

Meh…It’s okay but I have to order it and price wise it’s not worth it. I think I will just stick to the product I have been using.

Remember when you use wood fillers to “patch” you may have to sand and reapply 2-3 times before you get a smooth repair…patience!

This little project took a lot longer than my normal KSTP project because of all the different paints…each “layer” had to dry before I could paint the next layer.

But the overall process was the same…first, patch and repair, then Kilz, sand and wipe with tack cloth, then paint on the design (KSTP). The white is lacquer and the other paint colors are some latex I had on hand…most of it “custom” mixed.

TOO. STINKING. CUTE!!!!

I used some round knobs I had in my stash and painted them the same color as the drawers. The “window wipers” are stainless pulls.

I wanted to buy an actual VW Bus emblem but they were pretty pricey for a “makeover-for-resale” project so I bought a vinyl decal from HERE and it looks great!

The details were a combination of freehand, taping and a few homemade templates. Seriously, you do not have to be super creative to do something like this…just patient and skip the coffee for a day…lol!

I sure hope Larissa believes “imitation is the sincerest form of flattery.”

This weekend we are headed to Phoenix so I probably won’t be around next week!

Until next time…

Herringbone dresser top....

I would love to take credit for all my incredibly creative makeovers but truth is I get a lot of inspiration from a lot of sources…Pinterest, other DIY bloggers, and random website.

This time it was my son. He found a really awesome entry bench online and built one for himself!

I shared his entry makeover here.

His girlfriend loved it so much he made her a desk for Christmas!

So when this dresser top turned out super cruddy, I decided to put a herringbone top on it.

The top is a veneer and had some “bubbling.”

I was able to sand the “bubbles” so that the top was smooth, but when I sanded, it took the stain and finish off and the gel stain just wasn’t covering it.

I could have sanded the entire top and removed all the stain and finish…or I could have painted it…. but nah….I kinda wanted an excuse to do something “different.”

Matt was out of town and couldn’t help me so he sent me THIS link…AWESOME tutorial. These girls do a bang up job on the video tutorial…if you love the look, they tell you exactly how to do it!

The top of the dresser hung over the front quite a bit so I decided to use my Kreg rip cut guide to cut down the top a tad.

My daughter got it for me for Christmas and this is the first time I was able to use it…LOVE! I have always used my “yard stick” trick to make straight cuts with my skill saw…this was SOOOO much better!!!

Using the linked tutorial, I started laying out the top. I used white pine 1x4 for the top boards and 1x2 for the edge banding.

Now, this is where I had to deviate a tad from the tutorial. Because I was covering a dresser top and not making a new top that I could flip over to cut down, I had to cut the herringbone boards from the top. If I covered the entire top before the cut, I wasn’t going to be able to “see” the edges of the existing top to know where to make my cut. So I laid all but the corner boards, used my long metal guide to draw my cut marks on all four sides, and then cut those boards first. Then I nailed down the corner pieces, marked them, and cut them.

I used a palm sander to sand all the edges before applying the trim boards around all four sides.

I puttied the holes with wood filler, let that dry, then I sanded the top and sides smooth. Remember, stain will not adhere to glue, so you want to make sure you sand well and remove any glue residue!

After sanding I applied the stain…pine does not take penetrating stain well so I used General Finishes gel stain. There will be tiny gaps between the boards…to get the stain down in between those gaps, I used a small craft brush. I sprayed on a polycrylic finish to seal it!

I had kilzed and sanded the cabinet and the drawer fronts before working on the top. After the stain dried, I painted those a “steel blue.” (Again, don’t ask me the color…it is a mix of blues and black I had on hand!)

I wanted to use the existing hardware but I wasn’t digging the original finish. I primed them with metal primer and painted them flat black…soooo much better and far cheaper than replacing it with new.

Just another “ick” saved from a life of “yuck.”

Again, you don’t have to go all fancy…I could have easily painted the top…but the tutorial on “Shanty-2-Chic” is super easy to follow!

Another MCM dresser makeover!

This is not a dresser…this is a chest of drawers. I think there is often confusion, and I am the world’s worst at referring to a chest of drawers as a dresser.

There is a difference!

But seriously who cares…lol!

Regardless of what you call it, it was A MESS! But oh the potential.

My very first love…MCM pieces. It would take a month of Sundays to link to all the MCM pieces I have refinished…just search MCM or mid century on this site. Truth be told I would have kept every one of them if I didn’t have a fear of being featured on Hoarders. So I find pieces I love, give them a good little makeover and am sincerely happy when someone else gives them a good home.

In spite of all it’s flaws, I loved this piece. It had the normal wear and tear, a seriously cruddy finish, a chipped wood handle (aren’t those wood handles AMAZING!!!!) and what I THOUGHT was some stains around the hardware on the top drawer…turns out it is a beautiful wood inlay. But you couldn’t really tell because the finish was so icky. (The missing knob was in the drawer…yipeee!)

Let’s be honest, we will all have a pretty worn finish after 60 years on this earth!

My first thought was to paint the wood handles an accent color so I could repair the chip. My daughter suggested I just strip them first. So glad I listened to her. I used this process to strip the drawer fronts, handles and legs…the old stain came off the wood handles and revealed a beautiful white wood (oak, teak? Couldn’t tell)….LOVE!!! I sanded the chip down…and you know what, I can live with it….it is obvious it isn’t the way it is suppose to be but HEY…this is a vintage piece and vintage pieces are going to have a few boo-boos!

The drawer fronts and base were stripped and oiled, the cabinet was given a KSTP treatment (Kilz, sand, tack and painted with white high gloss enamel)

(After I took the pictures, I saw the VERY fine over spray on the top drawer…curses…a little mineral spirits cleaned it right off!)

Personally, I love the high contrast of the wood handles and walnut veneer. The Lane Acclaim tables I collect have the same stark contrasting wood detailing when I refinish them…LOVE!

Often vintage pieces would have been stained and finished so all the differing woods and the entire piece had a “uniform” look and the grain detail was toned down a bit. I say LET IT SHINE BABY!!! If you are a “purist” and want vintage pieces to reflect their original state, you probably don’t want to use the processes I use to refinish pieces!

I am all for exposing the grain and the natural color of the wood.

And I am all for bringing the old pieces back to life!

MORE makeovers...

Surprisingly I have MORE makeovers to share. The weather has been fairly cold and dreary but we have had enough warm days here and there to get a little work done. I get kind of lazy during the winter months…when it is cold and dreary I like to curl up and read. When it is warmer, I NEED to be out working…either at the apartments or on projects.

This first dresser makeover is something you could pretty much do inside on a cold day.

The only thing I had to take it outside to do was distress and seal. But honestly you could do both inside.

I use latex paint for my chalk paint recipe (5 tbs. of Plaster of Paris, 3 tbs. of water, mixed well, then add 2 cups of flat latex paint) and that can used inside.

To do a “wet sand” you would use a sponge with a scrubby on one side…something like this…

After the second coat of chalk paint, before it has thoroughly dried, you would take your sponge, wet it (DAMP NOT DRIPPING!) and start “scrubbing” the areas you want to distress…kind of like dry sand distressing. Keep a bucket of water on hand to rinse the sponge periodically. Doing it like that cuts down on the “dust” created when you dry sand, so you can do it inside.

Then I just seal the entire piece by brushing on a polycrylic (or wax if that is your preference.)

Rather than spend the money on all new hardware, I painted the existing hardware. I use a spray primer and spray paint so that needs to be done outside…but truthfully, you could live with the existing hardware until warmer weather…or just replace it.

But all in all, you COULD do this entire project inside…and it is well worth the time when you consider how much better it looks!

This next piece pretty much had to be done outside on warmer days…I wanted a high gloss lacquer finish on the cabinet and that entails spraying. And I wanted to strip the old finish on the drawer fronts and that definitely has to be done outside.!

I removed and labeled each drawer…that is a MUST because the drawers need to go back into their original position…just mark the underside with a pencil.

I removed the old finish on the drawer fronts using THIS process! I know I refer back to this tutorial a lot, but it is the BEST way to remove old finish or paint…it works and on projects like this, it probably only took me about 30 minutes to remove the old finish on these drawer fronts. Once the old finish was removed, I applied three coats of tung oil finish, rubbing with 0000 steel wool and tack cloth between each coat.

I sprayed the “cabinet” with Kilz, sanded and wiped with tack cloth, and then sprayed 3 LIGHT coats of white lacquer (KTSP).

As you can see from the “before” picture, it did not have legs…but it would have originally and there was even places on the underside to screw in the legs. I ordered new legs HERE and stained them to match the oiled drawer fronts.

Each is completely different and each required a different technique…but both were relatively simple and make a huge impact.

AGAIN, I am sharing how easy it is to do this because AGAIN…

LIFE IS TOO SHORT TO LIVE WITH UGLY FURNITURE!


Just ANOTHER makeover!!!

A few weeks ago I promised to share some of these makeovers….

I shared the details of this one….

here….

It sold in a couple of days!

This chest was a mess…

It is solid wood and pretty sturdy. A few of the drawer tracks needed some minor repairs but all in all it was a decent piece…just super ick.

Again, I have to have my “wood fix.” Since the drawer fronts were solid wood, I decided to use gel stain on them.

First I removed all the old hardware and gave the entire piece a good cleaning with a mild detergent.

There is no need to remove the old finish when using gel stain…maybe a light sanding to remove any boogers and dull the shine on the existing finish.

I ONLY use General Finishes brand gel stain. I applied three LIGHT coats with an athletic sock over a rubber glove, allowing each coat to dry overnight. The first coat will look like crud, the second will look a tad better, the third coat looks awesome. I sprayed on polycrylic to seal them. General Finishes has a wipe-on poly and it is pretty awesome…but I had polycrylic on hand so that is what I used.

I sprayed the “cabinet” with Kilz, sand, tack and latex paint (KSTP). I ALWAYS use an additive with paints I am going to roll and brush…Flotroel for latex.

New hardware…and PRESTO….

Another piece saved from the clutches of ugly and dated!
I share these makeovers to remind you….IT’S NOT HARD to take dated, ugly furniture and turn it into something you will be proud to have in your home.

Life is too short to live with ugly furniture!

Pretty in Pink...

If you “came of age” in the 80’s chances are you saw a John Hughes film. If you haven’t, you are missing out! “Pretty in Pink” was one of my favorites! Check them out…you won’t be disappointed and I can’t think of one that isn’t “kid friendly.”

Which brings me to pink…a color I have always loved but have never really used in my home decor. I must have gotten a “pink bug” because all of a sudden I can’t seem to get enough of it….and since next week is Valentine’s Day, this is a great time to infuse a little pink into my home decor under the guise of “decorating for the holiday.”

I found this little bench in 410 Vintage…the tag said it is walnut but I really think it is mahogany. I used this process to refinish the frame and recovered the seat with the same pink velvet I used for the club chair pillow (makeover here).

Several years ago I refinished a little piano bench to set by the closet so I would have a place to sit and put my shoes on.

In one of my “purging” marathons I moved it out but in all honesty I kinda missed it…so this little bench is a perfect little replacement!

I love my office…a simple room that is really multi purpose…a “thoroughfare” from the living spaces to the master bedroom, a “dressing room,” and of course, an office.

I featured the desk here.

I have seen a few desks over the years that peaked my interest but I still love this desk…it is perfect! Prime example of “buy what you TRULY LOVE and you will never tire of it!”

My office chair looks a lot like a Marcel Gascoin C-chair….I can’t find a picture of this exact chair so I don’t know for certain! Again, I don’t buy pieces like this for their potential value…but because I LOVE them.

I bought it years ago and share it’s little makeover here. Again, still love it!

I have replaced the dresser several times over the years but I LOVE this one! Shared the makeover here and while I loved the dresser that was here before, this one is MORE better!

The little bookcase…just adorbs!

I digress…off to the living room … I found the cutest pink pillows…

…and a yummy smelling pink candle!

The little white pillow was kind of plain so I decided to add some cute pink pom-poms I made out of “furry” yarn. I just tacked them on so they can easily be taken off when I tire of the pink.

The pink pillows will go well with the little bit of Easter decorating I do!

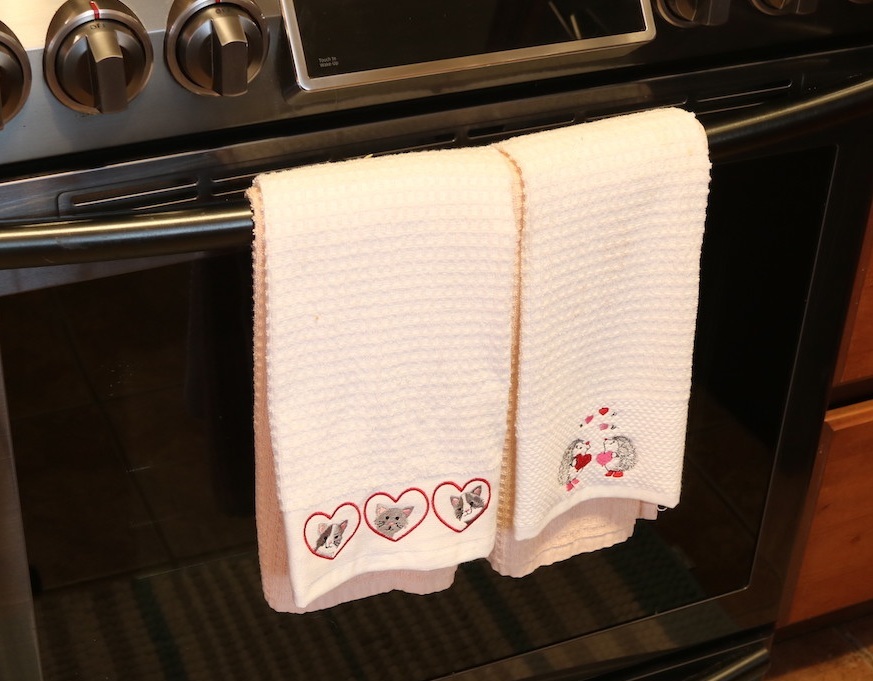
While digging around TJMaxx for pink pillows and candles I found a few other things I thought would be fun for the holiday….cute hedgehog mugs and fun little Valentine’s hand towels!

You don’t have to (or need to) spend a lot of money dressing your home for Valentine’s Day…but it is fun to infuse a little fun and color into an otherwise “drab” time of year!

Funny…I was wearing my pink tennis shoes and a pink vest when I was buying all this pink stuff…the check out lady remarked that I sure must like my pink…lol!

Turns out, I really do! It is so dreary and “wintery” outside and the pink just seems to brighten things up a bit!

I have some leftover pink velvet from the bench makeover…just enough for a few more pink pillows! Now if I can just being myself to sew them…eck!

Another antique chest makeover...

I promised last week to share all the dresser and chest of drawer makeovers I have been working on. This time of the year it is tough to get a lot of work done over several days because of the temperatures…fortunately this dresser was one I could work on inside.

Takes a little “strategizing” to figure out what I need to do outside on warm days and what can be done inside on cold days.

I knew I was going to paint the cabinet so I managed to get it (and a few others) Kilzed on a warm day. I try to avoid using Kilz inside because it is SUPER stinky…and I like to use the spray kilz on smaller pieces and that can’t be done inside. Sanding and wiping with tack cloth can be done when it is a tad colder so no biggy. I had to strip the drawers and top outside, but that can be done in the cold as well. I was able to bring everything inside to oil the drawers and top and paint the cabinet!

Again, this one didn’t need any major repairs…the only real boo-boo was one missing handle. This hardware was one of the most unique I had ever seen….not only the style but the fact that it was installed “vertically” vs. “horizontally.” Different…I like…so I was determined to use as much of the original hardware as I could.

I removed all the hardware. First I primed them with “metal primer” then I sprayed them with black lacquer.

Since one of the handles was missing and I knew there was NO way I was going to find a replacement, I decided to remove the handles on the top two drawers and replace them with knobs.

That meant the holes in the top drawers had to be puttied…and there is no good way to “disguise” putty holes without painting…but the wood on these drawer fronts was so pretty I really didn’t want to paint them!

The drawer on the right has been stripped…the drawer on the left has not. I just love how “clear and clean” the wood looks after removing the old finish (I used THIS process! Super easy!)

I decided the best way to disguise the puttied holes was to paint a stripe down the drawer fronts. I did this BEFORE applying the tung oil finish.

The stripe needed to be pristine…absolutely NO bleed through…and we all know how tough that is! I read a few tutorials on preventing that…some suggested using modge-podge…one suggested using caulk. I went with the caulk suggestion and it worked like a charm.

I used blue painter’s tape to tape off my stripes, then I ran clear LATEX (NOT silicone) caulk along the edges of the tape….

Then I used my finger to “mash” the caulk along the edge of the tape and wipe off any excess. WORKED LIKE A CHARM! Zero bleed through! I used clear caulk so any caulk that bleed through didn’t show!

I painted the stripes and cabinet. I used a grey latex I had on hand. I added Floetrol…ALWAYS add a paint additive…Penetrol for oil based paints, Floetrol for latex. I use a 4”foam roller and a high quality brush to minimize brush strokes and roller marks. And again, always apply 2-3 LIGHT coats to avoid drips and runs. I oiled the drawer fronts and top with 3 coats of tung oil finish (sand and tack between coats), drilled new holes for the knobs and reattached all the hardware and PRESTO!

Cute as a bug’s ear and super simple!

I just love bringing these pieces back to life!!!!

Antique dresser makeover....

It’s no secret that this antique dresser is really not “my style.” But I knew it could be beautiful with just a little work…

Okay, so it needed A LOT of work!

One of the first things I do when I buy an old piece like this is really examine it and figure out what, if anything, needs repairs and what is “salvageable.”

It would have been super easy to just slather the whole thing in paint, but I love the combination of paint and wood tones…and if I can salvage any of the wood by refinishing rather painting, I’m going to.

The drawers were in excellent condition…they were intact and they did not “stick.” The only real issue was the missing veneer on the front of the cabinet….a little wood filler and sanding fixed it right up.

The top was in relatively good condition…it did have a few “blemishes.” I have “fixed” blemishes using oxalic acid and it works wonders on solid wood surfaces. But this top is a wood veneer and I haven’t had as much luck on veneers…so I just “embraced” the blemishes and let it be what it is…an old piece with a history.

The drawer fronts were in mint condition…just super yucky. The top and drawer fronts were easily stripped using the 1/2 acetone and 1/2 lacquer thinner mixture. I scrubbed them with #2 steel wool and the mixture, wiping with old rags from time to time. After all the old finish was removed, I “washed” them with mineral spirits and applied three coats of tung oil finish, rubbing with 0000 steel wool and tack cloth between each coat. No stain, just a clear finish!

Rather than refinish the “cabinet” I chalk painted it with homemade chalk paint. My recipe for chalk paint is 5 tablespoons of Plaster of Paris and 3 tablespoons of water, mixed well. Then I add 2 cups of flat paint. I painted two coats and distressed, then sealed it with polyurethane. Again, I do not wax over chalk paint…I just don’t think it is a durable finish.

I was SUPER pumped that ALL the original hardware was there…even the top drawer knobs. They had been replaced but the original knobs were in the drawers…major score! They are just so unique and authentic!

Often the stain is mixed into whatever finish is applied. They did this to make the piece look “uniform.” When you strip the original finish, there is a good chance you are going to strip the original stain color…you WILL see the wood grain and there is a good chance the “color” of the piece will be different. For example, the drawer fronts on this piece were a different tone than the top when all the old finish was stripped away…personally I LOVE this look! But if you want that “uniform” look you need to be prepared to stain the piece…and since different woods stain differently, I would suggest using a gel stain application…that is the only way to ensure a “uniform” look. Or in this case, you could paint the top and only leave the drawers original. To each his own!

This is just one of many I shared on Instagram…and there are even more that aren’t pictured here. Over the next few weeks I will share how each dresser’s makeover!

Each one required a different process to bring it back to life!

Stay tuned!

Building a cat shelter and a new dresser....

I don’t normally share “life hacks” but I just have to share this Kitty shelter. I hope the video tutorial stays up but just in case it doesn’t….basically you take a large storage tub, put a styrofoam cooler inside it…cut a little opening in the tub and cooler…”insulate” around the cooler with blankets (or insulation if you have it) and put a warm blanket in the cooler.

If you have followed along you know I am somewhat of a “cat person.” I have two indoor cats, Litty and Mr. Jinx, one indoor/outdoor cat, Ms. Kitty and then there is Finley. I truly believe Finley is autistic. He isn’t “mentally challenged” he just has “severe social anxiety.” He is terrified of everyone but me and now he will barely come to me. Occasionally I can entice him with food and get him close enough to snatch him up, but he pretty much avoids ALL human contact.

I have had him for 8 years. Before Cleo, he would come in the house but only appear after I was snuggled in bed…then he would get in bed with me. But when Cleo started sleeping with us, he went outside and will not come in the house. Last year when we had a week long deep freeze, I managed to grab him one day only because he was dang near frozen. I brought him in the house to warm him up but he was obviously terrified and spent the entire time hiding…as soon as he could bolt outside he was gone…and there he remains to this day.

Needless to say I worry about him constantly. I have no doubt he has found a cozy spot under the storage building to avoid the elements but I still worry.

When I saw this kitty shelter I immediately bought the stuff to make one for him.

It took a few day, but he eventually moved in and seems quite content in his new warm bed! I placed it in a spot I believe is sheltered from the cold wind and next to the dryer vent so the warm air can blow on it.

I insulated mine with actual insulation because that’s what I had on hand. I put my snuggie in for his bedding…I don’t wash it so it will retain it’s “smell.”

IF you can entice your kitty to come in the house when it is super cold, that is always best. If not, this is a perfect “hack” for an outdoor kitty or stray kitties.

MORE DRESSER MAKEOVERS….

I spent most of last week working on a few dressers. I have finished those up but now I have another batch to start on. It is super tough to find good days to paint outside during the winter months. Dang, I need a heated shop!

This was a teaser I posted on Instagram…

They all turned out super cute but each got a different treatment. So over the next few weeks I will share each one and explain what I had to do to each to bring them back to life!

In the meantime I want to share one that has been lurking in my garage since summer.

When I bought it, it was a nasty mess….

Someone had “stained” it and changed out the hardware. Eck! I think I remember that it had a few wonky drawers. No biggy but AGAIN, make sure you make any repairs BEFORE you make it pretty!

I removed all the hardware and gave it the old KSTP treatment (Kilz, sand, tack, paint)

New hardware….

Again, I’m stuck on white…blah. This weekend we took four dressers into 410 Vintage and ALL of them were white! B.O.R.I.N.G.

I have vowed to use a little color on the dressers I am working on right now!

Stay tuned!