Painted kitchen cabinets and a new entry...
When Matt bought his house over a year ago I promised to share the projects. One year later, I am finally getting around to keeping that promise!
As I mentioned in earlier posts, Matt first had to find his inspiration and make a plan.
His first major project was the entry makeover. My entry makeover was obviously his inspiration but his entry felt SUPER tiny compared to mine.
These aren’t the best before pictures but you can see there is a header across the top of the opening between the living room and the “entry”…so the space felt really tight and cramped…wood flooring (again, a no-no in an entry IMO)…popcorn ceilings.
The “plan” was to remove the closet and header to open up the space, tile the floor and paint the door. Simple!
Before you remove a closet, make sure you have a plan in place for the things you would otherwise store in that space. In Matt’s case, he’s a single guy with two spare bedrooms and closets, a large master bedroom closet and a nice hall pantry. He had plenty of storage space for coats and such…getting rid of the entry closet was not a big deal.
UNTIIIIIL…you start hacking into walls and removing headers that are framed with aluminum studs instead of wood. Interesting to say the least and somewhat of a challenge for a “traditional” builder such as myself.
Lots of sheetrock repair, black paint on the front door that Matt is not real fond of but is living with for the time being, new trim, new tile, new paint. Eventually I think he will replace the light fixture…but it does the job for now.
Here you can see how the entry opens into the living room…before there was a “header” that dropped down 12” and really closed that space in…removing that header not only opened up the entry but it now matches the opening into the hallway that leads to the bedrooms on the other side of the living room.
Matt built the little bench! I found the beautiful metal mirror on clearance at a home interior store.
The fireplace was pretty “dated”…he painted it last year ….
…and we replaced the dated 8x8 beige tile with the same tile we used in the entry. MUUUUCH better!
The very first thing we did before he moved in was built open shelving in the kitchen. We used the “hidden bracket” method I shared here.
His kitchen cabinets were old, nasty oak and he knew he eventually wanted to paint them…but time and finances dictated he wait…the open shelving was a pretty easy and inexpensive way to give the kitchen a tiny update. Since he had his inspiration and had a plan, he knew what colors he wanted to eventually paint the kitchen cabinets…so he knew what color he wanted to paint the shelving.
We simply removed the cabinet to the right of the sink and installed 3 shelves. The cabinet we removed didn’t go to waste…he hung it in the garage above his work bench!
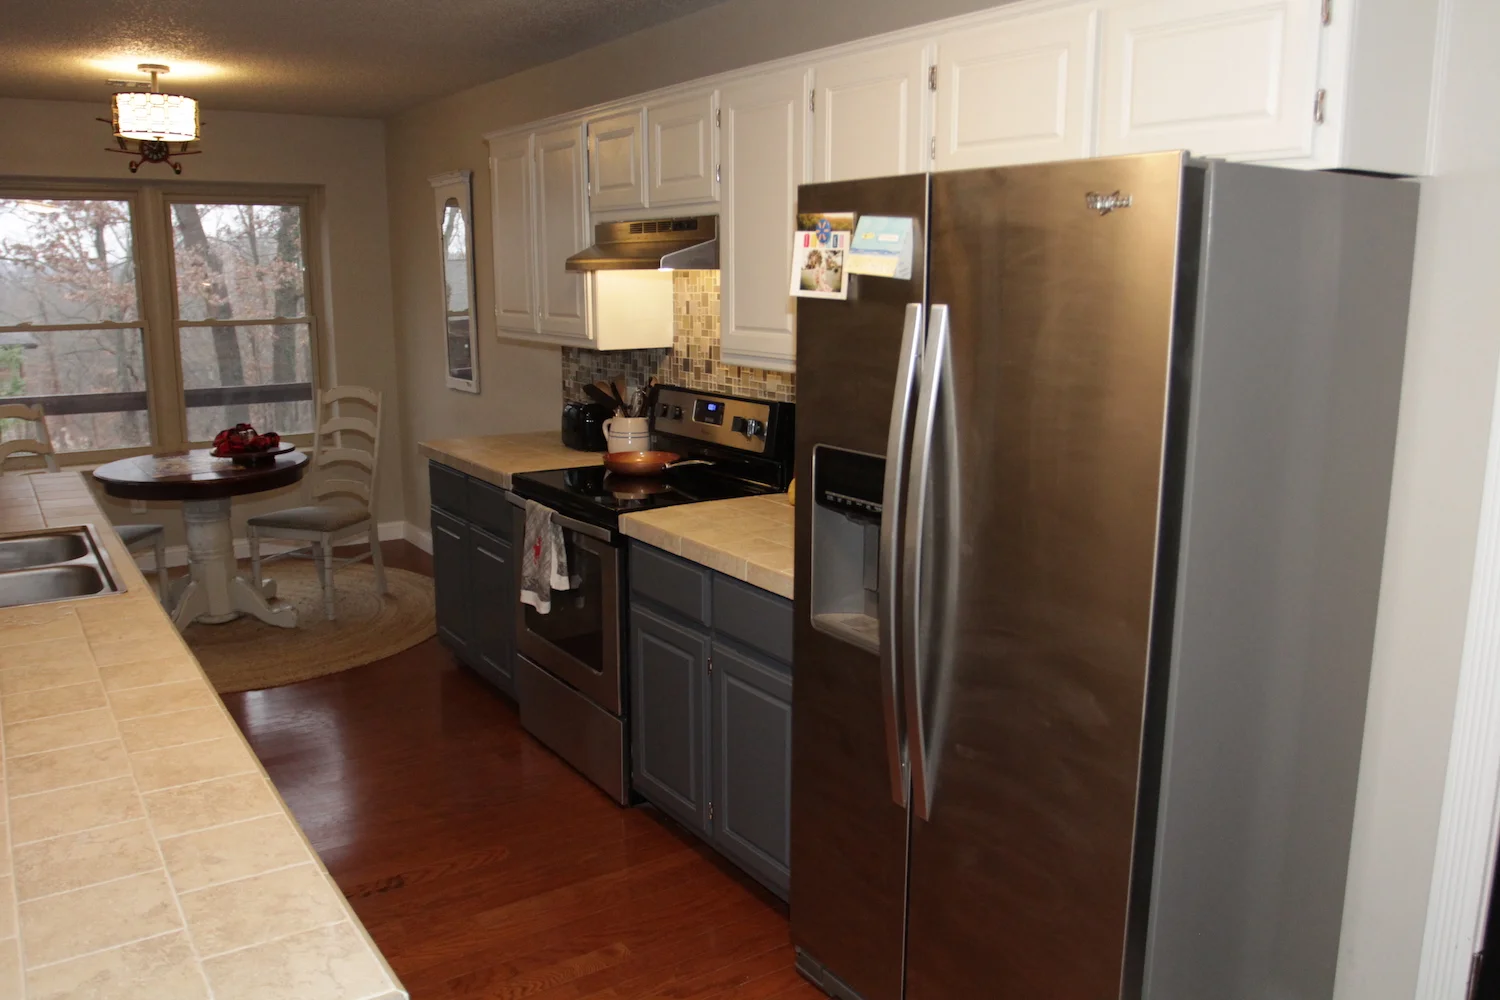
Painted cabinets…this summer he was finally able to complete this part of the plan.
The kitchen before…
The kitchen after…
He hired the actual “painting” part but he did all the prep work himself. He changed out the hinges from nasty ole’ brass looking things to nice new satin nickel hinges.
He also changed out four upper cabinet doors and put reeded glass in them…
The shelves inside the cabinets were old and “sagging” so we built new shelves since you could see them through the glass.
I would like to think I was the inspiration behind that change since I am a tad partial to reed glass cabinet doors!
One element of his original plan was to change out the tile countertops to a solid surface like quartz or granite. Honestly, once the cabinets were painted neither of us found the tops to be nearly as offensive so that part of the plan got bumped to the bottom of the list. It will happen someday, but it is no longer a top priority!
This kitchen is a relatively small space…kind of a “shotgun” or “galley” kitchen if you will…brightening it up with paint and installing the glass front doors and the open shelving made a HUGE difference!
The next big project on his list is his master bathroom. He wants to remove the tub/shower insert and build a walk in shower similar to mine.
Last week I went to an auction and I was able to purchase enough 12x24 floor tile and subway tile for pennies on the dollar!!! He’s been researching the best way to build a shower pan and of course we are experts at demo! So this little project could commence any day!
In the meantime he is busy being a home owner…mowing and raking the yard, mundane chores and dealing with all the grief after a tree falls on your house during a storm! Yep, it even damaged his brand new storage building he is so proud of!
Such is the life of a home owner!
Next week is Christmas and I may take a few weeks off since the whole family will be here! I hope you and yours have a VERY MERRY CHRISTMAS AND HAPPY NEW YEAR!

