How to sand sheetrock without a big mess!

My recent big project is one I have been eyeballing since day one.

Windows in the den next to the fireplace.

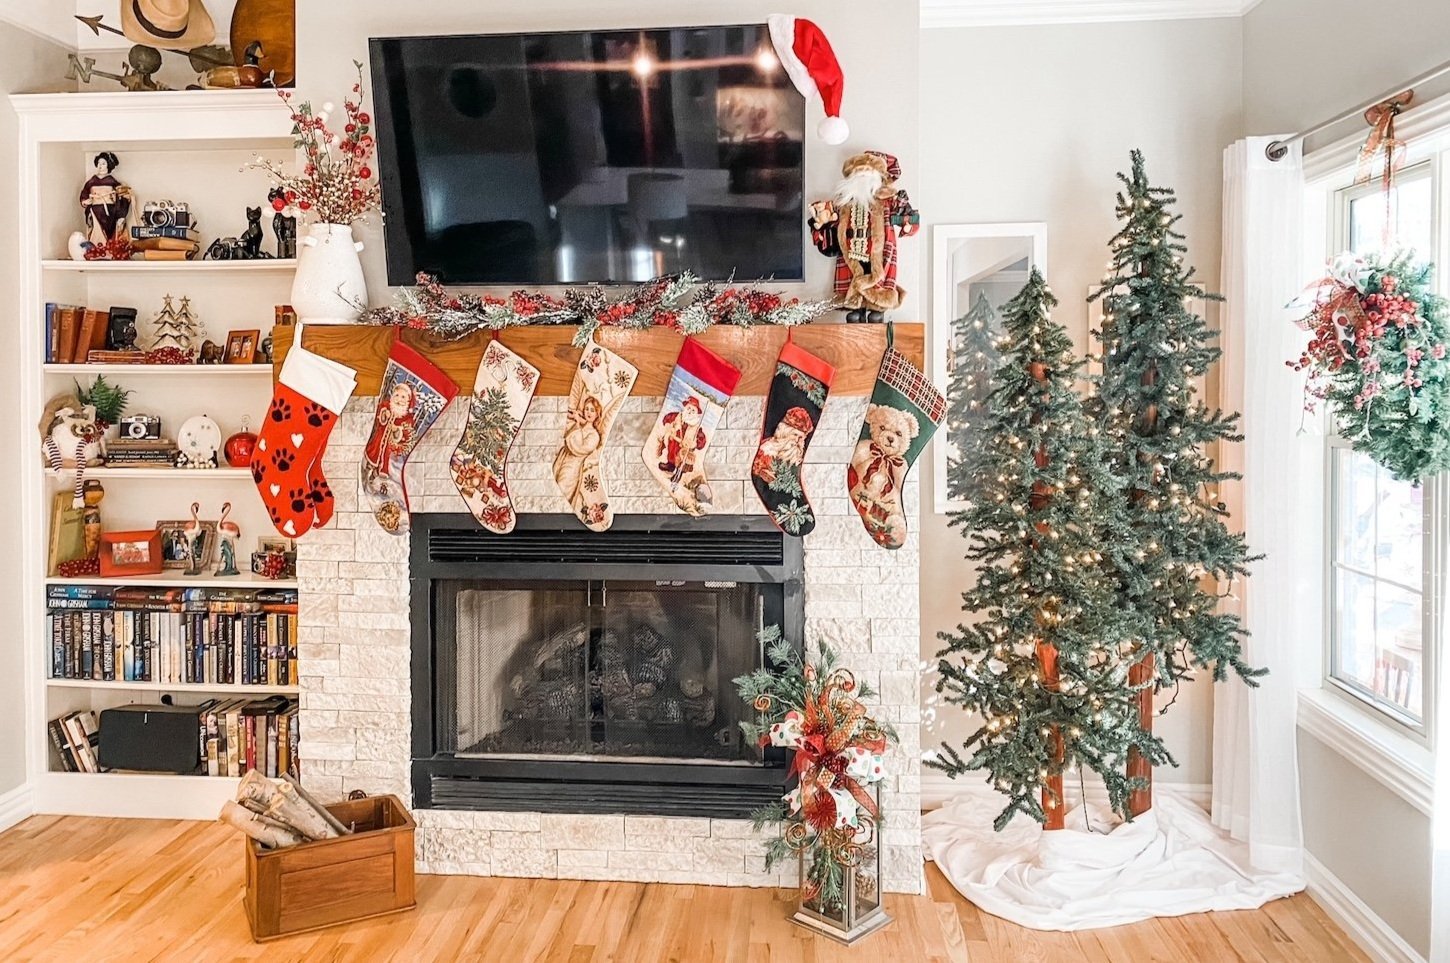
(Naturally I neglected to take a “before” picture so this is the only one I could find of the space…Christmas!)

My original plan was to remove the bookcase to the left of the fireplace but I discovered that the closet in the guest bedroom extends out so that part of the exterior wall is partially covered by that guest closet….poo.

So the only option was to leave the bookcase, which I honestly need, and just add a window to the right of the fireplace.

Why?

Well first, I love natural light…one thing I love about this house is the abundance of exterior windows.

The only problem is MOST are adjacent to a covered patio, a sunroom and a screened porch. So MOST of the natural light is seriously filtered.

Great for heating and cooling, not so great if you like natural light.

The den has windows and an exterior door, unfortunately both are on the wall adjacent to the sunporch.

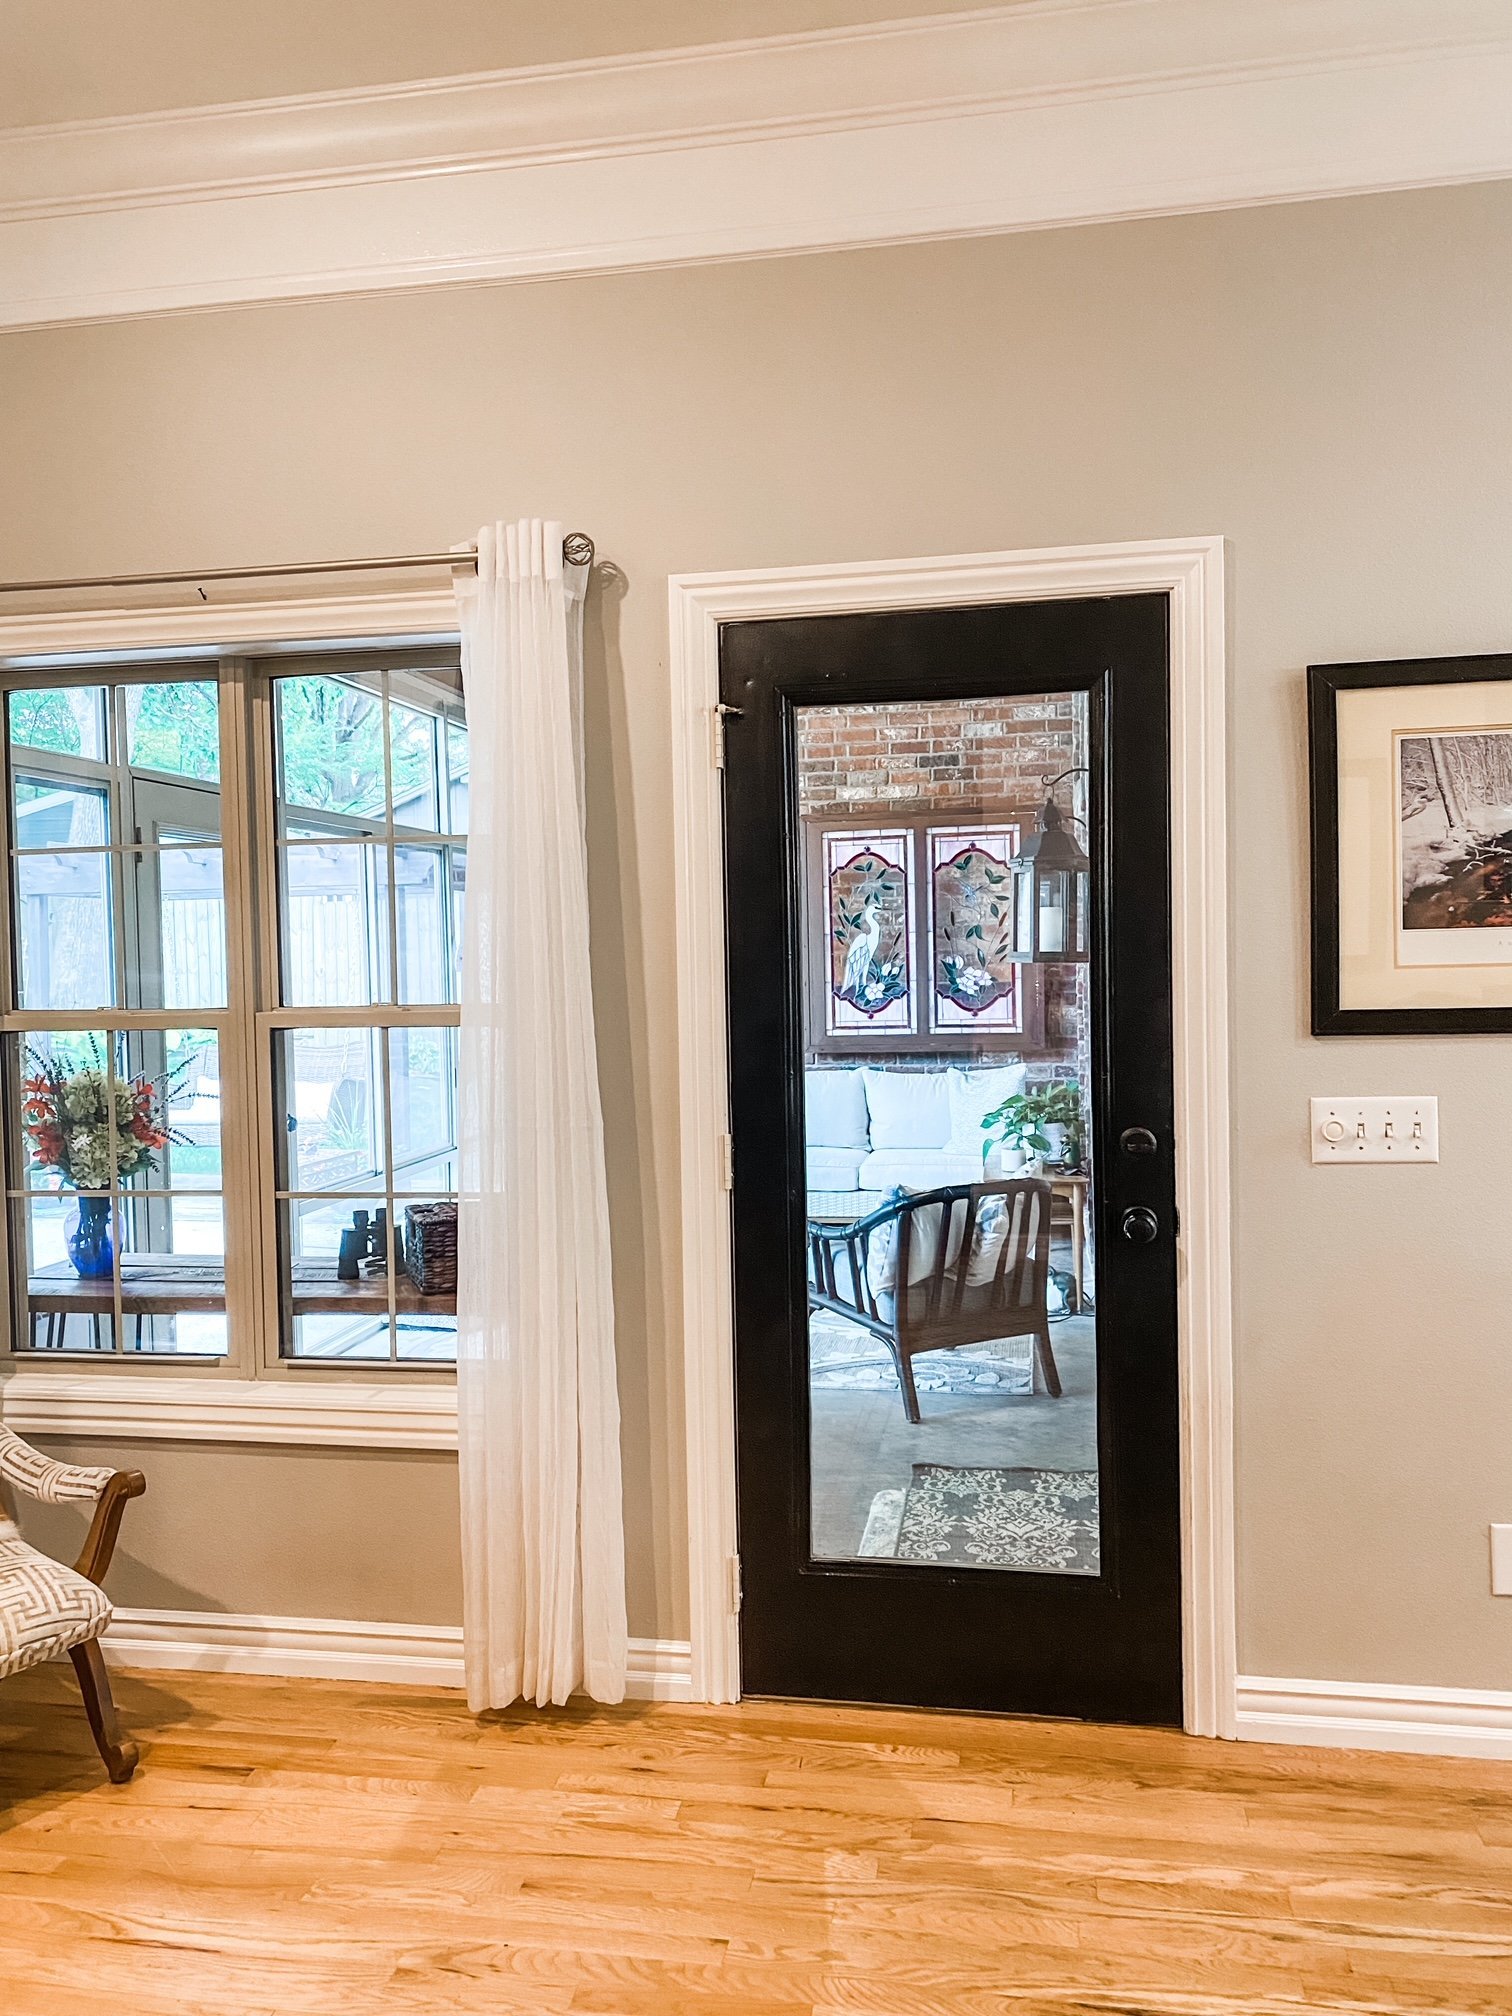
Nice windows, but again the light is seriously defused. So the den was basically a cave.

ANYWHO, I wanted a window in the den…for light and for fresh air.

So, I busted out the sheetrock, removed the exterior brick, moved some electrical outlets and fixtures and framed in for a new window.

Sounds so simple. It was NOT!

First, you never know what is behind your sheetrock. In my case there was serious framing. Then there was the electric outlets and exterior light fixture. Of course insulation and brick and Lord I can’t even remember it all.

One a scale of 1-10 this is a 10 DIY project. For me, not that huge of a deal because I know electrical, I understand basic framing and I have a great brick guy. But for your average Joe, my suggestion is hire it done! And expect to pay dearly.

But even this old dog can learn a new trick. I saw this suggestion somewhere on the interweb but have no idea when or where. I had never tried it but because of some serious sanding needed on the sheetrock I decided to give it a shot!

Just duct tape your palm sander to a shop vac…then turn the shop vac on while running the sander.

(Palm smacking forehead!)

Boy did it work! I would say 95% of the sheetrock dust went into the Shopvac vs. all over every piece of furniture in my house.

A FEW TIPS.

Make sure the holes on the sand paper line up with the holes on the sander…that is where the dust goes.

Tape well between the sander and the Shopvac hose to prevent dust from creeping out. I used duct tape.

Make sure your Shopvac has a clean (preferably new) filter.

I have never used an electric sander on sheetrock in the house before…just waaaaay too much dust. This time, due to circumstances I won’t go in to, I knew a light hand sanding wasn’t going to cut it. Hooking the sander to the shop vac was a game changer!

Adding a window, whether you have brick or siding exterior, is doable. Just know that it is not a project for a novice DIYer!

Next time I’ll share the transformation! HUGE difference!


A CUTE GARDEN BENCH...

I saw a precious little “mud bench” on Instagram….

Cute as a bug’s ear. Only one problem…I don’t have any grandgirls…just boys. Two are too old to appreciate something like this and one isn’t old enough to sit up by himself sooooo……

What to do?

As I mentioned before there is a precious little girl next door….I borrowed her to bake Christmas cookies!

She will be 8 this summer. She LOVES to make mud pies and has a raised vegetable garden. She had a little make shift “mud table” in her back yard so I knew she would love something like this!

They were on vacation a few weeks ago so it was the perfect time to build and stage a little surprise…so off to Lowe’s to TRY to find some decent wood. Not an easy task these days!

The inspiration bench looks like it is made out of regular wood and painted. I built mine out of treated wood so it would weather well. Unfortunately that means I have to wait a few months to paint it or stain it…no biggy.

For this bench I needed the following lumber (all treated):

2-4x4x6

5-2x4x6

5-1x4x10

2-8’ deck boards (they are around 3/4” x 5 1/2”)

1-1x2x8

1 plastic storage bin with a lid

I used a skill saw, chop saw, a kreg jig and my screw driver.

Remember, 2x4s are actually 1 1/2 x 3 1/2”….and 1” thick boards are actually only 3/4” thick…it’s a racket! The lengths are what they say they are….

I had all the screws and hardware so no need to buy any but you will want 2 1/2” Kreg jig screws and 1 1/2” and 2” deck screws…and some random hooks!

I decided to make the entire bench about 29-30” tall, 4’ wide and about 2’ deep. I think it may be a tad tall for a little one so I built a little “walk bench” for the front of it until she grows a tad.

I can pretty much construct something like this in my head, but if you are a novice, make sure you draw everything out on paper using the actual measurements of the lumber. Or better yet find a plan online THAT MAKES SENSE TO YOU!

The first thing I did was cut the 4x4x6s down to 4-29” pieces for the legs (remember the top will be about 3/4” thick). I used a skill saw to cut them down.

I used the 2x4x6 for the front/back frames and the side frames. The width will be 48” wide so the front frame is 48”, less 1” so the top can hang over by about 1/2” on each side, less 7”(two side posts/legs…remember they are actually 3 1/2” wide) …so the front and back frame pieces are 40”. For the sides…24” less 1” (for the overhang) less 7” (for the posts)…those are 16”. You will cut 4 of each length…2 for the top frame and 2 for the bottom.

To attach the front and side frames to the posts/legs I used my Kreg jig…love that thing. A little glue and then two screws on each end.

Just a reminder…ALWAYS attach boards with the “cup side” down…this applies to any project. To find the “cup” look at the grain at the end of the board. In other words you want the “hump” of the grain to face out. This is important to pay attention to when selecting wood…if the side that will face out is all scarred or knotted you will want to pass.

I put a frame at the top and also 2” from the bottom of the posts/legs so I could add a bottom shelf.

After I got the frame constructed using glue and the Kreg screws, I attached 47 1/2” 2x4 boards cut in 1/2, 3/4” from the top of the bottom front and back frames, on the inside…I did that so I could use 1”x4” boards as the shelving for the bottom. I just laid the 1x4s on the cut down boards then attached them with screws.

I made the top back by attaching two 2x4 boards vertically to the back frame, then attached 3 1x4x48” boards across them with screws. I laid a 1x4x48” board on top for a little shelf and trimmed it with a 1x2. Not on the inspiration bench but something that was simple to add and gave me a space for plants and such.

For the top I used deck boards. I used my jig saw to cut out a hole for the storage bin with a lid so she would have a little “sink” to mix her mud pies!

I made sure to leave gaps between the boards like you would for decking so water could run off.

As I said, we can’t paint or stain it just yet since it is all treated wood but it was super fun to stage…some cute little containers for little plants, some plastic bins for her pots and pans (all from the Dollar Store!)…a few hooks for more pots and spoons. Even a hook on the side for a little watering can.

My neighbor has a Cricket so she made a little sign so everyone will know it is her bench!

CUTE AS A BUG’S EAR!!!

I love it, she LOVES it, and the entire neighborhood loves it and now all want their own garden bench.

Super simple to make and it will not be hard to customize it if someone wants one bigger or even smaller!

I’ll let you know how the mud pies turn out!


My "life quandary"and FINALLY the shop reveal....

IMG_1704.jpg

Occasionally I go back and reread some of my posts from the last eight years. Man i have transformed some awesome pieces of furniture and spaces!!!

Now that I am “semi-retired” I have been trying to decide what I want to do “when I grow up.” After a year of binge watching “Gilmore Girls” and finishing the little projects around this house, I desperately need something to do.

I still haven’t decided what.

I love refurbishing furniture but honestly my body isn’t exactly cooperating these days. After just one day of projecting, I am usually hobbled for at least two days.

I don’t like to golf, I don’t knit, sewing is NO WAY JOSE, I raised four kids so while I will eventually help with my future local grand kiddos, I don’t think I want to take them on full time.

Volunteer…an option, but where. I love animals but if I volunteered at a shelter I would have a house full of critters. I would love to work at a zoo, but sadly we don’t have one!

Sick kids…they make me sad. I just don’t know if that is something I could do.

Old people. Hum….to close for comfort?

A real job? Nice idea but I don’t want to work nights, weekends or holidays. Brian and I like to take little vacations so I need lots of flexibility. Not exactly an ideal employee.

Besides I have NO idea what I want to do and I don’t want to spend 20 hours a week doing something I don’t enjoy.

I am blessed. I was blessed to own a business for 23 years that darn near killed me but allowed me to care for my family and “semi-retire” at a relatively young age.

So what do I do?

This blog is a wealth of information and I am sure there is a way I could turn it into a “business.” But truthfully, I like sharing my experiences with those who need the guidance. And I don’t want to make people pay for that help.

Which bring me back to my first love….building, creating, repairing, helping, sharing, instructing…my blog logo says it all….I hope I can share with you a passion and desire to easily create a home you will love!

All this whining and moaning to finally share one of my favorite things about this house…the shop. A space I have wanted for decades, finally got, and now really can’t use to it’s full potential!

For YEARS I worked out of my garage…what a mess. When I saw this house had an amazing shop I was stoked! A place to keep all my tools and work on a few small projects and I would still be able to park my car in the garage.

It is insulated, it has electricity, large doors, windows….the only downside was it was SERIOUSLY ugly!
Like baaaaad ugly.

IMG_0008.jpg

As with every inch of this house, I could see the potential.

I knew I had to make it pretty!

IMG_1703.jpg

The windows were old aluminum windows so those had to be replaced. I even moved the front one to the left to make it more “aesthetically pleasing.” New light fixtures inside and out were a must. The doors were aluminum and vinyl siding and not real attractive so I did just enough to make them look a little better. New cedar posts, some shutters…

And the biggy,,…brick. No I am not a brick layers so I was super fortunate to find someone who would take on a few small projects. Finding brick to match the brick on this 22 year old house was dang near impossible, but I was able to find one that was close enough and it made all the difference in the world.

We went from having a big ugly vinyl shed in the yard to having a super cute building.

The inside…it’s a storage shed in spite of what it looks like from the outside. Lawnmowers, tools, yard stuff…nothing fancy. I love the workshops that are all perfect and spotless….but it is a shop/storage shed, plain and simple. (Note Brian’s big fancy grill/smoker….God forbid it sit on the patio and get wet like a normal grill)

As I shared HERE when I spruced up the storage shed at our old house, I firmly believe storage sheds should enhance your space…not just be a big eye sore where you store you mower and shovel.

GET CREATIVE…make it pretty. Take a little time to doll it up and make it something that is aesthetically pleasing rather than just a huge eye sore in your back yard. Pinterest (my “go to” inspiration") is full of outdoor buildings that have been transformed into something other than just big ole’ eye sores!

No, you do not have to do something as fancy (or expensive) as mine…but a Pinterest search and a little “oops paint” can really make a difference.

Do a little “storage shed” search, then let your imagination run wild. Remember, we have lived in this house almost a year and I am just now sharing…transformations don’t happen over night!

How to build a shop or garden cart...

I’m kinda bad at posting “tutorials.” There are SOOO many tutorials online for just about anything you want to do and my motto is to FIND THE ONE THAT MAKES THE MOST SENSE FOR YOU!!!!

That being said, I am going to TRY to post a tutorial for building a cart…for either your “shop” or maybe a deck or garden cart…or even a little portable kitchen island.

I shared here how I took an old shop cart I bought at an auction and cleaned it up for use as a kitchen island.

The function will dictate the materials you will want to use. If it is something that will be outdoors, you want to use pressure treated wood or even cedar. If it is something that will be in your garage or “shop” you can use plain ole’ pine…if you want something a little fancier, like maybe a kitchen island, you want to find some nicer wood that can be stained and oiled and used in food prep.

In this case, my daughter Katie, wanted something she could put her chop saw and tools on and roll in and out of the house. Kind of like my old shop cart….

…another auction find that I fixed up a tad to use in my garage. It holds my chop saw so when I need to use it I can just wheel it outside so sawdust doesn’t get all over the garage. And the bottom shelf holds many of my tools! Not pretty but super functional!

Since her cart won’t be stored outside, I decided to build the bulk of her cart out of pine 2 x 4s. The tops are 1 x 6 treated decking, but only because it is the perfect sizing…not because I necessarily needed the pressure treated wood.

So my shop cart is my “inspiration.”

The next thing I did was “make a plan.”

Again, whether you are building something simple, refinishing a dresser, or giving a room a makeover, you have to first find your inspiration, then make a plan.

In this case, “the plan” is a simple little drawing with dimensions and a material list.

Originally the plan was based on my cart dimensions…but Katie decided she wanted her’s a tad smaller, 20 x 30, so that altered the dimensions and materials just a tad. I ended up using only 1 of the 2x4x10s and 3 of the 1x6x8s.

Important reminder: a 2 x 4 is actually only 1 1/2 x 3 1/2…2x6 material is actually only 1 1/2 x 5 1/2….only the length is actual. This is important when designing any build so make sure you know what the actual dimensions are of any wood you buy. This chart can be super helpful….

I could have bought 4x4 material to make the “legs” but decided to just “stack” two 2x4s…personal preference. If you decided to use 4x4 material, skip this step and buy 2- 4x4x6 posts and cut them down to 31” each.

The legs will be 31” because I wanted the height of the finished cart to be around 35”. The wheels I used are 3” high and the top is 1” thick.

Again, I used 2 x4s to construct the legs….

I cut 8 pieces 31”, glued (SUPER important to glue ALL joints)….

….stacked, nailed with my new Mother’s Day gift (LOVE!)….

…then screwed them together with 2 1/2” screws.

I nailed them first just to hold them in place…then I added screws.

After each leg was built, I attached the wheels to one end of each using 2” screws!

Next I built the top and shelf “frames.” Since Katie wanted it to be 20” x 30”, I cut 4 boards 29” (the face) and four boards 16”….the 16” boards are the sides. (1 1/2” thickness of each of the face boards = 3”…basically a 19x29 frame allowing 1/2” for overhang on the top)

IMG_6447 copy.jpg

I used my kreg jig to construct the tops….

…if you don’t have a Kreg jig, get one! Or you can just glue and screw the top together.

Then it was time to attach the frames to the legs.

I used screws and glue to attach them and since I wanted the screw holes on the front to be a tad fancier, I used my little “hide the screw” trick.

In this case I used 3/8” wood plugs to cover each screw hole…first I drilled a hole with a 3/8” bit about 1/4” deep, then I used a 1/16” bit to finish drilling all the way through the board.

TIP: Predrilling holes will keep the wood from splitting when you use screws!

I attached the legs to the frames using 3” screws through the “predrilled” holes and glue (GLUE IS IMPORTANT! USE IT!)

On the sides, I just used screws…no fancy holes or plugs!

I added the little plugs…just a dab of glue in the little holds, then popped them in…super simple but a nice detail!

After the frame is constructed it is just a matter of adding the tops…again, I used 1 x 6 pressure treated decking boards. I cut them to fit, glued and nailed. Simple….

I added a little handle made from galvanized pipe and fittings….

You don’t have to add a handle or you can keep it simple by using a cabinet pull…I just like the “industrial” look of the galvanized material….

I also attached a power strip to the back…again, not something you have to do!

Super simple build! Seriously, this is not hard!

That being said, you do want a little chop saw and cordless drill to construct this project (nailer and kreg jig are option!).

But if you took my advice, you have these tools…and now you have a nifty place to store them!


Kitchen counter top reveal....

Time and again I have made changes to my kitchen in my quest for “lighter and brighter.”

This past week was another piece to the puzzle in this quest…

I LOVE the white quart counter tops. LOVE!

In my quests for “lighter and brighter,” I started with under-the-counter lighting…an absolute must in any kitchen.

I swear it doubled the usable work space!

If you don’t have it, get it…seriously.

Then I popped up some cabinets, added floating shelves and some glass doors.

These awesome changes made a huge difference!

Then the last little makeover…new tile backsplash, larger window and more glass doors….

Then there was the addition of the black stainless appliances…one at a time, but eventually the stove, microwave, refrigerator and dishwasher all matched again!

All these changes have made a big impact…but I was still missing “something.”

I shared how I acquired my stunning granite…at an auction for a fraction of its retail cost. I had it installed nine years ago and it looked amazing!

It’s not that I grew to dislike the granite…I loved it. But my kitchen is relatively small and I just felt that even with all the “light and bright” changes, it still “felt” small and dark.

A couple of years ago I update my bar top with white quartz.

I absolutely love it…the quartz made a HUGE difference in the look and feel of the space and I have found it to be exceptionally durable and easy to care for.

When I did my mini makeover in the guest bath, I went with the white quartz again.

Now there was no question what I wanted in my kitchen. It was just a matter of affording it.

Quartz counter tops are not something I would suggest “DIYing” and while I really WANTED new tops, they weren’t really a NEED.

My rule of thumb…always ask, is it a need or a want?

“Wants” are okay…just as long as you don’t go into debt. So for a time I saved my pennies so I could afford new tops without digging into my savings or going into debt.

This past week they were installed.

Being a DIYer at heart I had to get in on the action just a tad. I used this AMAZING little tool to cut through the caulk between the old tops and the backsplash…

I have no idea how I managed without this tool for the first 54 years of my life! Add this one to your “must have” gift list!

I decided to change out the double bowl stainless sink to a single bowl black stainless.

I love it! I would like to have a black stainless faucet but I didn’t get around to ordering one in time…maybe someday. Right now I don’t find the stainless faucet terribly offensive.

My “baking corner”….

(The pink roses are from a bush Sarah and Joel gave me last year for Mother’s Day…I love gifts that keep giving! And in case you are wondering, I take my own advice…I asked for and received a battery trim nailer this year from my kiddos for Mother’s Day! LOVE!)

In case you are wondering if under cabinet lighting is worth it…this is the same corner pre-lights. I know the backsplash and top is lighter now, but just adding the lights made the space usable rather than just a big black hole!

IMG_5011.jpg

I love the white tops with the black stainless appliances and the travertine backsplash! That backsplash is amazing but I really think it was over shadowed by the “busyness” of the granite. Now it really shines!

My quest for “lighter and brighter” took a HUGE leap with the addition of these tops. I LOVE them. Yes, they are just plain white…but in a kitchen with a beautiful backsplash and stained cabinets, they look great!!!

My neighbor ask me what my next big project will be…hum, I’ll have to think on that!

Making the prefect photo frame....

I don’t consider myself a “crafty person” but I do know how to use a hot glue gun!

I have the coolest photos of Matt and me when we went to New York, and of Katie and me when we went to New York…all taken at the Top of the Rock in Rockefeller Center. Seriously cool pictures that I want displayed. But I could not find a frame that worked for all four photos!

I bought four 5x7 frames, trimmed the photos to fit and then hot glued the frames together to make one big frame for all four pictures.

The frames I used are actually desk top frames so I just popped the little “stands” off.

Super simple and a great way to make one frame out of four different frames. You could do this with different colors of frames, different sizes, just about any combo of frame you can imagine!

Simple and inexpensive.

A TIP: I like these little sawtooth picture hangers but the tiny little nails always give me grief…I just can not hold them and hammer them in at the same time. My trick is to use needle nose pliers to hold the little nails.

You are welcome!

A new storage project and Christmas 2019!

It has been a minute since I shared a home project…just too much going on the last few months to do anything other than what HAS to be done around here!

But I saw this little storage idea HERE and knew it was exactly what I need in my guest bathroom!

I had to build a little Christmas gift but I can’t share that just yet since it is suppose to be a surprise. But while I had the saw and nail gun out I decided to take time to build this little storage unit.

I keep plenty of spare toilet paper under the vanity but it is out of reach if you have already sat down. So for years I kept spare rolls in a basket on the floor next to the potty but I just didn’t think it was a sanitary place to store paper. So I set up a little wickerish box…paper inside, magazines on top.

So here’s my opinion about reading materials in a bathroom. First, I don’t want guests hanging out long enough to read an article in the guest bathroom…seriously, do that in your own bathroom. Second, if you have to sit there long enough to read an article, add fiber to your diet.

I needed something to set a little Christmas tree in so the little box got “repurposed.”

Anywho, I saw this little storage idea and thought “HEY! I can do that!”

I constructed mine a tad differently than Barb, but the concept is the same…and as I always suggest, use the tutorial that makes sense to YOU!

Either way, SUPER simple build! Something you could do with a miter saw and box. hammer and screw driver if you don’t have fancy power tools!

The first thing I did was use a stud finder to locate the studs then I cut into the sheet rock to measure the exact distance between studs…

…15”. Most wall studs are 16” on center so they SHOULD be 15” apart, but you never know so it is better to be safe than sorry! Just measure the distance between the studs and make your box a smidge narrower than that…or do as Barb did and “fur out” the studs to make a box a specific width.

I laid out the TP hanger (THIS is the one I used) and the spare rolls to see how tall I wanted the entire box to be…17” seemed to be perfect.

One suggestion…make sure the bar on the holder you choose “pivets”…you want the bar the paper will sit on to swing freely so you can swing it out of the box to put the paper on!

I used 1x4 (actually 3/4” x 3 1/2”) pine boards and 1/4’ luan to build the box. I cut the width pieces about 14 3/4” to give myself a little wiggle room between the studs. Basically I made a 14 3/4” x 18 1/2” box (outside measurements), then backed it with luan, cut to fit. I used wood glue and brad nails…ALWAYS glue your joints…trust me, the nails just hold everything together until the glue dries!

I used “door stop” for the face trim…it is 1/4” thick and 1 1/2’ wide and has a very simple profile! I used it when I installed the glass on my laundry room door…simple and beautiful!

After the box was constructed, I puttied the holes and caulked the joints, primed it with Bullseye primer, sanded it smooth, then wiped it down with a tack cloth.

I used the backside of the box as the “template” to mark the sheetrock, making sure it was level with a small 6” level (don’t assume your studs are level). I used a sheetrock knife to cut the sheetrock.

To install, I slipped the box between the studs, making sure the trim sat flush on the sheetrock. I drilled four 1/4 “holes approximately 3/8” deep on the inside of the box (2 on each side) and used 1 1/2” sheetrock screws to attach the box to the studs. Then I used wood putty to fill those holes and sanded it smooth after it dried.

All my trim is oil based “Swiss Coffee” (and of course I have spare paint on hand) so I painted the box with the trim paint. Again, ALWAYS use an additive when brushing or rolling paint on wood…in this case Penetrol since I am using an oil based paint. Two coats!

After the paint dried well I installed the TP holder and stocked it with spare paper.

Too stinking cute and perfect for storing extra paper and even a little “air freshener.”

Christmas is next week and so little changes from year to year it seems almost redundant to share my Christmas decor. But I will leave you with a few pictures of our cozy holiday home…

I hope you and yours have A VERY MERRY CHRISTMAS!!!

A few MCM makeovers and a life decision...

Again, I am a baaaad blogger. I jump head-long into a project and fail to take “before” pictures.

Prime example…

No “before” picture. It was in similar condition to THIS dresser…reeeeally bad. But of course I have no proof of that. Just take my word for it…again.

The entire piece was originally the old “natural” finish with a lot of “wear and tear.” I primed and painted the six side drawers and cabinet and stripped and oiled the top and middle drawers.

I absolutely love the wood handle “hardware” and the super nifty black concave and brass hardware. I sprayed the little concave pieces with metal primer and black paint.

The top had some chipped veneer. I originally planned to paint the top so I could repair these areas, but I just can’t resist beautiful walnut…even veneer. So I did what I often do…I just let it be what it is…an older piece with a few blemishes. You can buy replacement strips of veneer…but I would rather have flawed original…just a personal preference!

I did take a before picture of this piece….

I love the brass hardware on these pieces…again, the way to tell if it is solid brass is to use a magnet. A magnet will not stick to solid brass. Important because in order to clean these pieces I have to really scrub them with steel wool. No secret to cleaning brass hardware…lots of Brasso, steel wool and elbow grease!

Now…on to my “life decision.”

I have decided to stop doing the whole “auction/flea booth/resale” thing. I love doing what I do but doing it to “pay the rent” has become tiresome. I am just not enjoying it the way I use to.

So this past week I gave my notice at 410 Vintage and I went on a major “purgefest” in my garage (aka shop). I sold a lot of stuff on Facebook Marketplace, I donated a truck load to our local community thrift store and I took a truck load to the dumpster.

I have a friend who opened an awesome little consignment/flea market (Gathered Goods) so I took a few things to her to sell on consignment.

My garage has been a disaster for some time.

I painted the walls and cleaned all the shelving and cabinets!

I installed a Rubbermaid track system for large items….

…and we installed a nifty metal peg board system for all our tools. I knew where all my tools were but no one else could really figure out where anything was.

I even gave the door between the garage and laundry room a fresh coat of paint.

I am not “retiring” completely. I will still refinish and rehab pieces…I just won’t have to go looking for projects. If I find a project I want to work on, I can always take it to Darlene at Gathered Goods.

So fear not…I will always have a project to share here…and of course there are always my enlightened “muse” posts.

Herringbone dresser top....

I would love to take credit for all my incredibly creative makeovers but truth is I get a lot of inspiration from a lot of sources…Pinterest, other DIY bloggers, and random website.

This time it was my son. He found a really awesome entry bench online and built one for himself!

I shared his entry makeover here.

His girlfriend loved it so much he made her a desk for Christmas!

So when this dresser top turned out super cruddy, I decided to put a herringbone top on it.

The top is a veneer and had some “bubbling.”

I was able to sand the “bubbles” so that the top was smooth, but when I sanded, it took the stain and finish off and the gel stain just wasn’t covering it.

I could have sanded the entire top and removed all the stain and finish…or I could have painted it…. but nah….I kinda wanted an excuse to do something “different.”

Matt was out of town and couldn’t help me so he sent me THIS link…AWESOME tutorial. These girls do a bang up job on the video tutorial…if you love the look, they tell you exactly how to do it!

The top of the dresser hung over the front quite a bit so I decided to use my Kreg rip cut guide to cut down the top a tad.

My daughter got it for me for Christmas and this is the first time I was able to use it…LOVE! I have always used my “yard stick” trick to make straight cuts with my skill saw…this was SOOOO much better!!!

Using the linked tutorial, I started laying out the top. I used white pine 1x4 for the top boards and 1x2 for the edge banding.

Now, this is where I had to deviate a tad from the tutorial. Because I was covering a dresser top and not making a new top that I could flip over to cut down, I had to cut the herringbone boards from the top. If I covered the entire top before the cut, I wasn’t going to be able to “see” the edges of the existing top to know where to make my cut. So I laid all but the corner boards, used my long metal guide to draw my cut marks on all four sides, and then cut those boards first. Then I nailed down the corner pieces, marked them, and cut them.

I used a palm sander to sand all the edges before applying the trim boards around all four sides.

I puttied the holes with wood filler, let that dry, then I sanded the top and sides smooth. Remember, stain will not adhere to glue, so you want to make sure you sand well and remove any glue residue!

After sanding I applied the stain…pine does not take penetrating stain well so I used General Finishes gel stain. There will be tiny gaps between the boards…to get the stain down in between those gaps, I used a small craft brush. I sprayed on a polycrylic finish to seal it!

I had kilzed and sanded the cabinet and the drawer fronts before working on the top. After the stain dried, I painted those a “steel blue.” (Again, don’t ask me the color…it is a mix of blues and black I had on hand!)

I wanted to use the existing hardware but I wasn’t digging the original finish. I primed them with metal primer and painted them flat black…soooo much better and far cheaper than replacing it with new.

Just another “ick” saved from a life of “yuck.”

Again, you don’t have to go all fancy…I could have easily painted the top…but the tutorial on “Shanty-2-Chic” is super easy to follow!

MERRY CHRISTMAS/LAST MINUTE GIFT IDEA!

When I first started blogging I posted a page called “Every Woman’s Tool Box.” If you look at the links at the top of this site you will see it!

I realized today that some of you may be searching for last minute gift ideas (for your wife/girlfriend/college student!)

As I mentioned in that post, I asked for a toolbox full of tools for Christmas one year! One of the BEST gifts I ever received!

For some reason it is so empowering for a woman to be able to hang a picture or tighten loose hardware or door nobs…the ability to make any minor repair around the house.

If you are a guy, this will definitely shorten your “honey-do” list…you know, that list of mundane little tasks that your significant other needs you to do on your day off!

I put together a little tool box for my daughter when she went off to college…she loves it!

So guys…or mom’s of college students…go to Lowe’s and search around for a bunch of “little” tools…find a tool box small and light enough to keep tucked away in a closet…put a bow on it and PRESTO-BINGO! Awesome last minute gift!

In the little tool box or bag I would suggest the following…hammer, Phillips and flat screw driver, needle nose pliers, regular pliers, tape measure, 6” level, utility knife and blades, a stud finder, maybe a little socket set and a small box with an assortment of picture hangers, screws and nails.

The post also lists a lot of “big stuff” any DIYer might like…saws, sanders, clamps, nail guns, etc…but just the basics is all you really need if you aren’t into the whole DIY thing.

This may seem like a silly gift idea but most women I know would love this!

I hope you all have a VERY MERRY CHRISTMAS!!!! See you next year!