The never ending project....

Six months ago I shared a project I was working on …quilts. Sewing…UGH!!!!

As I pointed out in the original post, it was for a good cause…a way to show off the years of Christmas PJs my family wears every Christmas.

I finally finished the first SIX quilts I tackled.

Four are throws that are being given to my daughter-in-laws and my grandsons for their birthdays. I know they should probably be Christmas gifts but I want them to have them for the Christmas season. I also made a twin size and a full size for the upstairs bunk room.

This past week I added shelving and organized our spare room closet so that Brian can move all his “stuff” out of the guest room closet and into the spare room closet. While in the process I finally decided to organize the boxes of leftover fabric from the massive quilt project.

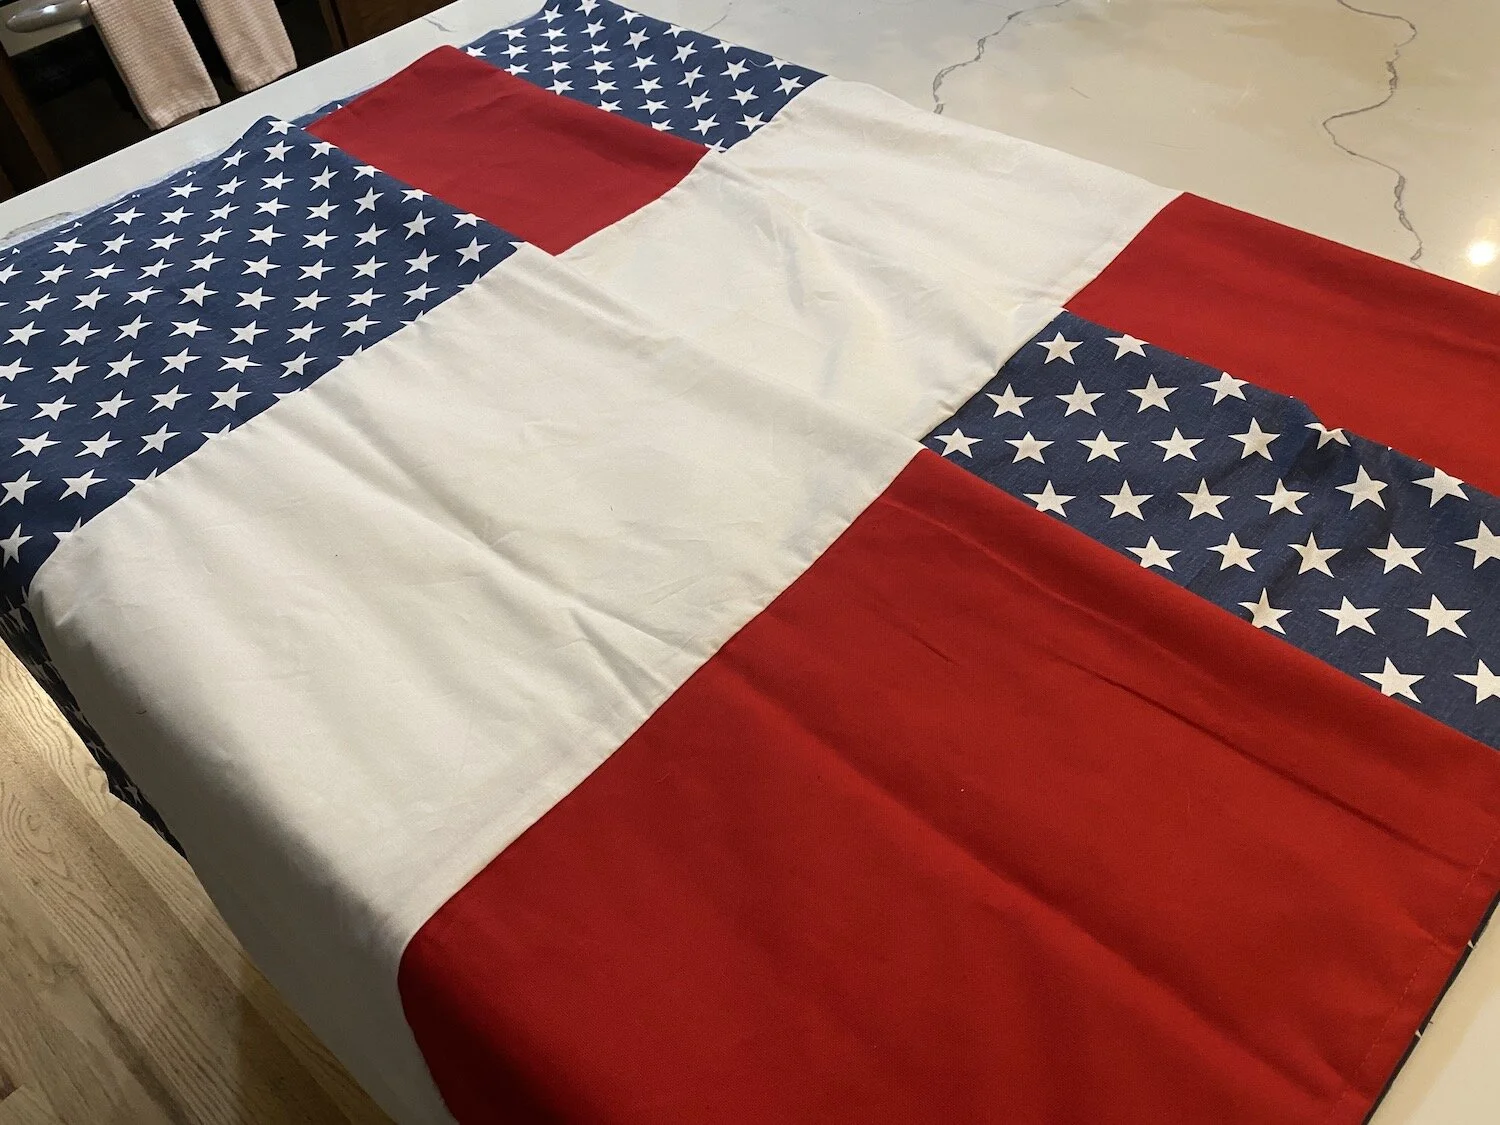
Well, low and behold, I had enough panels to make a throw for Katie…might as well whip that up…

…and Sarah wanted pillows…I didn’t have any panels for those so of course I had to whip those up as well…

…and I wanted a pillow using some scrap green velvet I found…whip that up. Two days of “whipping” and I am WHIPPED!!!

But I managed to use up a good bit of my leftover scraps and get everything organized. I still have a bunch of plaid pieces left I may do something with…someday!

It has been a few weeks of “giving what you have.”

One neighbor wanted a counter top over her washer and dryer…done!

Another wanted a walnut mantel… (similar to mine)

…and a storage divider for her baking sheets…

Done and done.

And of course I have a long list of things I want to get done before we head out on vacation in a few weeks. So little by little I am chipping away at the list on my refrigerator.

No, the closets and the sewing projects weren’t on the list.

That reminds me, I need to add them to the list so I can check them off!

Patriotic Wreath....

PATRIOTIC WREATH

PATRIOTIC WREATH

I saw this wreath on Facebook and loved it…

IMG_1372.jpg

But as I have mentioned before, I learned the hard way NOT to order from unknown sites and always pay close attention to reviews….this one got bad reviews on Amazon.

So I decided to make one.

First, I had to create the “bunting.” I decided to sew together three fabrics I found.

IMG_1394.jpg

I also picked up all the goodies I wanted to adorn the wreath with…

IMG_1479.jpg

….ribbon, floral pics, the wreath. Since Hobby Lobby only has select stuff on sale every other week, this can take some time. For the record, the grapevine wreaths never go on sale, but they are only around $9. For that matter, if you have a wreath you are no longer in love with, deconstruct it and reuse it, or pick up a cheap one at a garage sale!

IMG_1450.jpg

I bought two yards of each fabric, cut the widths in thirds, then sewed each together. I actually got three buntings so I made a few extra wreaths. Two yards would be 72” so you could also use a table runner or a long scarf if you want to avoid the whole sewing thing.

I folded the fabric in half and kind of gathered it by hand then laid it onto the grapevine wreath….

IMG_1481.jpg

After getting it pulled super tight, I secured it with a zip tie. After adjusting it by hand I hot glued the edges of the bunting at the top just to give it a little bit more security,

Next I made a spray and my funky bow. I have linked to THIS tutorial several times since I discovered it at Christmas. I LOVE how easy she makes this process! I have now made dozens of these decorative sprays for every holiday, big and small, and I just love them.

IMG_1482.jpg

I made my floral spray and made sure it was the size and fullness I wanted. Then I made my bow. I chose these three ribbons for my bow…

IMG_1483.jpg

These bows may look intimidating, but trust me, the tutorial I linked makes it SUPER simple!

After making the bow, I secured it to the spray with floral wire then attached it to the wreath with small zip ties and floral wire!

IMG_1487 2.jpg
IMG_1486.jpg

I absolutely love this wreath and it will work perfectly from Memorial Day through July 4th! In a few weeks I will swap out my spring pillows on the porch for my patriotic pillows! I already have my red, white and blue candles on the table and last week I swapped out the little ribbon on my welcome sign….

IMG_1451.jpg

All part of my plan to stay festive year round. Who said decorating for the “holidays” is only for Thanksgiving and Christmas.

My bathroom windows are finally installed and the only thing left to do is the brick…but the inside is trimmed and painted and I LOVE IT! Can’t wait to share!

Until next week….

static1.squarespace.png

Pretty in Pink...

If you “came of age” in the 80’s chances are you saw a John Hughes film. If you haven’t, you are missing out! “Pretty in Pink” was one of my favorites! Check them out…you won’t be disappointed and I can’t think of one that isn’t “kid friendly.”

Which brings me to pink…a color I have always loved but have never really used in my home decor. I must have gotten a “pink bug” because all of a sudden I can’t seem to get enough of it….and since next week is Valentine’s Day, this is a great time to infuse a little pink into my home decor under the guise of “decorating for the holiday.”

I found this little bench in 410 Vintage…the tag said it is walnut but I really think it is mahogany. I used this process to refinish the frame and recovered the seat with the same pink velvet I used for the club chair pillow (makeover here).

Several years ago I refinished a little piano bench to set by the closet so I would have a place to sit and put my shoes on.

In one of my “purging” marathons I moved it out but in all honesty I kinda missed it…so this little bench is a perfect little replacement!

I love my office…a simple room that is really multi purpose…a “thoroughfare” from the living spaces to the master bedroom, a “dressing room,” and of course, an office.

I featured the desk here.

I have seen a few desks over the years that peaked my interest but I still love this desk…it is perfect! Prime example of “buy what you TRULY LOVE and you will never tire of it!”

My office chair looks a lot like a Marcel Gascoin C-chair….I can’t find a picture of this exact chair so I don’t know for certain! Again, I don’t buy pieces like this for their potential value…but because I LOVE them.

I bought it years ago and share it’s little makeover here. Again, still love it!

I have replaced the dresser several times over the years but I LOVE this one! Shared the makeover here and while I loved the dresser that was here before, this one is MORE better!

The little bookcase…just adorbs!

I digress…off to the living room … I found the cutest pink pillows…

…and a yummy smelling pink candle!

The little white pillow was kind of plain so I decided to add some cute pink pom-poms I made out of “furry” yarn. I just tacked them on so they can easily be taken off when I tire of the pink.

The pink pillows will go well with the little bit of Easter decorating I do!

While digging around TJMaxx for pink pillows and candles I found a few other things I thought would be fun for the holiday….cute hedgehog mugs and fun little Valentine’s hand towels!

You don’t have to (or need to) spend a lot of money dressing your home for Valentine’s Day…but it is fun to infuse a little fun and color into an otherwise “drab” time of year!

Funny…I was wearing my pink tennis shoes and a pink vest when I was buying all this pink stuff…the check out lady remarked that I sure must like my pink…lol!

Turns out, I really do! It is so dreary and “wintery” outside and the pink just seems to brighten things up a bit!

I have some leftover pink velvet from the bench makeover…just enough for a few more pink pillows! Now if I can just being myself to sew them…eck!

Old typewriter cart upcycled....

I am in "dresser" mode these days...lots of dressers and chest of drawers being "refinished" but after 5 years, I still can't remember to take good "before and after" pictures! So while I have refinished 4-5 dressers in the last few weeks, I have no good pictures to show for it! CURSES!

My garage is packed with dressers and chests I am working on now so MAYBE I will remember to take pictures when they are done so I can share!

One little project I DID remember to take pictures of is this old metal typewriter table....

I shared here the first little table I refinished. I have found they are perfect for my portable sewing machine. I commented on the first makeover that I wish I had one with a little drawer...low and behold I found one!

It wasn't in bad shape...just a really bad paint job. So I primed it with metal primer, sanded smooth, wiped it with tack cloth and painted it with a few coats of black lacquer....

This little table makes it super simple to store away my sewing machine until I need it...

...then I can just roll it out and set it up anywhere in the house! Just roll it out and put it anywhere...no more scratching my dining room table.

If you find one of these little metal tables that has a bit of a "rust issue" I shared here how to deal with that

I think these old metal tables can be used for many things...a portable sewing table, coffee bar, maybe even a little portable "prep" table for the laundry room, garage or kitchen. Roll it out then tuck it away when you no longer need it!

Simple!

Funky little chair makeover and a few upholstery tips....

Another auction buy that languished in the garage for months until I pulled it out and thought..."Hum, I kinda think that is cool!"

It may not LOOK cool, but it is a funky little chair...and I like "different." Not really my style (Hollywood Regency maybe?) but since my style is "eclectic," I can find a place for it! 

I'm not sure exactly what wood it is...my guess is walnut. But the finish was the typical dark stain with black flecks I see on a lot on furniture from the 70's...not really attractive...


After I stripped all the old fabric, I used my 1/2 and 1/2 mixture and stripping process to strip the old finish and stain...then I applied 4 coats of tung oil finish (no stain)! I like the warmth of natural wood.

As always, if one comes in, one must go out. So this little chair in my office was moved upstairs into the guest room until I have room in my space at 410 Vintage! I bought it 25 years ago at an estate auction and it was my first real reupholstery project.

Fabric is always a tough one for me...maybe because I know how hard it is to reupholster a piece and I don't want to do something I will tire of and have to redo. I found several fabrics I thought I might like, brought samples home and did what I always do...stare at it for a few days. In the end I went with this fun but somewhat conservative "geo" pattern...I like that it is relatively neutral and could be spiced up with a pillow or throw...

And spice it I did. When I was looking at fabrics I found an awesome pink velvet. I was briefly tempted to cover the chair in the fabric but I knew it would be a "fad color" I would later regret. But I couldn't stop obsessing over the pink so I decided to find a pink accent pillow.

Naturally, I couldn't find a pillow I like so I ended up buying a little bit of the pink velvet and made a little pillow. Instead of cording, I decided to go with tassels on the corners but couldn't find any I liked...so I made little "tufts" out of feather cording...just too stinking cute!

A simple but fun little detail that brings in the pink I was drooling over without the huge commitment of covering an entire chair in it! I would advise taking this approach on all "big ticket items." Couches, chairs, bedding...keep them neutral and add the "fad" details and colors with pillows, throws, curtains and rugs...accents that are relatively inexpensive to change out when the color falls out of favor in a few short years!

By the way, you may have noticed I changed the curtain...I went with white just to lighten the corner a bit!

I could never post a good tutorial on how to upholstery YOUR piece of furniture...there are so many great video tutorials online for just about any style of chair/couch/ottoman/etc and I strongly suggest you do a lot of research before you start your project. Find a tutorial that best suits YOUR needs.

I will share a few tips that will make your job a tad easier. It doesn't matter if you are recovering a chair or couch or ottoman...these rules apply!

First, learn to sew. Every DIYer should know how to use a sewing machine if for no other reason than to sew pillows or curtains or do basic upholstery or even hem a pair of pants. If you don't know how to sew a straight stitch, learn! I was fortunate that my mother made me take sewing lessons when I was young but I know a lot of local county extensions and hobby stores offer cheap (if not FREE) lessons! Take them...learn! And don't think you need an expensive sewing machine...I have a basic cheap machine that is at least 30 years old! 

Start simple. Before you tackle an heirloom wingback chair with expensive fabric, try something simple like this ottoman....

The drop cloth material I used was relatively inexpensive and super easy to sew. And I used a premade bias tape for the cording.

Take your time! I always think a project will take a lot less time than it actually does...so know that reupholstering anything isn't a "rainy day project!" Maybe a rainy WEEK...but deconstructing alone will take time and a lot of patience and you want to do it right!

Take LOTS of pictures while you deconstruct! Just snap random pictures as you strip the piece. If you are like me you THINK you will remember, but you won't...and you will find yourself sitting there wishing you knew how in the world it was originally put together. So take pictures!

It is always good to have a visual reference!

TRY to keep the pieces of the old upholstery intact so you can use them as a pattern for the new. If the old is really stinky and ewwwy, make a "pattern" with them out of butcher block paper or old newspaper. Make sure you label each pattern piece or old fabric so you know where it goes! And keep in mind that the fabric you remove has been trimmed...so add a few inches on each side of the piece...you can always trim after it is attached!

If you are going to strip and stain or paint, do it after you strip the old upholstery but before the new! 

Take time to make repairs! Make any repairs that need to be made BEFORE you start painting/stripping/staining and reupholstering! Do not spend the time and money reupholstering a chair if it wobbles or needs new strapping. If you don't know how to repair something property, Google it! Or email me! And remember, glue and clamps are your friend...not silicone, not sheetrock screws, not nails. Do it right or you are wasting your time!!!

Remove ALL the old upholstery nails and staples...all of them. And honestly, I have bought every tool on the market to make the job easier and I always revert back to a plain ole' flat screw driver, a hammer and a pair of good needle nose pliers!

Which reminds me...wear shoes! I don't care how careful you are, those nails and staples fly all over the place and you WILL find them with your bare feet!

Speaking of tools, I think I have tried every electric and manual stapler on the market. I have found that MOST will not set a staple flush or securely. So now I use a pneumatic stapler, similar to this one.  Best. Stapler. Ever!!!!  But word of warning...don't make a mistake and don't plan on recovering the piece any time soon because those staples aren't coming out!

Alway cover old batting with new. Even if the old batting seems to be in good condition, cover it with new batting. Always! If it has old horse hair stuffing replace it...if it has old "strapping," now is the time to replace it!!! On a few chairs, I have actually stripped everything down to the bare wooden bones and added new everything. Trust me, that is better than getting it all back together and discovering that the seat still sags or is lumpy and it smells!

Buy enough material! When you buy material make sure you account for any piping (welt cording) you might have to make. You can buy premade cording, but if you are going to make it out of the upholstery fabric it MUST be cut on the bias...in other words, diagonal across the fabric. To give you an example, on this little chair, I needed less than two yards for the seat and back, but I needed another yard just so I would have enough to make the welting. Again, google welt cording/piping and you will find great tutorials that will show you exactly how to make it. 

Make sure you have enough fabric to complete the project before you start. Lay ALL your "pattern pieces" out on the fabric and account for the welting before you start cutting. Nothing is worse than getting half way through the project only to discover you don't have enough fabric...and you bought the last bit of it! If all else fails you can always use two different fabrics on the project like I did on these little tuffets...but PLAN for it!


Google, google, google. I learned a lot at the elbow of my dad but today we have the world at our finger tips and you can find a good tutorial for just about any project...even upholstering furniture! I always advise watching as many tutorials as you can find and use the one that makes the most sense to you and your project! Watching DIY tutorials is also a great way to decide if you even want to tackle the project...advisable before you buy a wingback chair at a garage sale for $20 with the intent of "learning to upholstery!" 

Until next week when I hope to share Matt's entry makeover...


Club Chair Makeover...

For those of you who are old enough to remember 45 records, you know what it is like to buy a record for the "A" side, only to find you love the song on the "B" side.

That is basically what I did when I found the perfect upholstery for my big club chair and ottoman....

No I did not find inspiration in a song. I brought home 4-5 fabric samples I thought I might like. IIICKKKK! They were all awful so I tossed them on the chair, only to find exactly what I wanted on the flip side of one of my selections!

Magnolia Fabric Lemuel Mushroom

I knew I needed a lighter fabric...anything dark would just be too "heavy" for the space since the addition of the brown leather couch (reasons for the hulking brown leather couch here.) "Light" is kind of a problem in a house with a dog that sheds like a dead pine tree and thinks ALL the furniture in the house is for her comfort. You think kids are a mess...HA! 

So I really couldn't go with anything "off white" but I desperately needed a fabric that was "light" and would go with any color.

This chair is really "not my style." It is oak...strike one. It is "queen anneish"...strike two. But what keeps it in the game is the comfort...this chair is soooo comfortable. I bought it 26 years ago and this is it's second makeover, the last being 16 years ago. I have read many books in this chair, watched many movies in this chair, and even spent a few restless nights in this chair!

Originally it was in the den....

...but when the "combining of the households" went down, it was moved into the living room to make room for Brian's leather chair and ottoman!

I still love the black and gold fabric but again, big brown couch! Major "dark and dank!"

Since I knew it would be a major chore to makeover, I wanted to make sure I picked a fabric that I really love, could handle a lot of wear and use and one that would stand the test of time! 

I think this fabric fits the bill...super durable, not too light and not a "fad." It coordinates with any accent color I throw at it...teal, red, black, white, whatever!

And more importantly, I really do love it! 

First I removed all the old fabric and set it aside to use as patterns for the new fabric.

To mask the "oakiness" I stripped the old finish using this process and then stained it with gel stain. I used a gel stain to ensure I would get a deep, rich color. I actually layered several different colors to finally get the look I wanted...one of the reasons I advocate using a stain without a sealer! A few coats of tung oil finish and it was ready to reupholstery.

Again, I could give you a long-winded tutorial...but every chair is different and I really think you can find a perfect tutorial just by searching for a chair/couch/bench very similar to what you have! 

In my opinion, the hardest part of upholstery is stripping the old fabric and pulling the million plus nails and staples. But it is important to remove ALL the old nails and staples! Also, don't forget...NOW is the time to make repairs...wobbly leg...glue and clamp...broken frame...glue and clamp. If it needs new springs or batting or cushions...do it NOW!

I added a little fresh batting and tightened the strapping in the ottoman...but other than that, it was pretty solid!

Make the PROPER repairs before you start upholstering! If you don't know how to fix it, google it! I promise you will find a tutorial to fix anything! 

Now that the chair is done, the other things I want to change are all the more apparent...the window seat cushions and a few accent pillows...and of course the flooring and wall color. IT NEVER ENDS!!!

As I mentioned in an earlier post, I told Brian to just take me shopping if I EVER mentioned reupholstering a piece again. But the truth is, I love this chair...not the oak, not the style...just "the chair." And now that it is recovered in a fabric I really love, I love the chair even more! So I guess the two weeks of hell was all worth the effort...

...I think!

Little projects that can make a big impact!

While my garage is packed with projects I should be working on, the heat and humidity are just too much. This past week I worked on a few little projects inside!

The first is a "not so little project" but one I have been putting off for a loooong time! I shared the new living room chair I reupholstered here. I also had a little MCM chair and fabric ready to go but I could not bring myself to start the project. Upholstery is one of those things I do ONLY because I like the final results.

I was hoping duck egg blue and mauve would miraculously come back into vogue so I wouldn't have to mess with it, but that's probably not going to happen anytime soon! (Those who remember the 80s will understand this!) 

A teal club chair was one element of my den makeover plan I shared over a year ago. As I mentioned in the reveal post, not all elements of a makeover happen overnight...some may take years. Case in point!

Anywho, this wasn't technically a "little" project. I pretty much had to deconstruct the entire chair, strip and reoil the wood (beautiful!) and then reupholster. 

Once it was done....BIG impact.

But I really did accomplish two relatively "little" projects that have been on my "to do" list and that made a big impact.

The first was changing this little "gallery" wall....one of my "Things I Love" features. Family photos.

Honestly, these have not changed in 16 years but I want to change it up in my quest to "lighten and brighten" elements in my house. Since I am transitioning from the "warm" blacks and burnt reds to "cooler" reds, off-whites and teals, I decided these frames would be easy little elements to update with a little paint and new mats. Still love the pictures...just not how they are displayed

Here I shared the changes to the pictures on my dining room wall....

Just painting the frames and adding new mats made a HUGE difference in this space and cost very little.

I removed all the matting, photos and glass from the frames (good time to REALLY clean the glass!) I had mounted these pictures ON TOP of the matting so all I had to do was cut new teal matting using the old mats as a template and then reattach the photos using double sided tape. Frames are super easy to paint...a little primer and a little spray paint (Valspar Riviera Dune...my favorite off white spray paint) 

Perfect! (Um...yeah...I need to do something about the nasty looking thermostat!)

The other little project was super easy as well. I have wanted "modern" type house numbers for some time. I even painted some on my front door several years ago.

The actual house numbers that can easily been seen from the street are in the gable above the garage door...just cheapo, boring black numbers. Right now they are covered up with the "ivy" that is creeping all over the front of the house and at Christmas they are covered with a huge wreath (that warranted a visit from the code enforcer one year!) 

In my defense, this stuff usually doesn't get THIS out of control. Brian usually pulls it down every year when he puts up the Christmas lights. But last year we used one of those "star shower" thingies and didn't put any lights on the house...so...well...it is out of control! 

I have a plain "ho-hum" brick column on my tiny front porch that I thought might be perfect for a number display!

I ordered the "modern" style 4.5" numbers from Amazon. 

Somewhere along the way I picked up a plank of walnut. I've kind of been hoarding it for the last few years waiting for the perfect project and this was it.

I laid out the numbers on the board, measured and then cut the board the length I needed. Not sure how well tung oil finish will hold up outdoors, but that is what I used to seal the wood (3 coats).

Then I measured and marked where each number was going to go, drilled holes, secured the numbers using hardware screws, and then mounted it all on the brick column.

I used masonry screws to attach the board to the column. Since I didn't want the screws to show, I drilled a hole 1/4" deep with a 1" paddle bit, then pre-drilled in the middle of that hole for the masonry screws and then covered it all with hardwood plugs.

Dabbed a little tung oil finish on the plugs....cute as a bugs ear!

Doesn't look like the heat is going to let up any time soon so I have hauled several pieces into to the dining room to chalk paint! Maybe I can get a little bit of projecting done and get some room to breath in my garage! Maybe....

Mid Century Chair Makeover and the trick to sewing vinyl!

Recently my mother has been on a purgefest. As a result, I have inherited a few beautiful pieces of furniture and several sets of family china. 

This little table was one that belonged to my paternal grandparents and is the catalyst for my entry makeover that I will finally share next week.

Not really my style, but again, it combines two of my first loves....heirlooms and walnut! 

This little chair belonged to my maternal grandmother...so when my mom offered it to me I honestly could not get it in my truck fast enough! THREE of my first loves....heirlooms, mid century AND walnut! 

(Again, excuse the quality of the picture...this is from my phone!)

As much as I would love to keep it, Katie tagged it for her condo. Since neither of us were real keen on the finish or the fabric, I immediately put her to work stripping and oiling the frame using this process and finding a new fabric for the cushions. 

After looking online at similar mid century chairs, she decided to go with a "leather look" white vinyl. Beautiful, but the fabric has one serious drawback.

It wouldn't go through my old sewing machine! (When I say old, I'm pretty sure I bought it before my oldest son was born...28 years ago!)

I have used vinyl and naugahyde before, but always for recovering chair seats...like these mid century dining chairs! I had never actually used it for a sewing project. I discovered that the vinyl-like material was NOT going to glide through a sewing machine, which posed a real problem when one needs to make new covers for a cushion, including all the piping! 

My uber smart, engineering minded daughter came up with a perfect (all-be-it tedious) solution. Wax paper!!!! I encased the strips of material I was using to make the piping in strips of parchment paper (that's what I had on hand and it worked just as well!), and it went through the machine like butter!! 

Since the vinyl had a fabric backing, it was not an issue to sew the cushions together since I was sewing the fabric front to front...so the back of the fabric was what was feeding through the machine. The only real problem was when I was making the piping because I was having to sew on the top of the fabric....that is where the parchment paper came in handy!

I covered the old foam with new batting just to give the cushions a little extra loft! Eventually Katie wants to add two little "button tufts" to the back cushion! 

After all the tedious machine work, the cushions turned out beautiful!

Katie has stripped and oiled her new coffee table, I built a little entertainment cabinet and coffee bar and we still have another little tufted barrel chair that needs to be reupholstered. Move in day is this weekend so we may not have everything done but we are getting there! I have been buying kitchen ware at auctions and thrift stores and their kitchen should be well stocked! Exciting time for my baby girl! 

And when we get done with all our little projects, they will have one groovy pad! (did I just show my age...lol!)

Until next week when I FINALLY share my entry makeover....

Reupholstering the new living room chair...

I have said it before and I'll say it again...if you ever complain about the cost of reupholstering a piece of furniture, give it a shot! 

Trust me, you will never complain again...and there is a good chance you will just buy new! 

I spent over $200 just for the fabric for this chair!

It's not really "my style" but I wanted to use it to replace the big hulking brown leather chair in the living room and this one was a "freebie"...for obvious reasons. It had to be big enough for Cleo because that is "her chair." 

Perfect fit.

And honestly, with a down cushion and deep seat, it is super comfy! Not that I would have sat in it before it was completely stripped and covered with new batting...but it LOOKED comfy!

There are THOUSANDS of tutorials on line for reupholstering just about any style of chair so I am not going to do a blow by blow tutorial on how I reupholstered this one. Your best bet is to find a tutorial for a chair similar to the one you are going to do. Besides, it took me a day to strip it and removed 2,453,692 staples, a day to sew the cushion cover and all the piping, and another day to upholster the main frame....my hands were in no shape to hold a camera!

My advice...buy a new chair! HOWEVER, if you insist on reupholstering a chair, find a good tutorial and settle in for some serious work!

I do love how this one turned out. I really want to infuse some "lighter-brighter" furniture so I went with the teal/cream print. I like the texture of the fabric and I think it will be very durable which is important since Cleo immediately reclaimed her spot! 

Naturally the new chair means I will have to buy a new rug, but since Katie wants to take the existing rug to her new condo this summer, I have a valid excuse to buy a new one! 

My next upholster project is this little MCM chair in my den....

Seriously, if I hadn't already purchased the fabric, I might have just said to heck with it and wait for the mauve and pale blue to come back in style. Or just buy a new one! But I adore this chair so when my hands regain their feeling, I'll move on to this project!

The weather has been pretty amazing so I have managed to finish up quite a few little projects, in spite of the fact I can barely grip a paintbrush, so I'll share a few in the coming weeks! 

Sewing table....

I have shared this project before but with sewing and upholstery projects lined up on the dining room floor, it deserves another feature!

After a few weeks of working non-stop at the apartments, I finally have a little time to tackle the growing mountain of projects in my garage. Yesterday was spent prepping, priming and painting.

There has been a real "chance" of rain predicted for today all week and Mother Nature did not disappoint. Rain. Lots of it. So today, with the rain preventing me from getting out and finishing up those projects, I decided it was time to tackle one of my LEAST favorite aspect of DIY projecting!

Sewing...my nemesis! But it is an (evil) necessity if you are a DIYer! Just too many little projects require, at the very least, a straight stitch. The simplest upholstery projects, decorative pillows and curtains require the service of a sewing machine!

As I mentioned in this post, it is important that I have a way to store and use my little portable (and very old) sewing machine! Nothing fancy...pretty much does just the basics...straight stitch, zig-zag, button holes (which I NEVER use!) 

This little portable table has been a life saver! 

This was a little rusty typewriter table I bought at an auction...you can see how I dealt with the rust here and brought it back to life with a little TLC. I use to set my machine on my dining table, risking scratches and damage to the table and limiting where I could work on my sewing projects!

The portability of this table make it super easy to store it in the laundry room cubby!

As I have mentioned before, if you don't know how to sew, learn the basics! Take a class at your local hobby store or have a friend teach you! It isn't difficult and again, definitely necessary!