Cherry tv cabinet makeover....
I've said it before...I am a bad blogger and mediocre photographer at best.
Bad because I often get in such a hurry to start a project I completely forget to take a "before" picture. Mediocre photographer because...well, my photos speak for themselves.
As is the case of this Queen Anne Cherry tv cabinet. Hello 1998!
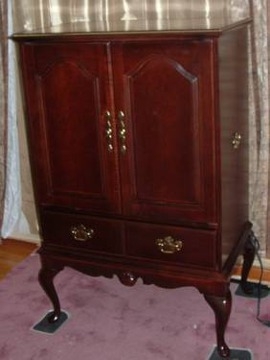
No, I did not take a "before" picture. So I did a little google search and found a cabinet that was SIMILAR to the one I acquired from my neighbor. Color and style are the same, but mine does not have a drawer.
We have all seen this furniture style...many of us still have it in our homes! I had similar bedroom furniture...not the Queen Anne style, but heavy and dark. I painted my bedroom furniture a few years ago and honestly I don't give it a second thought these days!! In other words, update the outdated and you may stop feeling the need to spend thousands on new!
There are several problems with this tv cabinet. First, who still uses these cabinets for housing tvs? Most of us have transitioned to flat screens...I finally pitched my last hold out a few years ago.
Second...it is dark and "heavy" looking. Not really the in thing right now.
But they are still good solid pieces that have use and purpose. Maybe not for their original intent, but who couldn't use more storage!
It is super simple to give these pieces a little update. I know most will not want this piece for a tv cabinet but everyone is looking for storage pieces for crafts, linens or even clothing. Honestly, it could be used in a kitchen for pantry space or a bathroom for towels and such!
Again, it just needs a little facelift.
I removed the back...super simple since they are usually just stapled on.
I added a new shelf then primed the inside of the cabinet with Kilz, sanded, tacked and spray painted it with white paint (KTSP!)
I used bead board to make a new back to add a little "interest." I used THIS process to "stain" it. Normally I would use an accent color but this time I used the same latex paint I mixed up as chalk paint for the exterior.
Making your own chalk paint is super simple...thoroughly mix 3 tablespoons of water and 5 tablespoons of Plaster of Paris and then add 2 cups of FLAT latex paint. You can use satin or eggshell paint but I have found that the flat tends to "chalk" better when you sand.
Sand and seal! Again I never use wax on chalk paint...usually polyurethane or polycrylic. If you want the added character that you get with dark wax, try applying a dark "glaze" before you seal. Personally, I think you get the same affect without having to use wax. I have even used stain as a "glaze"...this mirror being a good example.

Finally, I added simple knobs.
Sealing the piece with poly makes it super simple to repaint when the "distressed" craze ends...and trust me it will eventually!
Some of us remember when this dark "cherry" look was all the rage...
