Drexel Accolade Makeover...

An entire year…A YEAR!!!! That is how long this Drexel buffet has sat in my dining room in it’s original state because I couldn’t pick a stinking paint color. I may be able to paint and refinish and upholstery…but picking a paint color or fabric is TORTURE!!!!

I LOVE the white lacquer finish on this little side table….

….and I love how the bright brass hardware just POPS on the white lacquer but I really wanted to do something different.

But I could NOT make up my mind. I did a lot of research and most of the painted Accolade pieces are white or black…and honestly I did not want to do black.

Hum….

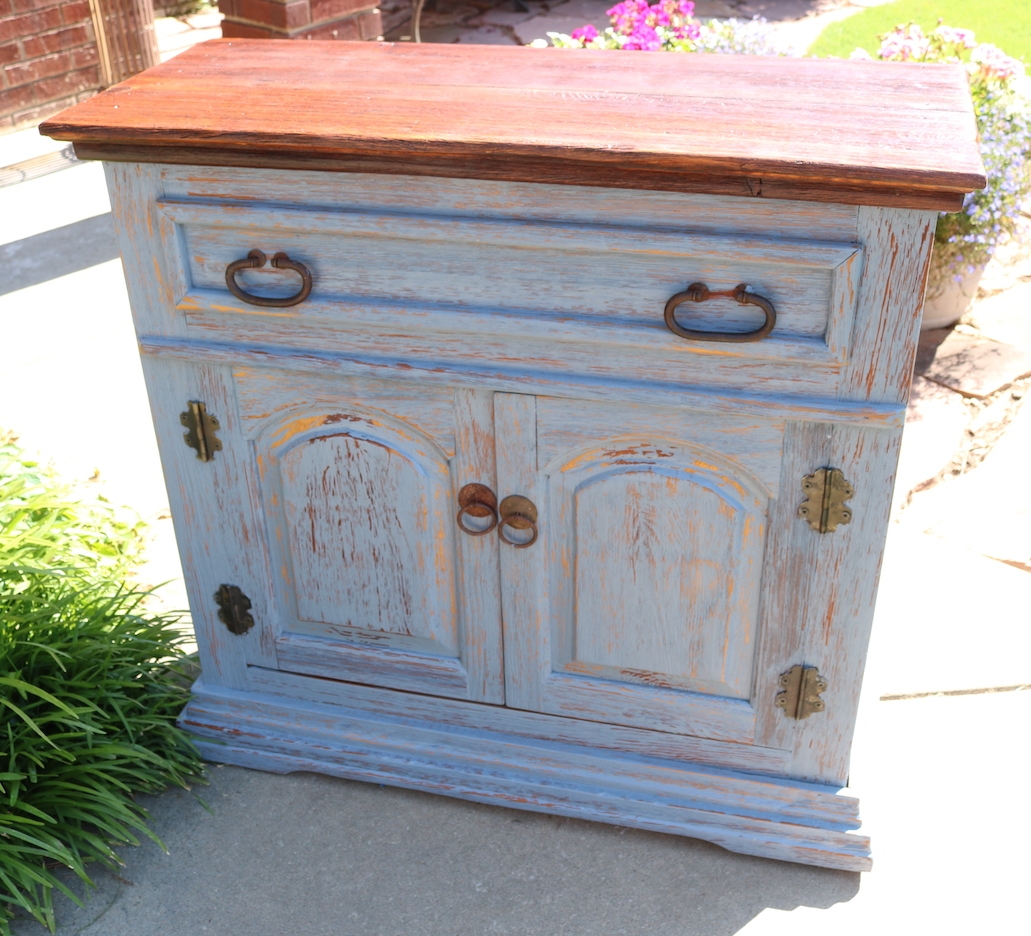
I found a paint color I am madly in love with!!!! It is actually a Krylon “chalky paint” and I have used it on several pieces and I just LOVE the color…Krylon’s Anvil Gray. While it has “gray” in the name it really is a true deep, rich navy. And it sprays on beautifully!

There was one problem with this paint for this project…it is super flat…like most “chalk” paints. I desperately wanted a “high gloss” finish so I tested a few clear coats over the paint to see if I could find a good gloss. I tried a new product (at least to me), Krylon Triple-thick Crystal Clear Glaze. It SAYS it is a “glass-like coating” and “superior high-gloss finish” and it is as good as advertised.

The finish is super high gloss and exceptionally durable…I am VERY pleased.

So…

I changed up the art in the dining room over a year ago and I still love it. I still love the red fabric I used on the chairs. I love the draw leaf table. If you search “buffet” or “dining room table” on this site you will see few last long around here….but truthfully, I think I am finally loving the “look” of my dining room…so these pieces may actually make it a tad longer.

Again, no secret to cleaning brass….lots of brass cleaner, SOS pads, and elbow grease…but worth every bit of the work!

I have already stocked it with my holiday and seasonal dishes. Pretty with a purpose…my favorite. But as I said, buffets don’t last long around here so we’ll see how it fairs.

I think I have mentioned before that I DO NOT have a green thumb when it comes to indoor plants….so some of you may be shocked by the massive peace lily.

A little side story…we went to an auction…they were selling the plants (yes, they sell EVERYTHING!) Nobody would bid on this big ole’ monster so then they threw in a monster pothos plant…I’m talking HUGE!!!! My youngest daughter has been sprouting “cuttings” for her apartment so I knew she would love the pothos…so I ended up buying them both for ONE DOLLAR!!! No kidding….a dollar for two huge plants. She didn’t want the peace lily so I stuck it in my dining room and other than dump my leftover night time water in it every morning, I pretty much ignore it.

And you know what…it THRIVES. It is growing, it is healthy and it is constantly blooming. Go figure!

Now I want to share a little issue I am having with my beloved Kilz…I had this issue sometime back when I was using white lacquer…so honestly I attributed it to the paint since lacquer tends to be a “hot” finish.

But I had the same issue this time, and I was using plain ole’ spray paint.

I call it “alligatoring.”

I cleaned the pieces, sprayed on the Kilz, sanded smooth, then wiped it down with tack cloth. When I sprayed on the paint, it “alligatored.” Curses!!!

I thought MAYBE the tack cloth left a weird residue, so I sanded the spots smooth after they dried well, reapplied Kilz, sanded and then just wiped it down well with a rag…another coat of paint…same problem, just in different areas. The entire piece alligatored randomly. WTF!!! Temperature…nope…humidity…maybe. But I had the same problem when I painted on a drier day. So who the heck knows. Like I said, I had this problem sometime back on another project.

The Kilz is what is actually crackling…not just the paint. I contacted Kilz and they swear they didn’t mess with the formula and were as stumped as I was.

My solution….well I had to sand the entire piece down, paying close attention to the areas that “alligatored.” After everything was smooth and clean again, I used Bullseye 1-2-3 Primer, let it dry well, sanded, and tacked. Sprayed on the paint and presto-bingo…perfect.

Kilz was kind enough to send me a replacement can of primer. Yippee…somehow I guess that is suppose to make up for two days of grief and cursing.

So now my “KSTP” process will become “BSTP” …eck…not really a good acronym…but I hesitate to use Kilz if it really is the only common denominator in this little disaster. Since no other factors seemed to affect the out come, I can only assume it is the culprit.

Who knows…but from now on I can’t say that Kilz is the be-all end-all of primers when painting furniture.

Sorry guys!

Sparking "joy" and my thoughts on purging....

Marie Kondo,…founder of the KonMari method ….an “organizational guru” who is all the rage now thanks to her Netflix show.

Her book, “The Life Changing Magic of Tidying Up” is worth the read…if nothing else it may inspire you to get off your butt and get organized!

I follow her methods to some extent…but I kinda get hung up on the “verbage.”

Tidying up is what I do before I go to bed at night…pick this up, put that away, wipe the counter down, blow the cookie crumbs off the table. ( I shared here how I keep my house “clean” and I love this blog article on “tidy people.”)

What she refers to as “tidying up” is what I call an all out “purge assault.” It is when I empty out the entire drawer, closet or dresser and toss stuff i have to think about for more than 3 seconds…none of this “does it spark joy” thing. If I have to think about it’s usefulness or importance for more than 3 seconds it’s a goner!

Joy…I actually “googled” the definition of joy…

Dictionary result for joy

/joi/

noun

  1. 1.

    a feeling of great pleasure and happiness.

    "tears of joy"

    synonyms:delight, great pleasure, joyfulness, jubilation, triumph, exultation, rejoicing, happiness, gladness, glee, exhilaration, ebullience, exuberance, elation, euphoria, bliss, ecstasy, transports of delight, rapture, radiance;

I guess you could say there are some innate objects that can “spark joy.” But truth be told, I am going to save that “sparking joy” feeling, in the true sense of the word, for more important things…like important people in my life…because they are what bring me “great pleasure” and true happiness.

A casserole dish…not so much! I can honestly say there is not one word in the definition of joy that describes my feelings towards a casserole dish…or a highlighter pen…or even a comfy pair of shoes.

Do I NEED a casserole dish…yes…does it “spark joy” when I hold it? Probably not.

When I cleaned out my kitchen cabinets

…I found FIVE identical casserole dishes, two of which were missing lids…the question for me was not “do they spark joy” but rather WTFrick! Do I really NEED five identical casserole dishes, two of which don’t even have lids. If I have to think about that for more than 3 seconds, the answer is no…so then I start working my way down. Four? Three? Two…yes in less than 3 seconds, so three of them got tossed (tossed meaning donated in this case!)

If you think three seconds is too short of time to make such a profound decision, ask your husband if he loves you. What would your reaction be if he hesitated for three seconds?

I truly believe if innate objects spark “joy”…if they give you feelings of “delight, great pleasure, joyfulness, jubilation, triumph, exultation, rejoicing, happiness, gladness, glee, exhilaration, ebullience, exuberance, elation, euphoria, bliss, ecstasy, transports of delight, rapture, radiance”… you may need to reevaluate what is important in your life.

People…your spouse, your children, your parents, you siblings, your dear friends…this is what should “spark joy.” And I kinda have to throw my pets in there too…as frustrating as they can be at times, they do bring me “joy".”

Yes, I believe our homes should spark feelings of happiness…peace…serenity…and even joy. But I BELIEVE it should be the “whole of the sum”…not individual little “things” that spark those feelings.

Look at (or even imagine) the perfect vignette in your home…maybe a reading nook…a perfect, comfy chair with a perfect little table decorated with beautiful little knick-knacks, perfect little throw and pillow, plush little rug, a reading lamp with the perfect bulb for reading…the walls around it are decorated with beautiful botanical prints…this space does indeed “spark joy.” But is it the WHOLE space…or is it each little individual element?

If my house was on fire, would I save members of my family and pets or my “stuff?”

So how do I stay organized?

I use the “pile method.” When I was a teenager my mom went in my room and emptied EVERYTHING into a big pile in the middle of the floor…then told me I wasn’t doing anything until the pile was sorted. Ugh!!!

But you know what, I find the “pile method” works wonders…I empty the entire master closet (or kitchen drawer or makeup drawer or dresser) into a huge pile in the middle of the floor…EVERYTHING!!

First, I use this opportunity to really deep clean the empty space.

Then I start working my way through the pile.

And remember, if I have to think about something for more than 3 seconds, it gets tossed!

Trash…sometimes the “stuff” is just plain ole’ trash. I watch those “Hoarder” shows and my first thought is IT’S JUST TRASH. Now, if you have some weird attachment to what is obviously “trash” I am going to strongly suggest you get some professional help.

How do I define “trash?” Anything a NORMAL person would not want. I have a lot of paint clothes….when it is time to get rid of it, I ask myself “Would a normal person want a landscape company t-shirt covered in paint?”

Trash.

When I am purging, I always keep a “hesitation bag.” You know, that stuff you just aren’t sure you want to get rid of…the jeans you hope to someday wear again, the sweatshirt your son brought you from his vacation 5 years ago, those dishes your mom gave you for Christmas that have a fancy gold rim so you can’t put them in the microwave or the dishwasher.

Dang…do I REALLY want to get rid of those things? So I put them in my hesitation bag/box and set it in the garage. In about 2-3 weeks, I pick it up, put it in the car and drop it off at the donation center….every time! (Don’t forget to get a receipt!)

And you know what…not one time have I regretted it.

There are also those items that really don’t need to be in the space you THINK they should occupy. I have small kitchen appliances I rarely use…like the three pot slow cooker I use Thanksgiving and Christmas, the blender I use 2-3 times a year to make salsa, the large coffee pot I use 1-2 times a year when I have company. Those are all stored in the hall closet. I have a large pantry in my master closet where I store my office supplies as well as my personal care stockpile…shampoo, conditioner, deodorant, lotion, soap, etc. Things you rarely use do not have to be stored in spaces that may be needed for daily use items, even though that is where you think it is SUPPOSE to go. Don’t be afraid to think outside the box when you are tight on storage space!

My goal is to “purge” at least 1/2 of what is in the pile…whether it be trash, store elsewhere, donate or hesitation. I don’t always hit that goal, but I can usually make a pretty big dent. Everything put back into the space is folded neatly and clean…if I don’t want to clean it or fold it, I probably don’t care too much for it anyway…so it gets donated or trashed!

Also, I am not big on cute baskets, boxes and bins. As I have mentioned before, I like to see what I have…

(Again, you can see here how I “thought outside the box” and moved my pots and pans into the pantry.)

If things are in a box or basket, I probably don’t know what I have. If I have things that need to be organized in a box or bin (like ribbon or cords) I put them in clear storage tubs so I can see what is in there!

The older I get the less tolerant I am of “stuff.” I see all those cute organizational tools like baskets, bins and boxes and I think, “do you REALLY need all that “stuff?” How many serving spoons do you REALLY need, how many coffee cups do you REALLY need, how many RCA cables do you REALLY need!

I just don’t think “stuff” should “spark joy” in the real sense of the word.

Like everything else, I say DO WHAT WORKS FOR YOU! Read the book and try this method of “tidying up.” It is a simple little read and like me, you may find motivation to “tidy up.” If the process works for you, GREAT!

If this methods gets your life and home in order, I am all for it. Because in the end, a home that is your haven, the place that brings you peace and serenity, THAT is something that sparks joy!

Old typewriter cart upcycled....

I am in "dresser" mode these days...lots of dressers and chest of drawers being "refinished" but after 5 years, I still can't remember to take good "before and after" pictures! So while I have refinished 4-5 dressers in the last few weeks, I have no good pictures to show for it! CURSES!

My garage is packed with dressers and chests I am working on now so MAYBE I will remember to take pictures when they are done so I can share!

One little project I DID remember to take pictures of is this old metal typewriter table....

I shared here the first little table I refinished. I have found they are perfect for my portable sewing machine. I commented on the first makeover that I wish I had one with a little drawer...low and behold I found one!

It wasn't in bad shape...just a really bad paint job. So I primed it with metal primer, sanded smooth, wiped it with tack cloth and painted it with a few coats of black lacquer....

This little table makes it super simple to store away my sewing machine until I need it...

...then I can just roll it out and set it up anywhere in the house! Just roll it out and put it anywhere...no more scratching my dining room table.

If you find one of these little metal tables that has a bit of a "rust issue" I shared here how to deal with that

I think these old metal tables can be used for many things...a portable sewing table, coffee bar, maybe even a little portable "prep" table for the laundry room, garage or kitchen. Roll it out then tuck it away when you no longer need it!

Simple!

A new bar top and Wayfair light fixture...

As I mentioned here, change is tough for me...which is why these things haven't changed much in 19 years.

I painted the dining room light years ago (antique bronze to black)...as much as I really didn't love the actual fixture, I loved what I could do with it during the holidays....

One year I removed the little shades and I liked that a bit better, but I still wasn't digging the light fixture itself.

Just too ornate and "heavy."

But I could never find one that would allow me to decorate it for the seasons...until I did!

(As you can see, I still have the Drexel buffet...love the piece...just not the color...waiting on "inspiration.")

The install was super simple...here I share how to install a new light fixture!

Not a huge fan of the Edison bulbs, but I think those can easily be changed out...eventually. For now I can live with them knowing that come fall (right around the corner...yea!) and Christmas, I can still decorate the fixture!

I think it is more of a "farmhouse" look but the nickel accents tie in with the more "modern style" brushed nickel bar lights. So it works for me....

Which brings me to the bar top....

...it wasn't totally offensive, but in my quest to go "light and bright" in my kitchen without painting all my kitchen cabinets, I impulsively ordered a white quartz top.

Truth is, I wasn't really loving it after it was installed. Just too "stark" and soooo white! 

I painted the little support corbels the same color as the trim...more "white." (They were originally black but since I didn't damage them when I removed the old top I just primed them and painted them with the trim paint...BM Swiss Coffee.)

This is what we refer to in the design world as "OMGosh what have I done" moments.

I decided what was really bugging me was the dingy old bar stool seats. They had certainly seen their better days. The bar stools are 18 years old and I still love the style dearly...heavy iron and super sturdy...but the "grey tweed" upholstery just didn't cut it any more!

Choosing fabrics is something I really struggle with...but I know I LOVE the fabric I used on this little chair makeover

Light and bright with just a touch of grey! So I ran out and bought enough fabric to recover the bar stool seats. About 1 1/2 yards for four seat cushions. If you don't know how to figure for fabric, take your measurements with you and they will help you figure it...just make sure you add 2" on each side! (Or better yet, just take a seat with you!)

Pay CLOSE attention to the direction of the fabric. This fabric doesn't APPEAR to have a "right or wrong" way, but it does. I put a pin in the top of each piece so I would know which way to lay the fabric on the seats!

Reupholstering chair seats is a super easy DIY project...probably one of the simplest DIY projects one can tackle! And this easy little project is an excellent way to make a pretty dramatic change in any room without breaking the bank or dragging out the sewing machine! There are thousands of great tutorials online...so again, do your research and find one that makes sense to you and use it!

In this case I had no desire to paint the stools...I like the black iron...but if you want to paint a dining chair or stool, do it after you have removed the seats but BEFORE reattach them. Again, super simple project! Use the KSTP method (kilz, sand, tack, paint...here is a pretty good paint tutorial.)

I removed the seat cushions! In this case, 4 little screws! I also scrubbed down the stools...pretty nasty after 18 years of use!

Then it was just a matter of wrapping the seats with the new fabric...I didn't even remove the old fabric or bother with applying a new underside....and reattaching them.

I guess that might be an issue if you are laying on the floor looking up at the underside.

Here I do share a few helpful tips on upholstering...pretty much applies to the simplest project!

While I had the camera out I played around with a few different "centerpieces" for the bar with knick-knacks I had on hand...

But honestly, with mischievous cats who insist on knocking everything off the bar, we are better off leaving it clutter free! Same with the dining table...too many broken vases and scattered flowers!

A few relatively minor decor changes that made a subtle but significant difference! 

Entry cabinet/console/buffet makeover...

Occasionally I will buy something at an auction for resale I THINK I won't need to do anything to! Example...this nifty "primitive" cabinet/console/buffet...

It could be used for many things...hence the cabinet-slash-console-slash-buffet.

It would make a darling entry table. Or a tv console. Or even a small dining buffet.

The wood is really rustic and rough...nifty iron hardware.

But alas, no one shared my vision and it sat in my space at 410 Vintage for MONTHS!

Last week I did a little reset...technical word in the world of retail for "move stuff around." Since this little cabinet/console/buffet had been hanging out for quite some time I decided to bring it home and give it a little facelift.

Darker gel stain on the top and a grey/blue chalk paint and distress on the base.

I think it is darling and HOPEFULLY someone else will agree! 

Another example of how easy it is to change things up a bit with just a little effort!

Another Drexel Accolade addition to the family....

It has actually been in the garage for months...but when I needed a large piece in my space at 410 Vintage Market and dug it out,I couldn't bring myself to turn loose.

A Drexel Accolade dry bar/server. The top actually flips open.

It isn't the first piece I bought for resale that wormed it's way into my heart...no secret that I love mid century pieces.

But this Drexel Accolade bar is more of the "Hollywood Regency" style. Identical to this little Drexel side table I painted with a high gloss lacquer and love in my den....

There is a good chance I will paint it if I decide to keep it...for now I have shined up the brass hardware and will leave it at that.

Over the years I have snagged some amazing bargains at auctions and on Craigslist...a little DIY magic and they are stunning additions to any home!

This Drexel coffee table....

My growing collection of mid century dressers...

This one is Matt's...I just don't have any more room!

My never ending collection of side tables!

I started collecting Lane Acclaim tables years ago...I think between the kids and I we are up to 10! That doesn't include the 2 walnut Lane coffee tables and the end table I just refinished for Katie and Matt!

Chairs...

Odd little bookcases are always fun!

If you walked through my home you might think I lean more towards the "traditional" side of home decor at a glance...but all these pieces have blended in to created a cohesive "eclectic" style. This "style" of home decor allows me to infuse pieces I love without worrying too much about whether I am breaking a "decorating rule" for a specific style!

So...back to the amazing Drexel Accolade console/bar...

In my opinion, there is too much "wood tone" in this space...I absolutely love the wood grain on this piece but there has to be a good balance...it just doesn't feel "balanced."

So there is a good chance that IF it stays, it will get painted. Again, that is a big "if." I think I have had no less than 5 different buffets and hutches in this space at one time or another and I always end up moving them out and moving the table back against the wall...as I mentioned before my toes tend to find anything out of place, and since the dining table has been against the wall for the better part of 19 years, it may not work well in the middle of the dining room where it REALLY belongs!

We'll see...that is one of the beauties of learning to DIY furniture...you can buy it cheap, paint, upholstery or refinish it and promptly move it out if it doesn't suit your needs. Without the guilt of having to live with something you hate because you paid a fortune for!!!!

OR it can find a permanent home where it can shine for another lifetime!

Gel stain tutorial on table makeovers...

I did it again...dove head straight into a project without taking a "before" picture. But at least this time I got an "inbetween" picture!

These little tables were simple makeovers. I picked up the side table at an auction a few weeks ago. Got it for a few dollars because, well, it was nasty, the color is pretty putrid AND the top had come unglued.

No biggy for me. I glued and clamped the top, then I sanded off the old finish on it. Yes, you heard me right, I sanded it. Two reason...first, I got glue on the top when I repaired it and stain will not adhere to glue. Second, it is solid wood and I knew I couldn't do a lot of damage to it. Light sanding...220 grit! Just enough to remove the old finish and glue residue.

I got the drop leaf table from my neighbors. I told you I am the dumping ground for neighborhood furniture...it just "appears." Again, the top is solid so I gave it a light sanding.

I knew I wanted to paint both tables but as always I have to have my fix of stained wood. So I used gel stain on both tops. 

Gel stain is SUPER easy to apply IF you use the right technique and product. As I have said before the ONLY gel stain I will use is General Finishes. It is not a brand the big box improvement stores carry so I usually order mine on Amazon. I have tried other gel stains and have not been happy with the results. The General Finishes brand never disappoints. I have used both the Java and Brown Mahogany colors.

I am going to share how I gel stain...it is a super easy application process and perfect for real wood or even that cheapo fake stuff you find on the ends of cabinets. Since it goes on fairly translucent, the wood grain (real or fake) will show through.

I have used this process on cabinets, tables, dresser tops and drawer fronts....some I have stripped down to bare wood, others I simply applied it over the existing finish.  It is a great process to use on any project where you want "stain" but know you might not get a good result by completely stripping the piece and applying penetrating stain!

First step for ANY makeover (after repairs of course)...give the piece a good cleaning. In this case, since both tops were solid wood, I also gave them a good sanding. Sanding is NOT necessary but you want to make sure that any old finish is stable and somewhat smooth. So if your old finish is flaking or a bit rough, sand it smooth with 220 grit paper.

You will need....

The gel stain...again, I ONLY use General Finishes. A quart will cost you around $30+ but it seriously goes a loooong way!!! If you just have a small project, get a pint. I have found that it doesn't store well.

The gel stain top coat...in this case I used the GF Poly wipe-on top coat. But I have used a spray on Polyurethane and Polycrylic and they work just as well. 

Disposable rubber gloves. I always have those on hand. Just the cheap latex gloves you buy in a box so you can toss when finished.

Old athletic socks. Again, I keep a stash on hand. Any time I find old socks at thrift stores or garage sales I buy them. They are perfect for applying any type of stain or finish and I can toss them when I am finished.

That's it...a relatively short list of supplies!

The trick to applying gel stain is to remember it is suppose to be somewhat "translucent." Put on a rubber glove, then an old sock over the glove...dip you finger tips into the gel stain and wipe the gel stain on the piece with the grain. The first coat will look like crud so don't try to get perfect solid coverage! Just wipe it on LIGHTLY WITH THE GRAIN....do not "glob" it or apply it thick...it is NOT paint. I usually wipe it on, then use the clean side of the sock to give it one final wipe WITH THE GRAIN...working edge to edge. 

THE FIRST COAT WILL LOOK LIKE CRUD!!!! I can not stress this enough...you are better to go light than to try to make the first coat look decent. It is not going to! If you can't see the grain through the coat of stain, it is WAY to thick.

Now, let that dry over night. Then do it again. New glove, new sock. Wipe on a second LIGHT COAT! The second coat will look a tad better, but not great. THAT IS OKAY. Keep it light and translucent! 

Let the second coat dry over night. Then with a new glove and sock, apply the third coat. NOW it should look good. The stain should allow the grain to show through!

If you feel like you have messed up....too thick, too streaky, just don't like it...you can still wash this stain off with mineral spirits if you haven't applied a top coat! 

Let the third coat dry overnight. If you are happy with the look, apply your top coat. Again, I used the GF gel wipe on poly on these tables...super easy to apply. Rubber glove, sock, wipe on. As simple as it sounds. You may want to apply 2-3 coats of the finish...especially on tops or cabinets that get a lot of use...just make sure you wipe it down with 0000 steel wool and tack cloth between coats. You will get a nice smooth finish that way!

Presto, bingo! This really is an easy application IF you don't overthink it and try to get a decent looking finish on the first and second coat...if you do, you will put the gel stain on too thick and I promise you won't be happy with it! My neighbor, Tammy, tried this process on a little side table...and sure enough she put the stain on too thick...it did not turn out well! Each coat should be light and "translucent." 

After I let the top coat dry well for a few days, I painted the rest with chalk paint...a light distressing with 220 grit sand paper and sealed with a spray on polyurethane. Again, sometimes I use polyurethane, sometimes polycrylic. I find that the urethane tends to "yellow" and give the piece a bit of an aged look...which is kind of what I was going for here. The polycrylic is a true clear coat and won't alter the color of the paint or yellow with time.

(As you can see the sun was very bright the day I tried to get decent pictures of these two tables...trust me that was the ONLY day this past week that it wasn't dreary, raining or cold as crud. I even had to cover my hostas this week to protect them from a freeze...and they are predicting another freeze this weekend...grrr!)

My recipe for chalk paint is 5 tablespoons of Plaster of Paris, 3 tablespoons of water, mix well then add two cups of flat latex paint. I usually paint two thin coats, then sand and seal.

Cute as a bugs ear and ready for another generation of use!

This week I decided I am getting too old and tired to paint my own house. I actually hired someone to paint my living room, kitchen and den! Ten years ago I would never have paid someone to do something like that! 

But just the process of getting ready to paint creates a mess and is exhausting!

This, my friends, is the reality of home improvement...normally we bloggers only share the beautifully styled and perfect "after." Truth is, most projects make a mess!

I'm a pretty clean person...or so I thought until I moved things that haven't been moved in years...yuck! 

I'm painting my living areas the same color I used in the master bedroom and guest room....SW Nuance. I'm a little nervous about painting these rooms a different color...I told you, change is hard for me. But I have lived with this color in those two rooms and I THINK I will like it! The painter will be here around 10 so there is no turning back now!

Hopefully the weather will take a turn for the better and I can finish and share a few fun projects I have waiting in the wings next week!

Until then....

Eastlake chair makeover!

Years ago, the "wood purist" in me would never have painted an antique anything!

But slowly I have evolved and my snobbishness has taken a back seat to reality...some "antique" pieces have little use in today's world of decor trends. The rich color and grain of walnut, the depth and beauty of rosewood, the vibrate color and delicate grain of mahogany...zip, zilch, nada.

The day will come when those who followed the decor trends of today will glare at their painted furniture and shiplap walls and growl...it happens. NOTHING is timeless. Honey oak cabinets were timeless...8x8 tile floors were timeless...white appliances were timeless. 

The fact is decor trends come and go and we realize that which we thought was timeless, really isn't.

(There are still some who cherish antique pieces...and of course, as always, do a lot of research and make sure the piece you want to paint is not a valuable antique "as is!")

I have no doubt that this piece I slathered in chalk paint and covered in buffalo check fabric will catch the eye of someone looking for a great side chair...but it will someday be stripped down and refinished...exposing the amazing walnut grain and delicate incised carvings. Someday...but not today.

That was my original plan. Strip the old finish to expose the beautiful walnut grain and intricate carvings, reconstruct, seal with oil and reupholster in a fabric worthy of an antique walnut Eastlake piece.

Knowing all that hard work would garner little favor with my "target market," this chair sat in my garage for YEARS. Seriously, I'm not sure when I bought it but I can't remember a time when it wasn't lurking in the back of my garage.

(If you are a "purist" or antique lover, turn away NOW!)

Some would look at this and think EEEWWWWW!

Yes, it was pretty "eeewwwy." And yes, this is pretty much the shape it was in when I bought it. I think I remember removing the original rotted fabric and a few thousand upholstery nails and I did start stripping it using this process. But I eventually shoved it into a corner of the garage where it languished until I got over my snobbiness. 

I constructed a new seat out of plywood...not even close to the original but then again furniture no longer sits in the parlor only to be used by tea sipping adults. 

The richness and beauty of oiled walnut has fallen out of favor for the "farmhouse" chalk paint and distressed everything!

New foam padding and batting...the old horse hair of yesteryear just doesn't cut it these days. (Thank God...that stuff is nasty!)

The crushed velvet or needlepoint fabric that would have originally ordained this piece was a no-go. I went with the trendy buffalo check that I suspect will be as popular as chevron was a few short years ago!

A bazillion metal upholstery nails...no way Jose! Hot glued gimp is the way to go!

Don't get me wrong, I think it is as cute as a bug's ear! I have no doubt someone will LOVE it! It would be a precious side chair or even a dining chair paired with a farmhouse table that are all the rage!

And as always, it is Litty and Mr. Jinx approved....

As much as I would like to think of myself as a "purist" I can certainly appreciate the desire to fill our homes with pieces we love or suit our desire for "going with the flow" without breaking the bank! 

C'est la vie.

The breakfast nook table and chairs makeover

When Matt decided to buy his first home (details here), I knew my love for "making old new again" would come in handy!

I love the dresser and chest I found and refinished!

He was able to use the farmhouse trestle table I featured here

And of course this "cute as a bug's ear" vintage chair makeover!

But he didn't have a table that would fit in his breakfast nook...a relatively small space in his kitchen.

I knew it needed to be a round table since the space is only about 9x9.

I found this round oak table at a flea market...a tad dated in it's original condition but I knew exactly what I wanted to do with it.

Normally these oak tables are around 48" in diameter but this one was only 32" so it is the perfect size...just not the perfect finish.

I honestly didn't want to strip and restain the top so I decided to go with gel stain...again, I ONLY use the General Finishes brand. It really is the best!

Rather than go with my usual Java color, I decided to go with the Brown Mahogany.

As I have said in other tutorials, the first coat is a bit stressful....

...you really question whether this stuff is going to work. 

Patience...wipe on a coat with an old athletic sock...let it dry overnight...then wipe on a second coat, then a third....

I promise, by the third coat you will see the results you want. Then just seal it with the General Finishes wipe on top coat. 

Sunlight streaming through the windows is awesome in the morning...not so much for photographing furniture...but hopefully you get the idea....

After staining the top, I chalk painted and distressed the table base. I picked up a couple of oak chairs at an auction and chalked painted and distressed them as well...then recovered the seats with some leftover fabric from my club chair makeover!

Perfect fit for this small space.

One tip...this little table came with a leaf...while this space really isn't big enough to expand the table, it is always smart to refinish table inserts just in case want to use them in the future! 

Also, just a reminder that I do not seal my chalk paint with wax...I use polyacrylic. Someday this whole "distress" thing will go out of style and he will want to paint this furniture...wax would have to be stripped before he could repaint the piece!

Next week I hope to share Matt's first big project...painting the brick fireplace. If you are debating whether to tackle yours, you really want to see what a little bit of paint can do...impressive!

So tune in for the big reveal.

The miracle chairs...

Even after years of proving I can turn just about any "trash" into a little "treasure," I think Brian still raises an eyebrow from time to time.

Such was the case with these chairs....

We went to a farm auction and these chairs had been tossed into an old barn, only to see the light of day when the auctioneer dug them out and sold them...to me!

What would possess me? They were literally caked with nastiness and two were in pieces. But I saw the potential (and of course the old mud dauber nests and spiders and bugs!). 

Rarely will I take a hose to a piece of wood furniture...but I had no choice. Even then I had to scrub them with a strong detergent and steel wool.

Then I pulled nails, scraped old glue, cut out broken spindles and removed splintered veneer.

Then I had to clamp and glue everything back together. One chair was missing a side apron so I cut a new one and secured it in place with glue and my Kreg jig! 

My original plan was to prime and paint them. They still had a few rough spots and I knew I wouldn't get a pristine finish I would be happy with so I decided to do a chalk paint and distress finish on them! Always a good choice for a piece that has a few "boo-boos!" 

I think the boo-boos and the distressed finish give the chairs "aged character." After recovering the seats on the two Duncan Phyfe style chairs and making a new seat for the other, I think they turned out pretty sweet.

My plan is to stage them with this trestle table I will be taking into 410 Vintage this week, just in time for the holidays! 

Just in time for Brian and me to take our annual trek to Colorado! I can't wait...two days of fly fishing, several days of sight-seeing and maybe even a day of gambling in Central City! The forecast shows the temps in the 50s and 60s so I will be packing my coat and Uggs! One thing is for sure, I always come home recharged and ready to enjoy my favorite season

I made a few changes to my fall decorating this year...one being these little pumpkins...

I added a few silk sunflowers, a fall garland, fall picks and deer antlers (yes, my kids killed them....ick!).

Not sure I am loving this little vignette but I have a few more months to make changes and additions!