The den window reveal!

From day one…three years. That is how long I have wanted to put a window in this room!

It was a cave. There are windows and a door on one wall but they are covered by the enclosed sunroom so the natural light is seriously defused. (HERE I swore I was through with major projecting on the house…HA!)

I crave natural light. This house has TONS of windows, but the majority are adjacent to a sunporch, screened porch and covered front porch. All which I am grateful for…I just wanted a hair more light in the den.

My original thought was to put a window on both sides of the fireplace. Unfortunately, the guest room closet extends out behind the bookcase to the left of the fireplace…so that is a no-go. That’s okay…I need the built in bookcase. (HERE you can check out how I refaced the fireplace!)

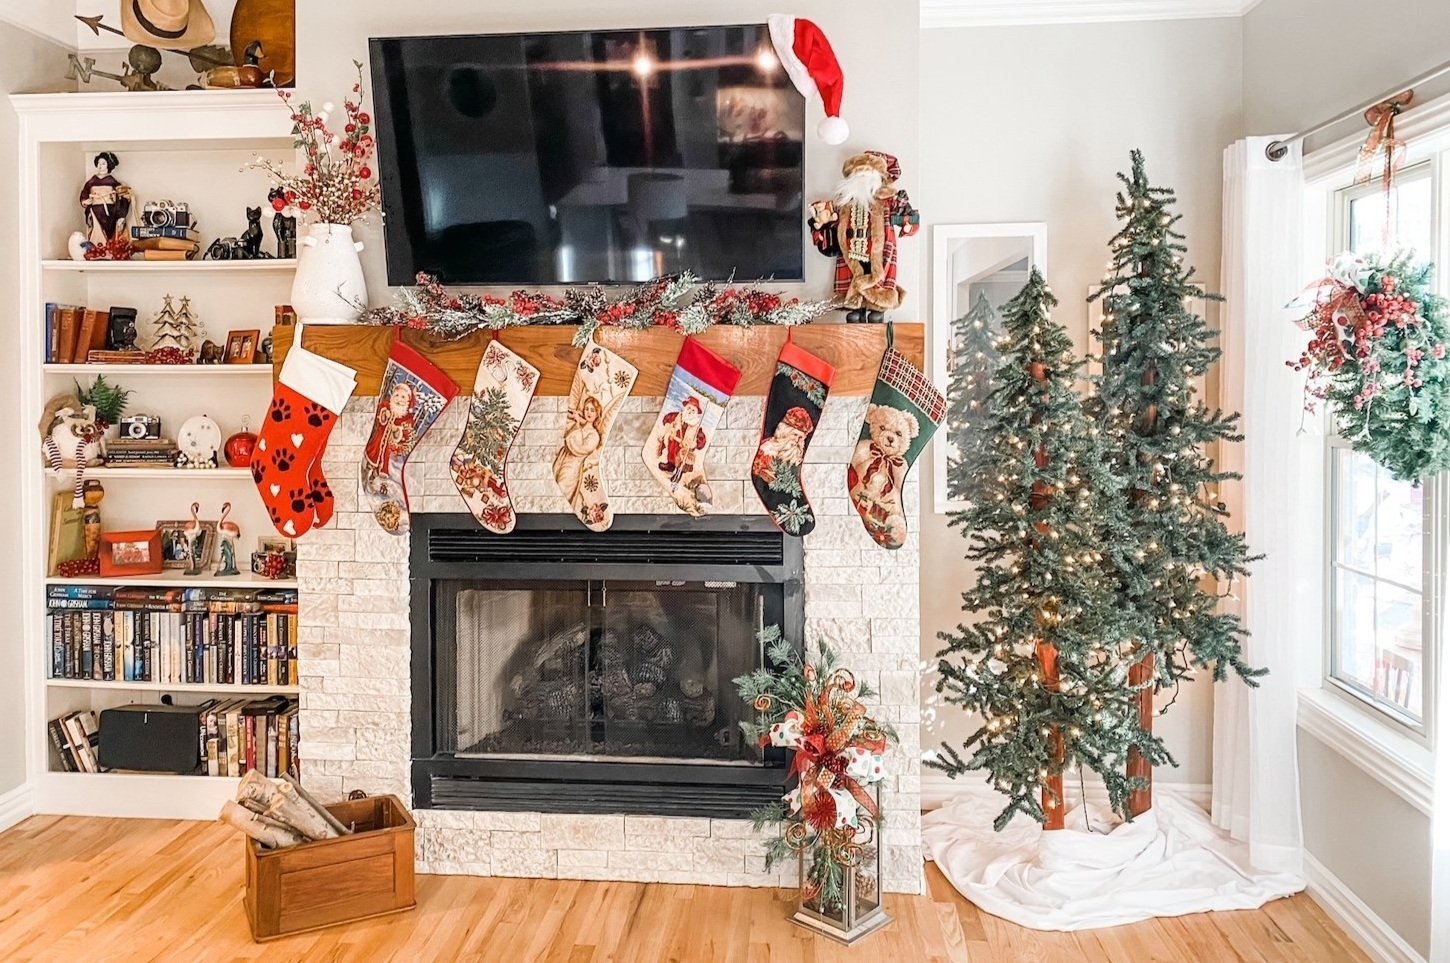
(Obviously I did not take “before pics” and the only picture I have of this space is from Christmas!)

A window on the right of the fireplace is doable….for someone like me with a bit of experience. Personally, I don’t think this is a “novice DIYer” project. If you are hell-bent, watch TONS of tutorials first and be prepared with a stand-by sheetrocker, framer, electrician, trim carpenter and brick/siding expert just in case you find yourself in over your head.

Even then, if you don’t have a basic understanding of how a home is constructed, I wouldn’t even attempt it. (HERE I posted a little bit about framing for a door or window)

Also, I highly suggest you check your local codes. You may need to pull a permit to modify framing.

As you can see from the post when I modified the laundry room opening I knew I was going to have to put in a header and maybe a few extra studs. Since I was only installing a 32” window, I figured I could just get by with a 2x4 or 2x6 (at the most) header.

Nope. When I opened the wall I found a support that was FOUR 2x4 sandwiched together…have no idea what that was all about. I went into the attic to see if maybe they loaded the roof rafters or something onto that area…not as far as I could tell. But what is there is there and I wasn’t about to assume it was just over kill.

Which meant I needed to put in a 12” header which meant I had to move the exterior light to make room for a bigger header, cut out way more sheetrock than I anticipated and add more stud supports.

CURSES!

All that being said, again it is doable. So if like me, you just HAVE to have a window (or even a door), go for it!!!

And go for it I did.

Again, I am not really a tutorial kinda person…there are tons out there, why reinvent the wheel. And honestly, every project will be different depending on what is behind the sheetrock.

Case in point.

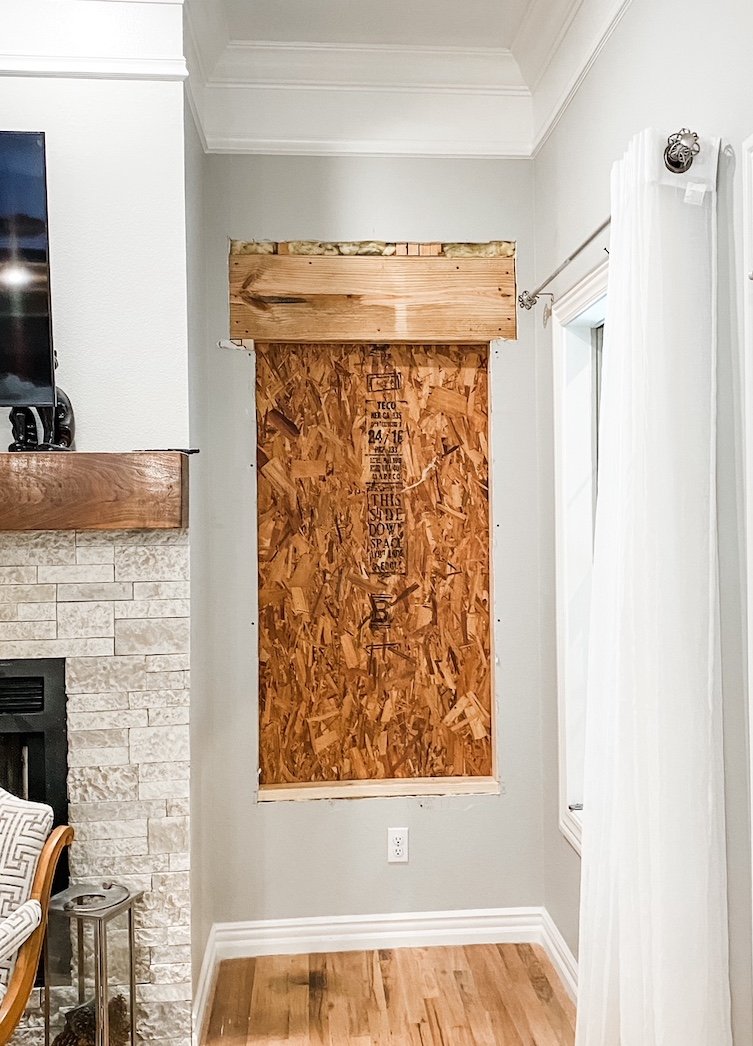
After all this “rough in” framing was done, I drilled through the corners of the opening (using a wood bit to drill through the plywood and a masonry bit to drill through the brick) and marked where the actual opening would be.

My brick guy then came and cut out the existing brick 3” from the mark where the actual window opening would be….

You can see in this picture where I had to move the existing exterior light!

While I was waiting on the brick guy I was able to get the sheetrock repair done…HERE I shared a little tip about sanding sheetrock in the house!

When the window finally came in, I cut out the plywood…MAN OH MAN!!!!

If it weren’t 100 degrees out I would have just left a big ole’ hole in the wall.

There are TONS of tutorials on how to properly install a window…read them and follow them to a T. Find one that makes sense to you!

After the window was installed, trim and paint! The brick guy came back and installed a window “casing” with new brick around the window ….

This house is 23 years old so I can’t find the exact brick to match but I found one that was pretty close! (HERE I shared how I used this “good enough” brick on my shop!) This is why he cut the brick 3” around the actual rough in opening.

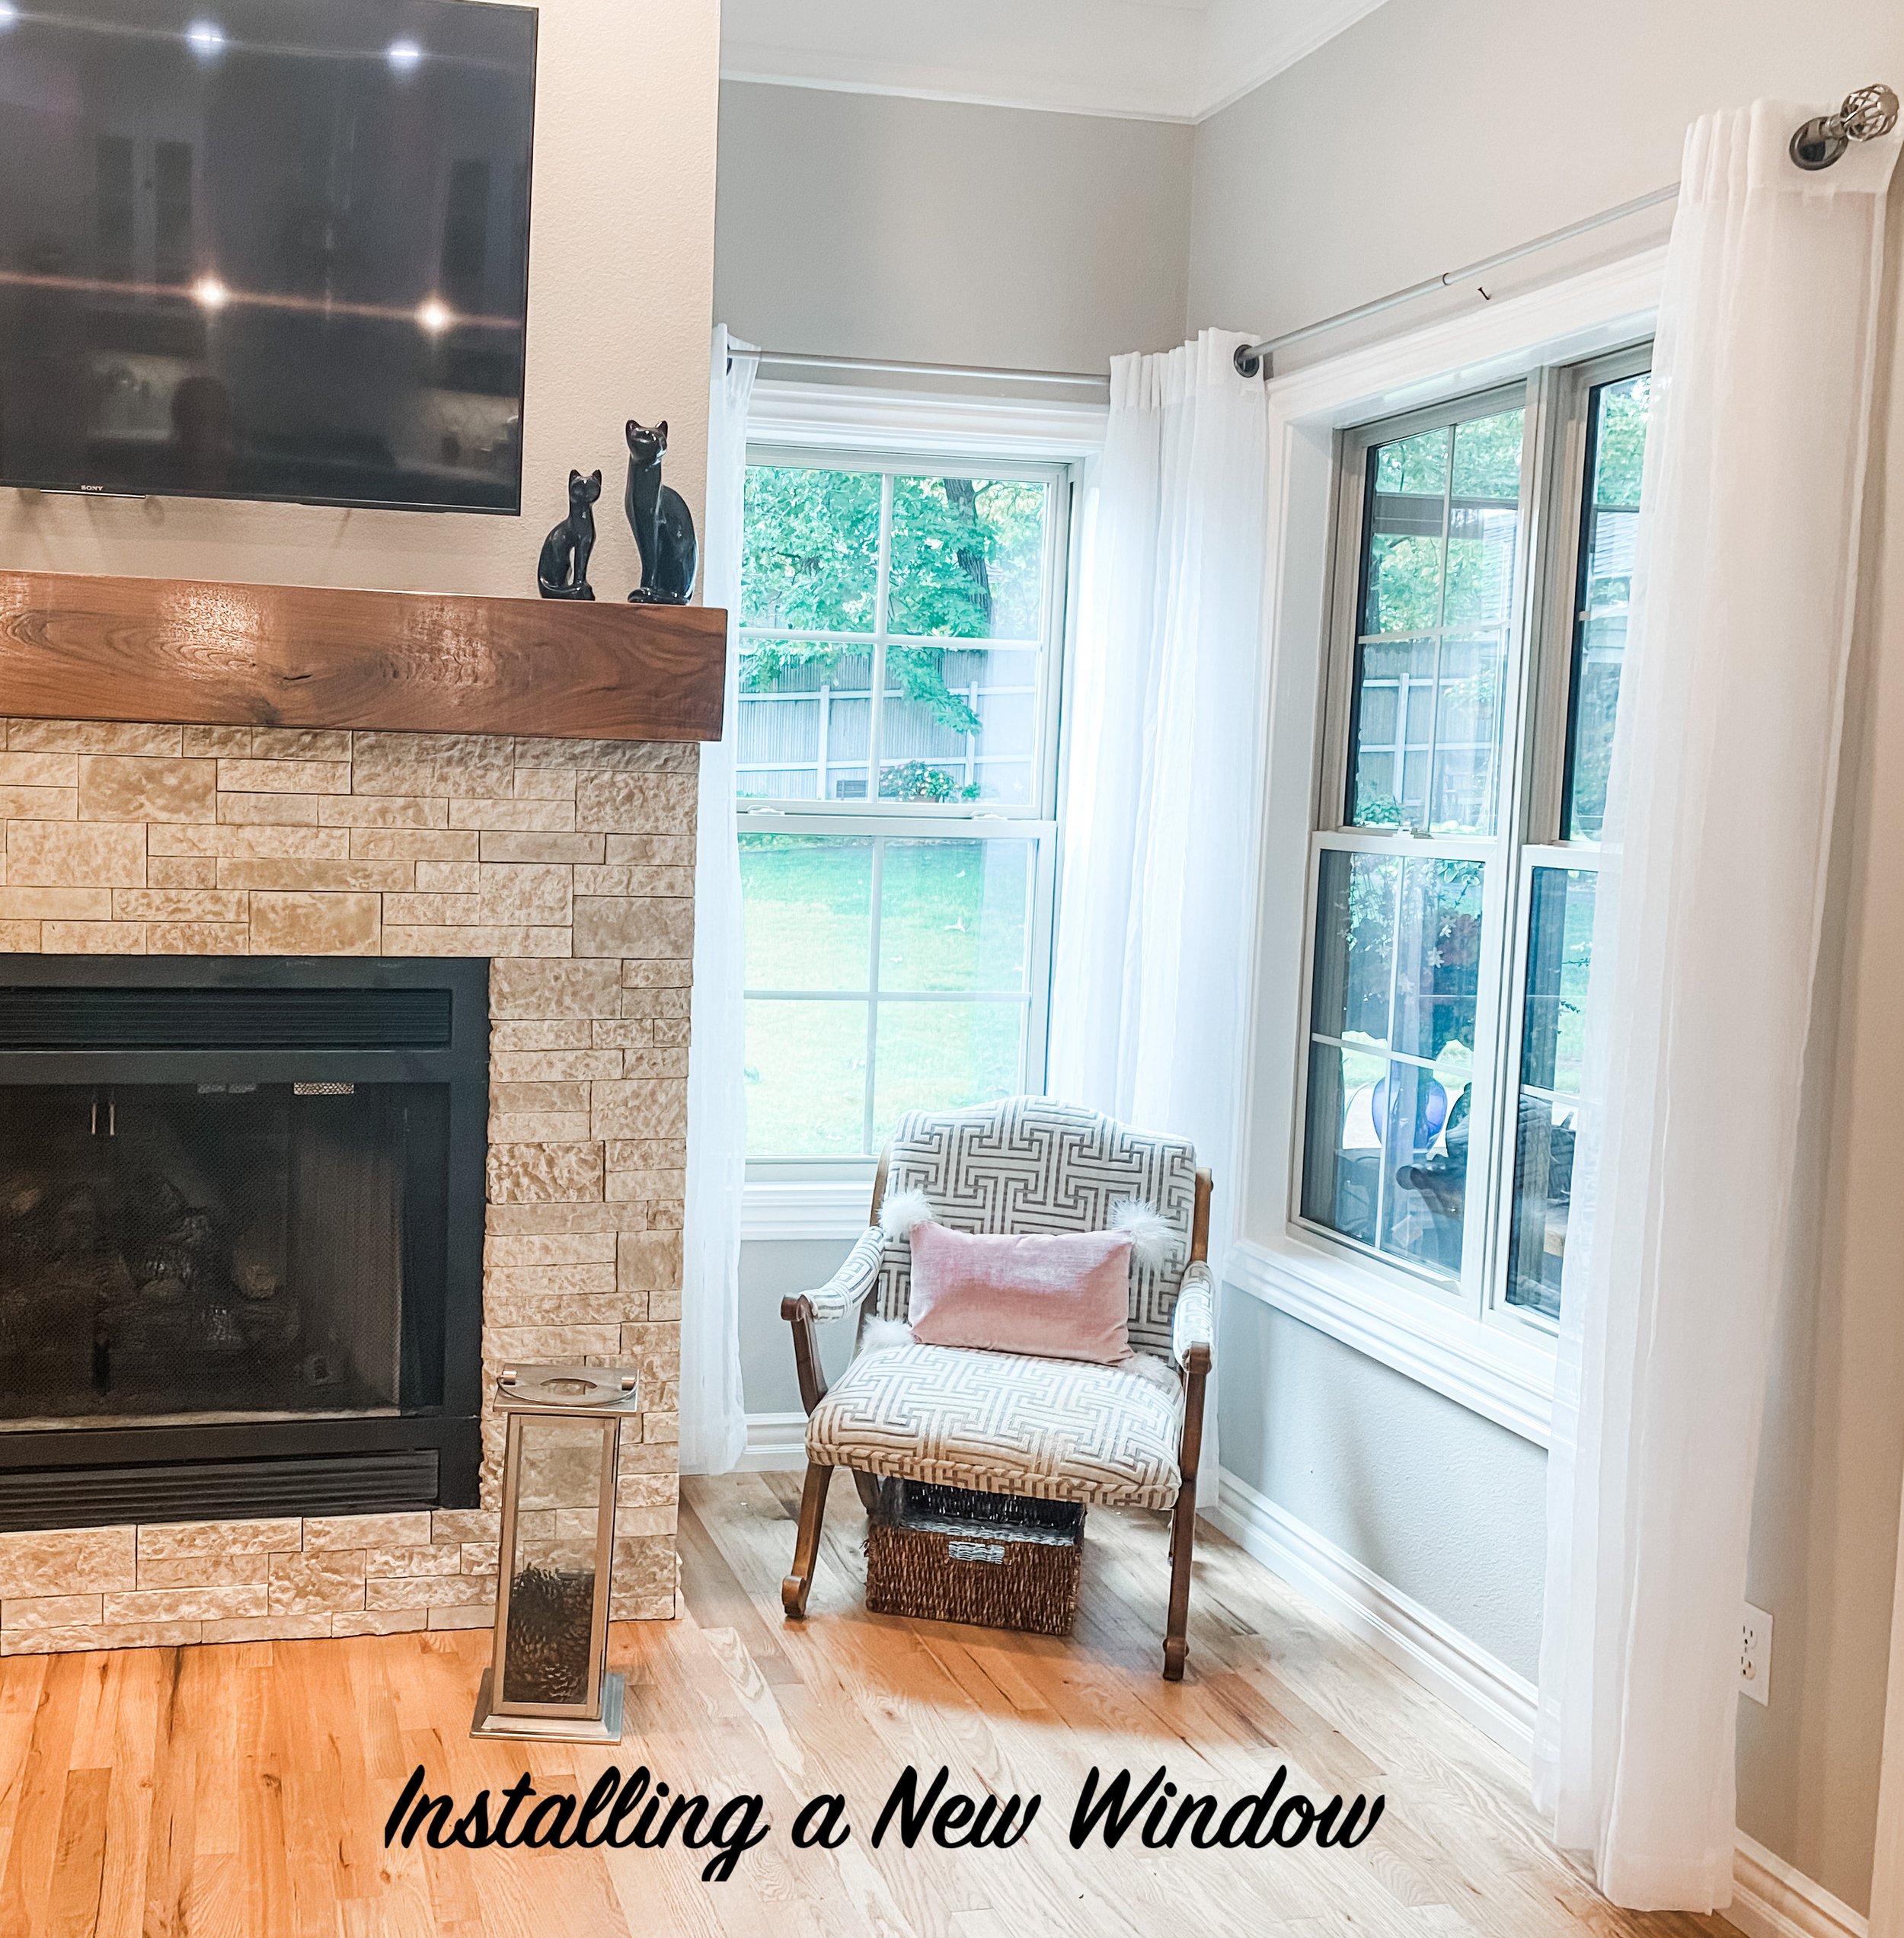
What a difference this little project made!

I LOVE IT!

Fortunately I originally bought matching sheers for the breakfast window and the den window. I couldn’t find sheers that matched them so I took the sheers from the breakfast window and used them for the new window and bought new for the breakfast window.

I love all the the wonderful light and the view of my flowerbeds! Blooming dogwoods in the spring and fall foliage in the few months!

Lovely!

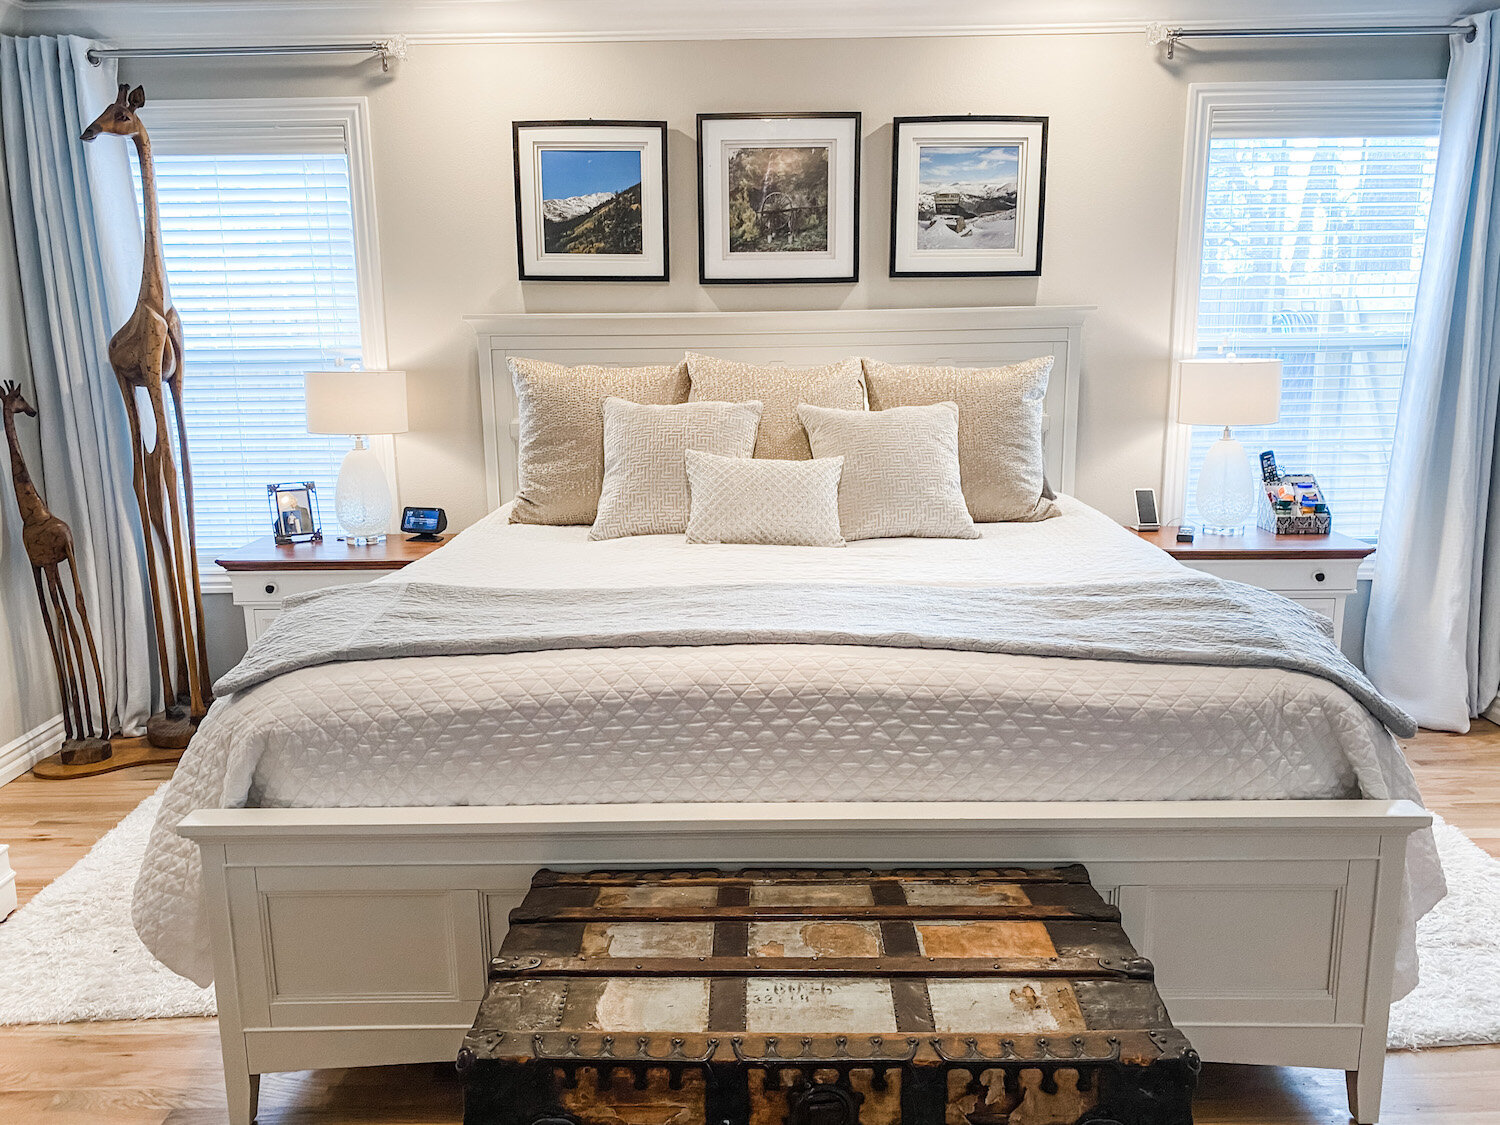
Master bedroom reveal....

When we moved into this house in September we basically moved our old bedroom into this new house. Nice fit, but zero thought put into the “design” of the room…I basically just put furniture on the floor and a few pictures on the walls.

A few weeks ago my daughter sent me a picture of a well designed bedroom similar to ours.

IMG_0694.jpg

That’s when I realized our current master bedroom has ZERO “design character.” I hadn’t even taken the time to paint all the trim the “new” white.

IMG_1317.JPG

Twenty year old lamps, white and brass paddle fan, stacks of pillows in bleach spotted pillow cases, no curtains, scuffed and dinged furniture, clutter…

IMG_1318.JPG

The picture was perfect inspiration! The push I needed to work this space to it’s potential.

So last week my goal was to to tackle the room. Paint the trim and furniture, new curtains, throw pillows, a few little touches here and there, and declutter.

I painted my bedroom furniture (HERE) almost 7 years ago and while I still love the pieces, they have gotten quite dingy looking. Remember, whites yellow over time and of course there are chips and scratches from normal wear and tear. So it was time to give them a little paint refresher! And the side table tops…holy crud they have gotten nasty. So it was time to strip and restain the tops as well.

Of course the little “room refresh” became a three day chore!

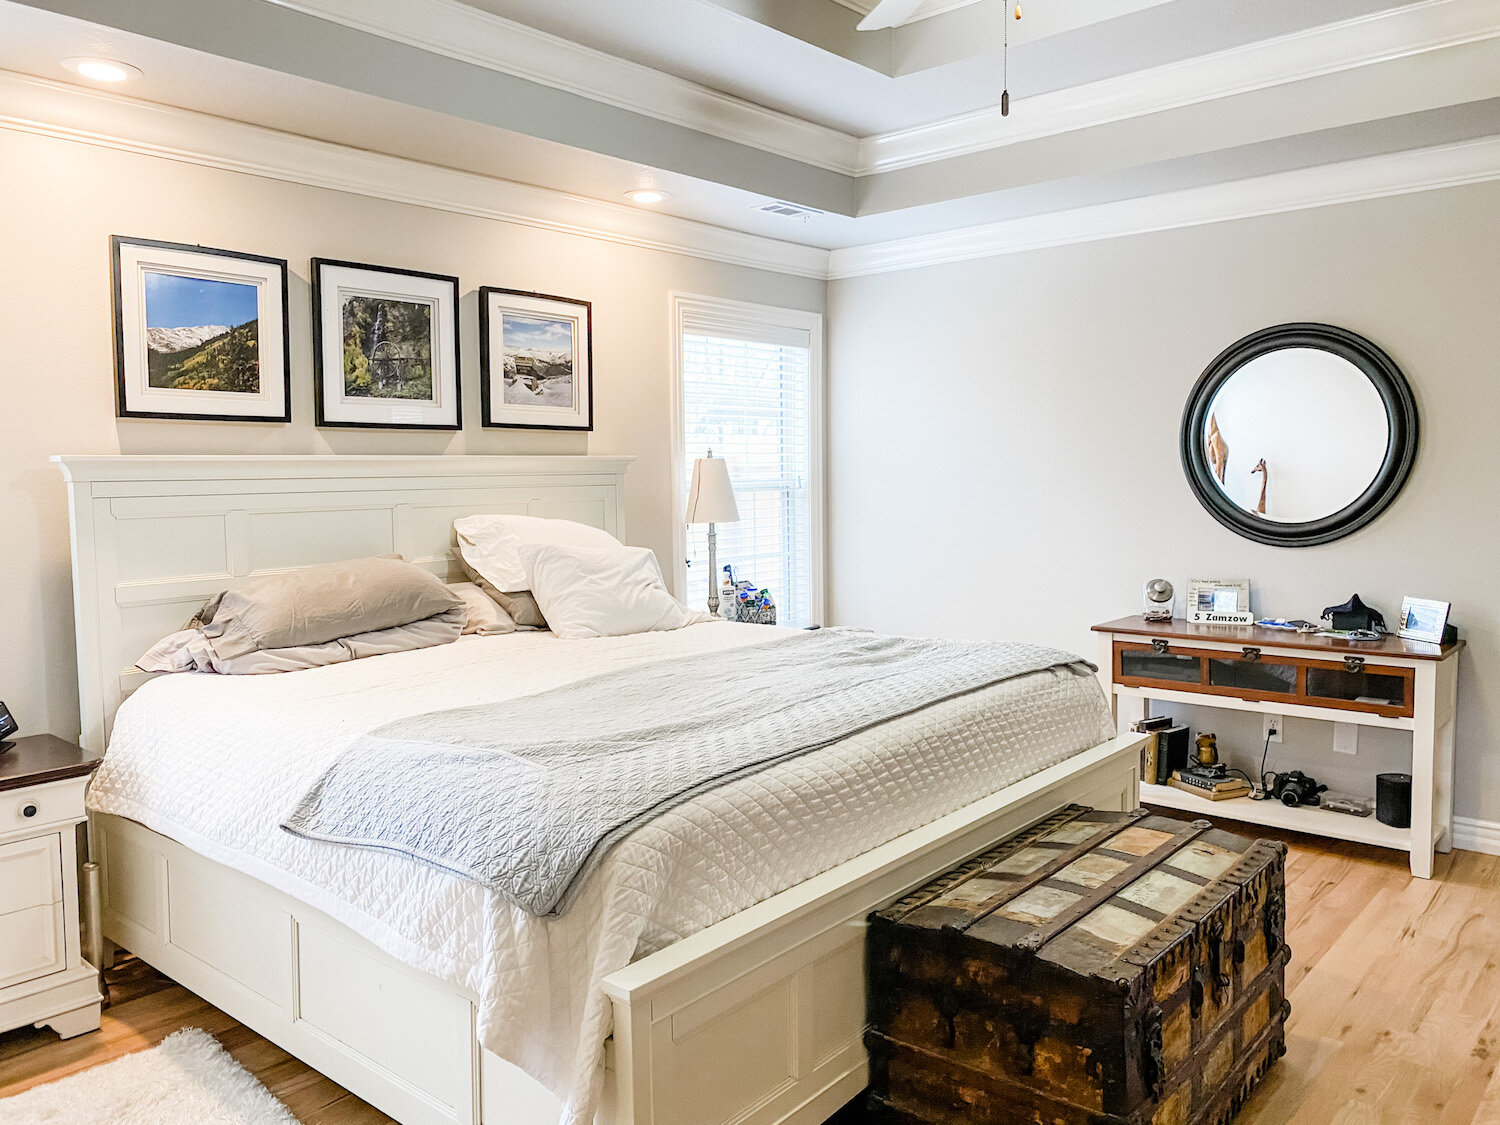
In the end, worth every minute.

New curtains (I still need to hem them), a little wall art and a plant and new throw pillows.

IMG_1315.JPG

I stuck with my tried and true white bedspread…with a big dirty dog I need something I can bleach every week. It covers a down comforter in the cold months.

I have always loved the larger throw pillows in the guest room so I bought new for that room and put the guest pillows on our bed.

IMG_1308.JPG

(The giraffes? They were made in Africa from the root of a tree…they are Brian’s…they are different…what can I say!)

I painted the high boy and bedside tables and stripped and restained the tops of the bedside tables. ..the dark java stain has pretty much run its course. New lamps (finally!!!)

I love the look of chandeliers in bedrooms but as I have said before, I HAVE to have a paddle fan above the bed. Brandon gave us a paddle fan he took out of his house and it worked perfectly in our room.

Decluttering is always a must in any room makeover so a lot of stuff was put away.

One thing I loved in the inspiration room picture was the bed bench. My trunk belonged to my grandparents so it has to stay. You can still see my granddad’s name stenciled on the side.

I love the basket and pillows on their bench but our big dog uses this trunk as a spring board so that wouldn’t have worked out well. Sometimes you have to change up a plan to fit YOUR life-style (a.k.a. accommodate animals and kids!)

I still want to do more on the “tv side” of the room. I repainted and stripped and stained the top of THIS little side table…

Maybe add a plant…a little more wall art….a wall leaning mirror.

IMG_1306.jpg

It only took me a few decades to style the master bedroom in my last house so again, already working at warp speed here.

My next big project are the master bathroom (reveal HERE) windows…

Oh, it’s happening. I cut big holes in the wall to kind of “force the issue.” Windows are on order and the brick guy is on call.

This was the one thing I neglected to do, and my BIGGEST regret, when I remodeled this house…no operable windows in the master bath. I know from my last house that an operable window in the bathroom is a must. I have ordered two casement windows (the kind that crank out) and hope to have them by the end of the month. I have some plumbing to move (WHY IS NOTHING EASY!!!) and framing to do. These windows will look out at the large flower garden out back…I CAN’T WAIT!!!!

Wait I will though…it has been warm enough to plant a few larger perennials like azaleas and Kimberly ferns, but the threat of a freeze until mid-April prevents me from going all out with the annuals. So I sit…and wait…patiently. Okay, not so patient, but I learned the hard way not to rush the early spring planting! Pay attention to your “last freeze date”….then add a few weeks. Ours is the middle of April, but a few years ago it snowed the first week of May!

Until next week…

Curtains...

Last week I concentrated on hanging curtains in a few windows.

I have a “list of things to do” but it is still pretty cold outside. I need to paint the trim in the office, master bedroom and laundry room. I am using oil base paint and as you know, cleaning brushes with mineral spirits can take a bit of time outside. I want to do some trim work in the entry, but again, outside work. I may tackle the pantry this week but not sure exactly what I want to do…I ordered some jars and labels.

I have Raynaud’s which is this stupid circulation thing with my hands and feet. No biggy except whereas a “normal” person could probably work out side for short periods of times when it is below 65 degrees, I can not. It causes great pain and distress and is frustrating as heck!!!

I’m still adjusting to being “semi-retired.”

For those of you who grind it every day like I did for years, the idea of “retiring” may seem appealing. If you like waking up on Monday morning with little purpose for the week, go for it. If you like sitting around reading or binge watching 10 year old TV programs days on end, go for it. If you think you are going to volunteer, forget it. They don’t want you during a pandemic. If you think you are going to garden all day or project outside, make sure you have a library ready for the three or four months out of the year you can’t get outside.

The highlight of my entire week was the little warm up we had. I was able to get out and reorganize my garage.

Seriously, that was the highlight of the ENTIRE week.

I knew finding a “purpose” would take time….it’s still taking it’s time…lol!

Enough of my pity party…on to the curtain adventure!

So as you may know from my last house, I am not a big “curtain person.” Every single window in this house has 2” mini blinds…which are nice but they are just so….”mini blindish.”

One of the really awesome things about this house is that no window gets direct sunlight, so no window really needs to filter out hot sun. Also, no window is really “open to the public” so privacy is not a huge issue.

The windows in the living room and den adjoin the all-season room.

The windows in the breakfast room adjoin the side screened porch.

The windows in the dining room face west…

… but are shaded by the covered front porch and the large trees in the front yard. There is a bit of a need for “privacy” since they face the street…but not much. You would have to be on our front porch to see in and truthfully I am rarely in a state of “need for privacy” in my dining room!

So basically the need for curtains boil down to aesthetics…I look at curtains kinda like lipstick. You don’t HAVE to have it but it kind of dresses things up a bit and finishes off the “look.”

For the record, I rarely wear lipstick either!

But since I want to really make an effort on this house and since I have WAAAAY too much time on my hands, I decided to tackle a few windows…put a little lipstick on the rooms so to speak.

So off to the home decor store I went.

Again, I don’t really NEED curtains in the dining room but I found a set I really like.

(I notice I need to make some adjustments…especially to the curtain on the left.)

I decided to leave the blinds in place for now just incase we do need privacy or to block the sun…eventually I may do something different but not sure what. I do love the curtains and they work well with the “glitter/monotone” vibe I am going for in this room.

I did have a debate as too where to hang the curtains…above the transom or between the transom and the window. I looked on Pinterest and decided I actually like the look of curtains above the transom…so that’s where I hung them.

My plan is to make this table my “seasonal decor” spot. Since we rarely use this table, it is the perfect place to go all out…kinda of like I did for Christmas….

I plan to do this for every holiday. I picked up a bunch of stuff for Easter but can’t find anything I really like for Valentine’s Day so right now it is kind of bare.

I am a big fan of Pinterest. If you are looking for inspiration…what color or how high…just search and cruise. I promise you will eventually see a pattern to what you do and don’t like.

Went with simple for the den and breakfast room…I removed the blinds and added plain ole’ white sheers. Neither of these windows need shading or even privacy for that matter and I thought this simple look was like a bit of lip gloss. Simple and understated.

I found curtains for the office but still have to get another curtain rod…another project for another day!

So I made an effort and I like the little changes. The major change will be the living room windows. I tried just removing the blinds…I like it…Brian doesn’t. I thought about shutters but when I looked at “shutters” on Pinterest I realize I really didn’t like the look. I may try tall curtain panels across the entire wall but then the big question becomes “what fabric…what color…blah, blah, blah”

I may have to save that for another week…between the afternoon of rearranging the garage and my eye appointment on Tuesday I am plum worn out.


Essentials for a cozy guest room...

I did not realize how unprepared we were for guests until I began my quest for the perfect "guest room."

Sarah and her family are our most frequent "guests." She doesn't have her own room in this house since she had moved away for college the year I bought it...19 years ago! (Wow...where does the time go!) When her family visits they have no problem digging through my bathroom or closet when they need a Q-tip or soap or an extra blanket! I don't mind that they do, but you probably don't want most "guests" scrounging around your bath or closet!

The three youngest babies who grew up in this house have moved on with their lives and I am left with three bedrooms upstairs.

Now, this is where I tell you that when your children first go off to college, do NOT think you can immediately turn their room into "a naked room." (Again, you have to see the movie!) Because truth be told, they do eventually come home...at least for frequent and sometimes extended visits. And the worst is all the "stuff" they leave behind...clothes, books, trophies, high school momentos. Stuff they obviously can't take with them but don't want to get rid of (okay, so MOM doesn't want to get rid of their t-ball jerseys and "Where The Wild Things Are" books...but that's a whole nuther issue!)

But eventually the time comes and you know they will not be moving back.

For me that time has come.

I decided it was time to pull together a real "guest room." It all started here

I finally got Matt's room painted and all three rooms purged. For the most part...there are still a few framed momentos and childhood books scattered about!

Katie's room will be our official "gym"...there is a twin bed and room for the portable cot for the grandsons and it has the large tv so it is perfect for their "game room." 

Mitchell's room has been the unofficial "guest room" but right now it still has a lot of "stuff" in it that I just don't have the energy to deal with. And truthfully, the bed in his room isn't real comfy.

When Matt moved into his new home, he left only a bed and dresser...

...that room has the least to deal with so that will be the "official guest room." After the new paint and purge, it was time to start working on "this list"....

In the bedroom I made sure there where the essentials...comfortable bedding, a bedside table with a lamp, an alarm clock with USB ports (love that little thing!), a scented candle, a flashlight, reading materials, a notepad, a trash can, etc. (I moved the bedside table from Mitchell's room and the lamp from Katie's...it "pays" to shop at home!)

I gathered all the extra blankets and pillows and bought new hangers and put them in the closet....

I put white inexpensive pillow cases on all the spare pillows! Just a reminder that I am a huge fan of white bedding and towels!

In the bathroom I purged all the outdated products (used toothbrushes, old deodorant, expired meds) and stocked it with everything on the list...toiletries, ample towels and washcloths, a blow dryer, personal and oral hygiene products, a first aid kit and basic meds. 

I made sure I checked everything off the list!

I wanted a new bed frame and found the PERFECT one through a friend. 

Okay, so it wasn't really perfect. I added some height to the side rails because I don't like the box springs showing. I used my Kreg jig and wood glue to attach a 1x6 board to the side rails....

...then nailed a piece of trim across the joint...caulk and putty...

Then I painted it! First the KST...kilz, sand, tack...

Then paint. I went with my go-to off white...SW Swiss Coffee. I thought about doing the whole chalk paint and distress thing, but I know that will eventually fade out of favor and I want clean and classic...in other words, something I don't have to repaint in a few years.

I found an inexpensive "indoor/outdoor" rug that works perfect with a neutral color pallet. 

I'm not big on piles of decorative pillows on the bed, but since I don't have to make this bed every day I picked up some pretty decorative pillows!

I replaced the blue and brown curtains with fresh white panels. 

I found this message board in the craft section at Hobby Lobby.

Chalk painted it and then hand painted the wording on it, distressed a tad and sealed. Super simple and just a touch of "farmhouse." 

This little "message board" is the perfect spot for the wifi password info and our home address info. Keep in mind, if you don't have a land line and someone uses their cell phone in an emergency, emergency responders may not know your exact location. Guests should have your physical address! It is also the perfect spot for hanging spare charging cords for I-pads and phones! 

Fresh flowers are on the list, but it is a bit unrealistic to keep fresh flowers in a room I rarely enter...these were from Sarah for my birthday! 

If you do not have an extra bedroom specifically for guests, put together a guest basket...a little basket with all the "essentials" that can be stored in a closet until it is needed! I stocked this one with little "sample size" products. I also pulled items from my hotel stockpile...yes, I am one of those people who takes all the little shampoos, lotions and soaps from my hotel room!

Having a room ready (or even a little guest basket on hand) sure makes it easy to prepare for overnight guests...last minute or scheduled.

I have a large matted frame I intend to hang above the bed if I can find a print I like. The frame was a "silverish" color...not the least bit pretty. I have it primed and ready to paint (and share) when I finally put it all together. Wall decor is something that can take time...like Matt, I don't want "stuff" just to have "stuff." 

I put my dad's walnut chair in the corner and eventually I want to add a mid century dresser...Katie is using this one and I may get it back when she moves so I may hold out for it! I also want to find a luggage stand. When I get that all in place I will share that side of the room!

The "froo-froo" takes time but the absolute must-haves are in place! 

Que "sigh of relief!"