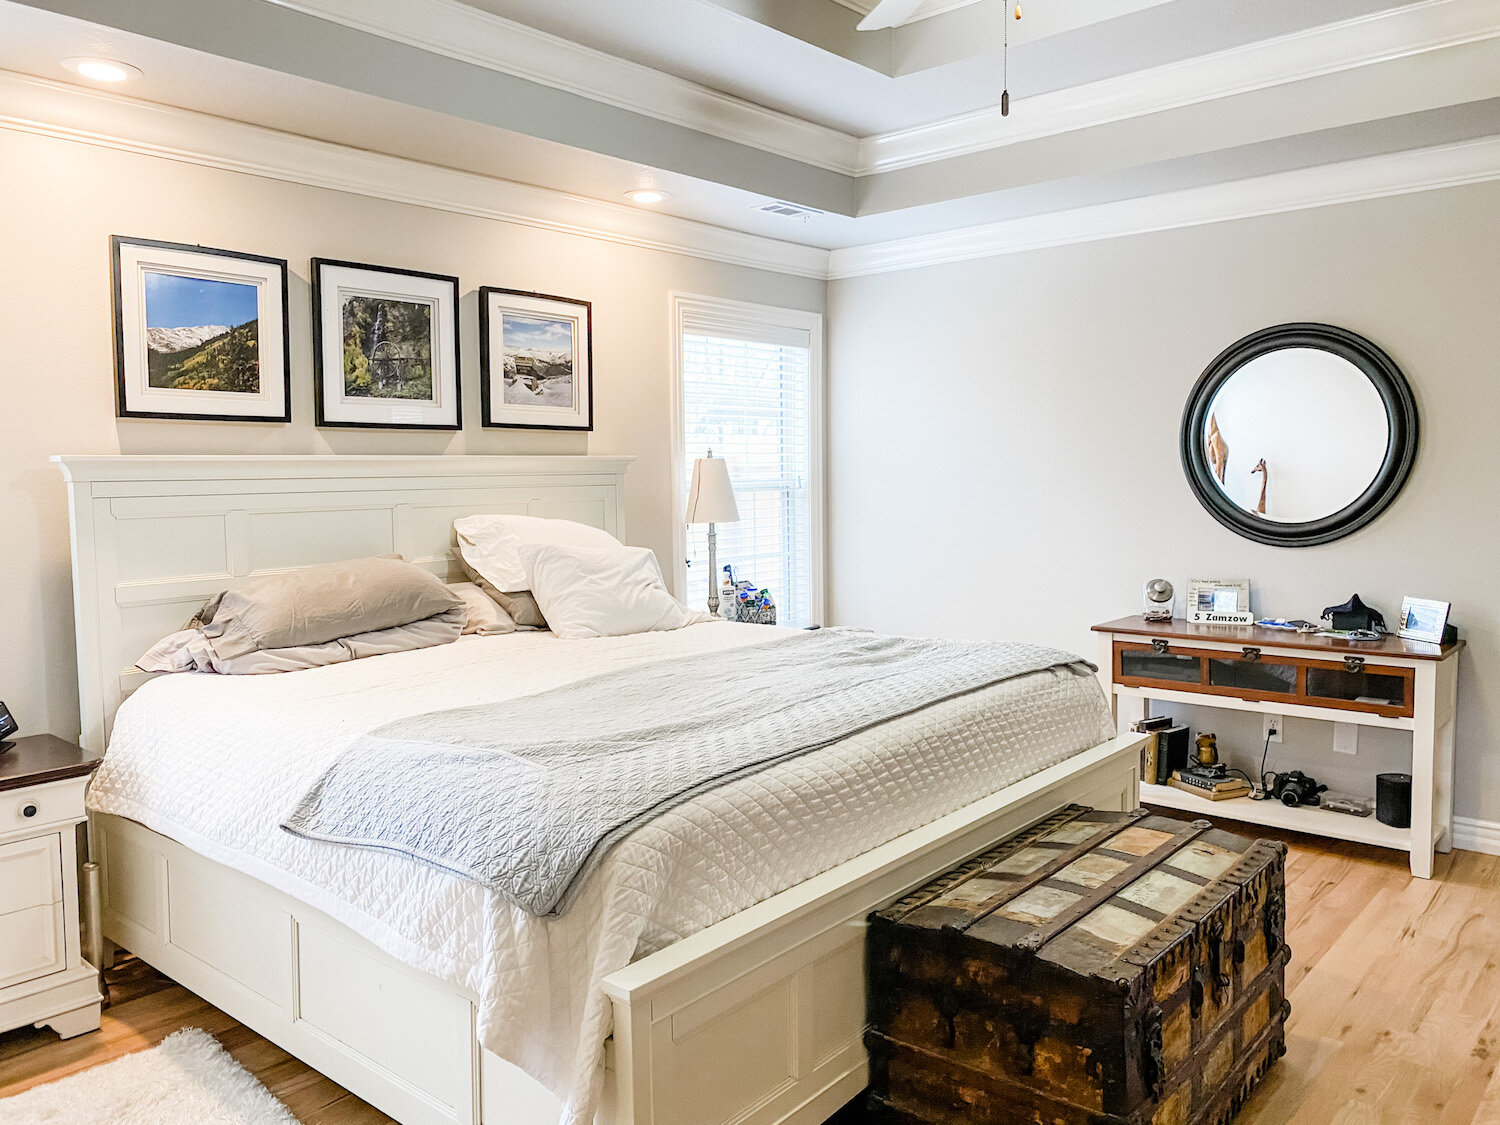
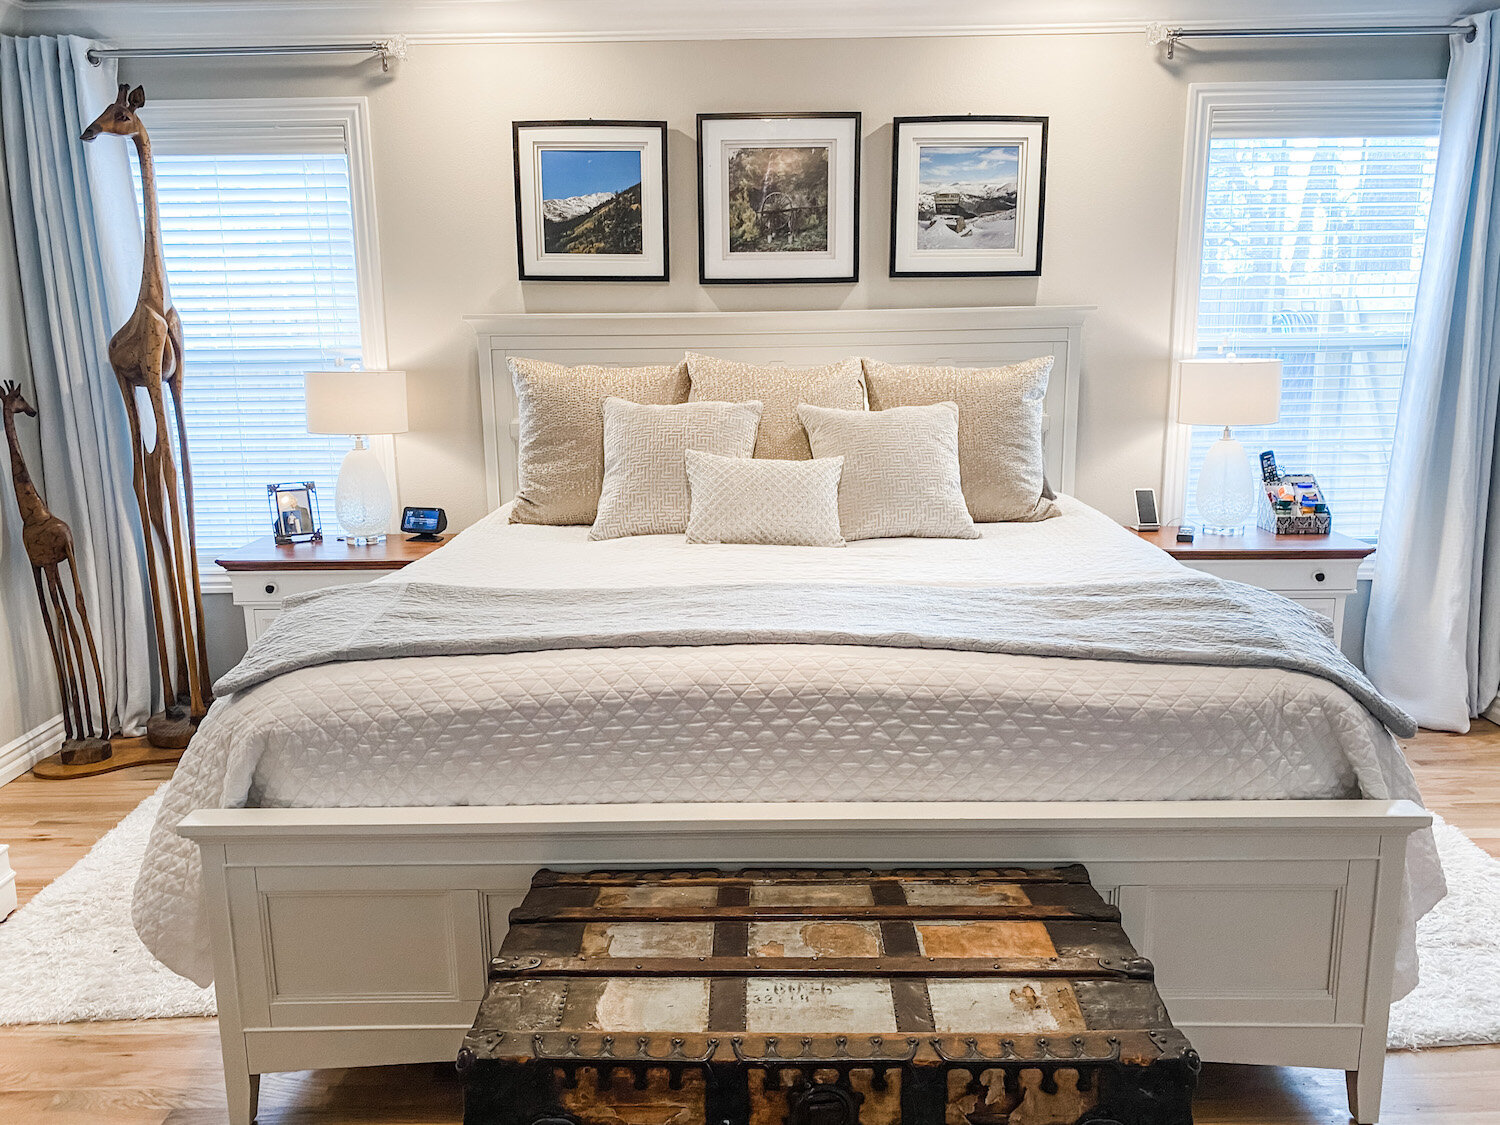
Master bedroom reveal....

When we moved into this house in September we basically moved our old bedroom into this new house. Nice fit, but zero thought put into the “design” of the room…I basically just put furniture on the floor and a few pictures on the walls.

A few weeks ago my daughter sent me a picture of a well designed bedroom similar to ours.

IMG_0694.jpg

That’s when I realized our current master bedroom has ZERO “design character.” I hadn’t even taken the time to paint all the trim the “new” white.

IMG_1317.JPG

Twenty year old lamps, white and brass paddle fan, stacks of pillows in bleach spotted pillow cases, no curtains, scuffed and dinged furniture, clutter…

IMG_1318.JPG

The picture was perfect inspiration! The push I needed to work this space to it’s potential.

So last week my goal was to to tackle the room. Paint the trim and furniture, new curtains, throw pillows, a few little touches here and there, and declutter.

I painted my bedroom furniture (HERE) almost 7 years ago and while I still love the pieces, they have gotten quite dingy looking. Remember, whites yellow over time and of course there are chips and scratches from normal wear and tear. So it was time to give them a little paint refresher! And the side table tops…holy crud they have gotten nasty. So it was time to strip and restain the tops as well.

Of course the little “room refresh” became a three day chore!

In the end, worth every minute.

New curtains (I still need to hem them), a little wall art and a plant and new throw pillows.

IMG_1315.JPG

I stuck with my tried and true white bedspread…with a big dirty dog I need something I can bleach every week. It covers a down comforter in the cold months.

I have always loved the larger throw pillows in the guest room so I bought new for that room and put the guest pillows on our bed.

IMG_1308.JPG

(The giraffes? They were made in Africa from the root of a tree…they are Brian’s…they are different…what can I say!)

I painted the high boy and bedside tables and stripped and restained the tops of the bedside tables. ..the dark java stain has pretty much run its course. New lamps (finally!!!)

I love the look of chandeliers in bedrooms but as I have said before, I HAVE to have a paddle fan above the bed. Brandon gave us a paddle fan he took out of his house and it worked perfectly in our room.

Decluttering is always a must in any room makeover so a lot of stuff was put away.

One thing I loved in the inspiration room picture was the bed bench. My trunk belonged to my grandparents so it has to stay. You can still see my granddad’s name stenciled on the side.

I love the basket and pillows on their bench but our big dog uses this trunk as a spring board so that wouldn’t have worked out well. Sometimes you have to change up a plan to fit YOUR life-style (a.k.a. accommodate animals and kids!)

I still want to do more on the “tv side” of the room. I repainted and stripped and stained the top of THIS little side table…

Maybe add a plant…a little more wall art….a wall leaning mirror.

IMG_1306.jpg

It only took me a few decades to style the master bedroom in my last house so again, already working at warp speed here.

My next big project are the master bathroom (reveal HERE) windows…

Oh, it’s happening. I cut big holes in the wall to kind of “force the issue.” Windows are on order and the brick guy is on call.

This was the one thing I neglected to do, and my BIGGEST regret, when I remodeled this house…no operable windows in the master bath. I know from my last house that an operable window in the bathroom is a must. I have ordered two casement windows (the kind that crank out) and hope to have them by the end of the month. I have some plumbing to move (WHY IS NOTHING EASY!!!) and framing to do. These windows will look out at the large flower garden out back…I CAN’T WAIT!!!!

Wait I will though…it has been warm enough to plant a few larger perennials like azaleas and Kimberly ferns, but the threat of a freeze until mid-April prevents me from going all out with the annuals. So I sit…and wait…patiently. Okay, not so patient, but I learned the hard way not to rush the early spring planting! Pay attention to your “last freeze date”….then add a few weeks. Ours is the middle of April, but a few years ago it snowed the first week of May!

Until next week…

New vinyl windows and a little window seat makeover...

This is one of those “needs” with a little “want” thrown in.

Any time I think about buying something or doing something I ask myself “Is this a need or a want.” Wants are okay…as long as you don’t go into debt for them or harm another person in pursuit of your “want.”

The “need” was new living windows. The old arch window was cracked and had condensation between the panes.

I have managed to ignore it for some time because in the hot months I have a temporary shade in it and in the fall and Christmas seasons I have cute little vignettes that block it…but this time of year it just consumes this room and it is near impossible to ignore!

The lower window was the original aluminum window and that thing might as well have been wide open on a cold blustery day. It leaked cold air like crazy!

So…a need.

As you will notice I changed up the “configuration” of the window…I went with a fixed window in the middle with two crank-outs (technically called “casement” windows) on each side. I have a crank out in my bathroom and I LOVE it…super easy to open and close!

When I measured for the new window I measured the outside opening…that is because the new window was going to be installed from the outside and I had to make sure it would slip between the brick.

While it fit snug between the brick…

… it had 1/2 “gaps” on the inside…

Usually the new window would slip in right behind the sheetrock that butted up to the old window…not the case here. I suspect it is because whoever bricked this house did not brick over the old window properly.

No biggy…it gave me ample room to put in A LOT of insulation! Silicone caulk around the outside…a must for ANY window! There is NO air coming in around this puppy!

It did mean I had to trim out around the new window. Again, no biggy. I used 1x4 pre treated boards and flat molding…good as new!

One issue I had was the existing seat cushions…they were not going to work because of the window crank….

The cushions are really not an issue for several reasons

I only added the cushions to help block some of the air leaking in around the old window. Second, the fabric has faded over the years and I needed to recover them! And lastly, nobody but the cats sit in this space so comfort is really not an issue.

So the cushions can go…but then I am left with the stark white of the faux marble…ick. Again so 90s!

Sooooo….I decided to remove the faux marble and add stained wood “bench” type seating before I put up the new trim!

Course I wanted walnut…but finding walnut boards proved to be impossible. I ended up using oak boards…NOT my favorite wood, but it was either that or poplar (too “green”) or pine (too ick).

The marble was super easy to pop off….heavy as crud but simple to remove. It was just siliconed in.

I bought 1x6 and 1x4 oak boards. I like the “plank” look so I used the router to add a VERY small groove on the top edge of each board. On the board that would be on the outside edge , I used the router to round the edge.


Again, I did not take pictures of the “process” or make a tutorial…I am a HORRIBLE teacher/blogger! Just sharing what I did!

After cutting each board to the proper width and routing the edges, I stained them with brown mahogany stain and sealed them well with poly BEFORE installing them.

Once the finish was dry, I finally got to use the biscuit joiner Matt got me for Christmas two years ago! I love this little tool. Because of the layout of this bookshelves, I couldn’t make the entire seat in one piece. I had to lay in each board one at a time. The biscuit joints allowed me to get a tight, even fit without having to nail into the top of the seat! Love!!! I just glued the “biscuits” and edges, and slipped them together!

After the new wood seats were done, I trimmed around the new window.

I removed the blind from the side window…after 20 years of neglect that thing was pretty nasty.

I will eventually replace this window as well since it is one of the original aluminum windows.

I haven’t decided what to do about window dressings. I have lived without a blind in the big window for years…we live at the end of a cul-de-sac and I don’t roam around in this room “indecent” and this window faces south so it doesn’t get a ton of sun in the summer months. The side window faces the fence and there is little view to the inside of the house so for the time being, I think I’m fine without a window covering!

I love the new look…again, I think stained wood always adds a little warmth to an area and this big sucker could use some “warmth.” And the new windows are AMAZING!!!! We have winter weather this week and not a drop of cold air can be felt around the window…and I CAN NOT WAIT to crank these babies open on a warm day!!!!

This photo of the outside reminds me of how “blah” the house looks in the winter compared to a summer view…

This one reminds me that we desperately need to power wash the brick this spring!!!!


I haven’t painted the trim just yet…truthfully this entire built in needs to be painted. I haven’t painted it in 20 years and I know it was originally painted with alkyd (oil-based) paint.

When we painted Matt’s bedroom a few weeks ago, he found a new “hybrid” paint…an acrylic alkyd paint they SAY will go over oil based OR enamel paints. I know the paint went on like an alkyd…leveled beautifully….and cleaned up like an enamel (with soap and water!)

While the paint went on well and cured well, my biggest concern is durability. This area gets a lot of wear and tear and I don’t want a paint that dings easily. Oil based paints are outstanding for furniture and wood pieces…super durable!

So I am going to wait a bit and see how Matt’s holds up…in other words, let him be the test monkey…lol! If his trim holds up well, then I will use the hybrid paint. Or I might just bite the bullet and use an oil-based. I know me well enough to know that a bug can bite me at any moment!