"New" barstools and a few dresser makeovers!

Last week I shared the prep work on the "chest of drawers from hell."  

This week I was able to get it painted and the hardware installed! Precious!

I kept the paint treatment fairly neutral with one of my favorite off-whites...."Swiss Coffee." The white and teal combo has been selling VERY quickly, but I decided to stay simple and neutral with this one! Partially because I absolutely adore this hardware and I didn't want to do anything to distract from it!!

As I mentioned last week, I painted the interior of the drawers to seal in the "funk" and make them look a little better! I used some leftover paint I had from another project...takes a few extra minutes but honestly, well worth the time and effort!

As you can see, the extra time I took to repair the damaged veneer on the top and the side really paid off!

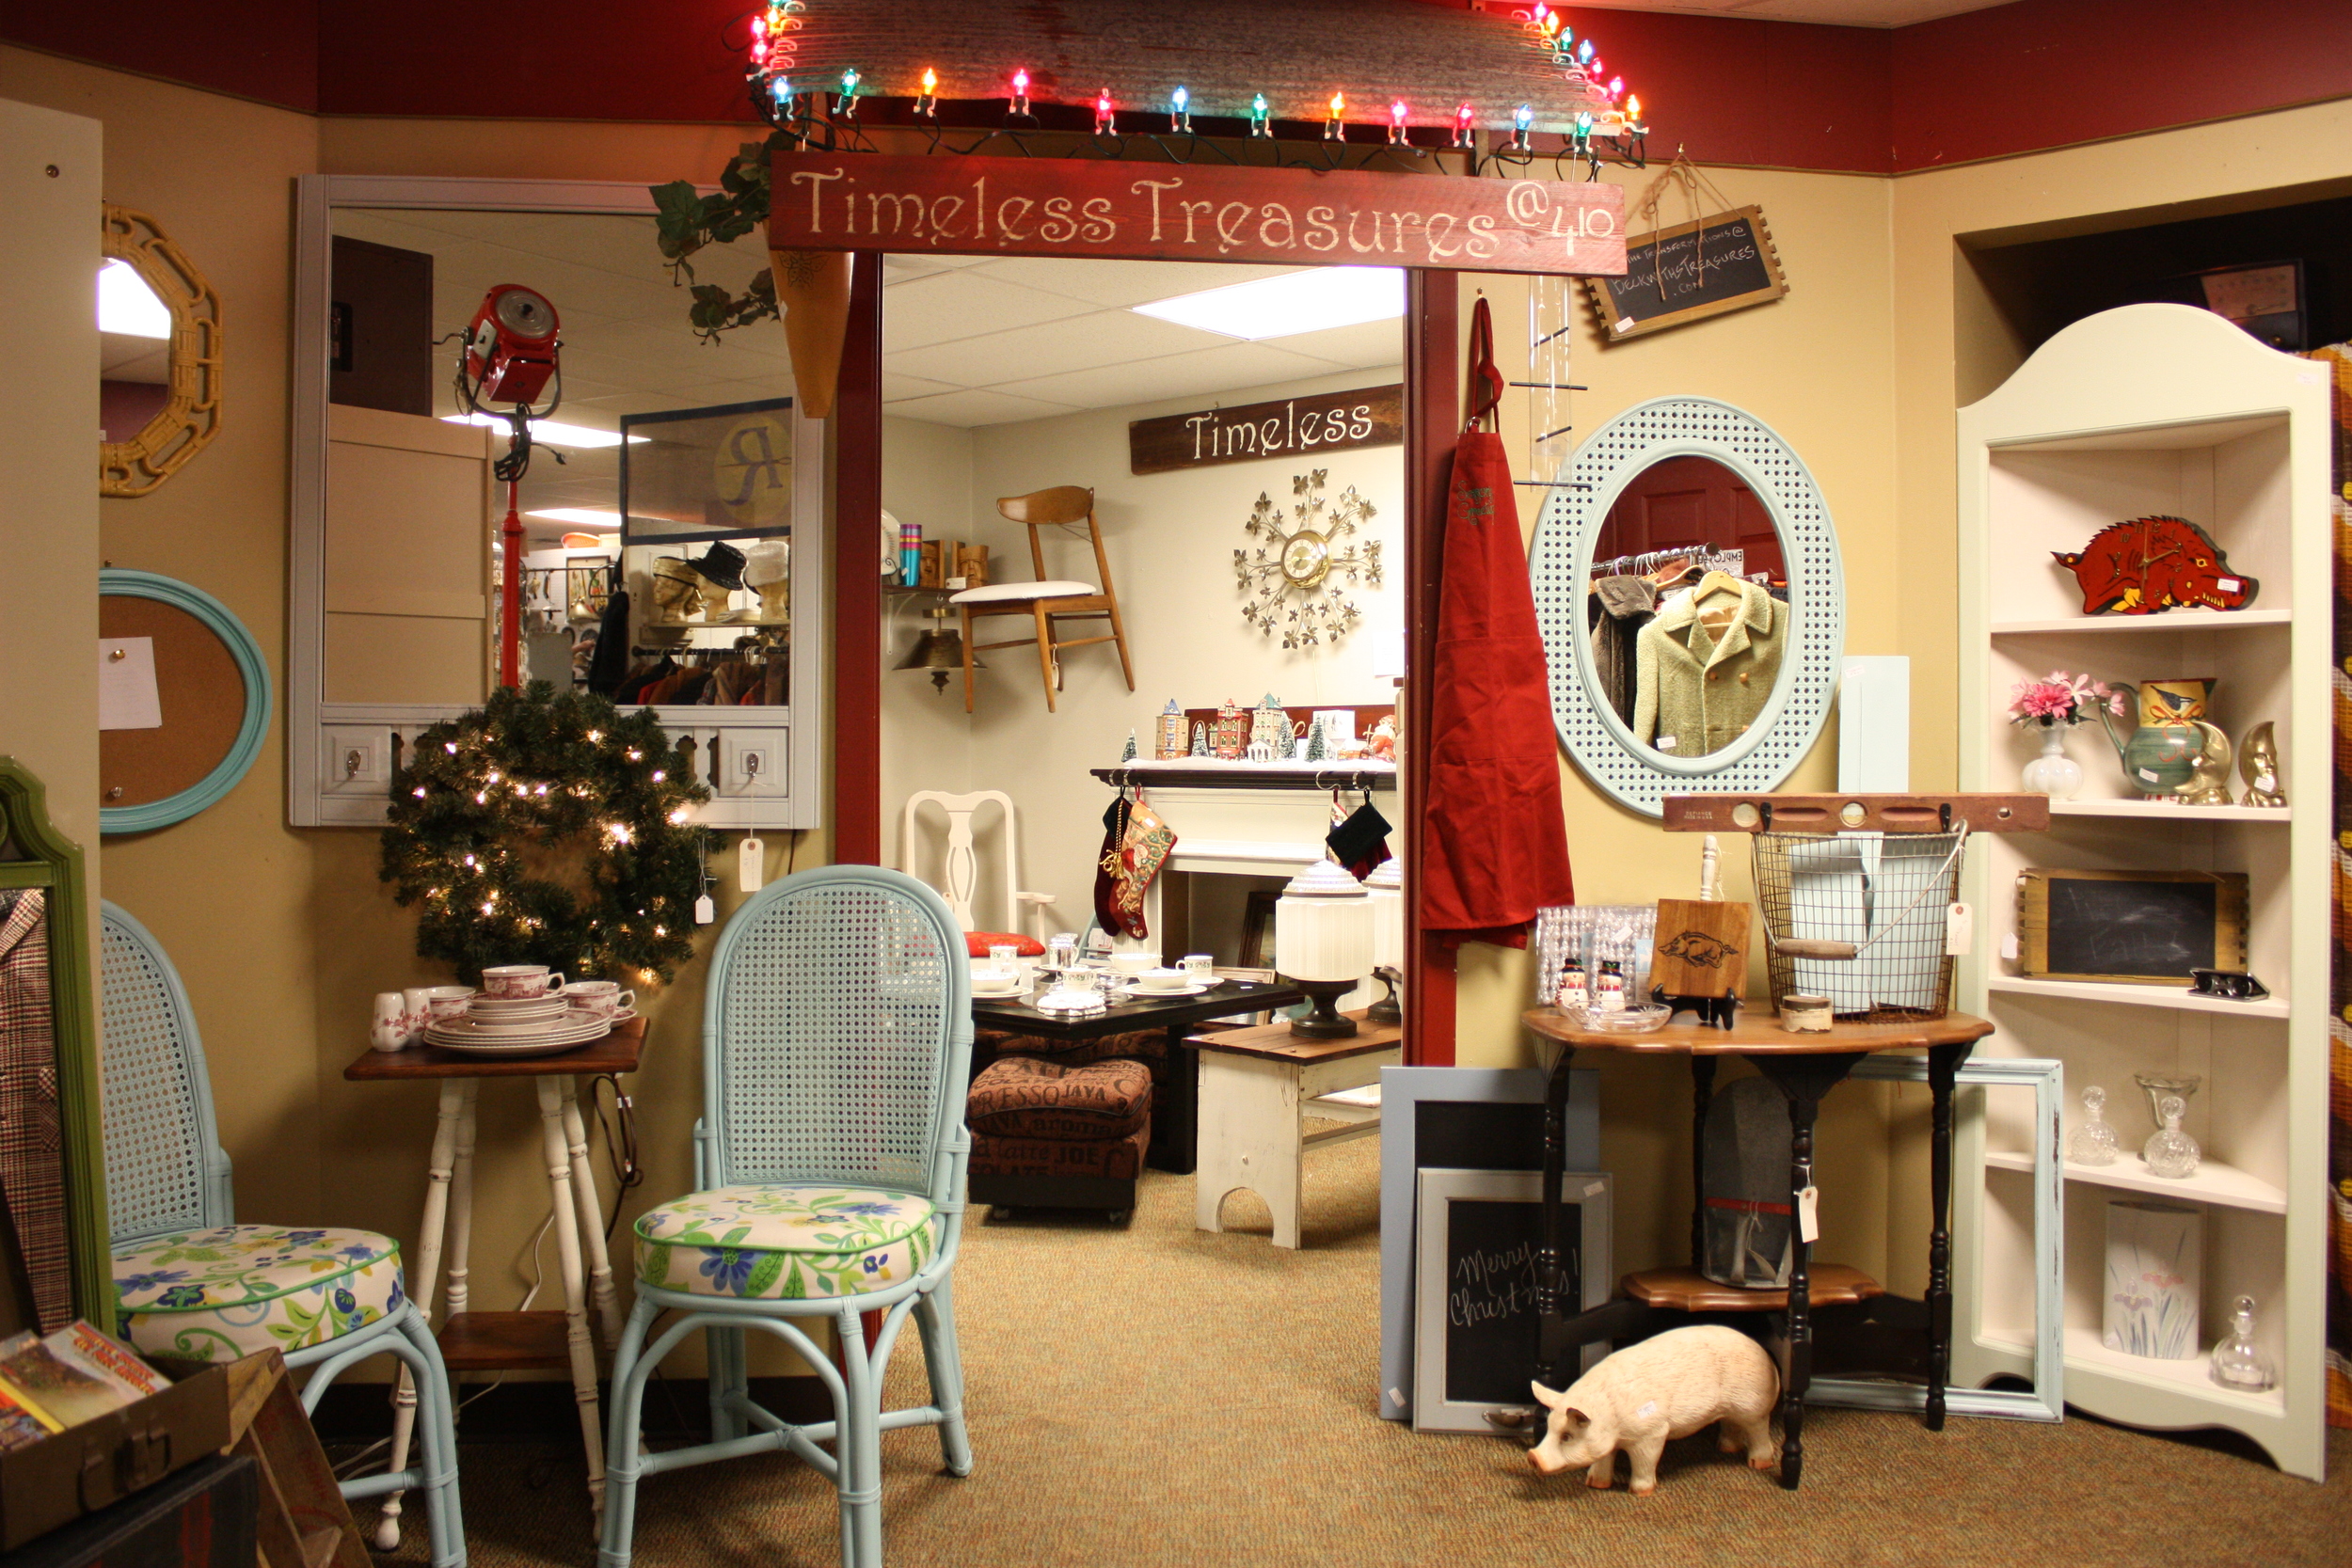
I took this little chest to 410 Vintage...it lasted all of about 4 hours! Confirmation that all the hard work was well worth it!

I did paint one old dresser I had with the teal and white combo...

Just one of those old maple dressers...a little paint, a little gel stain on top, some new hardware and this baby sold within two hours of taking it in! (I didn't even bother to take a photo before I delivered it...this is one I snapped with my phone!)

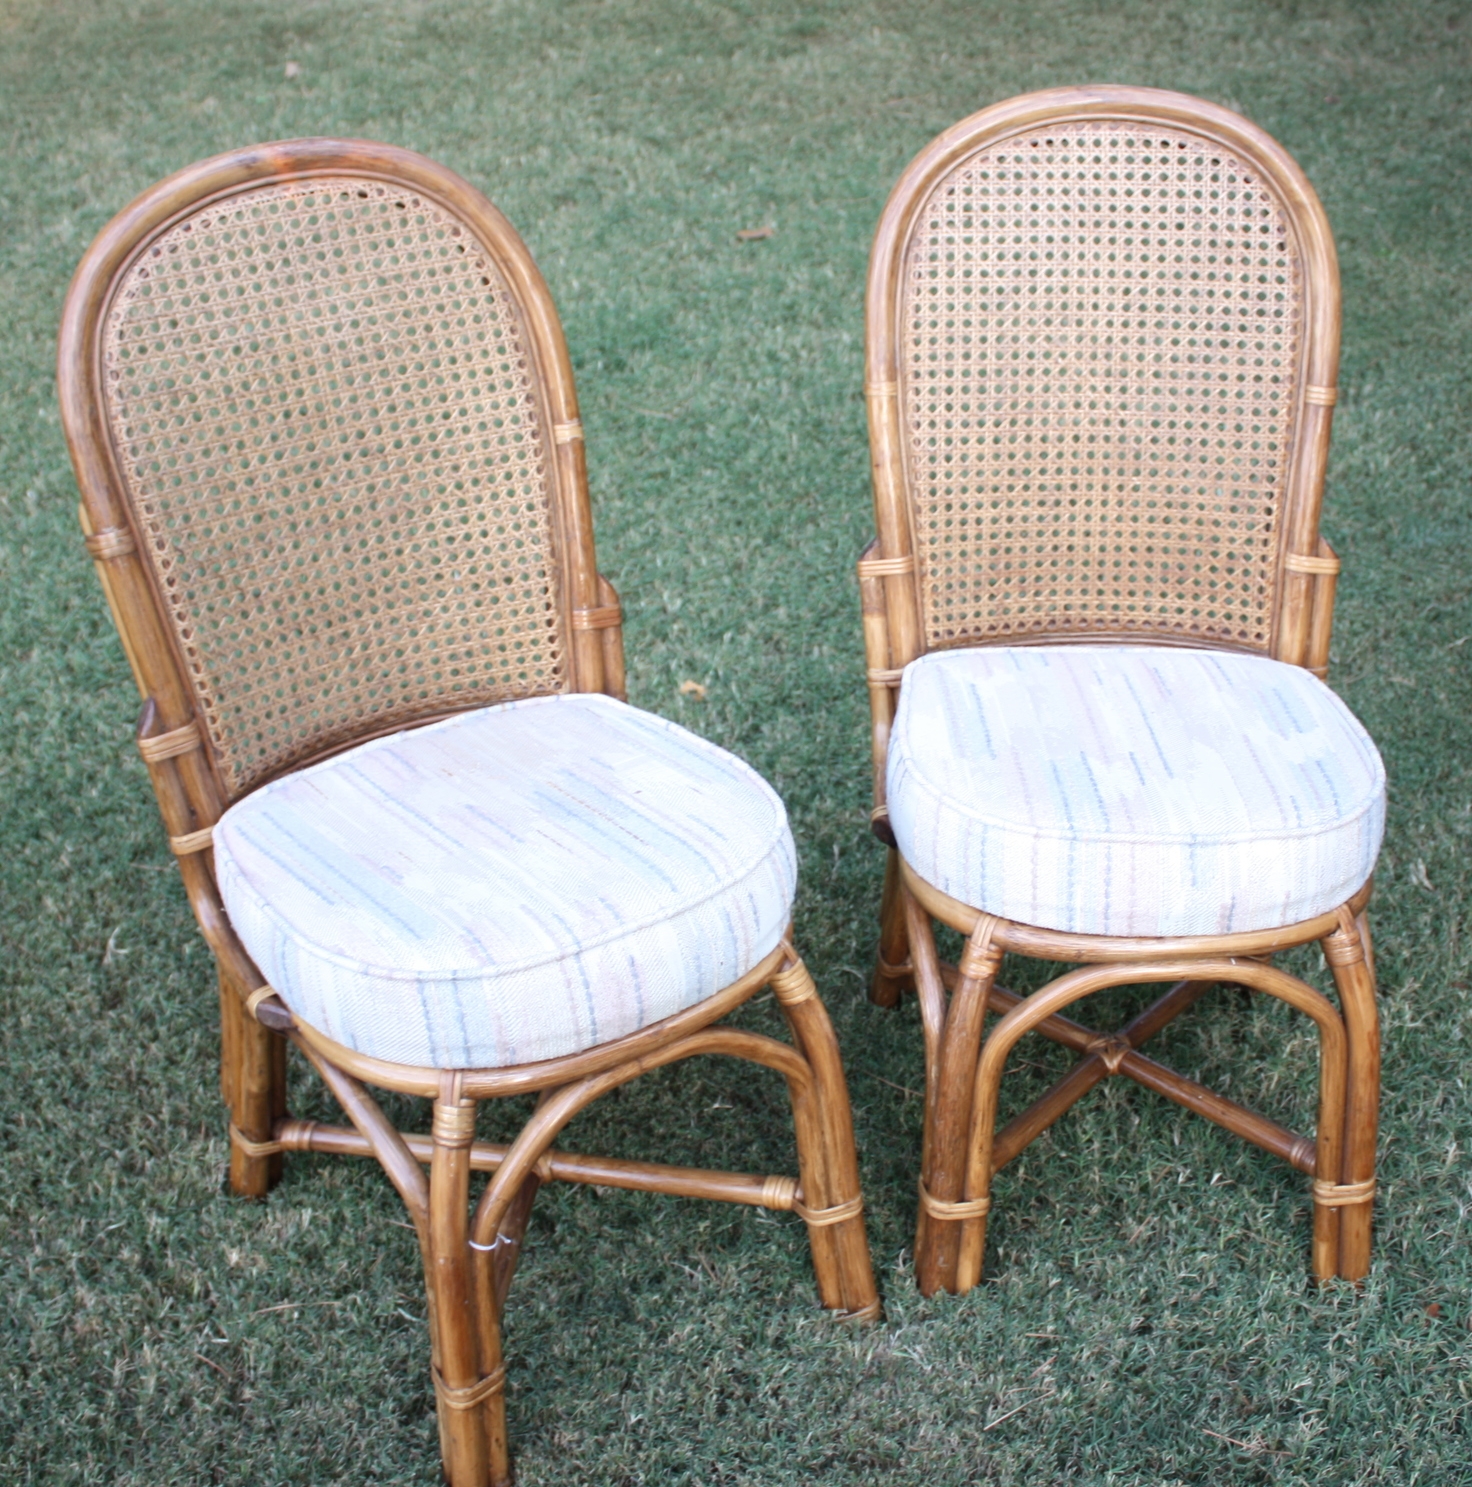
 I also finished up another little project waiting in the wings...these old bar stools!

Certainly not something you would want in your kitchen which might explain why I was able to pick them up for a few bucks each at an auction. Pretty ratty!

But with a little KSTP treatment and a simple reupholstery job on the cushions, beautiful!

After I disassembled them, I cleaned them up, sprayed them with Kilz, sanded smooth, wiped with a tack cloth, and then I sprayed them with a satin white spray paint. I had some leftover grey herringbone material from Sister's tufted chair project (will share that soon!) so I used that to recover the seats.

Recovering barstool seats and dining room chair seats are one of the simplest "reupholstery" jobs a DIY newbie can tackle. And it can completely change the look of a stool or chair. Again, TONS of great tutorials online for this simple project!

Again (and again and again) if you have a "ratty" piece of furniture that just doesn't trip your trigger any more, CHANGE IT! Life is too short to live with ugly furniture!

YOU CAN DO IT!  

The chest of drawers from hell...

Last week I told you not to be afraid of a sturdy piece of furniture that needs a little repair.

I think the key word is "little."

THIS monster needed more than a little!

Here is how this happens. I want something at an auction. They open bidding on one item, like this HORRID old dresser. I don't want it but neither does anyone else...so they add something...I don't want that either...neither does anyone else...so they add something...I don't want that either...neither does anyone else...so they add something...I WANT THAT! But in order to get it, I have to take all the other crud. So I ended up with this ratty chest of drawers, a disgusting trash can, a burnt orange smelly couch, and the ONE item I really wanted. I started to leave this chest, but I noticed it did have MOST of it's parts, and some stunning hardware.

It also had a serious case of ugly and some water damaged and splintered veneer on the top and at the bottom.

Hum....I can fix that...all because I thought the hardware was kind of nifty!

Seriously, what was I thinking?

I loaded it up and brought it home and went to work...and work it was. But this is a great opportunity to show you how to make the best out of the worst!

The first thing I did was remove all the drawers (and pieces of drawers) and the hardware and set those aside for the time being. The drawers needed some repair and the hardware needed to be painted. But I had bigger issues to deal with and unless I could deal with those issues, spending time on the drawers and hardware would be a waste of time!

The top...wow. Normally I would have just removed and replaced the entire top, but structurally the frame on this one solid. It just needed a new plywood top.

So I removed the old plywood top. Not a biggy...it pretty much popped off. All I had to do was take a chisel and scrape off a few chunks that stuck and some adhesive residue.

I took a piece of 1/8" oak plywood and laid it on the top, face DOWN, and marked the outline of the top with a pencil.

Veneers and plywood WILL "splinter" when you cut it...so the trick is to ALWAYS score it with a sharp utility knife. Once you score it, you will use the appropriate tool (in this case I used a jig saw since the front edge was curved) to cut on the OUTSIDE of your score line. 

I scored on my pencil mark, then cut on the outside of that mark.

Once I had it "rough cut" I applied it to the top frame with wood glue, set some heavy items on it, clamped the edges to the top frame and let it dry over night.

After the glue had dried well, I took a belt sander with 50 grit paper and sanded the edges of the plywood. When I got within 1/8" of the edge, I used my mouse sander with 120 grit to finish up flush with the edge of the frame.

I used my thumb to "putty" on a little wood filler along the edges, sanded smooth, then I primed it with Kilz.

The other issue with this chest was the "veneer rot" at the base. I scored the veneer with a utility knife above the highest point where the veneer was "loose." Then I just peeled the loose veneer off. No need to remove all the veneer if it is secure!

I nailed a 1x4 board along the bottom to improve the stability. I used scraps of the veneer I had removed to "shim" it. I did this on both sides, even though only one side had issues.

Now it was time to "fill in" the missing veneer. For that, I used wood filler and a broad knife. This is where a little creativity and patience comes into play because you will NOT accomplish a smooth finish with one coat! In my case it took THREE shots to get a nice smooth finish. I applied a coat of wood filler, let it dry, sanded, wiped, and then applied another coat. Same process...three times before I was satisfied with the results! 

Once the last coat of wood filler was sanded smooth and I was satisfied with those results, and ALL the other little repairs were made and I had cleaned it all well, it was time to give the "box" the old KSTP treatment...Kilz, sand, tack and THEN paint. 

The drawers...all but the top drawer were present and accounted for but they all needed a little glue and clamping! Remember, WOOD GLUE AND CLAMPS are your friend...not nails and screws. I pulled a few of those as well as scraped off silicone someone had used to "fix" the drawers!

I only had the front and the bottom of the top drawer. My initial plan was to make a little open shelf in that top space, but I decided to build and replace the drawer! Not a biggy for me since I have built drawers before, but you may want to consider making an open shelf if you are missing a drawer, or one is too difficult to repair. 

I primed the inside and sides of the drawers and will paint them as well. This is the best way to "kill" the smells that sometimes penetrate drawers and hide years of use and abuse!

I was super excited about the hardware...very unusual! But it was pretty cruddy so I decided to paint it gold. It is NOT hard to update hardware with paint! First make sure you reinsert the hardware screws. This is important so you don't get paint on the threads of the screws or in the screw holes of the hardware. Second, PRIME!!! There is primer specifically for metal, so make sure you prime with the proper primer. I prime both the back and front of the hardware. You may want to sand a tad after you prime just to knock off the "crumbs." Then just spray on whatever paint you want to use. In this case, I used a gold metallic paint to give them a nice gold sheen! 

(You may notice I am missing one of the smaller pulls...I noticed that too! Found it in the yard...not primed or painted...curses!)

If you are going to change the hardware on a piece of furniture, you will want to use wood filler to putty the existing holes and sand smooth BEFORE you prime and paint (again, it may take 2-3 coats) That way you are not limited by the size or placement of the existing hardware! Then just drill new holes for the new hardware!

The repairs were pretty extensive on this ratty old dresser but in the end, it really was worth restoring! At this point it is repaired and primed and ready for a final coat of paint.

The sky is the limit! I will probably paint this dresser the same color as a few other projects I am working on, so right now it will sit until I am ready to paint several things. Part of the "assembly line" process! 

Again, don't be afraid of doing a few little repairs...in the end, the process will always be worth the effort if you take the time to do it right! 

Remember this process...make ALL necessary repairs first and clean the entire piece! Then KSTP! Kilz (or whatever primer you prefer), sand, tack and paint!

I will share this piece once I get it painted. But even at "base neutral" it's looking pretty good!

Serpentine dresser makeover...

I want desperately to share my entry makeover, only because I want desperately for it to be done. Week 5 and I am STILL waiting on materials...specifically ONE stair tread that somehow did not get ordered properly. I have one, I have all the risers, I have a new newel post, and the tile was delivered over two weeks ago. But like so many of my home DIY projects, there is one little element that isn't here and I desperately need to finish. Pooh! 

So today I will share one of the pieces I told you about a month ago!!! I picked up several wash stands and dressers at an auction and all were in desperate need of a little "DIY magic!" 

First, and most important, always make sure whatever you are getting ready to spend your time and money on is in good repair. This little serpentine dresser needed some glueing and clamping before I could get down to the business of making it pretty!

It wasn't in horrible structural condition...just needed a little glue and clamping in the back and a few of the drawers. 

I used this process to strip the top...again, I have to have my "wood fix." These tops are super easy to strip and if the color isn't just right you can always apply a coat of stain....I added a coat of walnut stain to this one! Then just oil or poly, depending on your preference. I prefer tung oil finish but for resale I often use poly since most people know how to care for poly finishes! 

I didn't fill the gaps or sand out the "imperfections" ...I wanted it to look like what it is...a solid old oak top!

The drawers and cabinet could have been stripped and refinished as well, but for resale I kind of have to "go with the flow." Paint is the "thing" right now so I gave it a few coats of plaster paint, distressed and then sealed with poly. Again, I never wax a piece and poly has just enough "yellow" to give the paint an "aged" look! 

Simple new hardware, and it is good to go for another lifetime of use! 

Pretty! 

This is a busy and exciting week around our house! My youngest daughter finishes up her first year of college and will be moving home until her condo is ready next month. My oldest daughter...wife, mom, part-time paralegal...will be graduating (WITH HONORS!) with her associates degree on Saturday. So proud of both my precious girls!

The last time my oldest son was home, we managed to get a picture of all five! 

Yes, they are as amazing and awesome as they look! I know this past weekend was Mother's Day, but these kids make me feel loved and special EVERY day!!!

Drop door cabinet makeover....

Enough about my entry makeover FOR NOW! I'll get there eventually but I'm at the "wait" and "hum" stage...waiting on tile and stair treads and not quite sure what I want to do about trim and lighting...hum....

So in the meantime I thought I would share one of the wash stands I rehabbed. I went to an awesome auction several weeks ago and brought home 5 potentially beautiful dressers and wash stands. One just needed to be cleaned and oiled but the others needed some serious work.

On these older pieces I just can't bring myself to slather them entirely in paint. I always have to restore a little bit of the original wood. I know in today's world of home decor, paint is all the rage, but I need a good balance of paint and the "warmth" of wood. So no matter the condition of the top, if it is solid wood, I am going to strip it and refinish it. 

This little cabinet was originally a "wash stand." It wan't in terrible shape but it had seen better days!

It had a little mirror on the back, which when removed left a  "gap" along the back edge.

If I was going to paint the top, I could have filled it in with a strip of poplar and been done with it. But I knew I wanted to refinish the top so I added a piece of oak...

...just routed the edge, then attached it with glue and trim nails. I stripped the top with this process, applied a little walnut stain and sealed with poly!

I chalk painted and distressed the base and sealed with poly. The little drop front REALLY distressed, but sometimes I just let furniture do what it wants to do! A little update on the hardware and it is good to go!

The drawers on most antique pieces have some issues....remember GLUE AND CLAMP when repairing drawers! Not nails and screws! And since the drawers were pretty ratty and stained, I gave them a little KSTP treatment! (sorry, no pictures!) They look and smell much better if you will take the time to paint the inside of the drawers of these older pieces!

I think this would make an awesome bedside table or entry piece! Or even a tv cabinet!

I tried to "stage" this little piece with some of my auction finds....

....an old cheese box, some awesome scales and a wood duck decoy. But again, I am not the best photographer and I am definitely more about doing and less "froo-frooing." 

I have several dressers and another wash stand to share, so stay tuned!

TV cabinet makeover...

The bad news is I have had a lot of vacancies this past month...the good new is I have had a lot of vacancies this past month! 

The reason it is bad is because it means I have pretty much had to bust it every day...cleaning, repairing, rehabbing! I. AM. EXHAUSTED!

The reason it is good news is because OCCASIONALLY I find a decent little piece I can work a little DIY magic on. Before I started "rehabbing for resell" I would either toss this stuff or give it away to friends and neighbors....often after spending days rehabbing and refinishing! Seriously, I just gave away stuff! Now I will make repairs, paint, refinish...whatever it takes to give the piece another lifetime of use!

This piece is a prime example...

Dated, worn and just down right ugly. Very similar in style to this piece but a little sturdier so I thought it was worth giving a little makeover! 

This piece was a prime candidate for a little KSTP treatment I shared here.

It originally had a little shelf but it was missing so I cut another out of a sheet of plywood. Other than that, it really didn't need any repairs! I painted the cabinet a slate blue I mixed up using a blue and black latex paint I had on hand, painted the drawer fronts black and the hardware metallic gold. 

I liked the style of the hardware but definitely not the color.

This is one of those pieces I took to "base neutral" (in other words, primed) and then let sit because I just couldn't decided what color to use on it. 

Obviously the colors were okay...it sold 3 days after I took it to 410 Vintage


Simple makeovers for the worst offenders...the KSTP treatment!

There is NO excuse for ugly furniture. With warmer weather just around the corner, it is time to start looking at your furniture with a critical eye and making a list of pieces that CAN be changed with just a little bit of work!

We all have it...those "cheapo" pieces of furniture that are, at the very least, offensive! Maybe they were given to you, maybe you bought them at a "discount" store...maybe you bought it at the thrift store to fill space in a room.

Pressed board construction, laminate tops, dated finishes, pieces you put together with a little allen wrench thingy that came with the worthless little "screws" that promptly strip out and leave the piece wobbly and worthless!

It's ugly and cheap, but seriously who has the money to buy "real wood" furniture when you are struggling from pay check to pay check and having to buy shoes for a kid whose feet seem to grow a size every month.

I get it...I've been there. Fortunately I have learned to shop resale and auctions for "quality" pieces...and even if they need a little TLC, I have the tools, knowledge and time. But not everyone has that...or the money to buy and refinish high quality pieces.

That is why I advocate the KSTP treatment. Let me explain....

First, before you even get to the KSTP treatment, ALWAYS give the piece a good cleaning. On the nastiest, I use ammonia water but some can just be wiped down with a little water and mild detergent. Whatever you need to do to get the gunk off the piece! If it is "stuck" on just scrape it off with a razor! No matter if you scratch the finish...you are going to paint it!

Second, make any and all repairs that need to be made...and if you don't know how to repair it properly, google it! 

Okay, now the KSTP treatment....

K- Kilz (my favorite primer but any QUALITY PRIMER will do! That is why this is the KSTP treatment and not the PSTP treatment!)

For smaller pieces I use a spray can only because it is easy and gives me a nice smooth finish. On larger pieces I use a brush and 4" foam roller! TIP! Always shake the can longer than the directions recommend. Kilz will spray on with a "grainy texture" if you don't shake the can well! No biggy since you are going to sand anyway, but just makes it a little easier! Also, pay attention to the temperature recommendations...it matters!

Many paints SAY they are a "primer and paint in one." Sorry, I am old school....I ALWAYS prime and I personally recommend it. If you want a superior finish that will hold up to use and abuse, prime! 

S-Sand. A 220 grit paper will usually smooth out the piece after it is primed. I wrap a piece around a sanding sponge block!

If you have "ornate" legs or detailing, use 000-0000 steel wool.

USE YOUR HANDS, not your eyes. Feel the piece.

Trust me, if it isn't smooth, it WILL show after you paint it! Sand it until it is smooth to the touch! If you cleaned the piece well, scraped off all the gunk, this step really should only take a few minutes.

T- Tack cloth. A MUST after you sand but before you paint (or apply any finish). Blow or brush off as much as you can, then use a tack cloth!

You can purchase it at your favorite home improvement store...usually in packages of 2 and relatively inexpensive (around $2)! You can wipe a piece down all day with a clean cloth, but you WILL leave "stuff" on the piece if you don't tack cloth it. Tack cloth will remove EVERYTHING. If you still feel "stuff," hit it with the sand paper again and then tack cloth again! 

P-Paint. This is where people usually freak out. My favorite for wood or laminate furniture is oil-based but it can be a tricky paint to work with for a novice and difficult to clean up. Fortunately latex paints have come a long way and are much more durable these days! QUALITY spray paint is probably your best bet for smaller pieces. I say quality because you can buy spray paint a tad cheaper at discount stores, but I am not a huge fan of cheap paint for ANY project! I usually buy Valspar or Rust-oleum from Lowe's.

On smaller pieces of furniture the difference will only be a few dollars but will be worth it in the long run. 

Each of the brands come in LOTS of great colors...just find the color you love! I have found very little difference between the two brands...the Valspar tends to dry a tad quicker....but both are quality paints! ALWAYS shake the cans well and follow the directions on the can!!! 

I have followed every tip in the book to get rid of the occasional "striping" on large, flat surfaces...like dresser tops or table tops. It doesn't seem to matter how I spray, what the temperature is or how hard the wind is blowing...sometimes I get stripes.

My solution has been to purchase the little "sample pots" of paint custom mixed to match the spray paint I am using and roll it on the large flat surfaces with a 4" foam roller! 

Penetrol and Floetrol are a MUST any time you roll or brush on paint...oil or latex!

Use it. It will eliminate the brush and roller marks and give you a MUCH smoother finish! 

These are just a VERY few projects using the KSTP treatment (I have done hundreds!)....world of difference for a little bit of work! I am working on a piece right now that is in the S stage...primed and sanded but now I need to figure out what color I want to paint it...soon!


Even light fixtures and paddle fans can be spray painted!!! On metal pieces and furniture hardware, I use metal primer primarily for the "rust retardant" factor!

One last important TIP when using ANY technique to paint anything....ALWAYS give the piece time to cure before you put it to work! 

I was always skeptical of those "two day" makeovers they did on tv where they would paint something and then "stage" the pieces with all kinds of stuff within hours of putting a final coat on. (Kind of like getting your nails painted at the salon...even though you dry them for 10 minutes, you are still going to ding them if you dig in your purse for your keys! Unless you get gel polish...awesome stuff!) Trust me, that is the fasted way to ruin a finish! Don't do it...be patient and give the paint time to harden (cure) before you set a lamp on it or try to hang the fixture (trust me...I have had to repaint many pieces because of impatience!) 

One dated, nasty, cheapo piece of furniture can ruin an entire room. Toss it or paint it! YOU CAN DO IT!

*I have not been compensated for pimping these products! These are the products I use and work for me!!!*

Mid century chest makeover....

On rare occasions I find a little treasure hidden among all the garbage my tenants leave when they move in the middle of the night! I found this little table years ago and it started my love affair with Lane Acclaim tables....

It did NOT look like this! I remember I picked up the nasty little thing and started to toss it in the back of my truck. But it was sturdy and I could see quality through all the "muck" so I brought it home. I googled the markings on the underside and found that it is a walnut and oak Lane Acclaim table manufactured in 1959. With a lot of elbow grease and a little tung oil, it is now one of my favorite little "treasures." Along with the others I have purchased and restored over the years. Still waiting on the desk and a round end table...but someday...

Now I look at furniture I find a little closer. 

This dresser is one of my recent finds. A true mid century piece. Completely intact and sturdy as the day it was built. Unfortunately someone had done a REALLY bad job painting it!

I cleaned it, primed it with Kilz, sanded it and wiped it down with tack cloth....then I painted it with one of my favorite flat "charcoal" greys. The ole' KSTP treatment! The drawers were in mint condition and just needed a little cleaning!

Beautiful! Because of the style, I kept the finish simple. While I hesitate to paint MCM pieces, this is a prime example of "enhancing" a piece. 

Now I am going to share a little DIY frustration because I know I make this stuff LOOK easy sometimes. I first painted this entire piece with several cans of Valspar flat spray paint. I like spray paint because I normally get a nice smooth finish. For some reason I kept getting that "stripped" look on the top and sides...the drawers looked fine. Not a problem I normally have with flat finishes when the temperature is decent. I ended up buying a quart of latex flat paint, mixed to match, (and added floetrol...a must!) and used a 4" sponge roller to get a uniform finish.  Worth the extra effort!

I know I have said it a thousand times....don't overlook those "ratty old" pieces.....neglected or abused or poorly "restored." With a little bit of your time and attention, they can be beautifully restored and ready for another lifetime of use! 

This week I will be sharing this project at...

I was featured on Remodelaholic

...love their features and their site! 


A simple TV cabinet makeover...

This is the second year in a row I have been sick around Christmas. Fortunately, last year it was AFTER Christmas. This year it was BEFORE Christmas. Not good when I have so much to do the week before Christmas! I knew I felt bad Tuesday when I was out building fence (the wind did a number on my privacy fence at the apartments) but I didn't realize how bad I felt until I came home and sat down.

Now I have a list of things to do...presents to buy, a few things to return, wrapping boxes to hunt down, presents to ship, grocery shopping....and I feel to cruddy to even drag myself into the shower! Fortunately I THINK the worst is over so hopefully I'll feel like getting around later today!

In the meantime, I thought I would share another simple little makeover.

Remember all that dated, uninteresting furniture I keep harping on you to paint or do SOMETHING with! Well, this is just another example of a piece of furniture that no longer has a place or a purpose in our homes...unless you roll up your sleeves and give it a little makeover.

The dreaded old "tv cabinet" ...or "hutch"....or whatever you want to call it!

Here I shared how I acquired this less-than-interesting piece and how I used beaded craft board to start this simple transformation!

I gave the inside a KSTP treatment with my "go to" off-white and gave the outside a little plaster paint/dristress treatment. But it still lacked "character" so I wiped down the entire cabinet with walnut stain. That changed the color from a soft "teal" to almost a "greenish" color but it also added depth to the finish! Kind of a "patina"....

I sealed it all with poly and changed out the hardware. Actually I painted the original round knobs black and added black cup pulls to the bottom drawer! Remember, if you are changing out hardware, you may have to patch some holes BEFORE you paint. In this case I had to do just that since the holes on the bottom drawer were 3" apart and the holes for the cup pulls are 2 1/2"...no biggy! Just patch them with wood filler, sand and then paint....then just drill new holes for the new hardware!

It would be simple to reinstall the doors...but in this case I decided to go with an "open shelf" look! 

Simple little update! Now this little cabinet is ready for another season of life! 


Another day, another project....and a new venture! And my annual HOLIDAY CHALLENGE!

My neighbors, Kenny and MaryAnn, bought a beautiful antique dresser. The problem with beautiful antique dressers is they usually need a little work. Ever watch the tv show "Botched?" I should do a show about "botched" repairs on old furniture because 9 times out of 10 someone else has already tried to "fix" little problems, only to create much bigger problems.

In exchange for a few hours of work and a few choice curse words, MaryAnn gave me this little pine cabinet....

IMG_7489.JPG

At some point Kenny had removed the back and like me, had NO idea where he put it. That is okay...I have "repurposed" little cabinets like this before and one of the first things I do is remove the back and replace it with something with a little more "character."

This tung and groove "craft board" is perfect for adding a little "pop" to otherwise boring or dated cabinets. Since I decided to remove the doors and turn this into an "open shelving" unit, I knew it needed a little something....

Rather than paint the boards a solid color, I usually do a little "white wash" treatment on them in whatever paint color I plan on using on the exterior. I painted the inside of this cabinet my favorite off-white color and plan on painting the outside a soft teal. 

The first thing I did was cut the boards down to the size I need for this project. Then I just dip my paint brush in water, then dip it in the paint, brush the boards, then wipe them with a damp cloth....

This allows the grain to show while still giving the boards a little color. After the boards dry, I spray them with a clear coat. 

I put a tiny bit of glue in the "groove" of each board. Not a lot or it will ooze out and make a mess...a little glue goes a long way...and fit them together one at a time across the back! 

I use my pneumatic stapler to attach them to the cabinet....

This board is so thin you could probably attach it with a manual stapler if that is what you have handy!

This bead board really does dress up and update these old cabinets..

IMG_7529.JPG

Now all I have left to do is paint the exterior and replace the hardware...I will make sure I share the transformation when I get it finished!

I recently used this same treatment on a huge old ugly (but very solid oak) cabinet I hauled home from the apartments. 

I decided to use it for display in my new "room" at 410 Vintage

Yep, this is my "new venture." An entire room at 410 Vintage, rather than just a booth!

IMG_7466.JPG

This is just a little sneak peak at my new room...you can see the amazing ratan chairs that started out in a total state of FIX ME!!!!

(I had several dining room tables that where set all pretty for Christmas...neither lasted a day!)

IMG_6625.JPG

A couple of little side tables that had a bad case of the uglies...

They both just needed a little TLC...

I have filled this room with my auction treasures and furniture rehabs...its is a fun space!

If you are local and have not checked out 410 Vintage in Fayetteville, you really should drop in! The owner has one side filled with "mid century" awesomeness and the other side of the building are spaces filled with anything and everything vintage, retro, antique and wonderful! They have an Instagram page that is updated several times a day with new arrivals. I don't have an Instagram page but if you do, you might want to check it out!

HOLIDAY CHALLENGE!

This is the time of the year when I want to remind you of my "HOLIDAY CHALLENGE!" Our family use to do the Angel Tree every year and always enjoyed buying gifts for our "angel." But as the kids have grown and have less time to shop with Mom, I have encouraged them to find their own way of giving. For me, it is random giving. Every year I set aside 5 $20 bills...and I wait. At some point during the season, I will run across someone who will have a "need." Maybe at the grocery store...or the car hop at Sonic. One time I was getting gas and I felt the person at the pump next to me could probably use gas money. You never know...if you open your heart, you will know when to give! 

If you don't have a lot of cash to give, give of your time!

We may not have everything we WANT, but we always had what we NEEDED! It feels wonderful to be able to give back...even if it is just a tiny bit! 

Simple bench or stool makeovers...

At least once a month I run across pathetic little benches or stools at the auctions or in thrift stores. I have featured a few in the past....

...this cute little piano bench here....

A bench I made for my daughter out of an old coffee table here....

My dad's old tool bench....

I use it as a little side table next to the chair in the den! This is one of those things that serves a purpose and has tremendous "sentimental" value as well! 

And at least a dozen or more I failed to take either before or after pictures of over the years! I'm a baaaad blogger!

Trust me....they are super simple to makeover with a little paint and fabric and always turn out precious! 

Recently I did a little footstool and bench and actually remembered to take a before AND after picture!

This little foot stool was pretty pathetic in it's original state....

I stripped the fabric (and removed at least 2,483 staples), chalk painted the base, distressed a bit and sealed with poly (gives lighter paint an "aged" look), added a little bit of foam to "fluff" it, new fabric and new "gimp" trim.

Cute as a bugs ear!

I found this old icky coffee table at the apartments. Like the old coffee table I turned into a houndstooth bench for my daughter, it was pretty worthless for it's intended use...a coffee table. 

I removed the top (super simple...a few screws), added foam padding and batting and covered it with fabric and gave the base a little KSTP treatment.  Reattached the top to the base with screws. Super simple! 

Both are now in my new flea market booth at 410 Vintage in Fayetteville! Awesome place so make sure to drop in sometime and check out all the AMAZING treasures! 

Next time you see a ratty old foot stool or a dated old coffee table, see it for its potential! They are super simple to make-over and are perfect for additional seating or a place to throw your clothes at the end of the day...and of course, they are the perfect little touch to add character to your home!