Changing dated can lights!

My wing is broken.

Poo.

It’s my elbow…it is still boogered. I am trying to “heal” it by resting it but after about a month I’m ready to give up and see what a ortho dude can do for me.

While “resting” I pretty much sit around and look for stuff to do.

Laying on the couch, looking at the ceiling, I began to obsess about my dated can lights

SUPER simple fix and on a scale of 1-10 it is pretty much a 1.

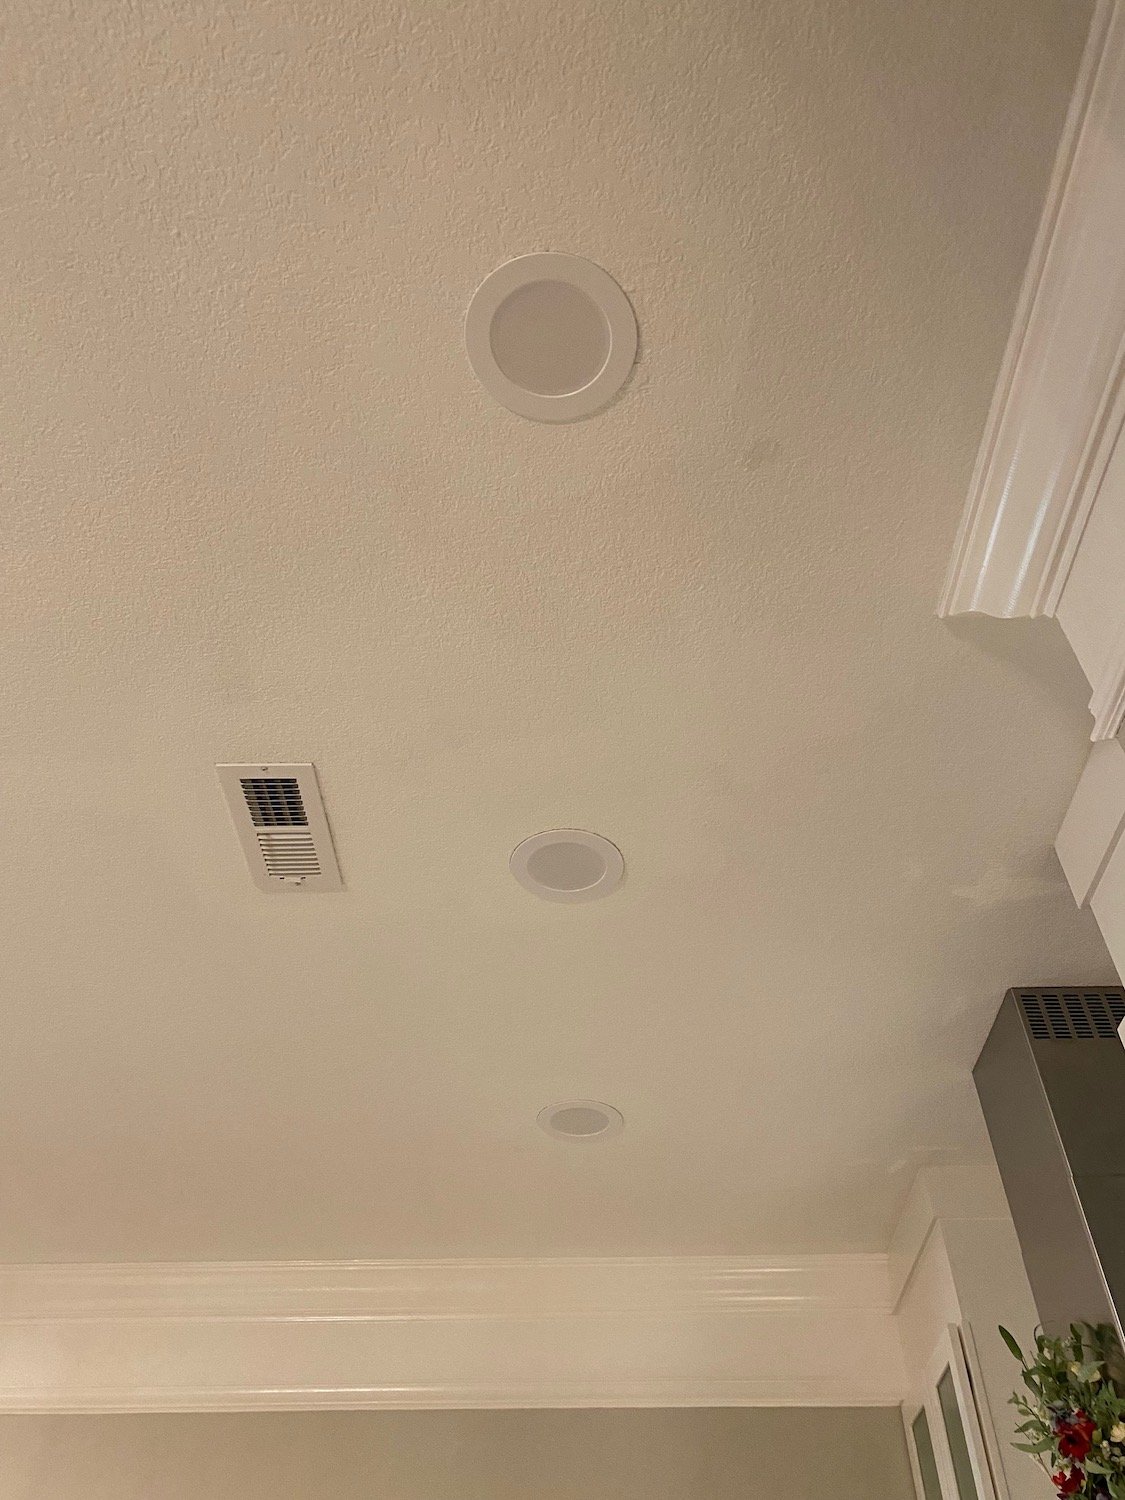
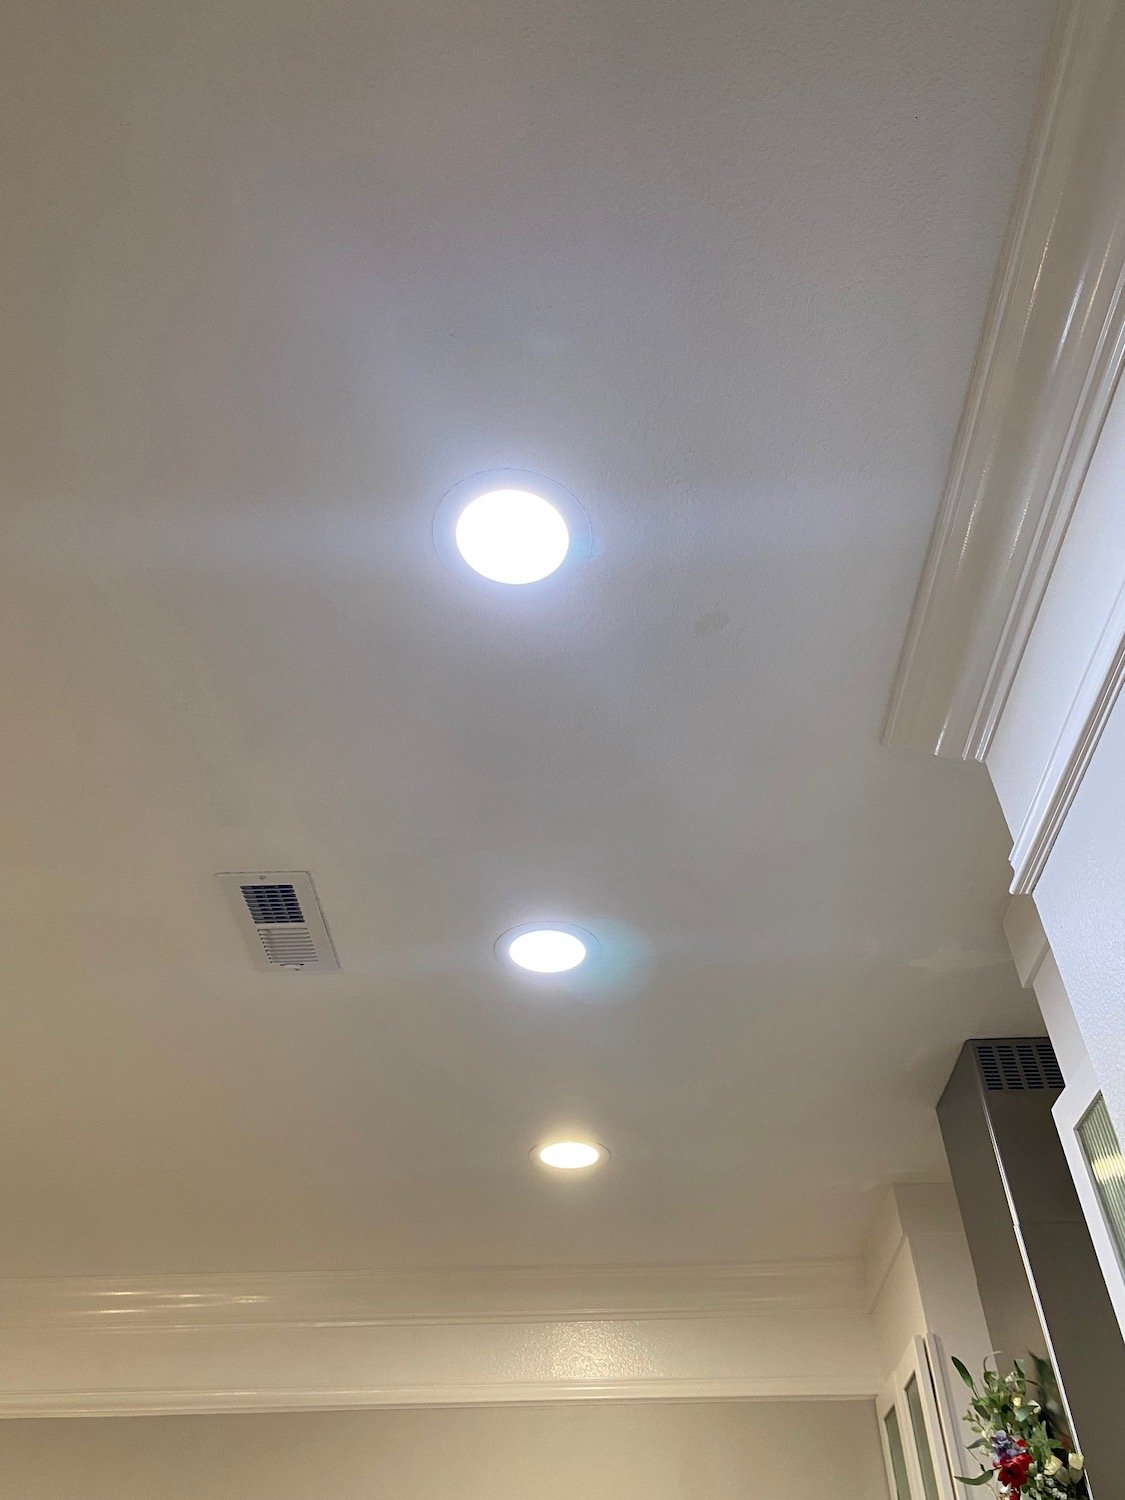
This is what I have….

…an ugly old can light with a bulb. It had obviously been painted over when the prior owner painted the ceiling. I have five in the kitchen, two in the den, four in the living room, two in the bedroom and four in the bathroom…so yes, they annoy me. But truthfully only when I am laying on the couch or in the bed looking at the ceiling.

While they are “dated,” truth be told no one really pays attention to them except of course when a bulb goes out.

This is where I want to say that when “they” say an LED bulb lasts 10 years, “they” lie.

Beside the point…point is, it is cheap and easy to replace these “dated” fixtures.

So off to Lowes I went and THIS is what I found….

When I say it was easy to replace, I am not kidding. The hardest part was climbing up and down the ladder. Just remove the existing bulb and trim piece. The trim piece is usually held in place by little springs or pinch clips.

Then just screw the new fixture into the socket (like a light bulb) then slip the little pinch clips into the existing brackets on the side of the can. Simple!!!!

The fixture has five different light settings on the back…from bright white to soft “yellowish.” I set all my living space lights on a soft setting and the three in my kitchen on a brighter white for task lighting. Perfect.

TIP! If one of these eventually goes out you can’t just replace a bulb. My suggestion is to get an extra 1-2 in case one goes out in the future and this style or brand is no longer available…that way you won’t have to replace multiples if one goes out!

Again, one of the simplest and most impactful DIY projects you can do. Don’t know why I haven’t done this in the last three years.

Oh, yeah, I know why. Rarely do I lay on the couch and look at my ceiling lights.

A rock water feature...

In my last house I had an amazing two tiered water pond with a fountain next to the back patio, outside my bedroom. I loved it. I could open the window at night or sit on the patio and drink coffee and hear the water.

If I believed in the whole Zodiac thing I’d say it is because I am an Aquarius…”water-bearer.” I don’t ….. I think I just like the soothing sound of water.

Truth is the sound of water is very tranquil…zen if you will. Calming. Destressing.

I can’t really have a open pond water feature here…too many leaves!

Then I ran across this tutorial on Instagram for a closed water fountain. THIS I can have!

So I set out to build it.

Keep in mind, this is MY tutorial for my specific fountain. There are TONS of tutorials and designs on Pinterest so do a little research and find a tutorial or design that works for YOU!

I decided to place it in the corner of my front flower bed (shared my flower beds HERE). The first thing I had to do was move a few plants around…no biggy!

The tutorial calls for using a large plastic tub as the reservoir. I bought a livestock feed bin at the local livestock supply store…a 40 gallon tub that has an inside diameter of 26 1/2”. (Much cheaper than a tub designed specifically for a water feature that you can buy at the big box hardware stores.) That measurement is important when you go to buy rock because your base rock needs to be a few inches less than that in diameter so the water flows back into the reservoir. If you want a bigger rock, I suggest getting a bigger tub.

So, dig a hole…a BIG hole…large enough for the tub to sit in flush with the surrounding grade. I dug mine a few inches deeper so I could cushion the bottom of the hole with a few inches of sand (plain ole’ play sand). I think that is important for leveling and stability. It also ensures that no rocks will compromise the bottom of the tub.

Set the tub into the hole and make sure it is level…I used a 3’ level. If you don’t have a 3’ level, set a board across the top of the tub then use a shorter level on top of the board.

Once the tub is level and flush with the ground, back fill around the tub with dirt…checking for level as you go.

Water the back fill well so that all the dirt settles around and under the reservoir.

After I was certain all the dirt around the tub was well settled, I dug out the dirt around the tub about 2-3” deep about 5-6” around the tub. I filled that in with small rock I bought at Lowe’s.

I did this so that if the reservoir “flooded” there was less chance of dirt and silt back flowing into the reservoir…kind of a “french drain” thing.

As you can see, I created a little “bed within the bed” by using THIS plastic border material …keeps it nice and neat and separated from the mulch. (TIP..buy extra stakes…this kit does not come with enough!)

The next step is the metal grate across the top. I was going to have my son wield me a grate out of rebar but I found this little gate at Lowe’s and decided it would work fine.

Being the “overkill” kinda person I am and knowing this was going to have to support some super heavy rocks, I did attach three pieces of 3/8” rebar to the underside of it just to add a little strength.

I painted the rebar with Rust-oleum protective paint just so it wouldn’t continue to rust and leach down into the reservoir.

Then I lashed them to the gate using zip ties, making sure they would rest on the edge of the reservoir.

I set a square rock in the bottom of the reservoir to set the pump on…that way it wouldn’t suck in any dirt or sludge that settled in the bottom of the reservoir between cleanings. I put the pump in after the grate but before the mesh. (THIS is the pump I used)

After you lay the grate down, but before waterfall rocks, lay chicken wire or some other smaller metal mesh down on top of the grate. This is because you are going to surround the waterfall rocks with smaller decorative rock and you don’t want them falling through the grate.

I used a stainless wire panel I found at Lowes,. (can’t find it online to link). It is a 2x8 panel next to the rebar.

Cut the wire mesh to fit over the metal grate, and cut a small hole in the front so that you can get your hand down into the reservoir. Remember the mesh has sharp edges so give yourself a little room so that you don’t slice up your hand! (yes I learned that lesson the hard way!)

Then just lay a scrap piece of mesh over the hole before you set the waterfall rocks.

If you need to get to the pump, or when you want to clean out the reservoir, you can easily move aside the decorative rock and remove this panel and access everything.

Now the fun part…picking out your “water fall” rock and decorative rocks.

So off to the rock store I went.

Funny story…my daughter called one day and asked what I was doing. Told her I was headed to the rock store. She laughed…what’s a rock store?

A place where they sell rocks!!!! Big, small, gravel, pavers…the whole nine yards.

I picked out three large rocks I thought stacked nicely and would fit within the 26 1/2” diameter of the reservoir and would flow water. I took a picture of them at the rock store so I would know exactly how they stacked…

I picked out the decorative rock that will go around the large waterfall stones, on top of the wire mesh. It took about 10-5 gallon buckets, but I only fill the buckets about 1/2 full so I can actually carry them!!! You can also buy bags of decorative rock…to each his own.

I also picked up 4-5 rock shims that were scattered about…little slivers of flagstone rock that are about 1/4'“ thick…later you will understand their importance.

These larger rocks are super heavy…so make sure you have some muscle to help you load them and set them in place!

Stack the rocks like you want them next to the reservoir. Pour water over the top of the rocks to make sure the water will flow properly. You can make minor adjustments with shims later. It’s important that the water that comes up through the rocks will flow back into the reservoir. I stacked mine so that all the water flowed to the front and sides…again, personal preference.

Time to drill the hole. WOW! What a chore. I used a 12” 1/2” masonry bit to drill down through the top rock drilling far enough to “mark” the second rock. Move the top rock to the side, then drill the second rock and go far enough to “mark” the bottom rock. I drilled the bottom rock after it was moved into place on the grate…that way you drill through the wire mesh where the hose needs to go.

After the holes are drilled, stack the rocks and line up the holes….it is easier to line up the holes by using the 12” drill bit as a guide. Then snake a 1/2” water line that is attached to the pump through the holes and out the top, cutting it about 1/2”above the rock.

Clean out all the rock dust and muck from the reservoir. Just hose it down well and suck out the dirty water with a shop vac….you may have to do that a couple of times. That way it is all nice and clean and ready for fresh water.

This next step is super important.

Fill the reservoir with fresh water, just enough to cover the pump about 2”-3” and turn it on. (Oh yeah, you do need a power supply close by!)

You want to make sure that ALL the water is flowing from the top rock into the reservoir…if it isn’t, make adjustments to your rocks by using the rock shims. You may have to shim the rocks from side to side or back to front to get the water to flow properly.

Watch it for a bit…make sure it does what you want it to do! (For the record, the pump can be adjusted to flow lighter or stronger…read the instructions…I did not)

I did this before I added the decorate rocks…just made it easier to see. I did notice that once I added the decorative rocks that some “splashing” happened…no too worried about it because the reservoir will have to be filled from time to time anyway, so….

One suggestion…only fill the reservoir about 4”-5"” from the top. If you fill it to the top, there will be no where for rain water to go and you are more likely to have “flooding.” Just my thoughts.

Bingo…a relatively simple water feature!

I added one of my Colorado decorative rocks and a piece of driftwood…

I loved this little things so much that Brian and I installed another one just off the screened porch so I could hear it when I am drinking my coffee in the mornings or having dinner on the porch…added a little Dwarf Japanese Maple….LOVE!!!!!

This is NOT a hard project. Yes, it takes some muscle…but it is relatively easy and probably cost me under $300.

Perfect for small areas or in areas where an open pond water feature isn’t feasible!!!

We've come a long way baby...

So often I share the inside of this house and all the work we have done. This week I finished up another landscape project and realized I have never shared how far we have come OUTSIDE!

I didn’t even comprehend the amount of work we had done outside until I looked it up on Zillow again. The pictures are from when we bought the house three years ago. Sooooo much has changed…both inside and out!

The landscaping was basically a blank slate. I pulled out a few shrubs here and there, moved some azaleas, cut down an overgrown tree in a flower bed and pulled up some edging. But basically it didn’t have a lot of landscaping. I guess the lady who owned it for over twenty years before us really didn’t do a lot.

Fine by me…just that much less to demo!

So let’s start with the front…and keep in mind I didn’t do any “editing” on the pictures i took so you can see how things really look around here. Shade and all!

Before….

The first picture is the Zillow listing. The last two are the street views from Google Earth.

You can probably tell from the Zillow picture and the Google street view pictures…clever photography and heavy editing can really make a difference!

On the house I removed the ugly wood arch things to open up the front porch, changed out the front door, replaced the dated light fixtures, added some minor detailing on the garage door and changed out the arch transom windows.

Trimmed up all the overgrown trees…a must for aesthetics but also for safety…a big dead limb can do a lot of damage.

Removed a few flower beds and then composted and mulched the others.

We brought in new top soil and sodded the entire front yard with fescue. I removed some blocks from the block retaining wall. I really wanted to created a new retaining wall with native stone but that is another project for another time.

I moved four large azaleas that were planted by the front entrance to the side yard where I created a shade garden.

Nothing was going to grow under these trees and it features a huge dogwood …the space really needed to be highlighted! The azaleas and dogwoods are spectacular in the spring!

I planted new plants in the flower beds to the left and right of the entry. Again I am transitioning to perennials so I planted small boxwoods, chokeberries, tick seed, lirope and Stella D lilies…and of course a few potted hostas.

The bed on the left is filled with beautiful daffodils and tulips in the spring…I left those. (This is where I added a simple water feature…stay tuned and I’ll share how easy it is!)

I fill in with a few colorful annuals and I have a few pots I add ferns and impatiens to every year.

Dressed up the beds on the north side of the house with a little rock and planted a few easy plants…hydrangeas, lirope and some astilbe.

Prime example of why you should really research plants…originally I planted some Stella D lilies here and they did not get enough sun. This side yard only gets a little morning sun which is perfect for the hydrangeas and astilbe.

A few weeks ago I finished a little makeover on the side yard where grass would not grow. I added a little flagstone, some decorative rock around the air conditioner, planted some lirope my neighbor was thinning out in her yard, planted a redbud and added a little birdbath.

When I was at the livestock store picking up supplies for my water feature project, they had their azaleas 50% off. I snagged a few and planted one here and two in the side shade bed incase the older ones eventually croak!

The entire back yard slopes towards the house and to each side. This side of the yard gets a pretty heavy water shed because of a downspout. It is one reason this side of the front and back yard would not grow grass. I have to be VERY careful about any changes I make.

HERE I shared the changes I made to the side yard behind the fence.

The back yard has probably had the most dramatic changes.

These are the “before” pics from Zillow…when we bought the house….

If you are wondering what that big concrete bench thingy is, we don’t know. It was there and it is HUGE so it’s not going any where. We have been told it is part of the old farm house that was once here before this area was developed.

One of the first things we did was take out the shrubs along the back of the house and cut out the old pawpaw tree. I loath to cut down any tree but this one was just too big for the space and was on the siding and roof. We replaced it with a little Japanese Maple and someday I MIGHT figure out what I want to do with this bed. In the meantime, potted flowers will have to do!

We added a little rock and planted smaller boxwoods long the back.

I’ve never been a big fan of rock beds…I always preferred mulch. The ease of these beds the last few years has really made me a fan. Truthfully it is easy to plant in and of course pretty much maintenance free.

I added the large flower bed in the corner when we first moved in. Again, it was NOT going to grow grass under the humungus trees. I knew I was going to grow mostly in pots so I put the edging down around the trees along the “shade line,” applied some Roundup on what little grass was there, then just topped everything with about 4” of compost.

(Feel free to be envious of my spectacular wind chimes. I showed them to Brian last spring at a local garden shop…he remembered and gave them to me last Christmas. The man is amazing!)

I have always heard you should be very cautious around oak trees so as to not “smoother” their root system. We have a HUGE white oak and several large red oaks. I made sure to keep the compost and mulch thin around the base of the trees. When I plant in the bed, I dig a big hole then add a mixture of garden soil and compost before planting the plant…that way I didn’t have to amend the soil in the entire bed. With all the rocks and roots in this area it would have been dang near impossible. And again, I didn’t want to do anything to disturb the tree root systems.

HERE I shared the pathway I made with my grandad’s old grind stones.

I shared HERE the extension of this little back bed. Just what little digging I had to do for the edging and planting destroyed my elbow (don’t ask, I don’t know!)

Around this entire back bed is my next “want to” project. I “want to” extend the entire bed about 4-5’, add a flagstone walk and more plants…in other words make the entire thing bigger. Hum…maybe someday when I don’t have a bum elbow.

I shared HERE the construction of the swing…and HERE when I stained it.

HERE I shared my shop and the changes I made to it to make it more appealing. The inside is still a shop full of tools, supplies and garden stuff…but the outside had to be dolled up!

I added this bed last fall for the hostas. I split off the potted hostas this year! Everyone of these hostas are splits!

Two years ago I added a little “pergola shed” onto the back of the shop for Brian’s zero turn mower and our larger garden tools (shovels, racks, wagon, etc.) Everything else goes inside the shop.

We didn’t completely sod the back yard but over the last few years I have sodded and seeded here and there…it is a work in progress. Someday I hope to have a perfect back lawn. With the shade and sun combo it is a struggle.

I was fortunate this yard had an irrigation system. It had been neglected for years so it took several years and some back breaking days to get everything repaired and in working order but it has been worth every effort. I don’t know that I could keep everything alive without it!

I keep thinking that SOMEDAY I will get it all done and then I can just sit around my park-like setting and enjoy. But truth is, I like working in the yard…I like digging in the dirt…I like planting new plants.

There are days I just walk around with my coffee and enjoy. But in my mind I am always looking for new ways to get my hands dirty.

It is my therapy.

A CUTE GARDEN BENCH...

I saw a precious little “mud bench” on Instagram….

Cute as a bug’s ear. Only one problem…I don’t have any grandgirls…just boys. Two are too old to appreciate something like this and one isn’t old enough to sit up by himself sooooo……

What to do?

As I mentioned before there is a precious little girl next door….I borrowed her to bake Christmas cookies!

She will be 8 this summer. She LOVES to make mud pies and has a raised vegetable garden. She had a little make shift “mud table” in her back yard so I knew she would love something like this!

They were on vacation a few weeks ago so it was the perfect time to build and stage a little surprise…so off to Lowe’s to TRY to find some decent wood. Not an easy task these days!

The inspiration bench looks like it is made out of regular wood and painted. I built mine out of treated wood so it would weather well. Unfortunately that means I have to wait a few months to paint it or stain it…no biggy.

For this bench I needed the following lumber (all treated):

2-4x4x6

5-2x4x6

5-1x4x10

2-8’ deck boards (they are around 3/4” x 5 1/2”)

1-1x2x8

1 plastic storage bin with a lid

I used a skill saw, chop saw, a kreg jig and my screw driver.

Remember, 2x4s are actually 1 1/2 x 3 1/2”….and 1” thick boards are actually only 3/4” thick…it’s a racket! The lengths are what they say they are….

I had all the screws and hardware so no need to buy any but you will want 2 1/2” Kreg jig screws and 1 1/2” and 2” deck screws…and some random hooks!

I decided to make the entire bench about 29-30” tall, 4’ wide and about 2’ deep. I think it may be a tad tall for a little one so I built a little “walk bench” for the front of it until she grows a tad.

I can pretty much construct something like this in my head, but if you are a novice, make sure you draw everything out on paper using the actual measurements of the lumber. Or better yet find a plan online THAT MAKES SENSE TO YOU!

The first thing I did was cut the 4x4x6s down to 4-29” pieces for the legs (remember the top will be about 3/4” thick). I used a skill saw to cut them down.

I used the 2x4x6 for the front/back frames and the side frames. The width will be 48” wide so the front frame is 48”, less 1” so the top can hang over by about 1/2” on each side, less 7”(two side posts/legs…remember they are actually 3 1/2” wide) …so the front and back frame pieces are 40”. For the sides…24” less 1” (for the overhang) less 7” (for the posts)…those are 16”. You will cut 4 of each length…2 for the top frame and 2 for the bottom.

To attach the front and side frames to the posts/legs I used my Kreg jig…love that thing. A little glue and then two screws on each end.

Just a reminder…ALWAYS attach boards with the “cup side” down…this applies to any project. To find the “cup” look at the grain at the end of the board. In other words you want the “hump” of the grain to face out. This is important to pay attention to when selecting wood…if the side that will face out is all scarred or knotted you will want to pass.

I put a frame at the top and also 2” from the bottom of the posts/legs so I could add a bottom shelf.

After I got the frame constructed using glue and the Kreg screws, I attached 47 1/2” 2x4 boards cut in 1/2, 3/4” from the top of the bottom front and back frames, on the inside…I did that so I could use 1”x4” boards as the shelving for the bottom. I just laid the 1x4s on the cut down boards then attached them with screws.

I made the top back by attaching two 2x4 boards vertically to the back frame, then attached 3 1x4x48” boards across them with screws. I laid a 1x4x48” board on top for a little shelf and trimmed it with a 1x2. Not on the inspiration bench but something that was simple to add and gave me a space for plants and such.

For the top I used deck boards. I used my jig saw to cut out a hole for the storage bin with a lid so she would have a little “sink” to mix her mud pies!

I made sure to leave gaps between the boards like you would for decking so water could run off.

As I said, we can’t paint or stain it just yet since it is all treated wood but it was super fun to stage…some cute little containers for little plants, some plastic bins for her pots and pans (all from the Dollar Store!)…a few hooks for more pots and spoons. Even a hook on the side for a little watering can.

My neighbor has a Cricket so she made a little sign so everyone will know it is her bench!

CUTE AS A BUG’S EAR!!!

I love it, she LOVES it, and the entire neighborhood loves it and now all want their own garden bench.

Super simple to make and it will not be hard to customize it if someone wants one bigger or even smaller!

I’ll let you know how the mud pies turn out!


Another flower bed...

I’m pretty much through with major projecting on this house…at least until I find something else to tear up!

I did replace the door between the screen porch and the breakfast room.

It was set a tad low and over time the “sweep” has begun to scar the wood…so I took out the old door and “lifted” the new door by adding a piece of 1/2” wood beneath the threshold. The door is also 25 years old and metal. I went with a newer, more energy efficient fiberglass door. Not a difficult project and one you can find a TON of tutorials for.

(You can see the old door with a divided light HERE.)

When I ordered the new door I decided I no longer want “divided light” …in other words “grids.” Which meant I had to replace the glass in the den door since it is divided light as well…and of course they have to match. That door is fine and I really only needed to replace the glass insert. Again, not a big deal…love the look!

As I mentioned before, one of the ways I stay busy and “give back” is to help my neighbors with their projects. In the past few months I have helped one build a wood screen around her AC units, installed a water line for a back yard faucet, hunted plants for landscape projects, help set a large pole for a hose reel, modified a metal fence to keep dogs from escaping a back yard and did some fiberglass repair on a garden fountain.

And this week I built a “garden bench” for my neighbor…I will share that soon. Too stinking cute!

Have wagon and tools, will travel!

In between dragging my wagon around the neighborhood, I managed to get a little yard work done.

I absolutely love my back flower bed and love this time of the year when it comes to life! Every time I look out my bathroom window I am so grateful for it!

This is the view from my bathroom window! When the dogwoods are in bloom…WOW!

But I have one area in my yard that bugs me…rocky and wouldn’t grow decent grass.

Since I have transitioned to perennials and don’t have to do as much spring planting, I decide to tackle this area and extend my back flower bed.

Why do I convince myself that ANYTHING is easy? In my mind I think, oh, I’ll just put down a little landscape edging, throw in some compost and add some plants.

Silly me.

First, this area has some massive tree roots that needed to be taken out. So I had to dig the dirt and rocks (more rocks than dirt) away from them, take a reciprocating saw and cut the roots and take them out. Sounds easy…it is not.

Oh, and I cut a buried wire while I was hacking on the tree roots. Don’t know what it is but I cut it and had to repair it.

Then I had to install the metal edging. Okay, first, that stuff use to be around $8 for an 8’ piece…it is now $30 for one piece. What the heck? Second, again, this area of the yard is really rocky so creating a little trench to set the metal edging in unearthed about 4 five gallon buckets of rocks. CURSES!!!!!

So then I decided I really should use what grass was there to fill in a few bare spots around the yard…kind of like “sod plugs.” That took two days and I think I have destroyed my elbow. Don’t ask, I don’t know.

Again, rocks. LOTS of rock. I think I raked up another 4-5 buckets and honestly I don’t think I put a dent in it. I just got it down low enough to top it with about 5-6” of compost. The booger was digging holes for new plants…AUGH!

And of course the whole irrigation thing, which will now not really work well with the new bed addition. So of course that had to be moved which entailed digging MORE rock…what a pain!

I carefully researched plants to make sure I put in perennials that can take full shade during the day with full evening sun.

Another issue…this area is under a huge black walnut. Black walnuts put off a chemical called “juglone.” Some plants can grow under their canopy but others can not! Research, research, research!

The only thing I knew for certain I wanted to plant is a pink dogwood…found a decent one at a local nursery. They didn’t bother to tell me that a tree can suffer “wind burn” if you transport it in the back of a pickup truck without a tarp.

Half the leaves are all shriveled and “dead” but they swore it will rebound next year. Guess I will find out.

I added a serviceberry, some coral bells, a few flowering bushes, and a few annuals just for summer long color. I transplanted some Stella lilies from another area of my yard where they didn’t get enough sun.

All in all I am pretty happy with it…only one regret…I should have made it bigger! But it’s done for now and maybe next year I can play with it some more…right now I am too busy icing my elbow and knees!

ANOTHER COLLEGE GRADUATE!

A few weekends ago we will celebrated my oldest grandson who is graduating from college. Hard to believe! CONGRATS CAMDEN! We are all so proud of you!

Piece by piece...

I had a friend on Facebook ask where she could find much of my decor because we share a style.

Funny…as I walk around this house I see so many pieces I have cobbled together over the years. Pieces I bought at auctions and refinished. Some at flea markets. Some I bought new and tired of over time so I gave them a little facelift. Pieces I inherited. ( I am actually kind of shocked at how many pieces there are and how little I paid for them originally!)

Every room in this house has pieces I have refinished, refurbished or rehabbed.

My bedroom….

Twenty years ago I bought an entire bedroom set…bed, dresser, highboy and two night stands. Paid a small fortune for the matchy-matchy set so I couldn’t bring myself to get rid of it. Over the years I finally gave up the bed and dresser and the highboy and nightstands have had little facelifts. The furniture and our master bedroom got a full makeover HERE.

Before….

After….

My office…

I bought this desk at a junk shop YEARS ago…I think I paid $25 for it.

Still love it although it could use a little refresh!

The china display cabinet in the dining room. This is a prime example of a piece that is not my professed style but I absolutely love it all the same…LOVE!

I had a vision in my mind’s eye of what I wanted and I knew this piece could be exactly what I wanted with a little time and effort….

It took a bit more time and effort than I anticipated but it really is one of my favorite pieces.

I have several pieces in the living room I have rehabbed over the years.

This AMAZING coffee table I picked up at an auction for $22!

I sometimes wish I had a round coffee table but I love this piece so much I just can’t bring myself to part with it!

Several Lane Acclaim tables I have picked up here and there and refinished.

My grandmother’s little mid century chair has had two little makeovers. The teal chair is one I bought off Marketplace years ago and reupholstered….

My breakfast nook has several pieces as well.

The table….

The little china cabinet was a fun and relatively easy project….

They seem to work well together after their little facelifts….

There are so many more pieces I have curated and rehabbed over the years. Side tables, benches, chairs, dressers…every room has pieces I have refinished, painted or reupholstered.

It took years for me to collect all these pieces, bring them back to life and create a home I love with pieces that have purpose and meaning.

Most of the links are to the original rehabs where I share what I did…unfortunately I am NOT a good teacher so often I direct you to search the internet for good tutorials on how to repair, refinish and paint pieces. Find a tutorial that makes sense to you and begin curating your home one piece at a time.

It doesn’t happen over night! And it seems to be never ending…

Just breathe....

If you can…I am struggling to breathe because of my stinking allergies.

Still, this is a wonderful time of the year to “breathe”…at least for me. In years past, when my kids played baseball, football and softball, this was a hectic time of the year. Practices, games, scrimmages…every evening, every weekend.

But now I can take this time, between the super busy holidays from fall to Easter that seem to be never ending, and breathe.

I still have a lot to do. Clean out and purge a few closets, clean the windows, clear out the flower beds in preparation for mulch, split hostas, power wash rugs.

But my favorite thing to do in the spring is sit on the porch and soak in the beautiful dogwoods and spring flowers…and breathe.

Monday all the bunnies and Easter decor were packed up and put away and for the first time in seven months there is no seasonal or holiday decor.

The next big seasonal explosion will be for Memorial Day and 4th of July.

Until then, just breathe….sit on your porch and drink your coffee. Take a walk around your neighborhood or local park and take in all the beautiful spring flowers and blooming trees. If you are like me and suffer from severe allergies, take your meds and get out and enjoy the season!!! It is so short!

Let your house breathe also…open the windows. Keep your decor simple and focus more on purging than filling space. Pick a drawer, closet or cabinet, purge and clean. Then go out and enjoy this beautiful time of the year!

In a few weeks it will be time to start my summer planting…I need this down time!

Easter garland....

I have mentioned many times my obsession with decorating for EVERY holiday.

Christmas was a given for years….

And of course fall….

Up until a few years ago, that was pretty much the extent of it…maybe a few knick knacks here and there for a few holidays like Valentine’s Day or Easter, but nothing major.

Then I “retired”…and decorating EVERYTHING for EVERY holiday has become my thing. A wreath on the porch, entry and kitchen, a tablescape, special candles, special dishes…every event. I even bought “Easter” champagne glasses this year and we don’t even drink! But they matched the Easter dinnerware so ……!

Anywho…I think the little holiday banners and garland I see on Pinterest are just too stinking cute. This year I decided I wanted an Easter garland…you know, with carrots and eggs….for the fireplace.

So I went searching.

First I ordered THIS carrot garland from Amazon.

Cute but it wasn’t really tripping my trigger.

So I went on Pinterest and started looking for a little inspiration.

All said and done, this was the final look I came up with.

I had a little extra of every thing so I even made one for the dining room hutch.

This was super simple to make…the little carrots slid right off the jute they were on. I threaded the jute on a big upholstery needle I had on hand, then strung the beads, carrots and foam eggs onto the jute.

Garland…too cute!

As you can see, i have a thing for bunnies…just scattered around the house. Lots of pink, blue and green candles…spring wreaths…Easter pillows. Foam eggs here and there!

It may not be “the most wonderful time of the year” but fun none the less!


The Olive Tree....

I recently decided to jump on a “decor bandwagon.”

Seems olive trees are all the rage right now. As I have mentioned before I have a few issues keeping indoor plants healthy so I have zero issues with breaking the “no fake plants” rule. If you are like me and have a black thumb for indoor plants, it is the only way to bring “life” into your home. (I kick butt when it comes to outdoor flower beds but this is where indoor plants come to die!)

Anywho, I have an olive wreath…but I was hesitant to spend a big chunk of money on a tree that 1) will go out of style in short order (think ficas, fiddle, etc) and 2) may or may not actually look decent.

So I did a little research and read reviews and landed on THIS tree on Etsy. I went with the 6’ tree. Pretty tree and very affordable but still seemed a tad short. I knew I was going to have to put it in a basket or pot so I decided to give it a little lift in the process.

I found a large pot at Lowe’s I like. To “pot” the tree I needed another smaller pot, some scrap cardboard, spray foam and decorative rocks….

I placed the small (and very inexpensive) pot upside down into the larger decorative pot…I secured it with a bit of hot glue just to keep it from moving around.

I hot glued the potted tree on top of the small pot. I used cut up card board around the small pot just to “fill in” the space and give a cardboard collar something to set on.

After all that I used spray foam to fill in and secure it all….

I use this spray foam for several reasons. First it puffs up pretty solid and kind of acts like a “glue” to hold everything super secure. Second, while it dries pretty hard on the top, it still is a foam and is easy to stick stuff in it if you want to…like for floral arrangements and such (I used it HERE for fall urns!) It is also relatively light weight so it fills these pots without adding a lot of weight like rocks would! It is also lightweight so it makes it easier to move the pot around!

Lastly…it is much cheaper than floral foam!

A few hints for using this stuff…it is super sticky…let it dry before you mess with it! If you get it somewhere you don’t want it, just let it dry well then scrape it off! (If you fail to take my advice and mess with it while it is wet, use mineral spirits to clean it up.)

It expands quite a bit so work in “layers”…let it cure well before you add more if needed. On this project I did two “layers” before I got it to the right height.

If you find that it is “too high” in spots, you can cut it with a serrated knife to trim it down after it has dried.

Since I was using black decorative rock, I sprayed the foam with black paint so it would blend in….

Then I just placed the rocks on top of the painted foam….

I like the overall height and look now. You have to “pot” these anyway, might as well add a little height to them.

I decided to put it in the corner of my breakfast room. If I want to move it to another spot, it is relatively light weight…not so much that it is a tipping hazard but not so heavy that it would be a pain to move.

You may notice I am already decked out for Easter…this little tree gave me the perfect spot for one of my newest Easter additions….

Next week I will share a bit more.

Until then….

"Mud room" bench....

This is a project you see a lot on Pinterest and it is a super simple and functional use of normally wasted space.

Case in point…my daughter-in-law’s sister’s (Laura) house….

This room is next to her kitchen…designed to be the “breakfast room” space but is really used as a thoroughfare from the garage into the house and has become a general “drop zone catch all. “ With two small kiddos, it could be the perfect “craft room” and drop zone but as you can see there was no form or functionality to the space.

So she sent me this “inspiration” photo.

A functional and organized space for shoes, backpacks, coats, etc.

Heck, I can build that!

She likes the board and batten look of my entry more than the “panelling” look in her inspiration photo. No biggy. Remember what I have said before…the key to any project is first, your inspiration…..second, your plan and third, the execution.

So we had the inspiration…just a few tweeks and we had a plan…

Now it was time to execute!

I have said before I am not a “how to” kinda person…I am a “YOU CAN DO IT” kinda person. So find a tutorial for installing board and batten and building a bench that makes sense to you and works for your space.

First up…the bench. I had to off center the middle support because of an outlet but it was pretty basic stuff…2x4s, construction mastic and wood screws. Again, find a tutorial that makes sense to you! (Even I look at tutorials sometimes and say WTH!)

I build the legs of the bench out of 2x4s then clad them with plywood. Simple.

I used 1x6 pre-primed pine to trim out the front of the bench. MDF will “swell” if it gets wet so you can use it on wall treatments but I highly recommend using a solid wood product on anything adjacent to the floor.

I always use pre-primed or prime and sand before I install to avoid having to prime and sand inside the house!

I used 3 1x6 lengths of oak for the bench top. You can also use pine…MUCH cheaper but Laura liked the look of the oak. I used a rooter on the edges, just a hair, so when I joined them together they look more “plankish” than solid.

I built the bench top, using a biscuit joiner, in the garage… no stain just 3 coats of polycrylic, and then installed it before I moved on to the wall treatment.

For the board and batten wall treatment I used preprimed MDF.

I usually install the horizontal pieces first…making sure they are perfectly level. Then I go back and add the vertical boards. Putty all the nail holes and seams and make sure you caulk EVERY joint and crack…sand it all super smooth.

REMEMBER if you can feel it you are going to see it after paint…so sand and feel with your hands! Sometimes it can take 2-3 coats of joint filler to get good coverage.

We covered the wood bench top and painted with a brush and roller…three coats!

GORG!!!!

We added cute little hooks Laura picked out!

I was still loading tools and the littlest (3 y.o.) was already claiming all the hooks for his back pack and Hulk costume and mask! Probably should have added more hooks…lol!

Props to Laura…I really believe the vision and inspiration are the most important keys to any successful DIY project.

She did good and I have no doubt this little area will now serve her family well!