Nasty little chair makeover...PART I!

My INTENT was to get this chair done this week so I could feature it. The weather and a bum back kind of slowed me down.  But I got it done...but I am still going to break this up into a "Two Part Series" because the work that had to be done was pretty extensive. If you just want to see the before and after, check out Part II and scroll to the bottom!

This gives me a great opportunity to stress the importance of TAKING YOUR TIME and DOING IT RIGHT! 

The simplest little makeover takes time.  You can't rush the process.  Strip it properly, sand it properly, prime it properly, paint it properly!  Otherwise you are wasting your time and money!

My newest project is very similar to a chair I did for Sis....it was one of my first "features" here. (I wish I had taken better pictures to show all the detail!) The paint part was a tad easier because it didn't have to be stripped first.  But it was one of my first upholstery jobs, and the more experience you get, the easier it is. Okay, it doesn't get easier...you just know it is going to be a challenge.

One thing I have learned about upholstery...no two pieces are the same and ALL have their challenges. You learn to be creative, take your time, and use the proper tools...more on that when we get into the actual upholstery process!

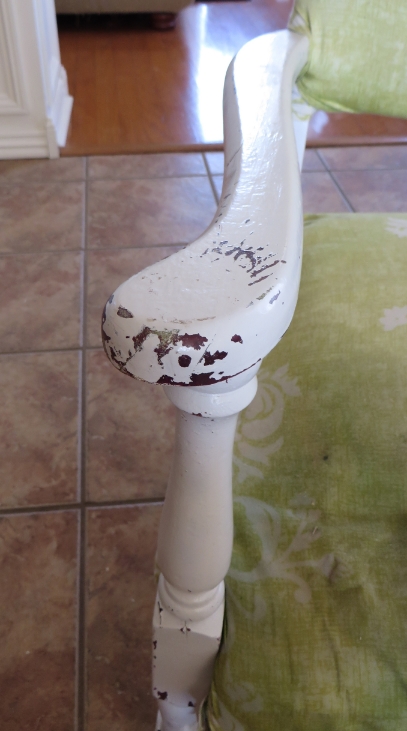
I spied this pathetic little chair sitting outside an apartment...obviously it was being neglected and unloved! And then it was abandoned! So I tossed it in the back of my truck and brought it home. As with most projects, it sat and waited for inspiration (and time).

I know many tout the virtues of chalk and plaster paint.  No sanding, no prep, no prime.  But 1) I am old school and 2) the paint on this chair was literally crumbling off and I could scrape the white paint off with my fingernail!

IMG_0214.JPG

I wasn't going to risk painting this chair only to have the old paint flake off! Besides, I have to have a nice smooth "template." So my best bet was to strip, sand, prime and paint.

First I had to remove the old upholstery.  I'm not sure what is worse...a seriously botched attempt to "cover" the old upholstery or doing so and leaving the old upholstery intact. Which means I had to remove the 8,324 staples someone used to haphazardly attach the disgusting green fabric and the 6,352 upholstery nails (these are just estimates) used on the original disgusting fabric.

Regardless of what you are removing...good or bad...I always suggest taking TONS of pictures while you deconstruct.  You THINK you will remember how something was constructed, but you may not.  It is always good to have pictures to refer back to! When I took my first shot at reupholstering a chair I took hundreds of pictures as I deconstructed it...boy was I glad later when I got stuck on something and wasn't sure what to do! I just referred back to the picture of the original and I knew exactly what I needed to do!

After hours of pulling, prying and cursing, I was down to bare bones (both the chair and my hands!)

Once I got all the old upholstery off, I addressed the little "wobbles." This chair was in pretty good shape structurally but it is important to make sure all the joints are secure and tight. Glue and clamps! Don't move forward on a project like this until you make sure everything is in tip-top shape. You don't want to be glueing and clamping after you have a shiny new finish on!

Now it was time for a little strip job.

I used Citristrip jel to remove the multiple layers of paint! It actually took 2 applications. An old toothbrush on all the nocks and crannies. I used a mineral spirit wash to remove all the "goo." Then I let it all dry thoroughly.

I know stripping old finish and paint is a tedious, nasty, back-breaking process...and I have no doubt it is the reason someone came up with the idea of mixing plaster and paint.  But again, my "old-school" mentality just won't let me move forward without properly stripping all the old paint off.  

I don't paint over wallpaper, I don't tile over vinyl, I don't upholster over old upholstery.  I just don't. Call me crazy. 

Then I sanded....and sanded....and sanded! Getting all the old paint out of the grooves in the legs was not an easy task...but absolutely essential! This is exactly why I always keep old toothbrushes with my shop tools!

After sanding, I primed it with Kilz.  I like Kilz for several reasons.  For me, it is my personal preference after years of experience. Others swear by Zinsser. This is just one of those things you need to experiment with and do what works best for you! Regardless, I will ALWAYS recommend an oil-based primer!

Nine times out of ten I am going to prime a piece before I paint it.  I am not willing to take the risk of "bleed through", I want a smooth finish and I want my paint to stick!  On rare occasions I will not apply a primer if I am going to use chalk/plaster paint and plan to distress the piece.  But even then I prime areas I suspect might bleed through or cause problems.

Anywho, after I got MOST of the old paint off and sprayed on the primer, I let it dry thoroughly. Then I sanded, and sanded, and sanded...again. I started with a 80-120 grit, and finished with a 220.

I like to sand. Or rather I like how the piece feels and looks after it has been primed and sanded.  And in my opinion, "feeling" is the key! 

Funny story...years ago I was feeling quite smug about the fact that I had not gotten all those nasty little wrinkles all my friends had around their eyes and mouths and on their neck.  Until I put my readers on one day to pluck my eyebrows...and there they were.

Even though I finally broke down and got prescription glasses, I still don't trust my eyes to see all the imperfections...but I do trust my hands.  As I sand, I "feel."  If you can feel it, it will show through a coat of paint!!! Sanding transforms the piece and if done properly, it can mean the difference between having a piece that is beautiful and professional or one that looks like an inexperienced DIYer threw it together!

After priming and sanding, I used my compressor to blow the dust off and then tack cloth to get rid of all the little smidges of dust and debris! I know I harp on using tack cloth...I can not stress how important this step is!

My original plan was to paint the chair a "blush/salmon/coral" color and then upholstery it in black damask. I saw a chair almost identical to this one in those colors SOMEWHERE...and then I couldn't. What I could find was a lot of teal and damask...and since this is a piece that will be sold, I decided I had to go with what is obviously "in." A "pink" chair can be risky! Pretty, but risky!

So teal it is....

The trick to spray painting anything (besides the prep work) is to do 3-4 VERY light coats...let it dry for 30-45 minutes between coats. If you get a drip or run (which you shouldn't if you do LIGHT coats) let it dry OVER NIGHT and then carefully and lightly sand it with a VERY fine grit sand paper! Tack and then lightly spray it again.

After the paint dries I gave it a good coat of clear poly finish.  Probably overkill considering the Valspar spray paint I use SAYS it is an "all in one."  Again, I'm old school.  You clear coat everything. 

The key now is to WAIT.  Wait and let the paint dry and cure for a few days. Upholstery can put a lot of wear and tear on a piece so you want the paint to be cured before you begin working on the upholstery.  

And as you can see, this piece has some serious reconstruction to do before I can ever begin to put the fabric on! I'll make sure I take good pictures and share step-by-step instructions on how to reconstruct and reupholster this chair!

IF YOU WANT IT DONE RIGHT....TAKE YOUR TIME!

Stay tuned! Part II is on its way!

Drexel Declaration Mid Century coffee table...

I know I am always talking about how AWESOME some of my furniture finds are, but this is truly an AWESOME piece!!! Mid century and walnut...my absolute favorites! (Check out some of my other mid century finds and makeovers here!)

We scored this coffee table at an auction.  I probably should have flipped it over and looked for markings before bidding, but it is pretty big and honestly, I didn't want to draw too much attention to it (gotta be "cool" at the auctions!) When I bid on it, I knew nothing about it other than it was walnut and mid century! Structurally, it was in mint condition and I knew it could be spectacular with a little elbow grease. The scratches and water sports were not too bad! We were told it had been stored in an old outbuilding for years....I believe it! 

The piece is marked on the bottom. It is a Drexel Declaration coffee table.  A relatively "rare" piece with a good value!

As I have said before, it is not the "profit value" that motivates me.  It is the absolute LOVE I have for this furniture.  

It has been in my garage for months. I just didn't have the time or space to mess with it! The first thing I had to do was strip it.  Keep in mind the finish on these pieces are 50+ years old so the old varnish has "yellowed" over time.  And of course there is all the wear and tear...scratches, water damage, worn finish! But you CAN NOT strip old paint or varnish inside. The chemicals are just too strong and stripping and sanding does make a bit of a mess so I made sure I got all stripping and sanding done before it got too cold to work outside! (I really need a heated shop!)

I almost always use Formby's furniture refinisher to strip old varnish.  I find that it really does a great job of "melting" the old finish off while hydrating the wood.  Occasionally I may have to use something a little stronger and on very rare occasions I will actually sand the piece.  I did take some sand paper to this piece only because there were several "water stains" that just couldn't be chemically removed.

I can not stress enough how important it is to CAREFULLY sand old furniture!  Veneers can be very thin and it is easy to get carried away!  Always start with a fine grain paper (220 grit) and work your way to a heavier grit ONLY if you need it.  Then work your way back to a fine grit!

You may not be able to remove every stain or imperfection.  And that is okay!  Old and antique pieces are going to have imperfections!  Embrace them!  My office desk I featured here is a prime example....

Try as I might, I could not get this old cigarette burn to go away...and that's okay.  It is a constant reminder of one of the many reasons I shouldn't start smoking again!

Fortunately I was able to get almost all the "imperfections" off the coffee table.

Also, most finishes were originally applied in a way to make the wood grain appear "uniform."  A multi-layer technique may have been used or the finish and stain were sprayed on. Once the original finish is removed, you are likely to find that the wood grain no longer has a "uniform" appearance. Again, embrace it! 

After making sure I removed ALL the old finish, I "washed" the entire piece with mineral spirits. This is an important step when refinishing furniture whether you are applying a clear finish or painting.  It removes all the gunk and oils. Then I hit is with a very fine sandpaper just to knock down the grain a bit.

The mineral spirit wash will also give you an idea of what color the wood will be when you apply a clear finish.  Most woods will be a completely different color stripped than it will after a clear finish has been applied. After you wash the piece with mineral spirits, the wood will eventually dry back to a natural color, but while it is wet you will be able to tell what color it will be after a clear finish is applied and whether you will want to apply a darker or different color stain.  I personally love the color of natural walnut after a clear finish is applied, so rarely will I apply a stain.

After wiping the piece down with mineral spirits, I wiped the entire piece down with tack cloth to remove dirt and dust.  Again, you can wipe down a piece all day with the cleanest cloth...I can promise you the tack cloth will find more!  Use it and use it between EVERY coat of finish or paint! 

After stripping, sanding and tacking, I began applying the Formby's tung oil.  I love this stuff...in my opinion it is a superior finish to poly!  Super easy to apply and much less room for error. If it gets scratches in the future, just hit it with 0000 steel wool, tack cloth and then apply another coat of tung oil.  Simple!

Because of the weather, I had to apply the tung oil inside.  The smell and fumes from tung oil is not that bad. Steel wool itself tends to crumble and create "dust" so I decided to try something new...which is NOT something I do easily! I picked up these little "finishing pads." They seem to work pretty well! I still favor the steel wool, but the pads produced far less "dust" than the steel wool!

A little trick when painting or refinishing...place aluminum foil under the feet/base after you are finished sanding and tacking.  Most paint and finish won't stick to aluminum foil (unlike paper) and it will protect your floor and keep dust from being dragged onto the base when applying the finish!

I usually apply 3-5 coats of tung oil.  I use a "stain sponge."  You can usually find them in the stain section at Lowe's. Three coats is usually enough, but if I still feel the finish is "uneven" I will continue to apply coats until I get an even "gloss" look.  ALWAYS rub it down with 0000 steel wool and tack cloth between each coat. 

Whether you use steel wool or finishing pads or sand paper, make sure you always sand WITH the grain.  

"Sanding" and tack cloth between each coat is VERY important.  I used tack cloth before I applied the first coat of tung oil and I could still see and feel "crumbs" after it dried!!! 


I love this piece.  I think it looks a tad too big for my living room, but I just can't bring myself to part with it! Honestly, I think I would like it a bit better if I had a bigger rug.  This one has always been a tad too small, but it was cheap and I just needed something to throw down to keep our toes warm! With an old kitty in the house, you don't invest too much in rugs.

So I have been looking...Joss and Main...Overstock...I'm looking!  Someday.

(UPDATE!  Yep, that is the NEW rug...featured it here...and I seriously love it! I am so honored to be featured on betterafter.net!  Gail asked to see the inside, so here is a picture with the top open. As you can see it has a little compartment with a sliding drawer. The inside was in mint condition, so I did not do anything to it!)

IMG_0224.JPG
signature.jpg

Painted throw pillows....

Some days I am determined to get my sewing projects completed.  And then this....

IMG_1101.JPG

How am I suppose to get any work done when they do this!? 

But I did...I actually made a few pillows, including these darling painted throw pillows.  Check out the tutorial here! (I can not currently get the link thingy to work...just click on "Trash to Treasures Tutorials" above!)

Due to the "cat delay" I wasn't able to get my couch cushion made.  Darn. Oh well, I've lived without for a year...guess it can wait another day or two...lol!

Cabinet door chalkboards....

I just assume everyone has old cabinet doors laying around...probably a silly assumption!  But I see old cabinets all the time at garage sales and thrift stores.  If you can find inexpensive old cabinets with decent doors, buy the cabinet and use the doors to make these super cool chalkboards!  Or stop by your local Habitat for Humanity...they have TONS of old doors for cheap!

I just happened to have a bunch of cabinet doors stacked up in storage at my apartments...ones I had saved for whatever reason. I decided to put them to good use!  (I have no doubt I will need one next week...always happens!)

First remove all the old hardware and fill the holes with wood putty.  Some doors have European hinges and those leave big holes...just ignore them!  They are on the back...no one will see them!

Next, sand the door with a 110 or 220 grit paper...just enough to knock the shine off the finish...then use TACK CLOTH!!! 

I always paint the back or underside of any project first...that way when I flip it to do the top I don't feel too terribly bad if I ding or scratch the back or underside!  

You are going to use chalkboard paint in the center of the front, so you only have to paint the back and the frame of the front.

I painted all these cabinet doors different colors since I will be putting them in my flea booth.  

I spray painted a few with bright colors, so I primed those with Kilz (sanding and tack cloth between coats!).  I used plaster paint (no primer) on a few and sanded the edges.  

Regardless of the paint you use, always apply 1-2 coats of clear coat to seal the paint. Do this BEFORE applying the chalkboard paint! 

Let the paint and clear coat dry over night and then tape off the frames with painter's tape.  

I wanted to try the new Frog tape because I have read really outstanding reviews but I could NOT find the roll I bought last week...it is here somewhere, I just can't find it.  So I used good ole' blue painter's tape. 

Several months ago I bought a quart of black chalkboard paint at Lowes.  I have used it on several projects and it really is outstanding.   When Katie wanted "chalkboard" walls, we just used Valspar flat paint since we needed 2 gallons and it has worked great!

I think for this size project, the "real" chalkboard paint is worth the investment.

I used a brush for the corners and edges and then I used a 4" sponge roller.  I applied 3 coats.   

After all the paint dries, put a hanger on the back.  I used cup pulls for the little tray for chalk.   

This is a fairly simple and inexpensive project!  If you have any old cabinet doors sitting around or stumble across a few at a garage sale or thrift store, give it a shot! 

Wall murals....

Decorating with wall murals is not that difficult....and it is an awesome way to instantly add a big impact to any room, especial a play room or kid's room!​

A few years ago I decided to surprise my youngest daughter with a full room makeover while she was at choir camp.  Paint, new side table, lamp, desk chair makeover, bedding, rug...everything.  She was all into Betsy Johnson at the time so I used her design as a touch of "inspiration."  Katie's first words when she walked in...."I hate it."​

I wish I had all the "before the before" pictures handy.  When I first bought this house she was only 3 so decorating with the pastel pinks and blues was easy (imagine castle walls with trellises of ivy!) ....so precious.  Then she went through the teal/purple/lime green stage.  That was really awesome and it last a few years.

But as she entered her teens she wanted something a little more "mature."  Unfortunately, I learned the hard way that one should not assume what ones teenager will like. Better to let them have a hand in any design decisions, especially as she reminded me, it is  "MY personal space."​

Unfortunately, I knew our "design tastes" were on total opposites of the spectrum when she told me she wanted "dark grey," specifically chalkboard grey.  No way in this world was I painting a room "dark grey." ​ The last thing I wanted was my spunky, cheerful daughter getting swallowed up in the dark dank world of goth doom and gloom which I was certain would happen if we painted her room such a depressing color.

But then she told me she wanted a "fail whale" mural.  Huh?  What the heck?  So she googled it....I thought it was pretty neato!  She picked out the red and blue accent colors.  And as her "vision" became a little clearer, I realized she had a pretty awesome plan in her mind.

We painted the "fail whale" mural on one wall and painted her study cubby with the brighter blue and red.  (Originally the study cubby had a built in twin bed with a trundle...it is an addition I built years ago...rather cute but I took her bed out of it when I did the Betsy Johnson inspired room...it was the only thing she liked!)​

I had a hand in the basic paint design (okay, so I was a common laborer) but I let her add her own little design elements...posters as a headboard and art, Christmas lights, ​knick-knacks....after all it is indeed her "personal space."   And I want her to love her space as much as I want others to love theirs!

We agreed on a nice grey for three walls....we used Valspar flat paint.  It works beautifully as a "chalkboard!"  She loves it and she writes her inspiration quotes on it!  ​

Okay, the mural....there are a several ways to get a mural on a wall.  

If your design element is small enough, you can actually trace it onto the wall by taping sheets of sewing trace paper together.  I like the sewing trace paper because it isn't "messy" and it wipes off easily!​

You can free-hand the piece...which I did here....​

This is a mural of Mitchell's high school mascot...it is on the garage wall.  There use to be one on his bedroom wall, but I painted over it when I remodeled his room after he went off to collage. (Be prepared to paint several coats of primer over these things when the time comes to paint over them!)  ​

Or you can use a large "stencil" like Sarah did in my grandson's "Monster" themed game room.  She has a friend who is a graphic designer and they have the machines to print off and cut out large murals...might be worth the money it would cost! 

Or you can use a projector like we did in Katie's room.  In all honesty, the "fail whale" was a tad too big for the size we wanted on the wall, so I projected his head onto the wall to get the scale and then I free-handed the rest.  I made a little cardboard template for the birds and traced them.​

Regardless of the method you use to get your design on the wall (templates, tracing paper, projector, free-hand) first paint your base color and allow it to dry well.  Then use a sewing pencil to lightly mark your design and then use latex paint and small brushes to paint the details.  The little "sample pots" of latex paint at Lowes are the PERFECT size for these projects and VERY affordable (around $3 each) when you need several colors!  ​You can have ANY color mixed in the sample sizes so don't limit yourself to the premix colors! 

Again, murals are a GREAT way to add a huge impact in any room!  You are only limited by your own imagination.   Anything you can think of that you LOVE can be painted on a wall.  

And remember too, there are a LOT of wall mural inspirations on line...Google it! ​

And the great thing about paint...if you don't like it, paint over it!!!  ​

Pretty in pink....and a little zebra....

Earlier I posted this "before" picture of a little dresser I brought home from the apartments.....​missing a drawer and really not attractive! (I found it, and this one, in the same unit!)

​But it was relatively sturdy and I knew I could install a shelf where the drawer was missing...perfect for little decorative baskets! Or books...or whatever!

​I never posted a before picture of this chair....and unfortunately, I forgot to take a picture BEFORE I took it all apart.  But basically it was just a little gray chair I found at the apartments...kinda nasty as usual and veeeery boring.

Both have been in my garage for months...kilzed and ready to go.  What to do, what to do.  I just couldn't get "inspired."  I don't have a problem doing this stuff, I just have a problem deciding exactly WHAT to do.  But the other day I was walking through Hobby Lobby and I saw all this pink and zebra stripe little girl's decor, and I thought "Oh MY!"  Inspiration at last. Keep in mind, I have NO place in my home for this but some little girl somewhere is going to love this stuff....​

The zebra stripes on the drawer fronts are hand painted.  Don't get too impressed.  While I have a tad of artisticness and creativeness in me, I'm honestly not THAT talented.  Here's a little secret...if you see a design or picture you want to put on a piece of furniture, trace it onto a piece of wax paper.  Then place the wax paper on a piece of sewing trace paper and trace it onto your piece.  (TIP: use sewing trace paper...it doesn't "smudge" as badly as other traceable papers and the markings are easy to remove with a damp cloth!) You can do this on ANYTHING...walls, glass, furniture, anything!!!  I painted the drawers white, traced the fabric design on wax paper and then traced that onto the drawer fronts....then painted them with black latex paint.  And with everything, I sprayed it with a clear coat!​

You can even print things off the computer and trace that...if the printed picture is too small for the project you are working on, just take the picture into any edit program and break it up in sections that can be printed off and then taped together.  If it is REALLY big, you can always project it onto the object with a projector.  We did that with a mural on my daughter's wall...if she EVER gets her room clean enough for me to take pictures, I will share her mural...totally awesome.  Ever hear of a "fail whale?"  Google it...it really is awesome!!​

Anywho....animal print is not really my cup of tea...evident by the fact that I pretty much hated my bathroom when I decorated with "leopard print" in a failed attempt to decorate around my ugly gold shower doors!  

But after seeing a little inspiration and how "fun" it can be, this was a fun little project. 

Sew awesome....

I really want, and honestly need, a sewing desk...some place I can store and use my sewing machine without having to set it up on my dining room table.  I found this sewing desk in a thrift store and man-oh-man was this thing seriously ugly!  

 I knew this desk could be a little treasure after the cruddy paint job was stripped away!​

And even to my surprise, what a treasure it is...what I found under two layers of paint was beautiful mahogany. Initially someone had painted it a really disgusting green and then I guess they tried to improve it by painting it a flat black.  

This is a prime example of hurting a piece in a failed attempt to "enhance" it!  Truth be told, I felt a little guilty painting the base and drawers white.  But I could never live with myself had I not restored the top to it's prior glory!​

Before I started refinishing, I cut the opening a little bigger to accomodate my sewing machine.  TIP ALERT:  when cutting veneer mark the cut with a pencil and then score the veneer with a utility knife. Then use a jig saw with a very sharp blade to cut  "inside" the score...if you don't, the veneer with split and splinter and you will make quite a mess! 

Normally I use Formby's Furniture Refinisher to strip latex paint and old varnish...but two layers of paint needed a little more muscle....so I used a citrus stripper. I will not use anything stronger on veneer (always use any stripper per the instructions and in a VERY well ventilated area!)    This piece didn't have a single chip in the veneer and I didn't want to risk hurting the piece by using industrial strength stripper!​  Took a little more time and more than one application but it was worth it.  

After removing all the old paint, I took 0000 steel wool and mineral spirits and gave the wood a "bath."  When stripping wood, regardless of what you use to strip it, always "wash" the piece with mineral spirits to remove all the "crumbs."  After it dries, take VERY fine sand paper or 0000 steel wool and sand lightly before applying stain or a finish.

TIP ALERT...keep old toothbrushes on hand to get into groves and corners when stripping furniture.  DIYers never throw away old toothbrushes, coffee cans, socks, old tshirts or towels...trust me, you will need them!

IMG_8918.JPG

Since I knew I was painting the base and the drawers, I didn't strip them but I did sand and prime well before painting.​

And again...ALWAYS USE TACK CLOTH BEFORE PAINTING OR APPLYING FINISH...AND BETWEEN EVERY COAT!!  ​I seriously can not stress this enough! So many DIY tutorials tell you to "wipe down"...again, I challenge you...wipe down your piece with a clean cloth, and even some mineral spirits...then wipe it with a tack cloth!  You will be shocked at how much crud was still there!

Two coats of gloss white paint on the base and drawers.  A light coat of walnut brown stain on the wood to even out the color and give it a little more depth....4 coats of my favorite Formby's Tung Oil. New crystal knobs. Total awesomeness!​

I can not stress how beautiful this wood is....I wish I was a better photographer.  And I wonder if I should have stripped and stained the drawer on the right...but then again, I kind of like the paint/stain contrast...I think I would love it either way!

I REALLY love tung oil.... it allows the grain of any wood to just shine!  And it is sooo easy to take care of and touch up when needed!  (Now I know why my father refused to use polyurethane)​  I think so many use polyurethane because they are concerned about durability....that is honestly not an issue with tung oil!  Try it...it is almost impossible to mess up the application (unlike poly) and it is extremely easy to touch up scratches in the future if necessary!  

This project was pure joy!  Anytime I can take something that has been so abused and turn it into a treasure it just makes me happy!  

Maybe now I will enjoy sewing just a little more!  ​

Swing into spring...

NOW is the time to do this project...too stinking hot in the summer and you will want to enjoy it during the lazy days of summer!​

I have built 5 of these swing pergolas...two at my house, one at my daughter's first home, one at her current home and one for a neighbor.  It is not a difficult project to built but one that requires two sets of hands and a little muscle!  ​And with everything, patience!!!

I have posted a tutorial HERE​.  It is not a terribly difficult project and one I think most DIYers could easily manage.

This is the SUPER sized pergola I built onto my house about 11 years ago...I won't even begin to tell you how it is constructed...but I can promise you, if the house is blown away, it will probably still be standing!  And notice the wisteria canopy...seriously, that stuff is CRAZY!​

Pathetic little shed no more....

Time flies... I didn't understand why my 4-5 year old shed looked so pathetic and was already showing signs of rot in places...then I realized that it was actually 9-10 years old and had never really had a makeover other than adding some little window planters!

I didn't want a "typical" storage building in my backyard.  So when I bought the "kit" at Meek's originally and contracted them to build it, I had them put a higher pitch on the roof and use architectural shingles.  I designed a cute little "cottage" style door for them to build and I also added two inexpensive windows and shutters. Cost a few pennies more, but is much more attractive than your typical storage building!!!  

But now it is time to spruce up the little place.​

I really just wanted to paint the shutters and door black, but as you can see, the door had a few issues....like a serious case of rot!  As did the siding on the side...and I have always wanted to add little "scallops" above the door and paint the hinges black and add cute little lantern style light fixtures...

Even the simplest little projects turn in to complete "rehabs" around here!!!​

But that is when you learn that doing this stuff is not THAT difficult! Sometimes the only thing stopping you from making a change is FEAR of it being too big....how do you eat an elephant...one bite at a time ;)  

How do you start a project....just be willing to take the first bite!!!!

So we begin...I took down the shutters...marked them on the back so I would know where they go (remember...paint fumes cause memory issues...this has nothing to do with age!) Gave them a good little bath and then used good ole' spray paint!  Beautiful!​

I also took all the screws from the shutters and the hinges, stuck them in an old styrofoam lid, and sprayed them with black paint!!  Easy way to paint screws to match!​

​I pre-primed and pre-painted all the trim I was going to be using on the building and door.  I still have to caulk and do paint touchup after it is installed, but it makes that job a little easier!!!

I took the door off and left the hinges attached to the trim on the building...but I have always wanted the hinges black, so I taped them off and sprayed them with black spray paint as well.  The siding on the side of the building had some "rot issues" from years of standing water, so I chipped away the rotted material and put a ​new piece of trim along the bottom of the building to "hide" the rot. (Before you do this, make sure the area is now VERY dry and there are NO termite issues...look for little ant creatures with wings or their little "tracks" in the wood.  If you see ANYTHING that is remotely suspicious, call your termite company!)

On to the fun part....rebuilding the door.  Unfortunately, I was so focused I didn't take pictures along the way.  But I basically used the old door as a "pattern."  Any time you need to replace or rebuild, examine closely what is there....what materials were used...how is it put together.  Fortunately, this door was a pretty easy read for me...so I bought the materials, measured, cut, glued and nailed.  And presto...I have a new door.​

After cutting the door out of the wood siding material, I had enough left over to make the little scallop things I wanted to put above the door.  This took a little creativity, but I had made a scallop fascia for a little cabinet I made for my daughter years ago, so I pretty much knew how to make it.  I took 6" strips of the leftover wood siding material, used a coffee can to mark the scallops and then cut them out with a jig saw!  I then installed them on the little building by overlapping one row on top of the other and painted them!   No biggy!​

I added some little lantern style fixtures! (they don't REALLY work....there is no electricity in the building...but they are kinda cute! But I think I need bigger ones) 

I still need to repaint the little porch railings...and I can't wait to get the planting done in the beds...but all in do time! ​

For now, the MAJOR work is done! And my little garden shed has new life!

This may seem like a HUGE and daunting task for a novice DIYer.  But seriously, if I can do this YOU CAN DO IT!  Before you can complete any rehab or makeover, you just have to START IT!  Take it slowly and examine what is already there...but conquer your fear and start!​

My father did not teach me to rebuild a storage building door.  He didn't teach me to make scallop siding...he didn't teach me to tile or sheetrock or install hardwood on my stairs.  He taught me to DO....to think...to look at something you want to change and figure out what you have to do to change it!  ​Really if you think about it, DIYing is kind of like life...if you don't like something change it...but you have to be willing to take the first bite! And honestly, if you get stuck, you have to be willing to ask for help when the going gets tough....but never quit or give up!

We are soooo fortunate to have the internet...you can Google just about anything and find a ton of places that will tell you how to do just about anything!  They may differ in some respects, but that is where you have decide what you are comfortable doing....and what makes sense for the project you want to complete!  ​

Dad didn't have internet...he just had a lifetime of experience and knowledge...I get very sad when I think of all he took with him.  I am grateful for the knowledge he gave me...but more than anything I am grateful for the confidence he gave me to start any project and figure it out!  ​

If I can give you just a "smidge" of that confidence, you will have received a tremendous gift!​

Window sills....

I've been working hard the last few days on my little garden shed...want to paint the shutters, but if I paint the shutters, I have to paint the door, but the door is rotten so it needs to be rebuilt, and while I'm doing that I might as well...blah, blah, blah.  NEVER ending.  But I'm almost done and I will share soon!​

In the mean time, I wanted to share a SIMPLE project... 

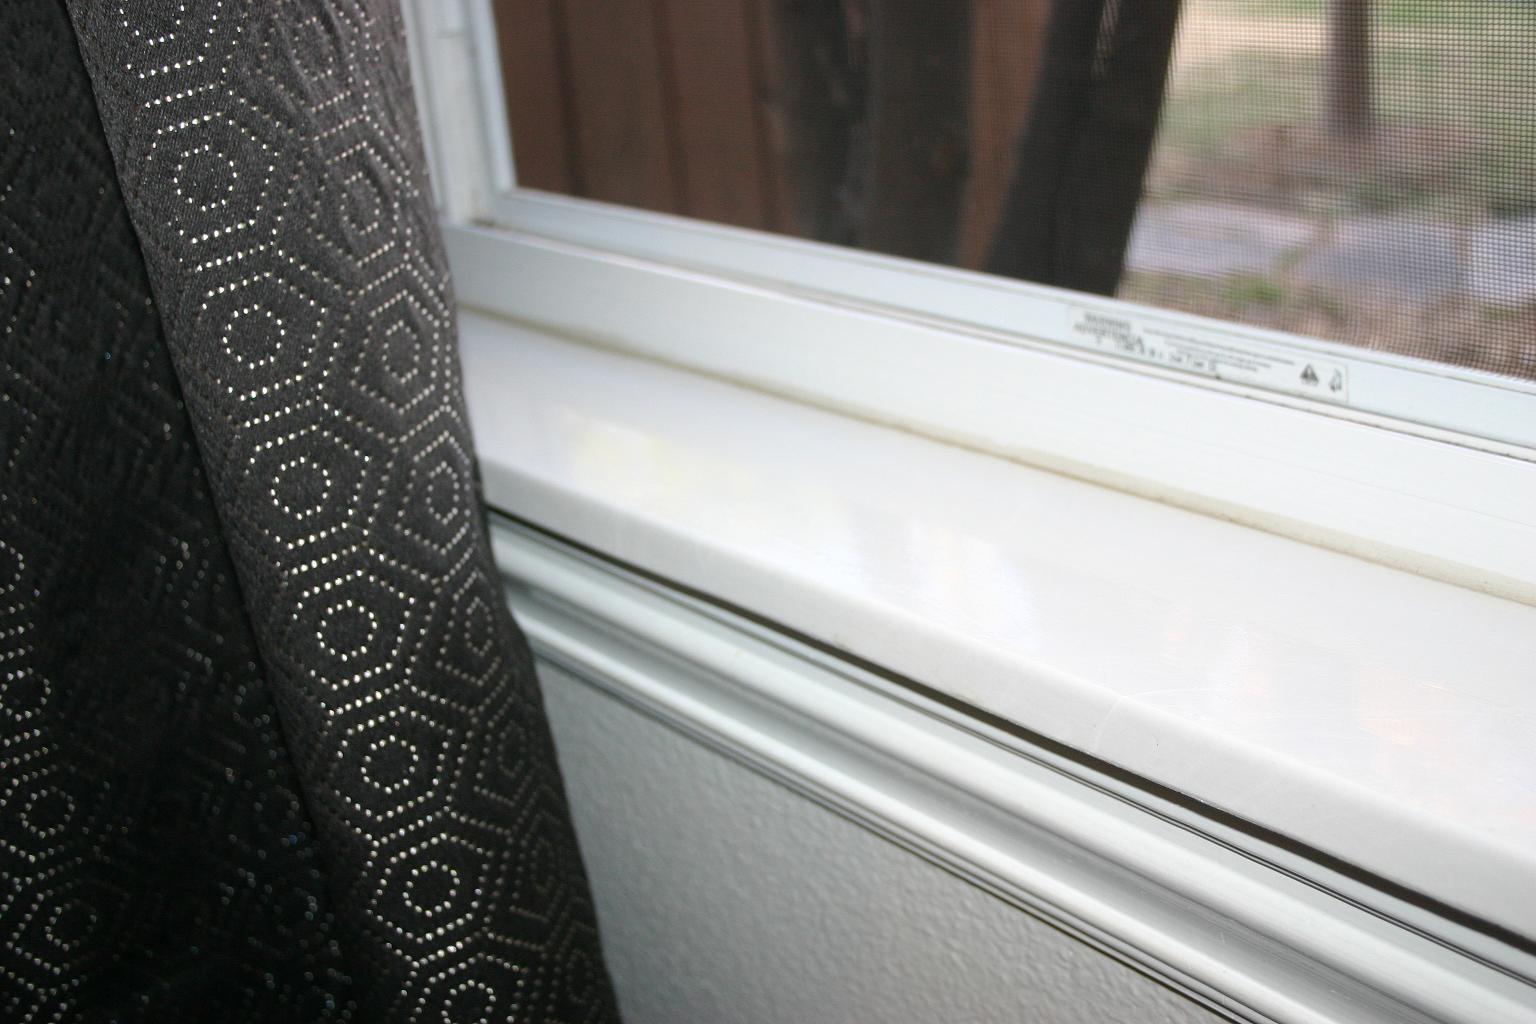
Marble window sills (or any solid surface material for that matter!)  Have you ever noticed the nasty black crud (i.e. mildew) on your window sills...or how the paint flakes and chips, especially after they get rained on a time or two.​​

IMG_8707.JPG

Easy solution!!!​ Cultured marble window sills.  Such an easy, inexpensive solution.  Now honestly, if you had to do them ALL at once, it would be a tad expensive.  But start with one or two...maybe the few that get left open the most in the spring (oops!) and over time replace all your sills with marble. I usually pay around $25 per sill.

It really is simple!  Take a VERY sharp utility knife and carefully "score" (cut through) all the caulk around the existing sill.  Basically between the existing window sill and the window, wall and trim.  ​Then take a flat tool (a chisel, flat screw driver, metal putty knife) and use a hammer to tap it between the sill and the trim under the sill.  Your objective is to lift the sill up...so however you can do that carefully....it doesn't matter if you scar up the sill, but you don't want to make too big a mess of the wall or trim.  Once you have the sill off take it to a culture marble manufacturer (easy to find in your phone book) and they can use it as a template for your new marble sill.  I usually get "white on white"...will match any white trim color.

If you are going to do more than one, make sure you number or somehow label your pieces so you will know what goes where!  You may THINK all your windows are 3' wide...trust me, there is a good chance there is a hair difference!​

IMG_8708.JPG
IMG_8709.JPG

To install your new marble sill, first "dry fit" it to make sure it fits properly!  You can make minor adjustments with sandpaper and even a skill/jig/tile saw IF you know what you are doing and feel comfortable doing so (cultured marble is NOT difficult to cut) If you can't make the adjustments yourself, mark where the cuts need to be on the marble with a permanent marker and take it back to the marble shop.

You will probably have a small gap (1/8" +/-)  all the way around...that's okay, you will fill that in with caulk.  If it fits properly,  just put a good thick "squiggly" of silicone caulk on the framing board the sill will sit on, install the sill and press firmly.   (If there is a gap between the actual window and "framing sill" you will want to run a nice heavy bead of silicone caulk to prevent air from getting in.  If the gap between the window and framing sill is BIG, you might consider stuffing it with insulation before installing your new sill!)

Now, here is the tricky part...you really should use silicone caulk to fill the gaps...and that stuff is NOT for the novice.  A 100% silicone will not clean up with water AND most are not paintable.  So if you are not a GREAT caulker, I would suggest using a "painter's caulk."  Easy clean up and you don't have to worry about it if it gets on the wall or trim...because it will hold paint.

IMG_8617.JPG

Remember my instructions about caulk...cut the tip small and at a 45 degree angle, with a very sharp razor blade.  When you caulk a gap, squeeze the gun trigger gently and keep it moving along the gap.  The deeper and wider the gap, the slower you will want to move the gun....the narrower or shallower the gap, the faster.  Again, it is a learned art....practice does make perfect.  But caulking is a necessity with MOST DIY projects!!!​

If you are really afraid you are going to make a big mess, take the time to tape off the area...run masking/paint tape along both sides of the "gap"...caulk...wipe with your finger...immediately pull up tape!!!  If you are going to attempt using silicone caulk, I would highly recommend doing this!!!  Keep mineral spirits handy for clean up!​

After you run a bead of caulk, take your finger and run it along the caulk/gap.  You want a nice, smooth "line."​

Caulk between the sill and the window/wall/trim...all the way around.​ If you are using painter's caulk, it will easily clean up with water...silicone caulk cleans up with mineral spirits. 

The entire process really isn't that difficult...and in the end you have a beautiful window sill that will never rot or chip, is super easy to clean and is very forgiving when you leave the window open during a thunderstorm!  

​BTW, if you are having a new solid surface installed in your kitchen or bathrooms I would highly recommend having the installer cut and install a new sill for any windows from the solid surface you are using...I had my granite installer cut a window sill for my kitchen window!  Looks beautiful and no more worries when I forget to shut the window before it rains!