Making cabinet doors shut!

This is a super simple DIY “home improvement” project.

I would never give it a second thought had my neighbor, Carolyn, not been looking for a fix for her cabinet doors that seemed to be possessed. No matter how well she shut them, they would open. To solve for the problem she bought sticky velcro….a novel fix for a simple problem but they do actually make little magnet thingies to solve this problem.

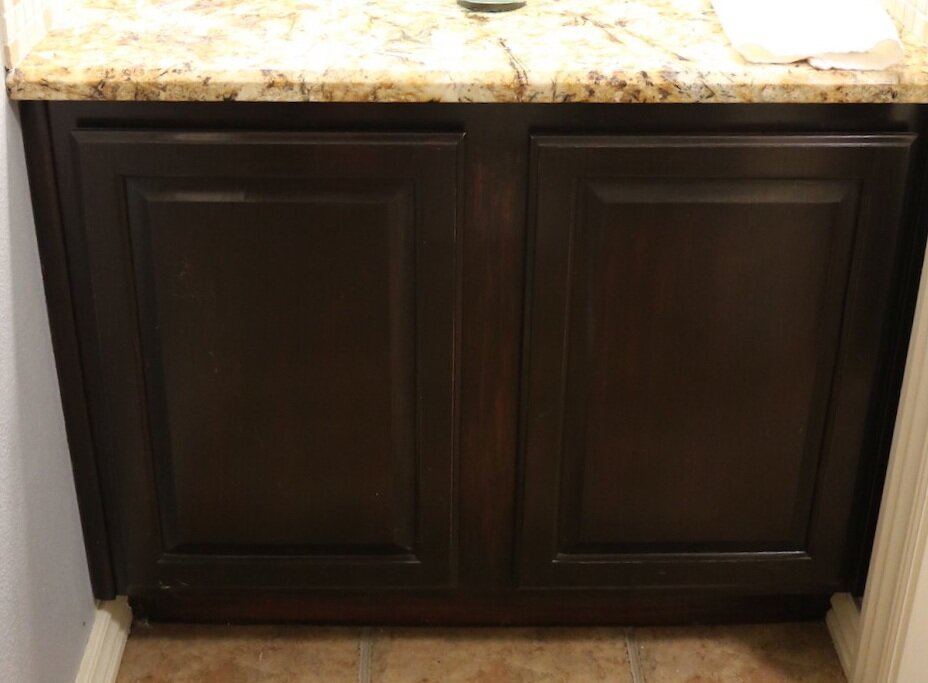
Truth is, I have several cabinets that have the same issue…no matter how much I adjust the hinges (and it usually is a hinge issue) the doors never want to close all the way.

I told Carolyn about the little magnet thingies so she bought a few and it took us all of about 5 minutes to put two on the offending cabinet doors.

Which made me wonder why I haven’t done this on MY cabinet doors. Seriously.

So this week while I was in Lowes I picked up a few of these little “cabinet door magnets.”

Super simple to install…you can either place them at the top of the cabinet or at the base…personally I say place them where they are least noticeable.

Walla! Cabinet doors will now stay firmly closed but are still super easy to open with little resistance.

Such an easy fix for a simple problem!

It only took me 20 years to do it.

Guest bath makeover....

I’m trying to complete a few small projects…a few weeks ago it was my laundry room.

This past week it was my guest bath.

The guest bath is right across the hall from the laundry room…since I painted the laundry room a pretty “sagey green” I decided to tone down the blue in the guest bath. While I was at it, I decided to change out the counter top and backsplash.

I installed a glass vessel sink, a super awesome faucet and new lighting when I gave the room a little makeover a few years ago (probably a decade ago!) and I still love them so I didn’t need new ones.

(My dismal attempt to photograph dark cabinets with no natural light!)

The wall decor over the toilet had yellowed a tad because I sealed it with poly. (Yes, poly yellows…to avoid, use polycrylic or a clear coat sealant)

My “plan” was to paint the walls and trim, change out the top and backsplash, strip the cabinet and mirror frame for a “lighter” wood stain and repaint the wall decor.

After painting the room a lighter color and installing a lighter top (white quartz) and white backsplash and lightening the wall decor with a fresh coat of white chalk paint, I decided to stick with the vanity cabinet and mirror “as is” for the time being. I had stained the vanity “java” with gel stain years ago and I think it looks fine (but impossible to photograph!)…the mirror has a “java” stain finish, so it coordinates well with the vanity.

Just these few easy changes made a huge difference…the paint really lightened and brightened it.

Still love the Devoe prints I added two years ago!

One of my favorite little projects…a TP cubby! Super simple!

Fresh white chalk paint with a tiny bit of distressing…this time I sealed it with a clear coat so hopefully it won’t yellow again!

I would like to mention my trim paint…I painted it the same color as ALL the trim in my house. White would have been great but I decided to stick with the color of the trim throughout the house…just my personal preference.

Paint.

A must when you want to change a room! Whether you paint the walls or furniture, JUST DO IT! Paint is relatively cheap (only took 1/2 a gallon for this room) and if you don’t like it, you can always change it!

I love this little makeover. I have been coveting white quartz for my kitchen tops and this tiny bit has REALLY stoked the fire.

Who knows….

ANOTHER laundry room makeover!

One nice thing about blogging is I can go back and know exactly when I did something…case in point, the laundry room.

Here I shared how the laundry room went from this….

…to this….

…in 2014.

I raised the cabinets to the ceiling and painted them. I painted the walls, stenciled the little birdie murals, installed a new light fixture, purged and added a little storage cart. Nothing earth shattering but enough to dress it up a tad.

The most dramatic thing I did to the laundry room was installing reed glass in the door. Here I share a tutorial on how I turned a plain ole’ hollow core door into a really awesome feature!


One thing I debated and am now glad I did not do…put a solid “top” across both the washer and dryer. I worried some day I might go back to a top load washer. Sure enough I did! The shelf is perfect and it is an element I kept!

The only other changes over the last few years was a little kitchen cabinet I removed in one of my kitchen makeovers and put in the laundry room and I moved the sewing machine to a little portable table.

When I painted the walls I was a tad frugal and used some paint I had on hand. I decided to go for broke and actually buy an entire gallon of custom color paint this time. Gasp! I wanted a soft “sagey/greenish” color so I did what I always do…headed to my favorite DIY store, picked up about 15 paint samples and brought them home. Took me all of 2 minutes to pick the perfect shade! Seriously, I think this is the perfect “sagey/green” color…I wish the photos did it justice!

THIS is the process I use for any “makeover”…whether a room or a piece of furniture. Find your inspiration, make a plan and execute the plan.

Inspiration came from cruising Pinterest. As I said in the first makeover, I don’t have the laundry room of my dreams but I have a space I want to be pretty and organized. I knew exactly what I wanted (the plan)…paint, storage, lighting and tile!

First step….PURGE! Empty out the entire space.

Yes, you are going to make a mess…there is just no way around it!!!

My goal is to NOT put back most of the stuff I take out. Now in my case, I am a pretty good “habitual purger” so I have very little “stuff”….but there are always things lurking that have been untouched for years and can go!!!

Next, remove the old light fixture, paint the ceiling (with a flashlight) and install a new fixture. It wasn’t that i disliked the old fixture, but it had fluorescent bulbs that got really hot and one of the three sockets evidently had a short or something because I could never get it to work right. I tried to change out the sockets in the fixture to accommodate LED bulbs, but the wiring was too short and I finally said “FORGET IT” and bought a new fixture.

Remove switch plates, shelving, and stuff on the walls.

Wipe everything down with a damp cloth….don’t paint over dirt!!!

Build storage shelving. I have lived here long enough to know what I need and how I want a space to function.

Caulk the new shelving.

Paint the trim, then walls.

A new shelf…I went with poplar sealed with a clear finish…no stain. I may or may not stain it or paint it in the future…for now, I like this look!

Then a debate. Do I or don’t I stick with my original “plan.”

So my original “plan” called for tile on the wall behind the washer and dryer. I really gravitate towards that look and every time I see a picture of it on Pinterest, I really love it. Yes, that would mean losing the birdies…

HOWEVER, as I have mentioned many times before, NOTHING is “timeless.” And I know me well enough to know that in 5-6-7 years I will not like whatever tile I pick out today…which means that sometime in the future I will have to remove the tile, repair sheetrock and do something else.

NOT something I look forward to. A huge reason why I didn’t put wallpaper in this house 20 years ago, even though it was still a “thing.” I had removed enough wallpaper in my years to know I never wanted to do it again.

So…no tile…for now! I painted the wall and added a little “farmhouse” mirror. The light fixture and the mirror add a touch of “farmhouse fad” without breaking the bank. This is a small room so the mirror is a huge plus!

The storage shelving is THE BOMB!

Love it…it is something I have wanted to do for years! And again, since I have lived in this house for 20 years, I knew exactly what I need. A place for doggy towels, some simple baskets for light bulbs and dust rags and plenty of room for my detergent stockpile! I designed the shelving so I would have the perfect spot for my sewing cart (See how I “upcycled” an old typewriter cart to make a portable sewing table HERE!) At the last minute I added a shelf above the sewing cart so I would have space for a sewing machine if I ever did away with the cart in the future…right now it holds my little coupon box.

Keep in mind that the cart between the washer and dryer I built on the last makeover holds a ton of stuff…dryer sheets, MORE detergent, the iron, spray starch, etc.

The back of the cubby is perfect for storing paints…remember, STORE YOUR TOUCH UP PAINT IN THE HOUSE!!!! Not in the garage or storage building!

Since I now only do laundry for two, my laundry room isn’t near as chaotic as it was when I was raising kids. But whether you do 8 loads a week or 30, there is NO reason to have a disorganized and blah laundry room. Get it organized. Make it a space that is beautiful…it won’t take the sting out of doing laundry but maybe it will make the experience a little more enjoyable.


New vinyl windows and a little window seat makeover...

This is one of those “needs” with a little “want” thrown in.

Any time I think about buying something or doing something I ask myself “Is this a need or a want.” Wants are okay…as long as you don’t go into debt for them or harm another person in pursuit of your “want.”

The “need” was new living windows. The old arch window was cracked and had condensation between the panes.

I have managed to ignore it for some time because in the hot months I have a temporary shade in it and in the fall and Christmas seasons I have cute little vignettes that block it…but this time of year it just consumes this room and it is near impossible to ignore!

The lower window was the original aluminum window and that thing might as well have been wide open on a cold blustery day. It leaked cold air like crazy!

So…a need.

As you will notice I changed up the “configuration” of the window…I went with a fixed window in the middle with two crank-outs (technically called “casement” windows) on each side. I have a crank out in my bathroom and I LOVE it…super easy to open and close!

When I measured for the new window I measured the outside opening…that is because the new window was going to be installed from the outside and I had to make sure it would slip between the brick.

While it fit snug between the brick…

… it had 1/2 “gaps” on the inside…

Usually the new window would slip in right behind the sheetrock that butted up to the old window…not the case here. I suspect it is because whoever bricked this house did not brick over the old window properly.

No biggy…it gave me ample room to put in A LOT of insulation! Silicone caulk around the outside…a must for ANY window! There is NO air coming in around this puppy!

It did mean I had to trim out around the new window. Again, no biggy. I used 1x4 pre treated boards and flat molding…good as new!

One issue I had was the existing seat cushions…they were not going to work because of the window crank….

The cushions are really not an issue for several reasons

I only added the cushions to help block some of the air leaking in around the old window. Second, the fabric has faded over the years and I needed to recover them! And lastly, nobody but the cats sit in this space so comfort is really not an issue.

So the cushions can go…but then I am left with the stark white of the faux marble…ick. Again so 90s!

Sooooo….I decided to remove the faux marble and add stained wood “bench” type seating before I put up the new trim!

Course I wanted walnut…but finding walnut boards proved to be impossible. I ended up using oak boards…NOT my favorite wood, but it was either that or poplar (too “green”) or pine (too ick).

The marble was super easy to pop off….heavy as crud but simple to remove. It was just siliconed in.

I bought 1x6 and 1x4 oak boards. I like the “plank” look so I used the router to add a VERY small groove on the top edge of each board. On the board that would be on the outside edge , I used the router to round the edge.


Again, I did not take pictures of the “process” or make a tutorial…I am a HORRIBLE teacher/blogger! Just sharing what I did!

After cutting each board to the proper width and routing the edges, I stained them with brown mahogany stain and sealed them well with poly BEFORE installing them.

Once the finish was dry, I finally got to use the biscuit joiner Matt got me for Christmas two years ago! I love this little tool. Because of the layout of this bookshelves, I couldn’t make the entire seat in one piece. I had to lay in each board one at a time. The biscuit joints allowed me to get a tight, even fit without having to nail into the top of the seat! Love!!! I just glued the “biscuits” and edges, and slipped them together!

After the new wood seats were done, I trimmed around the new window.

I removed the blind from the side window…after 20 years of neglect that thing was pretty nasty.

I will eventually replace this window as well since it is one of the original aluminum windows.

I haven’t decided what to do about window dressings. I have lived without a blind in the big window for years…we live at the end of a cul-de-sac and I don’t roam around in this room “indecent” and this window faces south so it doesn’t get a ton of sun in the summer months. The side window faces the fence and there is little view to the inside of the house so for the time being, I think I’m fine without a window covering!

I love the new look…again, I think stained wood always adds a little warmth to an area and this big sucker could use some “warmth.” And the new windows are AMAZING!!!! We have winter weather this week and not a drop of cold air can be felt around the window…and I CAN NOT WAIT to crank these babies open on a warm day!!!!

This photo of the outside reminds me of how “blah” the house looks in the winter compared to a summer view…

This one reminds me that we desperately need to power wash the brick this spring!!!!


I haven’t painted the trim just yet…truthfully this entire built in needs to be painted. I haven’t painted it in 20 years and I know it was originally painted with alkyd (oil-based) paint.

When we painted Matt’s bedroom a few weeks ago, he found a new “hybrid” paint…an acrylic alkyd paint they SAY will go over oil based OR enamel paints. I know the paint went on like an alkyd…leveled beautifully….and cleaned up like an enamel (with soap and water!)

While the paint went on well and cured well, my biggest concern is durability. This area gets a lot of wear and tear and I don’t want a paint that dings easily. Oil based paints are outstanding for furniture and wood pieces…super durable!

So I am going to wait a bit and see how Matt’s holds up…in other words, let him be the test monkey…lol! If his trim holds up well, then I will use the hybrid paint. Or I might just bite the bullet and use an oil-based. I know me well enough to know that a bug can bite me at any moment!


Making the prefect photo frame....

I don’t consider myself a “crafty person” but I do know how to use a hot glue gun!

I have the coolest photos of Matt and me when we went to New York, and of Katie and me when we went to New York…all taken at the Top of the Rock in Rockefeller Center. Seriously cool pictures that I want displayed. But I could not find a frame that worked for all four photos!

I bought four 5x7 frames, trimmed the photos to fit and then hot glued the frames together to make one big frame for all four pictures.

The frames I used are actually desk top frames so I just popped the little “stands” off.

Super simple and a great way to make one frame out of four different frames. You could do this with different colors of frames, different sizes, just about any combo of frame you can imagine!

Simple and inexpensive.

A TIP: I like these little sawtooth picture hangers but the tiny little nails always give me grief…I just can not hold them and hammer them in at the same time. My trick is to use needle nose pliers to hold the little nails.

You are welcome!

Another family heirloom...a desk makeover.

As I have mentioned a bazillion times I am all about family heirlooms.

So when my mother offered me “dad’s desk” I didn’t hesitate…even though I have absolutely no use or room for it.

If I remember the story right my dad built this desk when he was 12…he would have been 79 this year…that makes the desk 67 years old…something my dad made when he was a boy….yes, I want it!

Fortunately my son Matt loves family heirlooms as well and since he just moved into a larger home, he has the space and need.

The desk was sporting green. I THINK it is green because at some point I did have it and I painted it green for Matt’s room. When the boys were younger everything in Mitchell’s room was blue and everything in Matt’s was green!

I guess at some point I gave it back to Mom.

Originally the desk would probably have been stained. I remember a time in the 70s when it was red. Then there was the “mauve” phase in the 80s. In other words, I knew there were at LEAST four layers of finish on it!

My original plan was to strip it down to bare wood and stain it.

What is the old saying about “best laid plans….” Yeah…that wasn’t happening.

There was the green…then the mauve…something white I suspect is a primer that was painted over the red…the red was painted over the original finish…whatever that may have been

I used every trick in my arsenal and still could NOT get all the paint off. Industrial stripper, my 1/2 and 1/2 mixture and even sanding.

One thing I will say about both my dad and I…when we do something, we do it to last!

After a few days of stripping and sanding I was able to get all the paint off the top but finally gave up on the rest of it…it wasn’t happening without doing serious damage to the wood itself.

I decided to stain the top and paint the base.

I sanded everything as smoothly as possible, primed it, sanded again, rubbed it down with tack cloth then painted it with a white enamel.

I stained the top with a java stain and sealed it with poly.

It is not exactly what I wanted but Matt and I both love the way it turned out. Right now he is using it as a tv stand in his den.

I was only able to snap a quick picture with my phone but as you can see, it turned out pretty cute.

We are in the process of making some major changes in his new house…new flooring, paint, shelving, etc.

Our plan is to eventually makes some major changes to his kitchen and den and when we do, hopefully I can get some good, staged pictures!

Until then I just wanted to share what one can do with older pieces…and also show that even we “old pros” get stumped occasionally…and when we do, we just drop back and punt!

Another new living room rug and my thoughts on board and batten...

Over the years I have been able to remove all the wall-to-wall carpeting and install hardwoods. I learned the hard way (after raising 4 kids and several puppies) that I never want to spend a lot of money on area rugs.

Unfortunately they are a necessity on hardwood and tile. What isn’t a necessity is spending A LOT of money on something that gets tons of wear and tear and may go out of style on a whim. So several years ago I started experimenting with indoor/outdoor rugs…and honestly., I have found that I get serious bang for the buck!

It started with this rug…

….an indoor/outdoor rug I picked up at a big box store for less than $100. I just needed something simple to pull the room together. Since this room only gets used a few times a year, I wasn’t too terribly concerned with having “super comfy” under foot!

I was so impressed with the quality and look of the rug I decided to give the “indoor/outdoor” thing a shot in the den! Let’s be honest…the den is really just a big romper room for the dogs! One reason we don’t even have a coffee table in the room!

I picked up this indoor/outdoor rug at my favorite home improvement store!

Not super comfy but it is neutral and has held up well. If I want “comfy underfoot” I wear my Ugg slippers.

I spent a little more and went a little more “fancy” on the dining room

…this rug doesn’t get a lot of wear and tear so I was okay spending a tad more. Still love this rug!

When it was time to change out the rug in the living room I found a really pretty and simple indoor/outdoor rug at a local home decor store.

I knew the minute I unrolled it I had a problem.

It was stiff and not at all pliable. It had some serious “crease marks” from being rolled up and the edges curled up. I went ahead and put it down and hoped and prayed the creases and rolled edges would eventually go away.

Nope.

Honestly, I think they got worse and I’m lucky I didn’t break a dang hip on the thing.

I tried steaming the edges and curling them the opposite way…nothing worked.

The rug just plain sucks.

If a rug looks like crud when you lay it out, good chance it isn’t going to get much better. I should have rolled it up and taken it back but noooooo….I just crossed my fingers and hoped it would get better.

So now that the holidays have passed and everything is back in order I decided it was time to find a new rug that wasn’t a tripping hazard.

Again, I just wanted something inexpensive that would pull the space together. We have moved the big (ick) brown leather couch back into the living room so I really wanted something relatively neutral. (Why do I still have the big (ick) brown leather couch…because it is Brian’s and he spent a ton of money on it so I can’t bring myself to get a different one)

I try to keep the furniture and rugs in this room relatively neutral so I can add splashes of color with pillows and throws…right now I am enjoying a “pink phase.”

Two major changes coming in this space…first, I have FINALLY ordered new windows for the front…the old ones are the 20 year old original aluminum windows that are terrible…can’t hardly open them and they leak some serious air! And as you can see they dominate this space!!

I would love to change the 1990s arched window to a simple transom but unfortunately I can’t get my brick anymore and changing out the shape of the window would require additional brick…curses!

Regardless, the window seal has broken in the arch window and there is condensation between the panes…nothing you can do about it but replace the window.

I COULD just buy a new window insert but since I am replacing the bottom aluminum window with vinyl I decided to change out the arch window as well.

I changed things up a bit on the style and design and I can’t wait to share! Hopefully those will be here in the next week or so and we will have a decent day to install them!

The second change is the entry. I shared it here….

I’m looking at the date of the original post…3 1/2 years ago….and sadly, little has changed.

But last fall I bought a nifty antique mirror at a local market…at Christmas I put a wreath on it, and honestly, I kinda like the look. So when I took Christmas down, I hot glued a hook onto the mirror and hung an olive branch wreath on it…

Hum…kinda like that look too.

So it looked funny to have a mirror on that side of the entry AND still have the blue “moroccanish” mirror behind the door, so I took that mirror down and gave it to my daughter!

So now I have a blank wall.

So change is coming…maybe…I think…some day. It only took me 3 1/2 years to get this far so what’s a few more years.

Truthfully I am kicking around the idea of extending the board and batten to this wall…from the door to the stairs. And then maybe put some little hooks on it to hang purses and such. I can’t do anything too bulky because the door swings into that wall.

My ONLY issue with board and batten is that I know it will go out of style in the coming years…and while I have the energy and time to install it today….what if I don’t have the time, energy or money to remove it in 5-7-10 years?

I know, I know….”Board and batten is timeless…it will never go out of style.”

Bull…hardwoods are timeless…but yet 40 years ago people covered them with wall to wall carpet. Subway tile is timeless…yet decades ago people ripped it out and put up olive green and harvest gold 4x4 tile.

My point, just because something was popular 100 years ago and came back around, doesn’t mean it is “timeless.” Trust me, something different will come back around and all those painted white cabinets and rooms full of board and batten will be the bane of our existence.

I’m not saying you should live with a dated carpet, tile or wall treatment if it makes you crazy. I’m just saying think carefully and spend wisely when “updating” your home decor!

And if you are like me and procrastinate long enough, you may miss the current bandwagon…but trust me, another will come along!

The upside is I save myself a lot of work AND money by being somewhat indecisive…lol!

UPDATE!!! I WROTE THIS POST WHILE I WAS ALL COMFY IN BED. I got up, put on my grubby paint clothes and had time on my hands.

Something is going down!!!!

Or rather UP!

Yep, board and batten in the entry!

And you know what, I’m kinda glad I did it. It only took about 2 hours to install it and another hour or so to paint it.

There are dozens of tutorials for installing board and batten…much better than anything I can do.

If you want it, JUST DO IT!!!!

And yes…I still believe it will go “out of style” in a few years but whatevs.

See, even I don’t take my own advise…so “grain of salt” people…lol!

Lego table project!

One of the “littles” in our family LOVES Legos. Course I am all for any child’s entertainment that doesn’t involve electronics.

Believe it or not I managed to raise four intelligent, college educated children without video games or smart phones…imagine that!

When I heard she has to commandeer the family room coffee table to build her Lego sets, I decided she needed her own personal space!

I looked at buying a Lego table as a Christmas gift…but as with much of the furniture today, they were all cheaply made and didn’t seem very sturdy…certainly not pieces a child could lean on for hours.

So I decided to build one!

First thing I had to do was locate “Lego flats.” I found these on Amazon…perfect!

The package SAYS they are 10x10 but when I laid out 3 wide I discovered the measurement was actually 30 1/8” …good to know! I decided to build a table that would hold 3 wide and 2 deep…and knowing the exact measurement of them laid out is important. The inside measurement of the trim on the top will be 20 1/4” x 30 1/4” so there is room for 6 total interchangeable flats.

I constructed the table out of 1/2” plywood, 14” furniture legs, 1x3 pine boards and 3 1/4” trim.


I bought a piece of 24” x 48” 1/2” plywood and cut down the width to 34”.

When cutting plywood with a skill saw, make sure you “score” the line you will be cutting with a utility knife…

…then cut on the OUTSIDE of the scored line…this will keep the plywood from “splintering” when you cut it with a skill saw.

After cutting the plywood 24” x 34” I “banded” the entire board with 1x3 pine… then added the leg brackets to each corner. The legs just screw into the brackets.

Banding the plywood top with 1x3 pine does several things…it increases the width and length of the table by 1 1/2” …remember 1”x3” boards are actually 3/4” x 2 1/2”. It also strengthens the plywood and the “skirt” it creates will hide the leg brackets.

Also remember…glue AND nails. ALWAYS USE GLUE!!! The glue is what actually holds everything together!

After the base of the top was constructed, I flipped it over and added the trim to the top…cutting it so that the opening on the table top would be 30 1/4” x 20 1/4” to accommodate 6 flats with a smidge of wiggle room so they can easily be changed out.

Once it was all constructed, I puttied all the holes and caulked all the joints. I primed it with primer, sanded everything smooth, tacked and painted it with Krylon satin white.

A few of the tables I looked at had storage drawers or the tops lifted for storage…cute idea and something I could have incorporated into the design…but truthfully if you have a “lego kid” you know the table would have to be the size of Montana to hold all their pieces…so you are better off finding bins or stackable containers that suit your needs!

This table is strictly so the little doesn’t have to clutter up the family coffee table when she wants to build and tear it all down when it is time to put it away…she can just remove the legs and slide it under the couch or bed!

Super cute and hopefully sturdy enough for hours of leaning.


A new storage project and Christmas 2019!

It has been a minute since I shared a home project…just too much going on the last few months to do anything other than what HAS to be done around here!

But I saw this little storage idea HERE and knew it was exactly what I need in my guest bathroom!

I had to build a little Christmas gift but I can’t share that just yet since it is suppose to be a surprise. But while I had the saw and nail gun out I decided to take time to build this little storage unit.

I keep plenty of spare toilet paper under the vanity but it is out of reach if you have already sat down. So for years I kept spare rolls in a basket on the floor next to the potty but I just didn’t think it was a sanitary place to store paper. So I set up a little wickerish box…paper inside, magazines on top.

So here’s my opinion about reading materials in a bathroom. First, I don’t want guests hanging out long enough to read an article in the guest bathroom…seriously, do that in your own bathroom. Second, if you have to sit there long enough to read an article, add fiber to your diet.

I needed something to set a little Christmas tree in so the little box got “repurposed.”

Anywho, I saw this little storage idea and thought “HEY! I can do that!”

I constructed mine a tad differently than Barb, but the concept is the same…and as I always suggest, use the tutorial that makes sense to YOU!

Either way, SUPER simple build! Something you could do with a miter saw and box. hammer and screw driver if you don’t have fancy power tools!

The first thing I did was use a stud finder to locate the studs then I cut into the sheet rock to measure the exact distance between studs…

…15”. Most wall studs are 16” on center so they SHOULD be 15” apart, but you never know so it is better to be safe than sorry! Just measure the distance between the studs and make your box a smidge narrower than that…or do as Barb did and “fur out” the studs to make a box a specific width.

I laid out the TP hanger (THIS is the one I used) and the spare rolls to see how tall I wanted the entire box to be…17” seemed to be perfect.

One suggestion…make sure the bar on the holder you choose “pivets”…you want the bar the paper will sit on to swing freely so you can swing it out of the box to put the paper on!

I used 1x4 (actually 3/4” x 3 1/2”) pine boards and 1/4’ luan to build the box. I cut the width pieces about 14 3/4” to give myself a little wiggle room between the studs. Basically I made a 14 3/4” x 18 1/2” box (outside measurements), then backed it with luan, cut to fit. I used wood glue and brad nails…ALWAYS glue your joints…trust me, the nails just hold everything together until the glue dries!

I used “door stop” for the face trim…it is 1/4” thick and 1 1/2’ wide and has a very simple profile! I used it when I installed the glass on my laundry room door…simple and beautiful!

After the box was constructed, I puttied the holes and caulked the joints, primed it with Bullseye primer, sanded it smooth, then wiped it down with a tack cloth.

I used the backside of the box as the “template” to mark the sheetrock, making sure it was level with a small 6” level (don’t assume your studs are level). I used a sheetrock knife to cut the sheetrock.

To install, I slipped the box between the studs, making sure the trim sat flush on the sheetrock. I drilled four 1/4 “holes approximately 3/8” deep on the inside of the box (2 on each side) and used 1 1/2” sheetrock screws to attach the box to the studs. Then I used wood putty to fill those holes and sanded it smooth after it dried.

All my trim is oil based “Swiss Coffee” (and of course I have spare paint on hand) so I painted the box with the trim paint. Again, ALWAYS use an additive when brushing or rolling paint on wood…in this case Penetrol since I am using an oil based paint. Two coats!

After the paint dried well I installed the TP holder and stocked it with spare paper.

Too stinking cute and perfect for storing extra paper and even a little “air freshener.”

Christmas is next week and so little changes from year to year it seems almost redundant to share my Christmas decor. But I will leave you with a few pictures of our cozy holiday home…

I hope you and yours have A VERY MERRY CHRISTMAS!!!

Hutch makeover reveal....

I shared the china hutch I started HERE.

Not the prettiest piece of furniture I have ever seen but I knew it would be perfect for the space Matt and Hannah have in their dining room…with a little tweeking!

In this post I also shared a few important tips for painting any piece of furniture. Tried and true advice!

First thing I had to do was “find my inspiration.” It doesn’t matter if you are making over an entire room or a piece of furniture…you have to find your inspiration.

In this case I needed to find a similar hutch so naturally I searched Pinterest…I sent several pictures of “french provincial china hutches” to Hannah and she liked this one best (originally posted on 509 Design)…

…beautiful. I love the stained top and the Miss Mustard Seed boxwood green.

The kids did not want doors or dividers on the top so those were removed.

They also decided to paint the entire inside white.

The first thing I did was strip the old finish and stain on the top of the base. Keep in mind that the top and the base where attached pretty tight so I just left them as is and only stripped and finished the part of the top that was showing. I used this process and it literally took me less time to strip and re-stain than it did to tape it all off. I used General Finishes Brown Mahogany stain, then sealed it with poly.

After the the top had dried (a day or two) I taped and papered it well so I could prime the entire piece. I also removed the drawers and taped and papered those so I could just paint the fronts.

Removing the vertical dividers left a gap that had to be repaired…

Pretty simple fix…I just cut a piece of decorative wood from the pieces I had removed and glued and clamped it over the gap…

After primer, I sanded it well, wiped it all down with a tack cloth and then painted…first the inside of the top with satin white. After that dried I taped it off and sprayed the rest of the hutch with Kylon Satin Italian Olive paint….closest green in a spray paint to Miss Mustard Seed’s boxwood. Again, it SAYS it is a “paint and primer” in one but I always prime wood furniture with Bullseye or Kilz.

I mentioned the brass froo-froo hardware in the original post…I honestly didn’t think it would make the cut.

But after some serious scrubbing with Brasso and SOS pads, they shined right up and believe it or not, the kids loved them!

So….here is the final product in place….

The farmhouse table is one I featured HERE. I found the black chairs at the apartments and they just needed a little repair, paint and reupholstery (never featured those), the bench is one I made for Thanksgiving one year, the plaid scarf is like the ones I featured HERE and the candle sticks were used as the stands for their wedding cake! It took YEARS for all this tp come together and now that it has…cute as a bug’s ear!

I know the original brass hardware may be a tad “gaudy” but I love it!

The “gap fix” isn’t exactly perfect, but as my Daddy use to say “You’ll never notice it on a passing train!”

I love how this piece turned out…and it shows what you can do with a pretty, um, not-so-attractive piece of furniture with just a little time and paint…all in all I probably spent less than $20 on supplies!

Hannah and Matt aren’t into all the “knick-knack” and “froo-froo” stuff so I am sure they will style it to their tastes!