Mid century side tables...

I have been working hard to find pieces I know others will just love!  Problem is every once in a while I find pieces I absolutely fall in love with and I know I will have a hard time letting go!  Especially after working on them all day! 

I believe these tables are black oak.  The tops, sides and drawers were veneer, but the bases were solid.  Really beautiful tables with great "bones."  

I primed and painted the boxes. Then I stripped and stained the drawers and bases and coated them with 4 coats of tung oil.  

Honestly, it will be tough letting go of these two.   

But someone, somewhere will love them....hopefully as much as I do! 

FOLLOW BECKWITH'S TREASURES ON FACEBOOK!  Now if I can just figure out how to put one of those little Facebook widgets on this blog! 

Little stool...

I have bought so much at auctions and sales that I sometimes forget to take before pictures of the little items!​

I bought a little stool at an estate auction a few weeks ago.  Unfortunately, I wasn't paying attention and hadn't really looked at the little guy...just saw it from a distance and before I knew it, I bought it.​

Unfortunately, it was poorly constructed so it required some reconstruction.  The wood base was MDF which doesn't hold up well to a lot of wear and tear.  So the legs were major wobbly and the fabric was, well, blah.  And it had this really disgusting "fringe" stuff on it.​

But it had good iron legs....and the nice thing about buying something like this is the "template" is already there.  So I deconstructed it, used the MDF base as a template for a new wood base, painted the legs black  and recovered the whole thing in a brighter, cheerier fabric!  ​

Cute as a bug.  This is one of those items I doubt I recoup my time and materials, but it is a cute little piece that will draw attention and hopefully will go to a home where it will be loved...now that it is sturdy enough to actually sit on!​

I also made a little cork board to match the stool.  I painted a frame a pretty yellow and covered cork board and backing with the stool fabric!​

Getting ready to go retail....

Wow...getting ready to go "retail" is a LOT of hard work.  I have been going to auctions and garage sales every weekend.  And if I was a hoarder, I would be in deep doody  because there is a whole world of really nifty stuff out there. ​

I have tried to focus on things others will LOVE!  I know I love most of what I bought...but since it is all piled in my garage and I have NO place to put it, I won't have a problem parting with it.​

This weekend I scored big time on July 4th and Christmas decorations, a big mirror, frames, planters, milk glass, candle holders...you name it, I found it!  Anything I can find that I think is wonderful, at a price that hopefully will let me make a few pennies...or at least break even!!!  I don't plan on getting rich on this little endeavor.  Again, I need an outlet for my creative juices and it is wonderful to find things I know others will take home and LOVE!

And honestly, this gives me an excuse to do something I use to love to do...go to auctions!!!  I forgot how much fun they are!  Even Brian has gotten into it so it is something else he and I can do together....that is always the BEST part of any hobby...sharing it with your best friend!​ And Matt, my youngest son, comes when he is free!  Family fun!

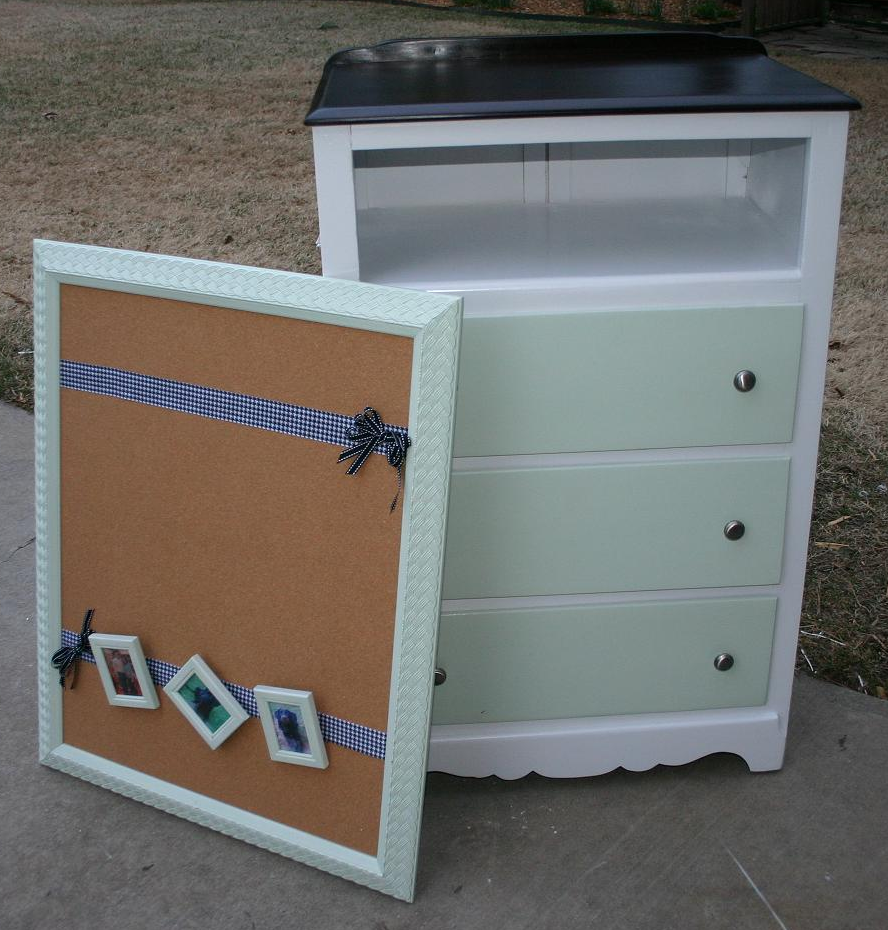
I have found a few pieces of furniture that are inexpensive enough for me to put my "spin" on.  It is hard to pay a premium for a piece of furniture and then come home and put a lot of money and hours into it.  I probably devalue my time and labor way too much, but when I go out and buy $100 worth of upholstery for a little ottoman it makes it tough to sell it for $75...especially when it took me all day to recover it!​

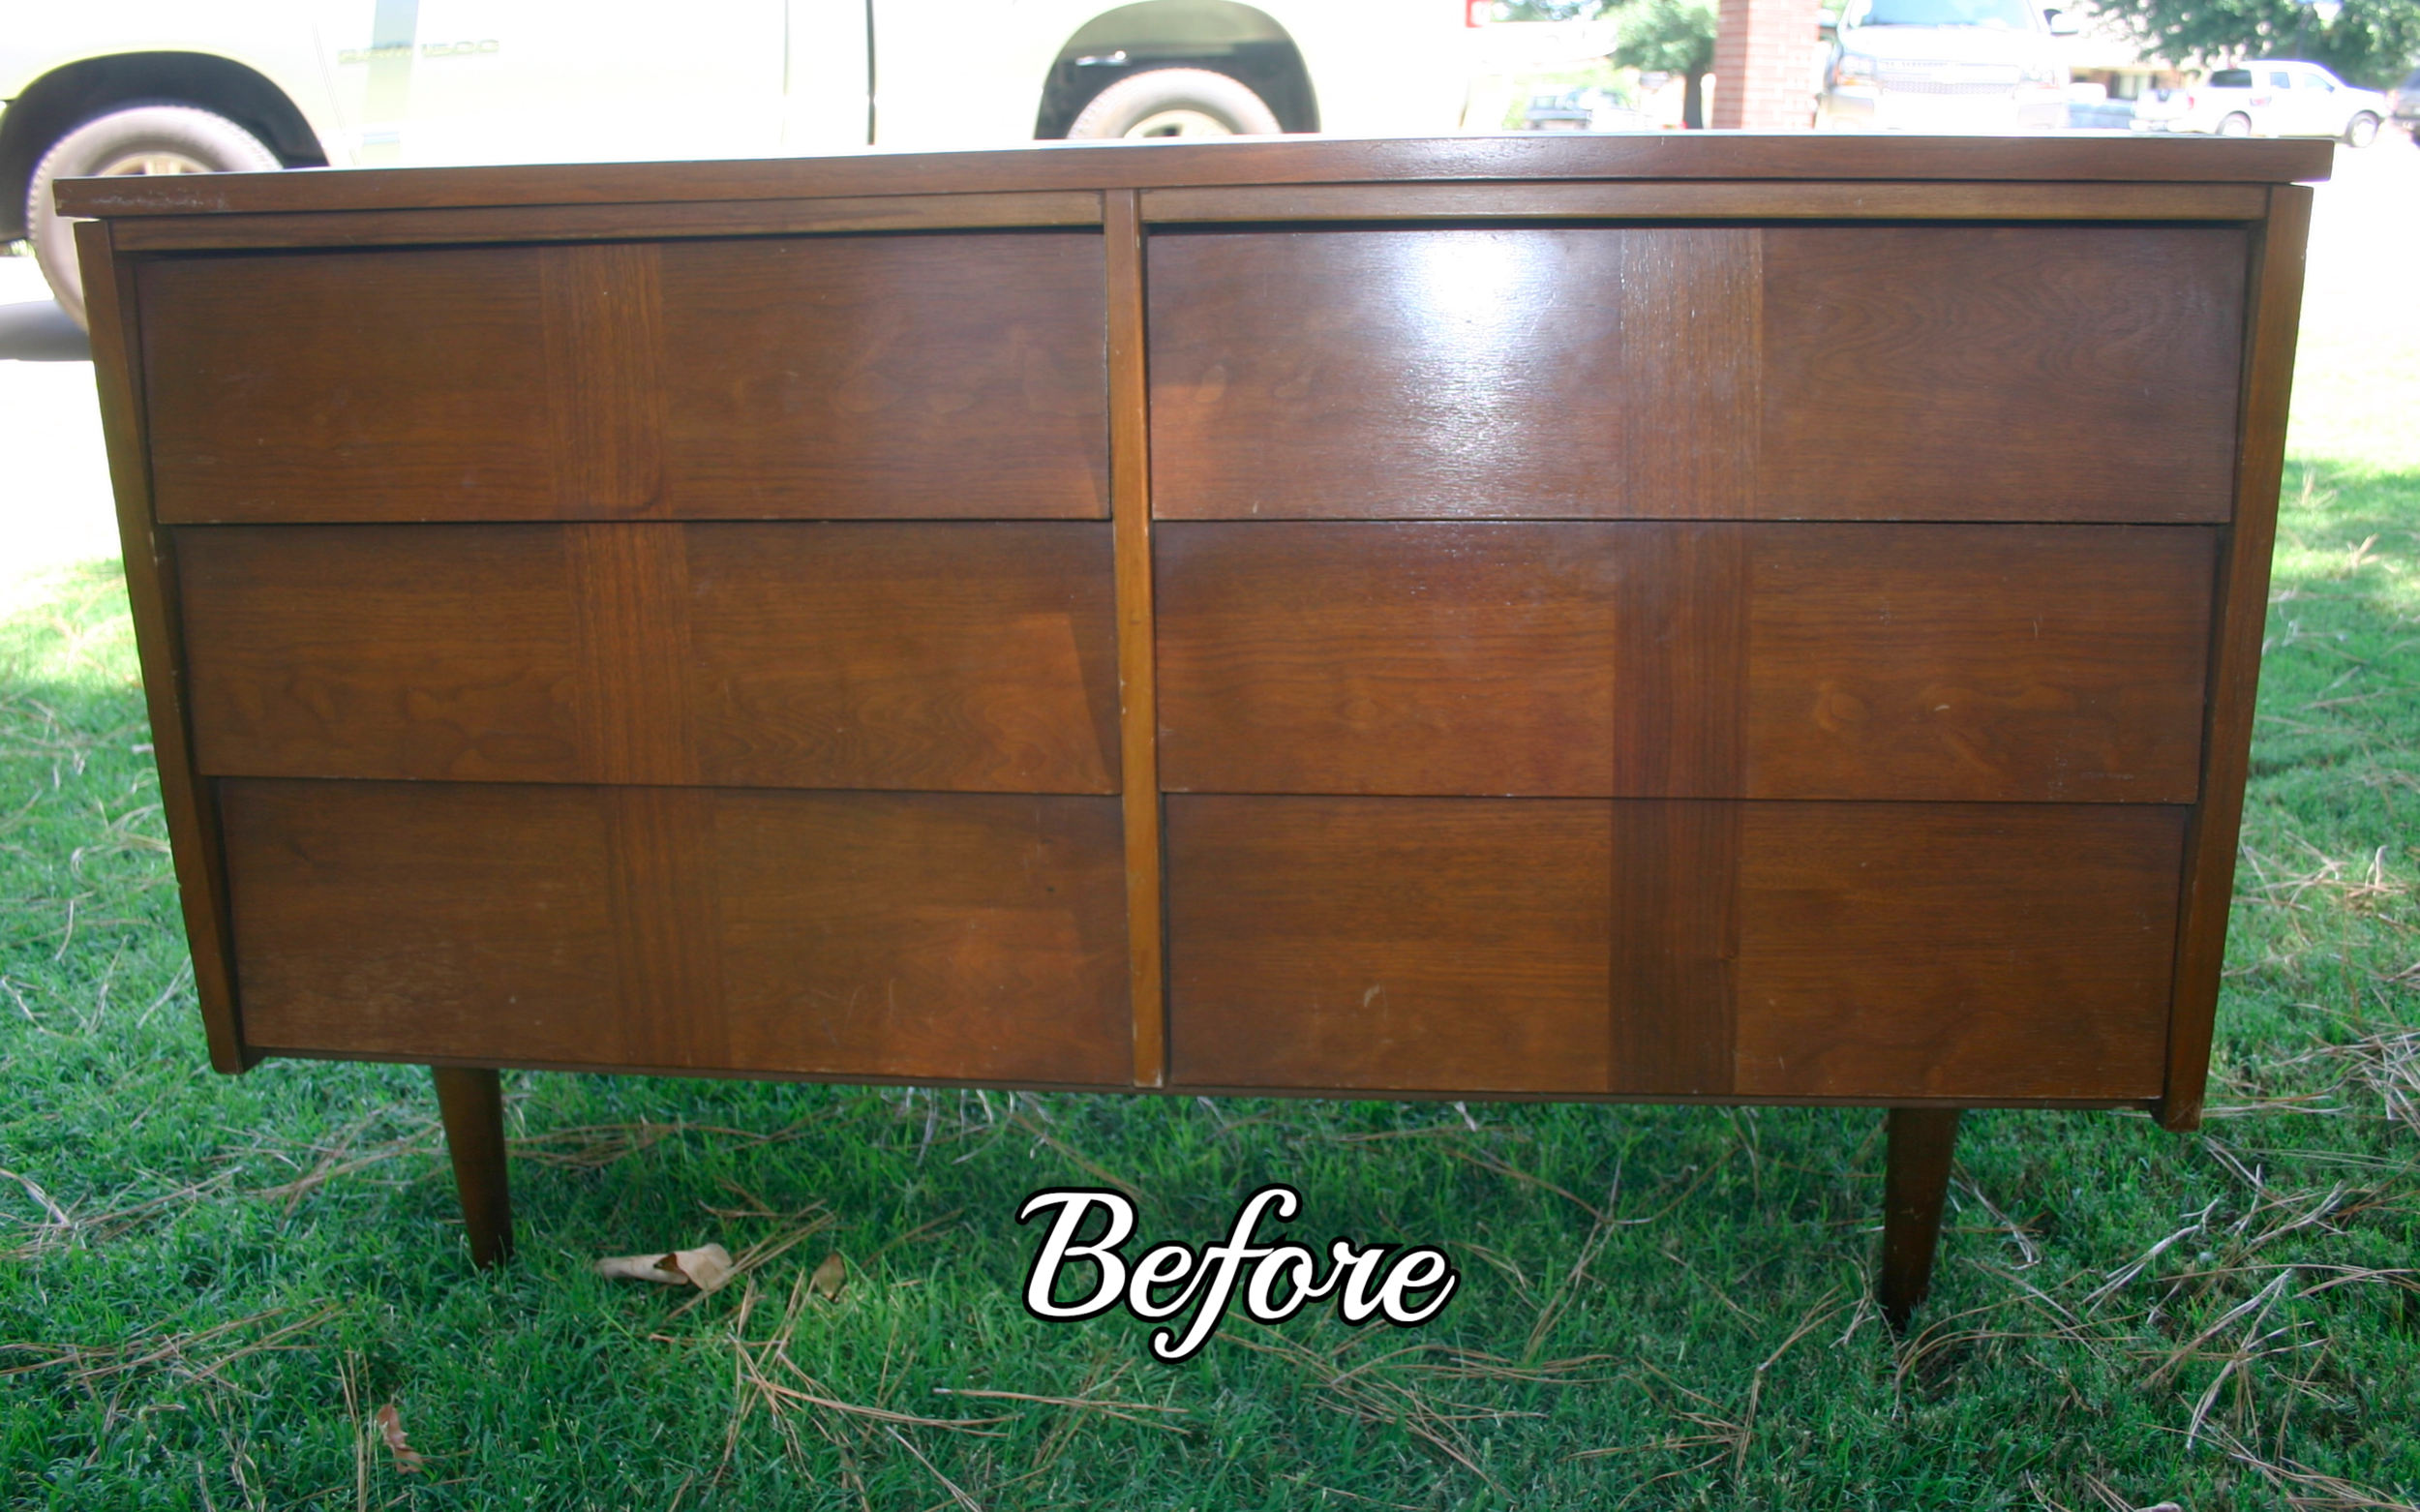
So I have to be very careful when bidding on and buying furniture.​ I found a wonderful Duncan Phyfe table that would have been beautiful...but the top was in pretty bad shape and I knew it needed a great deal of time and attention!  So I set a max in my mind and I tried not to groan too loudly when it sold for $15 above my maximum! But I knew if I paid more than that, I would NEVER recoup my time and expense.  

I also have to be very cognizant of what buyers want vs. what I personally like.  I am not that big into the shabby chic/plaster paint thing...but I know the buyers love it.  ​

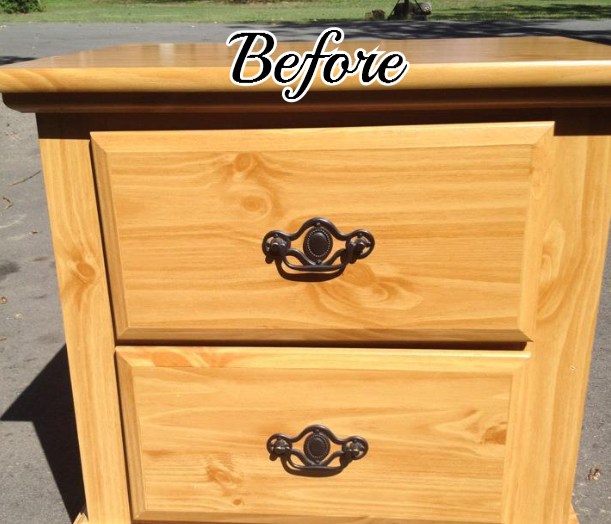
This oak chair is a prime example.  Kinda dated before so I knew I would have to do something with it...​

When I first started my plan was to prime, paint with high gloss black and then recover in a black and white damask...very "formal."​

But I had to do some sanding on the paint coat and before I knew it, it had a "shabby chic" flair that everyone LOVES!​

So there you have it...a little shabby chic chair flair!  

I already featured the 3-legged table with the plaster paint legs...but I also have a nifty little oak table and a few other projects I will share over the next few weeks as I get ready to fill my booth!

Course at this point, I think I have enough to fill an entire store...not just a booth.  Typical me...at some point I will learn moderation...or just quit going to to auctions and stopping at garage sales....because honestly, I am running out of room in my garage!!!!

​Love this fabric!

Walnut chair reveal.....

Well, it is done....and while I know where the little "goofs" are, I have to keep in mind one of my father's pearls of wisdom...​

"You'll never notice it on a passing train!"

As I have mentioned before (here), Mom told me she and Dad found this chair in a field when I was a baby.  When they found it, it was bleached white from being in the sun...and she is pretty sure it originally had a cane seat and back.  Dad knew it was walnut so he took it home, repaired it and refinished it.  I would bet the upholstery in the "before" picture was probably the second time he refinished it.  This looks more like something he would have done in the 70s or 80s.

I pulled the 5,486 nail heads (so I exaggerate a tad) and removed the old upholstery, nails and padding.  Dad wouldn't have touched polyurethane so stripping the original varnish finish with my favorite Formby's varnish stripper was not a real challenge.  I repaired a few loose joints with glue and clamps!

Even with a new coat of dark walnut stain, it was very "uneven" in places so I had to do some patch-work staining.  Then I put 4 coats of tung oil on it.  And then it sat...and sat...and sat....

I just didn't know what fabric to get.  I knew I wanted something a little more formal and neutral. I let Brian pick from 7-8 fabric samples...wouldn't you know he picked my least favorite, but in all honesty, it turned out beautiful!  I opted for the double welting vs. the nail heads.  I contemplated having it recaned....but decided against it...maybe next time! ​ And I have just enough leftover material for a little pillow!

Every chair in this house has been bought or repurposed to uphold to "abuse" from kids and animals.  But this chair is special and it will be tucked away in the corner of my room where the worst thing that can happen to it is one of the cats will find it!

Maybe someday, when I am long gone, one of my children will cherish it as much as I do....thanks Dad!​

Pretty in pink....and a little zebra....

Earlier I posted this "before" picture of a little dresser I brought home from the apartments.....​missing a drawer and really not attractive! (I found it, and this one, in the same unit!)

​But it was relatively sturdy and I knew I could install a shelf where the drawer was missing...perfect for little decorative baskets! Or books...or whatever!

​I never posted a before picture of this chair....and unfortunately, I forgot to take a picture BEFORE I took it all apart.  But basically it was just a little gray chair I found at the apartments...kinda nasty as usual and veeeery boring.

Both have been in my garage for months...kilzed and ready to go.  What to do, what to do.  I just couldn't get "inspired."  I don't have a problem doing this stuff, I just have a problem deciding exactly WHAT to do.  But the other day I was walking through Hobby Lobby and I saw all this pink and zebra stripe little girl's decor, and I thought "Oh MY!"  Inspiration at last. Keep in mind, I have NO place in my home for this but some little girl somewhere is going to love this stuff....​

The zebra stripes on the drawer fronts are hand painted.  Don't get too impressed.  While I have a tad of artisticness and creativeness in me, I'm honestly not THAT talented.  Here's a little secret...if you see a design or picture you want to put on a piece of furniture, trace it onto a piece of wax paper.  Then place the wax paper on a piece of sewing trace paper and trace it onto your piece.  (TIP: use sewing trace paper...it doesn't "smudge" as badly as other traceable papers and the markings are easy to remove with a damp cloth!) You can do this on ANYTHING...walls, glass, furniture, anything!!!  I painted the drawers white, traced the fabric design on wax paper and then traced that onto the drawer fronts....then painted them with black latex paint.  And with everything, I sprayed it with a clear coat!​

You can even print things off the computer and trace that...if the printed picture is too small for the project you are working on, just take the picture into any edit program and break it up in sections that can be printed off and then taped together.  If it is REALLY big, you can always project it onto the object with a projector.  We did that with a mural on my daughter's wall...if she EVER gets her room clean enough for me to take pictures, I will share her mural...totally awesome.  Ever hear of a "fail whale?"  Google it...it really is awesome!!​

Anywho....animal print is not really my cup of tea...evident by the fact that I pretty much hated my bathroom when I decorated with "leopard print" in a failed attempt to decorate around my ugly gold shower doors!  

But after seeing a little inspiration and how "fun" it can be, this was a fun little project. 

Sew awesome....

I really want, and honestly need, a sewing desk...some place I can store and use my sewing machine without having to set it up on my dining room table.  I found this sewing desk in a thrift store and man-oh-man was this thing seriously ugly!  

 I knew this desk could be a little treasure after the cruddy paint job was stripped away!​

And even to my surprise, what a treasure it is...what I found under two layers of paint was beautiful mahogany. Initially someone had painted it a really disgusting green and then I guess they tried to improve it by painting it a flat black.  

This is a prime example of hurting a piece in a failed attempt to "enhance" it!  Truth be told, I felt a little guilty painting the base and drawers white.  But I could never live with myself had I not restored the top to it's prior glory!​

Before I started refinishing, I cut the opening a little bigger to accomodate my sewing machine.  TIP ALERT:  when cutting veneer mark the cut with a pencil and then score the veneer with a utility knife. Then use a jig saw with a very sharp blade to cut  "inside" the score...if you don't, the veneer with split and splinter and you will make quite a mess! 

Normally I use Formby's Furniture Refinisher to strip latex paint and old varnish...but two layers of paint needed a little more muscle....so I used a citrus stripper. I will not use anything stronger on veneer (always use any stripper per the instructions and in a VERY well ventilated area!)    This piece didn't have a single chip in the veneer and I didn't want to risk hurting the piece by using industrial strength stripper!​  Took a little more time and more than one application but it was worth it.  

After removing all the old paint, I took 0000 steel wool and mineral spirits and gave the wood a "bath."  When stripping wood, regardless of what you use to strip it, always "wash" the piece with mineral spirits to remove all the "crumbs."  After it dries, take VERY fine sand paper or 0000 steel wool and sand lightly before applying stain or a finish.

TIP ALERT...keep old toothbrushes on hand to get into groves and corners when stripping furniture.  DIYers never throw away old toothbrushes, coffee cans, socks, old tshirts or towels...trust me, you will need them!

IMG_8918.JPG

Since I knew I was painting the base and the drawers, I didn't strip them but I did sand and prime well before painting.​

And again...ALWAYS USE TACK CLOTH BEFORE PAINTING OR APPLYING FINISH...AND BETWEEN EVERY COAT!!  ​I seriously can not stress this enough! So many DIY tutorials tell you to "wipe down"...again, I challenge you...wipe down your piece with a clean cloth, and even some mineral spirits...then wipe it with a tack cloth!  You will be shocked at how much crud was still there!

Two coats of gloss white paint on the base and drawers.  A light coat of walnut brown stain on the wood to even out the color and give it a little more depth....4 coats of my favorite Formby's Tung Oil. New crystal knobs. Total awesomeness!​

I can not stress how beautiful this wood is....I wish I was a better photographer.  And I wonder if I should have stripped and stained the drawer on the right...but then again, I kind of like the paint/stain contrast...I think I would love it either way!

I REALLY love tung oil.... it allows the grain of any wood to just shine!  And it is sooo easy to take care of and touch up when needed!  (Now I know why my father refused to use polyurethane)​  I think so many use polyurethane because they are concerned about durability....that is honestly not an issue with tung oil!  Try it...it is almost impossible to mess up the application (unlike poly) and it is extremely easy to touch up scratches in the future if necessary!  

This project was pure joy!  Anytime I can take something that has been so abused and turn it into a treasure it just makes me happy!  

Maybe now I will enjoy sewing just a little more!  ​

Before and After dresser....

Yesterday Brian and I took off and went trout fishing for the day!  OH MY!  I am sore and sunburned...and I loved every minute of it!  Sometimes you just have to say to heck with the yard work and go have a little fun! Awesome day with my best friend!​

But Saturday was a busy day.  My neighbors came over to show off their new grandson and I found a perfect home for a precious little dresser I have been working on!  Just so happens they NEED a dresser and I NEED to find it a good home.  Done!​

As you can see, it was missing a drawer so I added a shelf...perfect spot for little storage baskets.  I painted the "box" white, the drawers a pretty green and stained the top with my favorite java gel stain.  I originally put little crystal knobs on the drawers, certain it would go to a little girl, but when I found out it was going into a boy's room I changed the knobs to brush nickle...just thought it was more appropriate for a little boy!  And I am going to throw in a cute little cork board I made up and featured earlier!  ​

IMG_8900.JPG

The great thing about these little dressers is the fact that as the little boys grows, the drawers will be easy to paint to match any decor!  ​

Another "trash to treasure"...a piece of furniture destined for the dumpster but given new life and new home with just a little time and attention!  ​

A new "before and after" by SIS....

Man oh man...what a difference a day...or just a few hours...can make in NW Arkansas.  Beautiful and warm this morning and now it is too cold to even work on my dressers.  Suppose to be in the 40s tomorrow, with a chance of snow...craziness!​

Anywho, since I can't project outside and I really don't want to do what I NEED to do IN the house because of this "spring fever" bug I have, I thought I would share one of Sister Sarah's projects.  As I have mentioned, Sarah (my oldest daughter) likes to "project" but with two active boys it is tough.  I remember (and MISS) those days!!  That time in your life when you want to be in the garage sanding and painting, but while you are doing that your youngest is locking himself in the dryer or taste-testing your sleeping pills (yes, that would be my youngest grandson!) 

But she does manage to get in a project or two...so I thought I would share this darling little nightstand she did...​

NIGHTSTAND BEFORE.png
NIGHTSTAND AFTER 2.jpg

See how a little Kilz and a little paint can make a world of difference!  ​

Great job Sis!!!​

She also used the gel stain I told you about on her bathroom vanity and wall cabinet (see here)...totally awesome transformation. 

Dressing up an old dresser....

I'm tryin' here! Smarmy comes easy..."witty"...not so much! 

But it dawned on me....I have never posted my dresser makeover! 

I use to have this HUGE hulking dresser in my office/dressing room.  It was a "matchy-matchy" to my bed and highboy...which I love, but the dresser was seriously huge and just seemed to shrink the entire room.  So when I was out digging around for the desk (featured earlier) I found this sweet little dresser and said to myself "Why not!" 

I LOVE the style.....kind of a mid-century modern with walnut veneer.  The top was laminate, so I knew I was going to have to paint the entire thing...and I did.  But later I found a picture online of an identical dresser and they had painted the top and sides, but refinished the wood veneer drawers...GORGEOUS! And you know how I loooove anything wood, especially walnut!  Live and learn...maybe next time! 

As with most of my furniture, I had a piece of glass cut for the top...lets me clean it with Windex! 


IMG_8157.JPG
IMG_8522.JPG

Another man's trash....

The other day I posted this picture of an old nasty dresser and three legged table I salvaged at the apartments.  People move and just leave their "stuff."  Most of the stuff is garbage and goes straight to the dumpster or trailer.  But eeeeevery once in awhile I will find something that is salvageable.


My new onsite manager and her husband are in need of furniture so when we ran across this rather nasty, yet very sturdy, oak dresser I promised her I could make it something she would love.  I asked her what "style" she wanted....she told me it would be going into her spare room which is also her husband's "Nascar" room...could I do something in black and white checkers?  Ummmmmmm....no.   That's okay, she has ​"checkered flag" knobs she can put on it.  (I guess my football and baseball decor is odd to some...but come on, those are REAL sports....lol!)

I will say, this piece was a challenge!  Some serious damage to the exterior as well as missing backs on two of the drawers....it took some serious "reconstruction" but that gives me an opportunity to share with you how easy this can be.​

Before beginning ANY rehab on old pieces, make sure you wipe them down with some type of disinfectant wipe.  Sometimes that means a little bit of scrubbing...but decades of grunge, oils and smoke can create problems down the road...not to mention, it's nasty!!!​

Glue, clamps and a nail gun are a must when repairing old furniture.  First and foremost you want your furniture to be sturdy and usable if you are going to invest time and money making it wonderful again!​​

First, you need to pry apart any "loose" joints, remove any old glue and fasteners and reglue and clamp.  Two drawers were missing the backs...so I took out the bottom, cleaned out the channel where the drawer bottom fit, reglued, cut a new back out of 1/2" plywood....​

and clamped and tacked it with some little nails.  Keep in mind, nails are not what holds a piece of furniture together....it's the glue.  The little nails just help secure it until the glue sets up!!  Glue well and clamp!  (Occasionally you will get a nail that does the above...pull it out from the back with needle nose pliers....and remember, nails WILL penetrate flesh (again, lesson learned the hard way) so keep your fingers out of the way!)

Also, many drawers on older pieces have dovetail joints....and in a perfect world we would all be able to dovetail new pieces to fit right back in with the old...but that is most often not the case.  If the "old" backs had been there, that is what I would have done....cleaned them up, reglued, fit them back together and clamped.  But since they weren't, I used my skill saw to cut off the dovetails from the sides and then just added a new back without dovetails.  If you don't know what a dovetail is (no, it is not the tail of a dove) Google it...​

This is also the time to repair any damage to the veneers and corners.  As you can see on this piece, a dog had used the corners as a chew bone and the veneer on the base was chipped badly.  Wood filler, a little sculpting and sanding do the trick.  This takes patience and may even take 2-3 attempts to "get it right."  Let the filler dry completely before attempting to sand. But in the end it is worth the effort....just sanding and painting damaged wood is NOT good.​

After all your repairs are made and everything feels sturdy, sand the entire piece with 120-220 sand paper, tack and get ready to prime.  I have posted a complete tutorial here on painting furniture that will help you through this process.  But I can not stress enough the importance of wiping down the entire piece with tack cloth before you spraying ANYTHING on it!  ​

If this piece were going in a more "formal" bedroom, I would glaze the carvings.  But they want a more "informal" piece...with checkered flag knobs...to each his own...lol!​

Regardless, it is a nice piece of furniture that was destined for the dumpster...instead it has been given new life and a new purpose....and will be much loved and appreciated for many more years!​