YOU CAN DO IT!!!

This is not a “feature.”

This is not a “tutorial.”

This is to encourage you…IF YOU WANT IT, JUST DO IT!

Wow…that should be a product motto…lol!

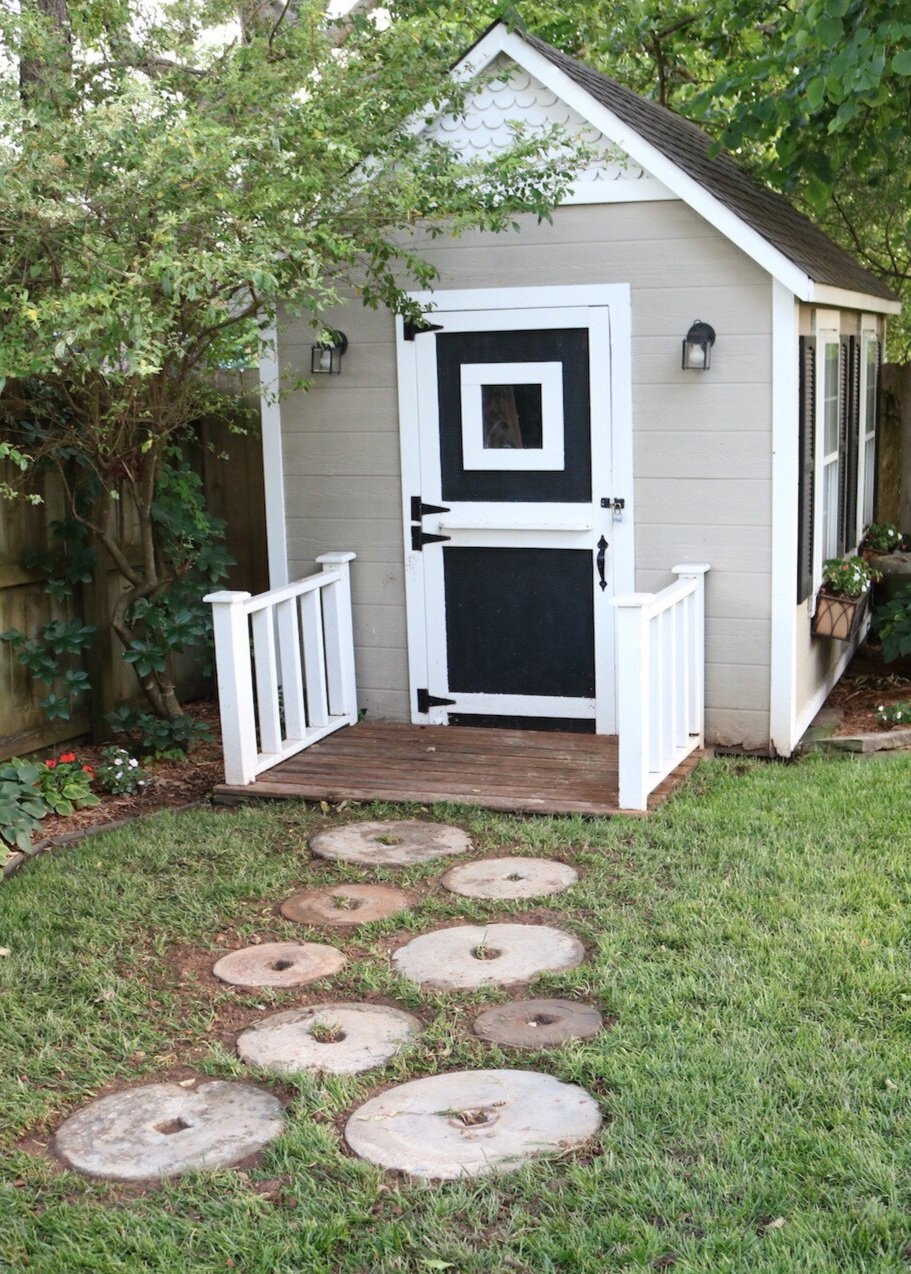
But seriously, if there is something you envy…a beautifully painted room or piece of furniture, (this blog is FULL of painted furniture!) a flagstone walk, a swing pergola…JUST DO IT.

I know you can!

A few weeks ago my neighbor asked if she though it was possible to put new boards on her deck…her’s was pretty old and rotted and the railing was a hazard waiting to happen.


The deck is off her bedroom…she likes to sit out there in the morning and drink her coffee. The original plan was to tear off the existing 2x4 deck boards and replace them.

She and her husband decided they wanted to drop the deck a bit, add a step and add steps to the back yard. That was a whole nuther project…and required some serious planning and rebuilding.

Probably a good thing we decided to redesign and rebuilt the entire deck because even the frame was pretty rotted. It ALL needed to go.

The hitch…the only “muscle” we had were 5 housewives/retirees…myself being the youngest…everyone else was over 60.

But by goshy, WE DID IT!!!!!

We demoed the original deck (man was it showing its age!) and replaced it with a brand new one with access to the back yard!

The only thing left to finish is the railing and she decided she wanted black iron railing…so that is on order. When she gets it finished I’ll post some better pictures!

For now, she has a beautiful new deck!

We are not young. We are not strong and we are certainly not “deck design” experts.

I have a little construction knowledge but I have never actually designed and built a deck.

We have the internet.

Between the five of us we managed to work together to lift the heaviest boards.

And we were able to “tag team” so when one got tired, another jumped in.

Two construction dudes could have knocked it out in a day…it took us a week. But by goshy WE DID IT!

It was a labor of neighborly love.

This was certainly the result of a bunch of “old women” giving what we have.

This week I am building ANOTHER swing pergola….I guess working on the deck gave me “the bug.” When I get it finished I’ll post pics. For now, if you want a swing pergola, HERE is a great tutorial. YOU CAN DO IT!!!

Another grindstone path...

A few years ago I inherited some grindstones that had originally belonged to my grandfather. I shared HERE how I turned them into a path to my storage shed at the Lankford House.

When we sold the Lankford House it was one of the things I wrote into the contract that DID NOT convey. We dug them up and moved them to the Bogey House and set them under some potted plants.

When we were making the side yard pathway a few weeks ago, Brian suggested we use the grindstones to make a path in the large back flower bed.

Outstanding idea. You could hardly see them under the pots and using them for another pathway would really highlight them. Bonus: I have wanted to make a little path in that flower bed.

The original plan was to set them and then fill in with rock…like the rock we used in the side yard.

We raked out the area where we wanted the path…not difficult since it was mostly decomposed mulch from last year. We bordered the area with metal landscape edging then proceeded to set the stones as I did at the Lankford House.

When we were putting down the cedar mulch I decided we should save a few bucks this year and just fill it with black mulch…just to create a contrast.

LOVE!!!

Truth be told, I think I like it better than I would rock. I know it will take some annual maintenance, but it only took 7 bags of black mulch, which is waaaay cheaper than the $250 worth of rock it would have taken.

The hostas are popping, the dogwoods are just starting to bloom and in a few weeks I will fill the other pots with colorful annuals. As I mentioned a few years ago I do most of my summer flowers in pots and just a few in the ground. Saves on my back and knees!

Spring is just around the corner. We have had a few days of “window open” weather but the heat still kicks on every once in a while.

Any day!

Another flagstone path...

HERE I shared a flagstone patio I did at my last house. I loved that area. I am grateful I have a covered front porch in this house, but I didn’t at the Lankford house and this little “patio” really opened up the front of the house.

I also shared how to repair flagstone HERE.

HERE I shared how to set a grinding stone walk way.

These were just a few of my stone walk projects. The Lankford house had a good 10-15 tons of flagstone walks and gardens…I love it!

One thing I don’t love is small rock…unfortunately there is one area in our yard that I decided I have no choice.

It is on the south side of the house but it is completely shaded by trees and I think our neighbor’s garden pond leaches into the area keeping it damp.

When it rained or there was a snow melt, water would pool in this area.

No sun, constant damp = no grass.

Out of sight, out of mind. So I have done little here, other than attempt to seed and grow grass, to no avail.

I have two big dogs who like to run and play and always seem to gravitate to this area and inevitably their muddy paw prints end up all over my house! I HAD to so something.

I decided to do a rock pathway.

AGAIN, there are hundreds of great tutorials on how to lay rock pathways. Find one that works for you!

I started by scraping down the area about 1-2” and compacting it well with a garden tamper, paying close attention to the grade. I wanted to make sure there was a gradual fall from the back of the house to the front.

This is where a lot of tutorials suggest putting down “garden fabric.” I do not. I don’t like it and I am willing to spray a little roundup on any weeds that may pop through from time to time.

Some also suggest putting down a firmer base. In some areas you may definitely want to do that. I did not do that here because I didn’t feel like it need it.

The next thing I did was put down sand where the flagstones where going to be set.

This is a super important step in my opinion. First, you want the large stones (whether flagstone or paver stones) to sit on a “clean” base…no rocks or pebbles. If a rock were to work its way into underside of the stepping stone and you put pressure on it by stepping on it, it could break. Second, it gives you a soft “pliable” base…so when you set your rock, it is easy to make adjustments by adjusting the amount of sand…just pick up the stone and easily remove or add sand as needed.

I usually add about 1-2” of sand. After putting down the sand I wet it down well then I used a long 2x4 and dragged it over the sand several times to level it out, again paying close attention to the grade of the area…you DO NOT want to create low spots where rain water and snow melt won’t drain!

Since I was creating a “path” I “walked” the path to see where I wanted each stone to set. I wanted the stones to kind of match my stride.

I leveled each stone as I set it, starting from the lowest area by the front gate and working my way back to the highest point by the corner of the house. There is only about a 6” drop in this 22’ span so I had to be very careful and pay close attention to that grade.

This is where you want to make sure you are not doing anything to impeded the natural flow of any water shed.

For example on the other side of the front gate is the side yard of the front of the house. It is already has a good grade and I wanted to make sure that what I did was not “lower” than that grade, creating a dam.

I also wanted to make sure I wasn’t altering the grade so that water actually flowed toward the house…that could be a major issue! So each stone needed to either be perfectly level or slant slightly away from the house, never towards the house.

Once all the pavers were set and leveled, I hosed down the area so that the sand leached under the rocks, filling any voids that might have been created by all the movement.

Next up was the gravel. You may wonder where I got all this rock. At the rock store, of course…lol! I was talking to my daughter when I went to pick out my rock and mentioned I was going to the rock store…she laughed at the fact that there really is a “rock store.” I picked out my rock, determined how much I needed, then paid them to deliver it. I had hoped they could deliver it to my back yard, but their little machine couldn’t fit through the side gate so I had to wheel barrel four thousand pounds of rock around my back yard! Yes, I hurt like heck this week!!!!

I decided I wanted a “path look” to the rock…so I picked out two different rocks. A small brown rock and a larger multi colored.

I used a 6’ piece of garden edger between each rock to create a crisp line. Put it in place, lay rock on both sides, walk on the rock a bit to bed it down, then just pick up the piece of edging. I used the garden tamper as I went to bed the rock a bit more.

I think this looks super awesome…course the first things the dogs did were run back there and scatter rocks so I am not sure how long this “crisp” look will last.

So far so good…

We have had one light rain and of course it is spring so I am sure we will get some heavy rains in the next few weeks. I held back a few buckets of rock so if there is any settling or pooling I can add more if needed.

Eventually I may add some shade loving plantings…someday. Again, out of site out of mind.

While I was digging around and creating pathways I decided to tackle another area as well. This one will highlight the grindstones that were my grandfather’s. I shared those HERE when I made a path at my other house. It was one of the things I made sure did not convey in the sale…yep, we dug them up and moved them here. They have been sitting under potted plants for over a year but Brian had a wonderful suggestion for using them and I will run with it…when I can run again.

I will share that at another time…maybe when I get further along in the process. I rarely leave a project half finished but after days of digging and hauling I was just too pooped to finish up Sunday. Fortunately it is it has rained for a few days so I a good excuse to stay inside and work on my quilt project.

Until next week….

My "life quandary"and FINALLY the shop reveal....

IMG_1704.jpg

Occasionally I go back and reread some of my posts from the last eight years. Man i have transformed some awesome pieces of furniture and spaces!!!

Now that I am “semi-retired” I have been trying to decide what I want to do “when I grow up.” After a year of binge watching “Gilmore Girls” and finishing the little projects around this house, I desperately need something to do.

I still haven’t decided what.

I love refurbishing furniture but honestly my body isn’t exactly cooperating these days. After just one day of projecting, I am usually hobbled for at least two days.

I don’t like to golf, I don’t knit, sewing is NO WAY JOSE, I raised four kids so while I will eventually help with my future local grand kiddos, I don’t think I want to take them on full time.

Volunteer…an option, but where. I love animals but if I volunteered at a shelter I would have a house full of critters. I would love to work at a zoo, but sadly we don’t have one!

Sick kids…they make me sad. I just don’t know if that is something I could do.

Old people. Hum….to close for comfort?

A real job? Nice idea but I don’t want to work nights, weekends or holidays. Brian and I like to take little vacations so I need lots of flexibility. Not exactly an ideal employee.

Besides I have NO idea what I want to do and I don’t want to spend 20 hours a week doing something I don’t enjoy.

I am blessed. I was blessed to own a business for 23 years that darn near killed me but allowed me to care for my family and “semi-retire” at a relatively young age.

So what do I do?

This blog is a wealth of information and I am sure there is a way I could turn it into a “business.” But truthfully, I like sharing my experiences with those who need the guidance. And I don’t want to make people pay for that help.

Which bring me back to my first love….building, creating, repairing, helping, sharing, instructing…my blog logo says it all….I hope I can share with you a passion and desire to easily create a home you will love!

All this whining and moaning to finally share one of my favorite things about this house…the shop. A space I have wanted for decades, finally got, and now really can’t use to it’s full potential!

For YEARS I worked out of my garage…what a mess. When I saw this house had an amazing shop I was stoked! A place to keep all my tools and work on a few small projects and I would still be able to park my car in the garage.

It is insulated, it has electricity, large doors, windows….the only downside was it was SERIOUSLY ugly!
Like baaaaad ugly.

IMG_0008.jpg

As with every inch of this house, I could see the potential.

I knew I had to make it pretty!

IMG_1703.jpg

The windows were old aluminum windows so those had to be replaced. I even moved the front one to the left to make it more “aesthetically pleasing.” New light fixtures inside and out were a must. The doors were aluminum and vinyl siding and not real attractive so I did just enough to make them look a little better. New cedar posts, some shutters…

And the biggy,,…brick. No I am not a brick layers so I was super fortunate to find someone who would take on a few small projects. Finding brick to match the brick on this 22 year old house was dang near impossible, but I was able to find one that was close enough and it made all the difference in the world.

We went from having a big ugly vinyl shed in the yard to having a super cute building.

The inside…it’s a storage shed in spite of what it looks like from the outside. Lawnmowers, tools, yard stuff…nothing fancy. I love the workshops that are all perfect and spotless….but it is a shop/storage shed, plain and simple. (Note Brian’s big fancy grill/smoker….God forbid it sit on the patio and get wet like a normal grill)

As I shared HERE when I spruced up the storage shed at our old house, I firmly believe storage sheds should enhance your space…not just be a big eye sore where you store you mower and shovel.

GET CREATIVE…make it pretty. Take a little time to doll it up and make it something that is aesthetically pleasing rather than just a huge eye sore in your back yard. Pinterest (my “go to” inspiration") is full of outdoor buildings that have been transformed into something other than just big ole’ eye sores!

No, you do not have to do something as fancy (or expensive) as mine…but a Pinterest search and a little “oops paint” can really make a difference.

Do a little “storage shed” search, then let your imagination run wild. Remember, we have lived in this house almost a year and I am just now sharing…transformations don’t happen over night!

Lessons in DIY....

One of the things I love about this house is the irrigation system…no more dragging hoses and sprinklers around the yard all summer.

In theory.

The system has been severely neglect for years so it has been a total rework. We finally got the two zones (there are four) working for the bulk of the front and back yard.

As usual, I did what I always do when I want to learn something new. I hover. Followed the irrigation guy around watching every move he made (for a $100 an hour I figure I should get a lesson).

I googled how irrigation systems work and how to repair and replace malfunctioning and broken heads.

I installed the Zone 3 drip system for the flower beds. Yay me!

Now I think I am an expert and thought I could tackle Zone 2 which wasn’t working at all.

Zone 2, the zone on the north side of the yard, has been a total bust. I knew there HAD to be a break in the main water line some where, I just couldn’t find it.

I am tenacious…the darn thing was broken and come hell or high water I was going to fix it.

After WEEKS of digging around and tracing lines, I found not ONE, not TWO, but THREE breaks in the water lines…..curses!

Needless to say my newly sodded yard looks like it has been hit with mortar shells.

IMG_1689.jpg

The first two breaks were relatively easy fixes….the third has been a total booger. It took three full days and at least 6 or 7 trips to Lowe’s…I repaired the same spot SIX times before I finally got it right…I think…I hope…unless one of the connections broke loose again when I covered it with dirt.

Today’s lesson on DIY. As I have said before, my daddy didn’t have time to teach me EVERYTHING I need to know about DIY. But what he did teach me was a valuable lesson. If you want something fixed, repaired, built, or changed, be willing to do the research and put in the time and muscle to do what needs to be done.

I didn’t have a clue about irrigation systems. Zip, zero, zilch. But I am not about to pay someone $100 an hour to do something as simple as change out busted heads. So I learned…and am still learning

The water line repairs….that’s another story. This was one of those times when after 3 days of crawling around in the mud and AT LEAST six trips to Lowe’s, I began to wonder if it was time to call in a professional.

I suspect it would take them all of about an hour to do what took me three days!

DIY lesson number two….know your limitations.

That’s a tough one for me.

I do get to share one little project I managed to complete while I was waiting on water line repairs to dry.

Years ago I bought these old metal wheels at an auction. Thought I might sell them but never have so they just sat in the yard with no real purpose.

This is the picture I took to post on Facebook Marketplace eons ago….

28336456_10213705878788595_1856686047250220767_o.jpg

I’m not really a “yard ornament” kinda person so the fact that I had these big ole metal wheels just sitting in my yard was, well, just not my jamb.

I moved them to the new house and set them in the back corner of the yard and thought MAYBE I could find something to do with them…..eventually.

Now I do like “sitting” areas….and the more I looked at these wheels, the more I thought, “Hum, just MAYBE I can figure out a way to turn this into some kind of bench or something.”

So last week Brian and I went out to this ratty little old “hobby mill” and picked up a live edge board, brought it home, power washed it and made a bench…I really like how it looks tucked away in the back corner of the flower garden.

IMG_1691.jpg

(The concrete “bench” in the forefront of the photo was there when we bought the house…we were told it was part of the old farmhouse that sat here originally…that sucker isn’t going anywhere! Makes a great place for squirrel food in the winter!)

IMG_1693.jpg
IMG_1694.jpg

Presto, bingo! Now instead of having some big ole’ honkin’ metal wheels in my yard that cause me confusion and grief, I have this nifty one of a kind bench in my back flower garden.

I haven’t decided whether to seal it or leave it natural.

LOVE!

We picked up another piece of milled wood just in case we needed another piece…I decided to use it to make a another bench. The concrete bases were from a bench in my Mother’s yard. It use to have a concrete top but someone (who I shall not name since it might embarrass my oldest daughter) sat on it and busted it. So these bases have just been sitting around waiting for inspiration.

I think I will seal these boards. I love how you can see the mill marks and a sealant will really make those “pop” like it did on this old wood I used to make a table.

IMG_1696.jpg
IMG_1697.jpg

Irrigation system is (fingers crossed) fixed and I managed to get a few little projects complete.

Makes for a good week!

static1.squarespace.png

Master bathroom windows...FINALLY!!!

IMG_1509.JPG

At last!

This isn’t the first master bath reveal and it won’t be the last.

This room is one of those “processes” that will take time, money and a lot of of “humming.”

By that I mean I’m still not sure what i want to do with the cabinets. But I knew from day one I wanted operable windows in this room. Why I didn’t do it when I did the major remodel before we moved in is beyond me.

I had the perfect spot….

IMG_0455.jpg

On either side of my vanity mirror. This wall is adjacent to the back yard and over looks the flower garden I put in under the humungus oak trees.

I learned in my last home that an operable window in the master bath is a MUST!

It is the mustiest, stuffiest room in the house and there are just times when you need to throw open a window and let the fresh air in!

Adding a window will entail cutting sheetrock, removing brick, framing and in my case moving both plumbing and electrical.

Like every major project, the best way to start is to just start…and in this case that meant cutting two big ole’ holes in the wall.

That was when I discovered the plumbing in the left opening. Okay, no biggy. I can manage that. I didn’t discover the electrical issues in the right window until I removed the insulation a few days before my windows arrived. CURSES!!!!

Again, no biggy for me. Just a few junction boxes, new wiring , relocate a light fixture…. blah, blah, blah. Fortunately I have a few basic skills (and a SIL electrician on speed dial) so I was able to do what needed to be done. But If I were without those skills and planning a “little remodel” like this, I would certainly budget for professionals. If you don’t need them, kudos…but be financially prepared.

IMG_1509 2.JPG
IMG_1507.JPG

They let in a ton of natural light!!!! (This is with NO lights)

IMG_1506.JPG

I can not even express how much I love these windows.

I thought adding a window in my laundry room was the best decision I made in this house. Hum…may be a tie! The extra light and ventilation in both is a must!

Even through the screens, I love the view of the back flower garden!

IMG_1512.jpg
IMG_1504.jpg

Now on to the next head scratching project. The bathroom cabinets. It may be difficult to tell in the photos but they are kind of a blah off-white.

I have contemplated refacing the fronts and replacing the doors and finishing it all in a light stain. I like the “concept” but when I searched Pinterest I kind of don’t care much for the look.

This is just a few examples of a bazillion I have put in my “inspiration” file….

a5a48166a2fd9000b6bf16011990d19d.jpg
fce0f15bf4f9aa2fd15d91ab2e960d5c.jpg

I like, but I don’t love.

I kind of like the look of a color…

8bcf39527809249718d4f65e500c4114.jpg
75df4049c026a2d7d83548afdc2e15ca.jpg

Again, liking but not sure I am loving. (And again I can not give proper credit because I stole them from Pinterest and dropped them in my inspiration file…my sincerest apologies!!!)

As much as I dislike the thought of the “sterile” look of all white in this bathroom, I think in reality I would really like it.

So right now I am leaning towards painting the cabinets a brighter white and definitely replacing the hardware.

That is the nice thing about paint… if I eventually find a color that really trips my trigger, it’s just another gallon of paint, a couple of hours of time and a back ache.

Until next week…

static1.squarespace.png

Master bedroom reveal....

When we moved into this house in September we basically moved our old bedroom into this new house. Nice fit, but zero thought put into the “design” of the room…I basically just put furniture on the floor and a few pictures on the walls.

A few weeks ago my daughter sent me a picture of a well designed bedroom similar to ours.

IMG_0694.jpg

That’s when I realized our current master bedroom has ZERO “design character.” I hadn’t even taken the time to paint all the trim the “new” white.

IMG_1317.JPG

Twenty year old lamps, white and brass paddle fan, stacks of pillows in bleach spotted pillow cases, no curtains, scuffed and dinged furniture, clutter…

IMG_1318.JPG

The picture was perfect inspiration! The push I needed to work this space to it’s potential.

So last week my goal was to to tackle the room. Paint the trim and furniture, new curtains, throw pillows, a few little touches here and there, and declutter.

I painted my bedroom furniture (HERE) almost 7 years ago and while I still love the pieces, they have gotten quite dingy looking. Remember, whites yellow over time and of course there are chips and scratches from normal wear and tear. So it was time to give them a little paint refresher! And the side table tops…holy crud they have gotten nasty. So it was time to strip and restain the tops as well.

Of course the little “room refresh” became a three day chore!

In the end, worth every minute.

New curtains (I still need to hem them), a little wall art and a plant and new throw pillows.

IMG_1315.JPG

I stuck with my tried and true white bedspread…with a big dirty dog I need something I can bleach every week. It covers a down comforter in the cold months.

I have always loved the larger throw pillows in the guest room so I bought new for that room and put the guest pillows on our bed.

IMG_1308.JPG

(The giraffes? They were made in Africa from the root of a tree…they are Brian’s…they are different…what can I say!)

I painted the high boy and bedside tables and stripped and restained the tops of the bedside tables. ..the dark java stain has pretty much run its course. New lamps (finally!!!)

I love the look of chandeliers in bedrooms but as I have said before, I HAVE to have a paddle fan above the bed. Brandon gave us a paddle fan he took out of his house and it worked perfectly in our room.

Decluttering is always a must in any room makeover so a lot of stuff was put away.

One thing I loved in the inspiration room picture was the bed bench. My trunk belonged to my grandparents so it has to stay. You can still see my granddad’s name stenciled on the side.

I love the basket and pillows on their bench but our big dog uses this trunk as a spring board so that wouldn’t have worked out well. Sometimes you have to change up a plan to fit YOUR life-style (a.k.a. accommodate animals and kids!)

I still want to do more on the “tv side” of the room. I repainted and stripped and stained the top of THIS little side table…

Maybe add a plant…a little more wall art….a wall leaning mirror.

IMG_1306.jpg

It only took me a few decades to style the master bedroom in my last house so again, already working at warp speed here.

My next big project are the master bathroom (reveal HERE) windows…

Oh, it’s happening. I cut big holes in the wall to kind of “force the issue.” Windows are on order and the brick guy is on call.

This was the one thing I neglected to do, and my BIGGEST regret, when I remodeled this house…no operable windows in the master bath. I know from my last house that an operable window in the bathroom is a must. I have ordered two casement windows (the kind that crank out) and hope to have them by the end of the month. I have some plumbing to move (WHY IS NOTHING EASY!!!) and framing to do. These windows will look out at the large flower garden out back…I CAN’T WAIT!!!!

Wait I will though…it has been warm enough to plant a few larger perennials like azaleas and Kimberly ferns, but the threat of a freeze until mid-April prevents me from going all out with the annuals. So I sit…and wait…patiently. Okay, not so patient, but I learned the hard way not to rush the early spring planting! Pay attention to your “last freeze date”….then add a few weeks. Ours is the middle of April, but a few years ago it snowed the first week of May!

Until next week…

Board and Batten Entry....

IMG_1171.JPG

The entry…the one place in your home EVERY guest will see. They may not see your awesome pantry…or even your darling guest bath or amazing kitchen, but when you open the door they will see your entry.

It is one reason I really stressed about what to do with this space. I wanted it to be warm and welcoming, and while it is a big space, there is very little “wall space” to allow for big credenzas or entry storage. I really don’t need either since we usually enter from the garage into the laundry room…great “drop zone” for our packages, coats, purses, shoes, etc….but I like the look of both in entry spaces!

Of course the first course of business was replacing the dated door, window and light fixture….relatively easy fixes and something I did before we moved in!

IMG_6549.jpg
This was after the window was replaced but before the door, light fixture and flooring!

This was after the window was replaced but before the door, light fixture and flooring!

I debated on the board and batten for some time…

IMG_0580.jpg

I just felt it needed a little “something.”

It only took me 16 years to get the entry in my last house the way I wanted it…I feel like I am moving at warp speed on this one…lol!

At one point I tried a larger rug…but I didn’t like it…I honestly like the little dinky rug that is probably too small for the space. This is a prime example of doing what I LOVE vs. doing what the “design experts” tell me I am suppose to do.

A hint of trouble came when winter hit and we needed a place for visitors coats…other than putting them in the closet in the office, there really was no place to hang them.

Coat racks are a bit out dated and just hanging a wall mount coat rack didn’t trip my trigger.

Board and batten allowed me to put a few hooks on the wall.

IMG_1172.jpg


But that led to a little problem with the table. I LOVED the little walnut table, but you can’t hang coats above a table.

IMG_1084.JPG

Again, it is NOT my style HOWEVER it was my grandparent’s and it is walnut…heirloom and walnut…my two favorite elements.

Truthfully I like the look of an entry table…but I really need the hanging space so I went looking for a simple bench.

And I found it….

IMG_1172.JPG

I LOVE this bench I found on Etsy. Not the least expensive bench out there (and I paid a tad more for walnut) but the quality and craftsmanship made it worth the investment.

Since the table is a family heirloom I didn’t want to get rid of it. The little wickerish bedside table in the guest room had no sentimental value so it got hauled to the bunk room and the table is now a bedside table in the guest room…perfect!

I love the look and feel of this entry now…warm, inviting, functional.

IMG_1173.JPG

I am currently playing around with the dining room table.

When it was set the other way, facing the living room….

….there was no room on the only large wall for a buffet or credenza.

So I have turned the table the “other” way, which gives me room for a buffet or credenza along the wall…

IMG_1176.JPG

But I am not sure I like it “that way.” So it will sit while I ponder.

That is just how I roll…sometimes I have to sit and ponder, like whether to put up board and batten or whether I should turn my table a different way. Sometimes I know almost immediately I am not going to like it. Prime example, the “river rock” I put in a flower bed for drainage. I knew immediately I did not like the white rock I put down originally!

So out came the white rock and I found some that I liked better…

IMG_1174.JPG

Sometimes it is okay to sit and “ponder.” I have learned that the more I really think about something, the more I tend to like it long term. When I just jump right in and start on a project without really visualizing it, living with it in my mind for a while, I tend to not like it as well. And that is a waste of time, energy and money!

Until next time….

Swing pergola tutorial....

The past few months have been super busy and honestly a little over-whelming. (When I can, I will share.)

As a result I haven’t had a lot of time to do many DIY projects around the house. Which of course explains my absence last week. For now, the best I can do is link back to some of my all-time favorite projects!

One of my all time favorite projects was the swing pergola. As I mentioned in the earlier post, I have built several over the years!

This is a picture of one of the pergolas pre storage building update and we now have a privacy fence along the back of the lot. I meant to take a “current” photo, but see above!

With so many people at home looking for “projects,” this little build is perfect!

It takes a few days and will require a few sets of hands, but it is doable.

Trust me, you will get HOURS of enjoyment out of it! And maybe even a few naps!

(And remember, wear a mask when you pick up materials!)

How to set stone in your lawn...

My first love is flagstone…I share HERE how I created a little flagstone patio in the front of the house…

This was a massive project and required “excavating” a large area.

My project this week is the same process but “small scale.”

My mother offered my Granddad’s grindstones that my dad had set in their yard as a pathway.

There are a few things I have that make me see “old ladyish”…my grandmother’s china and hutch, an old camera collection, a few knick knacks here and there…and certainly a grindstone pathway in the yard would qualify. Truth be told, I can not pass up anything that is a family heirloom.

If you don’t know what a grindstone is, google it.

Nifty stones that were originally used to sharpen tools. I have no idea if my grandfather actually used them for their intended purpose but I believe they were set in his yard as stepping stones…and my dad got them and did the same.

So now I have moved them to my house…and this past weekend I set them in the yard.

I had already set a few of them when I realized it would be a great way to show you how I create a path set in the ground…no worries about having to mow around it.

Whether you use grindstones, slabs of wood, bricks or flagstone…this is the way to property set them individually to create a “stepping path.” I have found that this method creates the least destruction to existing turf. You can even do it before you seed or lay sod.

The first thing you want to do is lay them out where you want them.

Look at them from every angle…maybe walk on them to see if they “step right.”

Once you have them laid out where you want them, it is time to get down to the REAL work. (I will refer to “stone” because that is what I used…again, you can create a path with just about any durable material!)

First, take a shovel and go around the stone… about 1'“-2” from the edge of the stone…keep the shovel straight and go into the ground at least 4”. (My stones were about 2” thick and I want at least a 2” bed of sand and soil to set the stone on.) You are basically using the stone as a template.

Once you have gone around the entire stone, just flip it out of the way for the time being.

Since my yard was sodded, I wanted to salvage the sod and use it to fill in a few bare spots here and there…so I used my shovel to carefully remove the sod…

I used a little hand rake to remove the bulk of the dirt off the piece of sod and relocated it to the bare spots.

Then I used the shovel and my hands to remove all the excess dirt in the hole. I put it in a bucket and used it in an area of the yard that need a little fill.

I made the hole about 4” deep, then I added sand.

You can buy bags of “play sand” or even “paver base.” Just make sure you put some kind of sand or base in the hole to create a stable, level bed free of rocks and debris. .

I would suggest hosing down the sand just to make sure it is packed well…your goal here is to create a level, compact bed for the stone to set on.

Once the sand is leveled, replace the stone and make any adjustment by lifting and filling where needed.

I used the dirt I removed from the hole to fill in around the stone.

Once all the stones were set, I saturated them…this forces the dirt around the stones to seep under the stones and also lets you see which ones may need to be lifted and additional sand toss under.

Step on them and make sure they seem “firm.” I had one that “rocked” so I lifted it and added sand. As the dirt around the stones seeped underneath I added more and plugged in a few pieces of sod.

With a little water and sun I expect the grass to fill back in nicely over the next few weeks!

(You can see HERE how I dolled up the storage shed a bit!)

I saved a little dirt in the bucket because I know some of the soil around the stone may compact a bit. Also, this part of my yard is fescue so I may have to over-seed a bit…but that is okay! I like the look and even though it may be a little “old ladyish” I have a walking path that has a little bit of sentimental value.

Perfect!