Dining room table makeover and my recent angst!!!!

Choosing fabric for a piece for "resale" is a tad easier for me than when I have to make a decision for my own home! It is still a struggle, but not nearly as difficult as choosing a fabric for myself.

Primarily because I know how much work goes into reupholstering a piece and I know if I go too "trendy" I will end up having to redo it in a few years. It is one reason I "stay safe" with bigger pieces like couches and chairs...then I use throw pillows, blankets and rugs to pull in the "in" colors. Those things are easy to change...and I don't cringe too much if I have to donate a $15 pillow vs. a $2000 couch! 

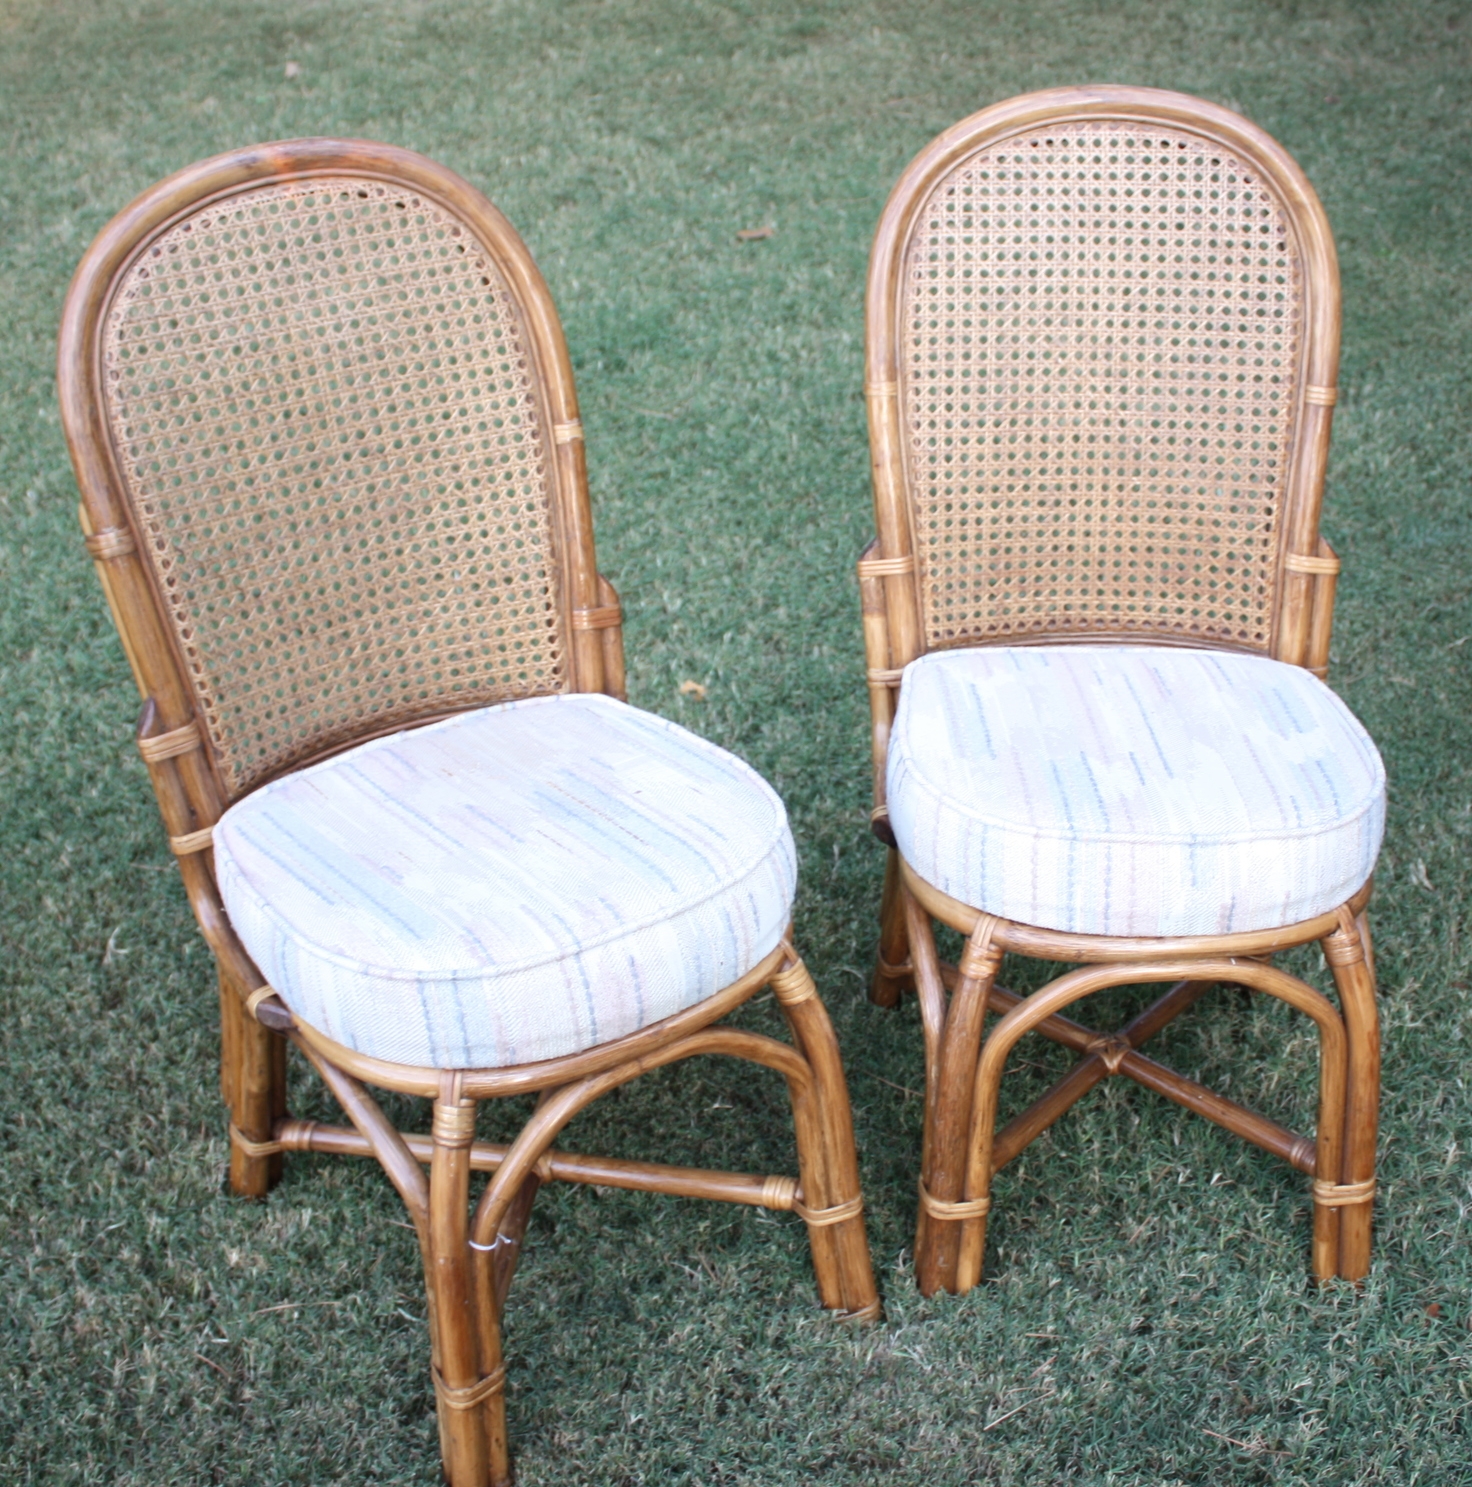
Example...I bought this ugly table and chair set at an auction....

In this condition, not appealing in the LEAST and not fit for any space...very dark and dated! But this is the kind of thing I know I can work a little "DIY magic" and make it perfect for another lifetime of use!

Not that I don't struggle with deciding paint colors and fabric for these pieces...this one sat for a while. I knew I would have to paint the top...it is laminate so it couldn't be "refinished." The legs on the table and the chairs are solid wood and in halfway decent shape but the vinyl brown seats had seen better days....that had to go!

I chalkpainted and distressed the table legs, primed and painted the top a flat black and painted the chairs a "steel blue." I found an awesome black/grey tweed upholstery fabric for the seats.

I saw several tables on Pinterest with this upholstery nailhead detailing and knew immediately I wanted to do it when I found the perfect table...and this table is perfect!

That little detail really makes all the difference, was relatively inexpensive (about .50 each!) and was not difficult. I just measured and marked where I wanted each nailhead to go, drilled a tiny hole, then hammered them into place! Cute as a bug's ear!

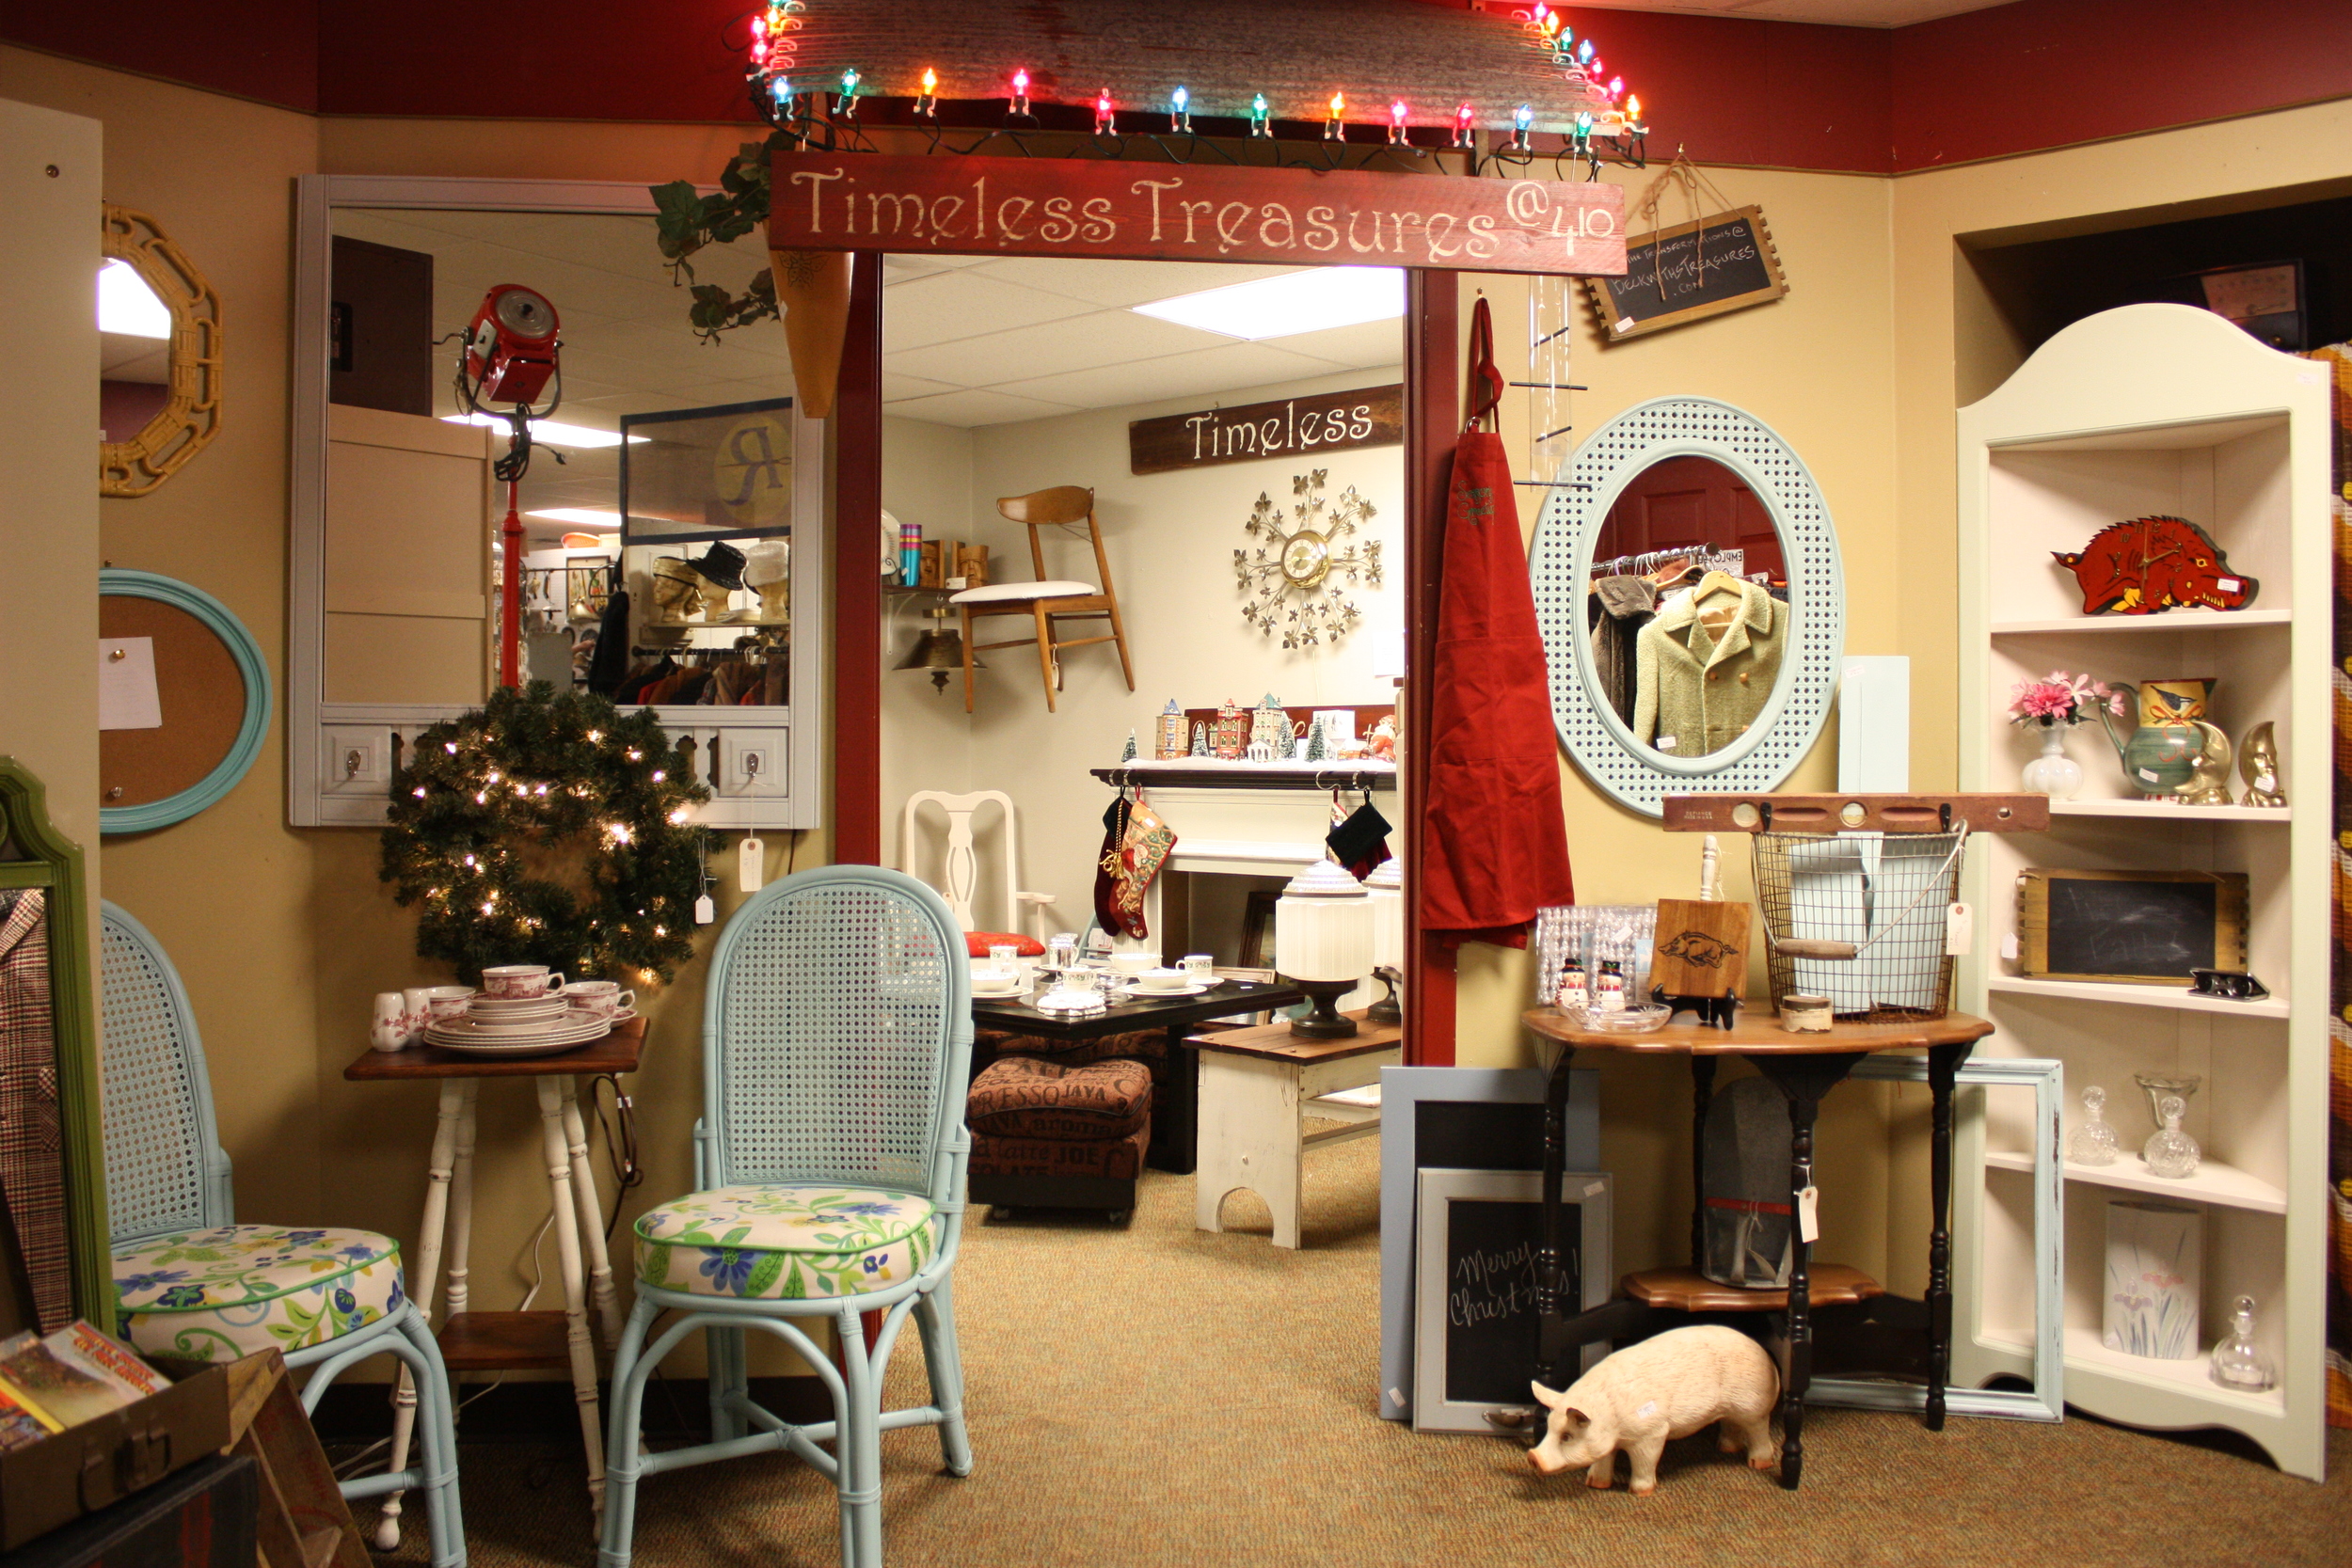
Obviously someone else thought it was cute as a bug's ear...it sold the day after we took it to 410 Vintage.

Which brings me to my recent angst! Chairs for my own home!!! 

When I remodel my den last year, I knew I wanted to add a teal club chair. I bought this little MCM style chair a year ago and it has sat in my den since, waiting on time and inspiration! It is the perfect size and style for this space, but of course the upholstery is all wrong!

I finally went to the fabric store last week and pulled a bunch of fabric samples that caught my eye. I THINK I have decided I like this teal tweed fabric. This fabric works well with the style of the chair and is pretty much the color I was leaning towards.

I found this chair just last week and I THINK I want to use it to replace my big fat leather chair in the living room!

It is a tad more "traditional" than what I really like but that is okay...again, that is the great thing about having a mosh-pot of styles...or "eclectic" as they say!

One of the reasons I want to replace this chair is because it has become "the dog's chair." In other words, Cleo has claimed it as her own. She sleeps in it, sits in it and jumps on it when anyone comes to visit her (and EVERYONE is coming to visit HER!) As a result, it is in pretty bad shape.

So naturally, she has to check out the new chair to make sure it is comfortable FOR HER!

Not nearly as roomy as the leather chair, but she looks pretty comfy!

Again, fabric samples and nail biting choices....

I kinda sorta like the idea of doing a "two fabric" design. The grey geo on the sides and back, and the black for the cushion. But then again, I worry about being "trendy" with something that is going to require a lot of time and work, so I am leaning towards the simple, one fabric choice in blue. 

What to do, what to do. For now I am taking my own advise. Looking to Pinterest and Google search for "inspiration."  Looking for chair upholstery I LOVE that will work with this style and in my space! 

It is the ONLY way I know how to make a decision and know it will be one I will be happy with for many years. 

Mid century chest makeover....

On rare occasions I find a little treasure hidden among all the garbage my tenants leave when they move in the middle of the night! I found this little table years ago and it started my love affair with Lane Acclaim tables....

It did NOT look like this! I remember I picked up the nasty little thing and started to toss it in the back of my truck. But it was sturdy and I could see quality through all the "muck" so I brought it home. I googled the markings on the underside and found that it is a walnut and oak Lane Acclaim table manufactured in 1959. With a lot of elbow grease and a little tung oil, it is now one of my favorite little "treasures." Along with the others I have purchased and restored over the years. Still waiting on the desk and a round end table...but someday...

Now I look at furniture I find a little closer. 

This dresser is one of my recent finds. A true mid century piece. Completely intact and sturdy as the day it was built. Unfortunately someone had done a REALLY bad job painting it!

I cleaned it, primed it with Kilz, sanded it and wiped it down with tack cloth....then I painted it with one of my favorite flat "charcoal" greys. The ole' KSTP treatment! The drawers were in mint condition and just needed a little cleaning!

Beautiful! Because of the style, I kept the finish simple. While I hesitate to paint MCM pieces, this is a prime example of "enhancing" a piece. 

Now I am going to share a little DIY frustration because I know I make this stuff LOOK easy sometimes. I first painted this entire piece with several cans of Valspar flat spray paint. I like spray paint because I normally get a nice smooth finish. For some reason I kept getting that "stripped" look on the top and sides...the drawers looked fine. Not a problem I normally have with flat finishes when the temperature is decent. I ended up buying a quart of latex flat paint, mixed to match, (and added floetrol...a must!) and used a 4" sponge roller to get a uniform finish.  Worth the extra effort!

I know I have said it a thousand times....don't overlook those "ratty old" pieces.....neglected or abused or poorly "restored." With a little bit of your time and attention, they can be beautifully restored and ready for another lifetime of use! 

This week I will be sharing this project at...

I was featured on Remodelaholic

...love their features and their site! 


A simple TV cabinet makeover...

This is the second year in a row I have been sick around Christmas. Fortunately, last year it was AFTER Christmas. This year it was BEFORE Christmas. Not good when I have so much to do the week before Christmas! I knew I felt bad Tuesday when I was out building fence (the wind did a number on my privacy fence at the apartments) but I didn't realize how bad I felt until I came home and sat down.

Now I have a list of things to do...presents to buy, a few things to return, wrapping boxes to hunt down, presents to ship, grocery shopping....and I feel to cruddy to even drag myself into the shower! Fortunately I THINK the worst is over so hopefully I'll feel like getting around later today!

In the meantime, I thought I would share another simple little makeover.

Remember all that dated, uninteresting furniture I keep harping on you to paint or do SOMETHING with! Well, this is just another example of a piece of furniture that no longer has a place or a purpose in our homes...unless you roll up your sleeves and give it a little makeover.

The dreaded old "tv cabinet" ...or "hutch"....or whatever you want to call it!

Here I shared how I acquired this less-than-interesting piece and how I used beaded craft board to start this simple transformation!

I gave the inside a KSTP treatment with my "go to" off-white and gave the outside a little plaster paint/dristress treatment. But it still lacked "character" so I wiped down the entire cabinet with walnut stain. That changed the color from a soft "teal" to almost a "greenish" color but it also added depth to the finish! Kind of a "patina"....

I sealed it all with poly and changed out the hardware. Actually I painted the original round knobs black and added black cup pulls to the bottom drawer! Remember, if you are changing out hardware, you may have to patch some holes BEFORE you paint. In this case I had to do just that since the holes on the bottom drawer were 3" apart and the holes for the cup pulls are 2 1/2"...no biggy! Just patch them with wood filler, sand and then paint....then just drill new holes for the new hardware!

It would be simple to reinstall the doors...but in this case I decided to go with an "open shelf" look! 

Simple little update! Now this little cabinet is ready for another season of life! 


Another day, another project....and a new venture! And my annual HOLIDAY CHALLENGE!

My neighbors, Kenny and MaryAnn, bought a beautiful antique dresser. The problem with beautiful antique dressers is they usually need a little work. Ever watch the tv show "Botched?" I should do a show about "botched" repairs on old furniture because 9 times out of 10 someone else has already tried to "fix" little problems, only to create much bigger problems.

In exchange for a few hours of work and a few choice curse words, MaryAnn gave me this little pine cabinet....

IMG_7489.JPG

At some point Kenny had removed the back and like me, had NO idea where he put it. That is okay...I have "repurposed" little cabinets like this before and one of the first things I do is remove the back and replace it with something with a little more "character."

This tung and groove "craft board" is perfect for adding a little "pop" to otherwise boring or dated cabinets. Since I decided to remove the doors and turn this into an "open shelving" unit, I knew it needed a little something....

Rather than paint the boards a solid color, I usually do a little "white wash" treatment on them in whatever paint color I plan on using on the exterior. I painted the inside of this cabinet my favorite off-white color and plan on painting the outside a soft teal. 

The first thing I did was cut the boards down to the size I need for this project. Then I just dip my paint brush in water, then dip it in the paint, brush the boards, then wipe them with a damp cloth....

This allows the grain to show while still giving the boards a little color. After the boards dry, I spray them with a clear coat. 

I put a tiny bit of glue in the "groove" of each board. Not a lot or it will ooze out and make a mess...a little glue goes a long way...and fit them together one at a time across the back! 

I use my pneumatic stapler to attach them to the cabinet....

This board is so thin you could probably attach it with a manual stapler if that is what you have handy!

This bead board really does dress up and update these old cabinets..

IMG_7529.JPG

Now all I have left to do is paint the exterior and replace the hardware...I will make sure I share the transformation when I get it finished!

I recently used this same treatment on a huge old ugly (but very solid oak) cabinet I hauled home from the apartments. 

I decided to use it for display in my new "room" at 410 Vintage

Yep, this is my "new venture." An entire room at 410 Vintage, rather than just a booth!

IMG_7466.JPG

This is just a little sneak peak at my new room...you can see the amazing ratan chairs that started out in a total state of FIX ME!!!!

(I had several dining room tables that where set all pretty for Christmas...neither lasted a day!)

IMG_6625.JPG

A couple of little side tables that had a bad case of the uglies...

They both just needed a little TLC...

I have filled this room with my auction treasures and furniture rehabs...its is a fun space!

If you are local and have not checked out 410 Vintage in Fayetteville, you really should drop in! The owner has one side filled with "mid century" awesomeness and the other side of the building are spaces filled with anything and everything vintage, retro, antique and wonderful! They have an Instagram page that is updated several times a day with new arrivals. I don't have an Instagram page but if you do, you might want to check it out!

HOLIDAY CHALLENGE!

This is the time of the year when I want to remind you of my "HOLIDAY CHALLENGE!" Our family use to do the Angel Tree every year and always enjoyed buying gifts for our "angel." But as the kids have grown and have less time to shop with Mom, I have encouraged them to find their own way of giving. For me, it is random giving. Every year I set aside 5 $20 bills...and I wait. At some point during the season, I will run across someone who will have a "need." Maybe at the grocery store...or the car hop at Sonic. One time I was getting gas and I felt the person at the pump next to me could probably use gas money. You never know...if you open your heart, you will know when to give! 

If you don't have a lot of cash to give, give of your time!

We may not have everything we WANT, but we always had what we NEEDED! It feels wonderful to be able to give back...even if it is just a tiny bit! 

Updating a little chandelier...

I am almost embarrassed to admit where I got this ugly little brass chandelier....

Out of the back of a strangers pick up truck at the dump. Seriously...I was paying out at the local dump and this guy drove up in a truck loaded with trash. Sitting on top was this light fixture. So I asked him if I could have it...and he said SURE! 

Geez...I have become one of "those" people who dig through other people's trash! Crazy cat lady, annoying coupon lady...and now this...(shaking head in disgust)

Whatever...I wasn't sure what exactly I was going to do with it but I knew it could be "updated" if I could just find the right inspiration. I knew I was going to paint the dated brass, so I decided to start there until I could figure out exactly what I wanted to do with the fixture!

Originally I primed it with metal primer, then started painting it with plain ole' off white spray paint. (Remember, when you aren't sure what to do with something, take it to "base neutral.")

And that is when a little DIY project turned into a total disaster. Yes, it happens. Even to me. Even though I shook the spray paint can per the instructions, it still started spraying all "clumpy." I don't know how to describe it, but rather than a nice smooth finish, it was all grainy and rough....AAAAGGGGGHHHHH! 

Made me so mad I tossed the fixture in the back of the garage and said "SCREW IT." (Yes, I curse at innate objects!) I knew I was going to have to completely sand it down and considering the "ornateness" of it, I knew it would be a royal pain. My "vision" was just a heap of "mess." 

Then I saw this on Pinterest...

Andrea at  "Personally Andrea" took a plain ole' chandelier and dolled it up a bit by using jute twine to wrap the ugly little plastic tubes. 

Hum....just the "inspiration" I needed to dig the "ruined" chandelier out of the back of the garage and give it another shot! 

I sanded down the "grainy" finish, reprimed where needed and then painted it in my current favorite teal spray paint! (This time I shook the crud out of the can AND test sprayed it!) 

Covering the ugly plastic tubes is super easy. Andrea used tape, but I used hot glue. I ran a little line of hot glue along the tube as I wrapped it in the jute twine.

WORD OF WARNING!!! Hot glue is HOT...and the plastic sleeves are a tad flimsy so use the glue sparingly or you will actually melt the little tube which will make it impossible to slip back onto the light. (Lesson learned the hard way...fortunately Lowe's sells replacement socket covers for under $3 a pair!)  

I think painting the fixture in black or oil-rubbed bronze would have made it a little more "formal." But I was going for "fun" and "hip" and a little more casual! 

I liked the look so well I decided to do the same to my dining room fixture using the plastic covers I purchased at Lowes!

I found some glittery gold fabric/paper kinda looking stuff at the craft store that I am going to use to cover new socket covers for the Christmas holiday!  I will share that later when I do my Christmas decorating! 

Don't turn your nose up at the dated brass fixtures...as I have shared many times fixtures, lamps and fans are super simple to update with a little paint.

And of course a little inspiration! Thanks Andrea! 

Sewing table....

I have shared this project before but with sewing and upholstery projects lined up on the dining room floor, it deserves another feature!

After a few weeks of working non-stop at the apartments, I finally have a little time to tackle the growing mountain of projects in my garage. Yesterday was spent prepping, priming and painting.

There has been a real "chance" of rain predicted for today all week and Mother Nature did not disappoint. Rain. Lots of it. So today, with the rain preventing me from getting out and finishing up those projects, I decided it was time to tackle one of my LEAST favorite aspect of DIY projecting!

Sewing...my nemesis! But it is an (evil) necessity if you are a DIYer! Just too many little projects require, at the very least, a straight stitch. The simplest upholstery projects, decorative pillows and curtains require the service of a sewing machine!

As I mentioned in this post, it is important that I have a way to store and use my little portable (and very old) sewing machine! Nothing fancy...pretty much does just the basics...straight stitch, zig-zag, button holes (which I NEVER use!) 

This little portable table has been a life saver! 

This was a little rusty typewriter table I bought at an auction...you can see how I dealt with the rust here and brought it back to life with a little TLC. I use to set my machine on my dining table, risking scratches and damage to the table and limiting where I could work on my sewing projects!

The portability of this table make it super easy to store it in the laundry room cubby!

As I have mentioned before, if you don't know how to sew, learn the basics! Take a class at your local hobby store or have a friend teach you! It isn't difficult and again, definitely necessary! 


Old shop cart transformation....

Sometimes you have to look really hard to see the treasure lurking beneath all the gunk and layers of paint. 

This piece is a prime example....

I bought this old shop cart with metal castors at an auction several weeks ago. It was covered in decades of grease, grime and several layers of paint. My original plan was to clean it up and fix it up a bit to be used in a shop. 

After a good scrubbing, I began stripping the top with my favorite finish stripper.... 1/2 acetone-1/2 lacquer thinner. My original intent was to completely strip the top and then apply a stain and poly.

After stripping off a majority of the top paint layers, I started sanding....and that is when I discovered that this table didn't want to be hidden away in an old shop...it wanted to be a beautiful butcher block island! 

(I apologize for the pictures! I had fully intended to take it in the house and stage it all pretty...again, more doing, less froo-frooing! These were taken with my phone after I took it in to my booth!)

Even after stripping and sanding, the grain of the wood held onto an amazing "patina" that was so warm and beautiful I decided to leave it. I applied 3 coats of butcher block oil to hydrate and preserve the wood. No stain...this is just the natural color of the aged wood that was hiding under the layers of gunk and green paint! 

I applied a chalk paint treatment on the base and distressed it a tad so the green "peaked" through a tiny bit. After painting and distressing, I sprayed it with poly. Again, poly tends to "yellow" a tad which gives the new paint an aged look, as well as seals! The inside of the drawer was pretty nasty, so I scrubbed it with ammonia and gave it a KSTP treatment!

This is not some fancy antique...just an old shop cart made out of pine. But it is absolutely beautiful and I think after years of being hidden away in a shop covered in gunk and grease, it deserved a little love! I honestly would have kept it if I had a place for it! 

Again, don't turn your noise up on a piece that has years of neglect and abuse. Maybe, just maybe, there is a beautiful "soul" just waiting for you to reveal!

Simple bench or stool makeovers...

At least once a month I run across pathetic little benches or stools at the auctions or in thrift stores. I have featured a few in the past....

...this cute little piano bench here....

A bench I made for my daughter out of an old coffee table here....

My dad's old tool bench....

I use it as a little side table next to the chair in the den! This is one of those things that serves a purpose and has tremendous "sentimental" value as well! 

And at least a dozen or more I failed to take either before or after pictures of over the years! I'm a baaaad blogger!

Trust me....they are super simple to makeover with a little paint and fabric and always turn out precious! 

Recently I did a little footstool and bench and actually remembered to take a before AND after picture!

This little foot stool was pretty pathetic in it's original state....

I stripped the fabric (and removed at least 2,483 staples), chalk painted the base, distressed a bit and sealed with poly (gives lighter paint an "aged" look), added a little bit of foam to "fluff" it, new fabric and new "gimp" trim.

Cute as a bugs ear!

I found this old icky coffee table at the apartments. Like the old coffee table I turned into a houndstooth bench for my daughter, it was pretty worthless for it's intended use...a coffee table. 

I removed the top (super simple...a few screws), added foam padding and batting and covered it with fabric and gave the base a little KSTP treatment.  Reattached the top to the base with screws. Super simple! 

Both are now in my new flea market booth at 410 Vintage in Fayetteville! Awesome place so make sure to drop in sometime and check out all the AMAZING treasures! 

Next time you see a ratty old foot stool or a dated old coffee table, see it for its potential! They are super simple to make-over and are perfect for additional seating or a place to throw your clothes at the end of the day...and of course, they are the perfect little touch to add character to your home!

A few new storage solutions!

In my quest to make my kitchen a tad more "user friendly" I stumbled upon a nifty little storage gadget at Lowes that will help me manage my casserole dishes and mixing bowls a bit better. 

As I have mentioned, in my "dream kitchen" I have nothing but big deep drawers in my lower cabinets. Unfortunately that is a "dream" so I have to work with what I have and digging around in a lower cabinet for heavy casserole dishes and keeping all my mixing bowls organized has become an issue.  

Again, and I can not stress this enough, the number one key to getting organized is PURGING!

Pull it ALL out and ask yourself...DO I REALLY NEED THIS?! In my kitchen cabinet, I had several casserole dishes that were duplicates of what I have but they didn't have lids. Do not need! I had 5 large 9x13 casserole pans...do not need them all! I had 3 stainless bowls the same size, which made stacking them a impossible...do not need! I have FIVE crock pots...two smaller ones just for dips and such. I DO need those but only once or twice a year so there is no need for them to take up valuable kitchen real estate. So off to the hall pantry they went! 

I contemplated building and installing either 4 drawers or 2 large drawers in this cabinet base. Lots of work! So when I found these nifty little metal storage drawers at Lowe's I knew I had found a relatively easy solution.

The problem with these metal drawers is they are not custom sized so I was going to end up with a lot of "dead space." I decided to only install one for my bowls and casserole dishes since those are things I use almost every time I cook. I left the other side shelf space for crock pots and dishes I only use occasionally.

The drawer component lets me easily get to my bowls and casseroles dishes without wallering around on the floor and pulling everything out to get to the stuff in the back.

A perfect, and simple, solution for organizing a tough space.

When Brian and I went scrounging around the flea market out in Tontitown last weekend, I found this neat little wall decor. A framed chalkboard with two "distressed" wire baskets. I knew it would be perfect for organizing magazines that tend to get piled up in the coffee table, which in turn means they get ignored!

I'm pretty sure it is probably something one could pick up at Hobby Lobby, or something I could easily make with an old frame and paper storage racks from an office supply store. But it was there, and it was done...the only thing I did not like was the original  finish on the frame...kind of a "white-wash" natural wood looking thing. I immediately painted it with some chalk paint and distressed and sealed it. Great for magazines or mail. Remodelaholics featured a bathroom with a similar one.

I like it in the bathroom but I am of the opinion that if you are in the bathroom long enough to read an article, you probably ought to seek treatment. Just saying....

Last fall I bought this awesome antique sewing machine at an auction. The "lid" flips back to reveal the machine

I immediately fell in love with the little wood box that covered the machine. After a little research I discovered they are called coffins....most often in mahogany or walnut. BEAUTIFUL! I immediately jumped on Ebay and found a few of these amazing little boxes.

Naturally they needed to be refinished, but a little magic mixture and a few coats of tung oil and they are amazing!

My original plan was to use them in the "kitchen reset," but there really was no good place for them so I have them scattered around the house for storage. In the den, I use them to store some of my photo albums. They would be darling with little castors for "rolling" storage. l absolutely love them! 

When I reset my kitchen, I dug around in my flea booths looking for "functional decor." In other words, pretty with a purpose! A few things caught my eye.

The first was a little glass pumpkin...perfect for this time of the year! I usually keep my coffee in a crystal decanter, but this little pumpkin is perfect for the fall season.

Now I am going to be on the look out for one I can use for the Christmas season!

I also found this little sterling silver piece. I THINK it might have originally been for sugar since it has a little notch in the lid where a spoon may have rested but most sugar jars are smaller. Regardless, it is the perfect size for my coffee filters. 

And of course the need to store 1/2 of my dishes when I built my floating shelves...seriously, who needs 20 plates! I purchased this little basket from Kaufmann Merchantile with a gift certificate from my son but I also found some on Amazon and have ordered 3 for my holiday wrapping station! (I'll share that little project when I get it set up!)

I have mentioned time and again that I really don't decorate much with  "pretty" without "function" or purpose...unless something has sentimental meaning. 

I am learning that these little touches are what really give a home "character." No need to use boring old plastic containers or cardboard boxes if you can "think outside the box" and find interesting pieces that are "pretty" but can also serve a useful function! 

Anything that can make my life more organized is great...the fact that it is pretty or interesting is a huge plus!


Decorating with the traditional colors of fall!

The week before Brian and I left for our annual vacation to Colorado, I spent several days cruising the blogosphere and enjoying all the beautifully decorated homes on the "Fall Tour." I noticed many are now decorating with more "whites and blues" and neutrals for the season....blue and white pumpkins, vintage containers, natural elements, muted greenery.

I think it is all beautiful but as I decorated my home for the season I realized that all my fall decor are the bright and bold colors of traditional fall foliage....reds, oranges, yellows, browns and deep greens.

And as I have mentioned before, when I am done, it looks like fall has puked in my house. I LOVE this time of the year and every time I stroll through the isles of department stores, craft stores or a flea market I find more fall "stuff" I just can't resist.

I had pretty much convinced myself that I needed to transition to the more "neutral" pallet of the "farmhouse fall" next year. Until....

I neglected to take pictures of the southern view at Mesa Verde so I stole this picture from Thomas Mangan...he has some breath-taking photos....the colors are AMAZING and a pretty representation of the southern slope of Mesa Verde! 

....Colorado...the vivid yellows and orange of the Aspens, the deep reds of the mountain sides and red oak foliage, the vibrant greens of the pines.

Yes, there are whites and blues and neutrals...the stark white of the Aspen bark, the muted "pinks" of Mesa Verde (a MUST see!)....

...the neutral pallet of a canyon wall along the river...

...snow capped mountains reflecting in the crystal blue waters of a mountain top lake!

...white snow filled clouds creeping over a mountain pass.

All beautiful...all colors found in nature!

For me, I am still in love with the vibrant colors of fall that are so prevalent here in the Ozarks...the yellows, orange, reds and deep greens. I have shared my "fall home" before, but I thought I would share again this year...nothing much changes from year to year and that is just fine with me!

Notice the "Colorado red" flagstone...yes, that is native Colorado stone and yes, there are rivers and mountains that color!

These little lanterns are "multi-seasonal." I can easily change them up for fall, Christmas and even spring/summer!

Every holiday I hang a "seasonal" wreath on the big mirror in the living room! I now have one for fall, Christmas, Valentine's and the 4th!

Still love my black doors! In the fall I hang simple "candle wreaths" with ribbon to decorate every door and window. I simply change them out for Christmas wreaths after Thanksgiving!

Several years ago I hit the 90% clearance at Hobby Lobby and snatched up all the high dollar fall garland...I wrap it in the dining light fixture, lay it on top of the display hutch and in the transoms, and lay it across the fireplace mental!

Say hello to Litty...she loves the camera! 

Years ago I made two "table top" fall wreaths...I use to put hurricane candles in both but I found this awesome little grapevine pumpkin last year. What do you know...I actually do change things up a bit every now and again!

For vases and urns, I just bundled a bunch of fall stuff I like together and stick them in the container...simple! This one is a glass vase filled with fall glass beads I picked up for Pier One years ago! 

Mr. Owl was actually one of those ugly plastic "decoy" owls I picked up at an auction. I painted him off white...again, super simple!

Here I shared how easy it is to make a little seasonal vintage box that can be easily changed up throughout the year...

THIS is what I love to decorate with...the traditional colors of fall. I love the blues and whites and neutrals but every year I take a 14 hour trip west to see the vibrant colors of the Colorado Aspens. 

For some, it is the beach....white sands and blue waters and sky. For me, when I see a grove of shimmering fall Aspens, it fills my heart with pure joy! When I stand on a mountain top at Mesa Verde and look down at the red, orange and yellow foliage on a mountain side, I feel at peace.

So for now, I will continue to decorate with the colors I love. Maybe some day I will transition to the "in" colors, but this year, I am at peace in my home surrounded with the vivid colors of a traditional fall! 

And that, my friends, is what decorating a home is all about!