Type A personalities should not blog......

It's not that I haven't been doing DIY projects for decades, it's that I have SOOOOO many I want to do and share NOW.  So I am going in 50 different directions trying to 
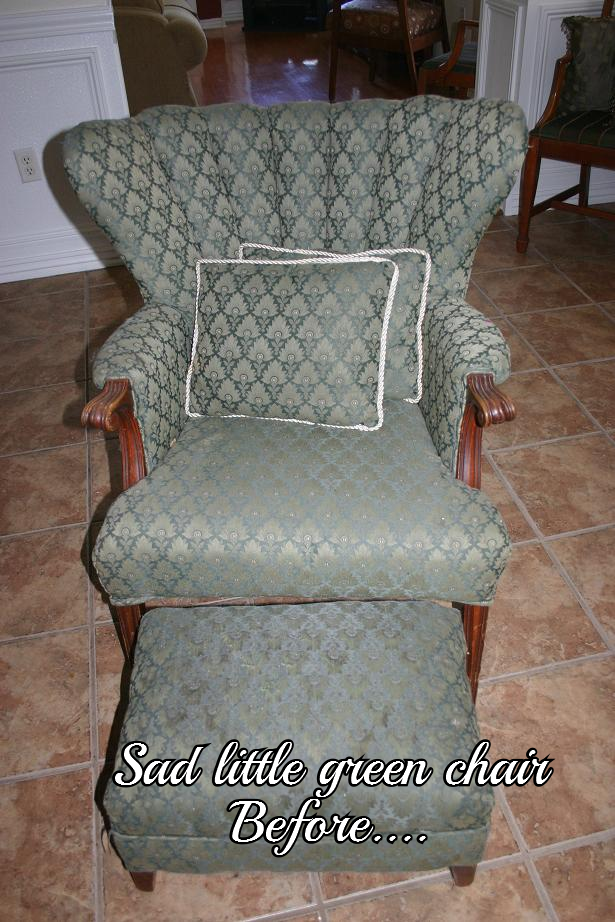
get a dozen little projects done so I can post them.​  A dresser, an ottoman, an old office chair, pillows, the 3 legged table, ANOTHER table I picked up at Goodwill today (it has all it's legs intact), cork boards...you name it, I've got it going on here.  It's madness and my house is a disaster....NOT a good thing!

Seriously, I think I have a few years left in me....I mean honestly, eventually I'll run out of things to post if I try to do it all right this minute....typical "type-A" personality.  ​

IMG_8544.JPG
red before.JPG
IMG_8649.JPG

But I did get one project finished today....thank goodness.​

About a month ago my son asked me to spend a Saturday at an auction with him....I LOVE auctions but more than anything I love spending time with the kids when they actually WANT to spend time with me! And it was a cabinet shop going out of business...fun fun!!  Ask me how much of the stuff I bought I REALLY needed....ummm...probably NONE of it.  But I picked up a huge stack of cork board....and of course that stuff is not cheap and who doesn't need a cork board?​

So I set out searching for old frames...any interesting frame I could find.  Found most of them at Goodwill for next to nothing!

Pop the picture and glass out, cover the backing with cork board and paint the frame....PRESTO!!! Nifty cork board!

The large one is for Matt's girlfriend, Kaitlyn.  She is the mother of my grandpuppy, Beau.  Did you ever read "Marley and Me" or see the movie (OMG, if you want a good cry....)  That is Beau....silliest dog in the world but I just adore him.​

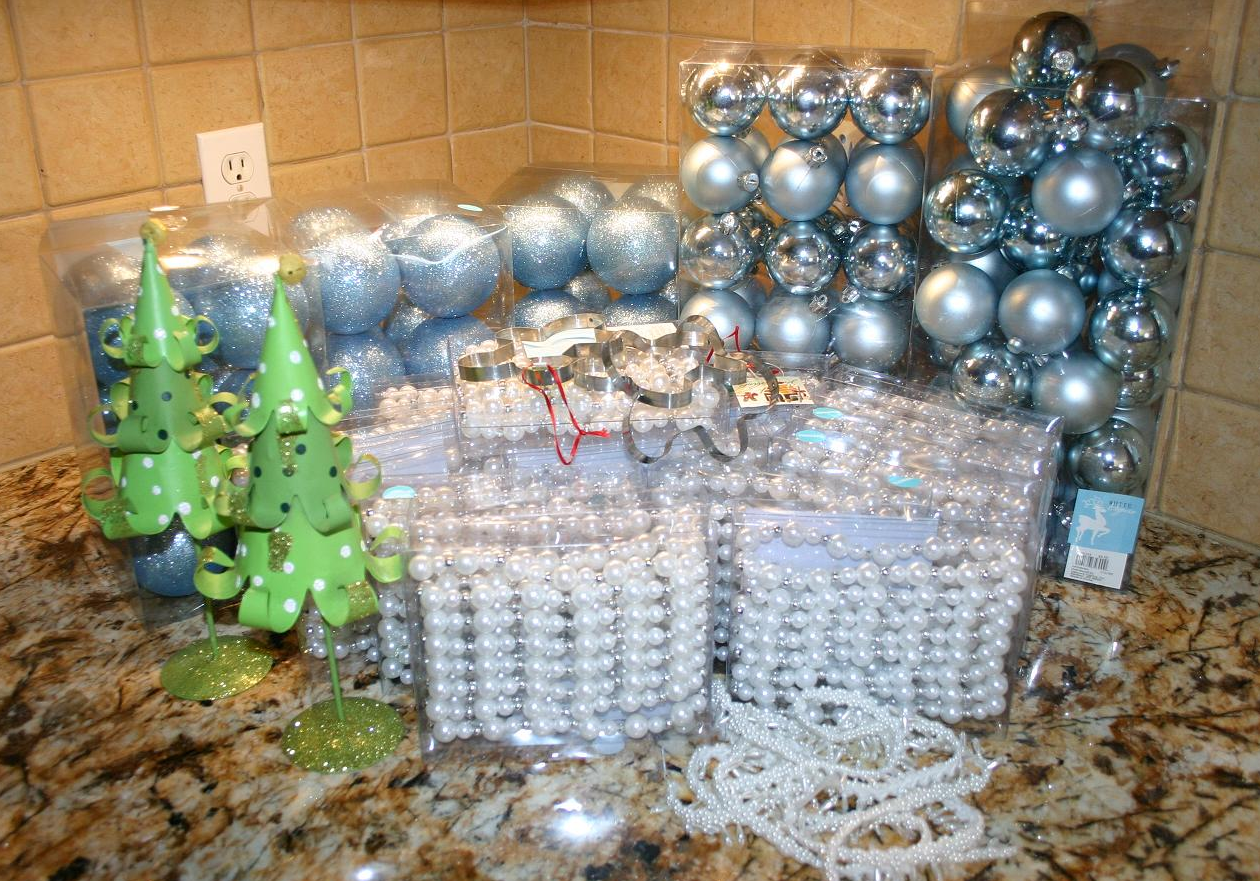
Anyway, when I went back to Hancock Fabrics today to buy the other THIRTY BOXES of pearl and bead strands (seriously, who could pass them up at 90% off....I just didn't realize they had soooo many left!) I found these nifty little 2 1/2 x 3 1/2 magnetic picture frames on clearance for .40....paint them up and they are cute as a bug on the cork board.  ​

IMG_8650.JPG

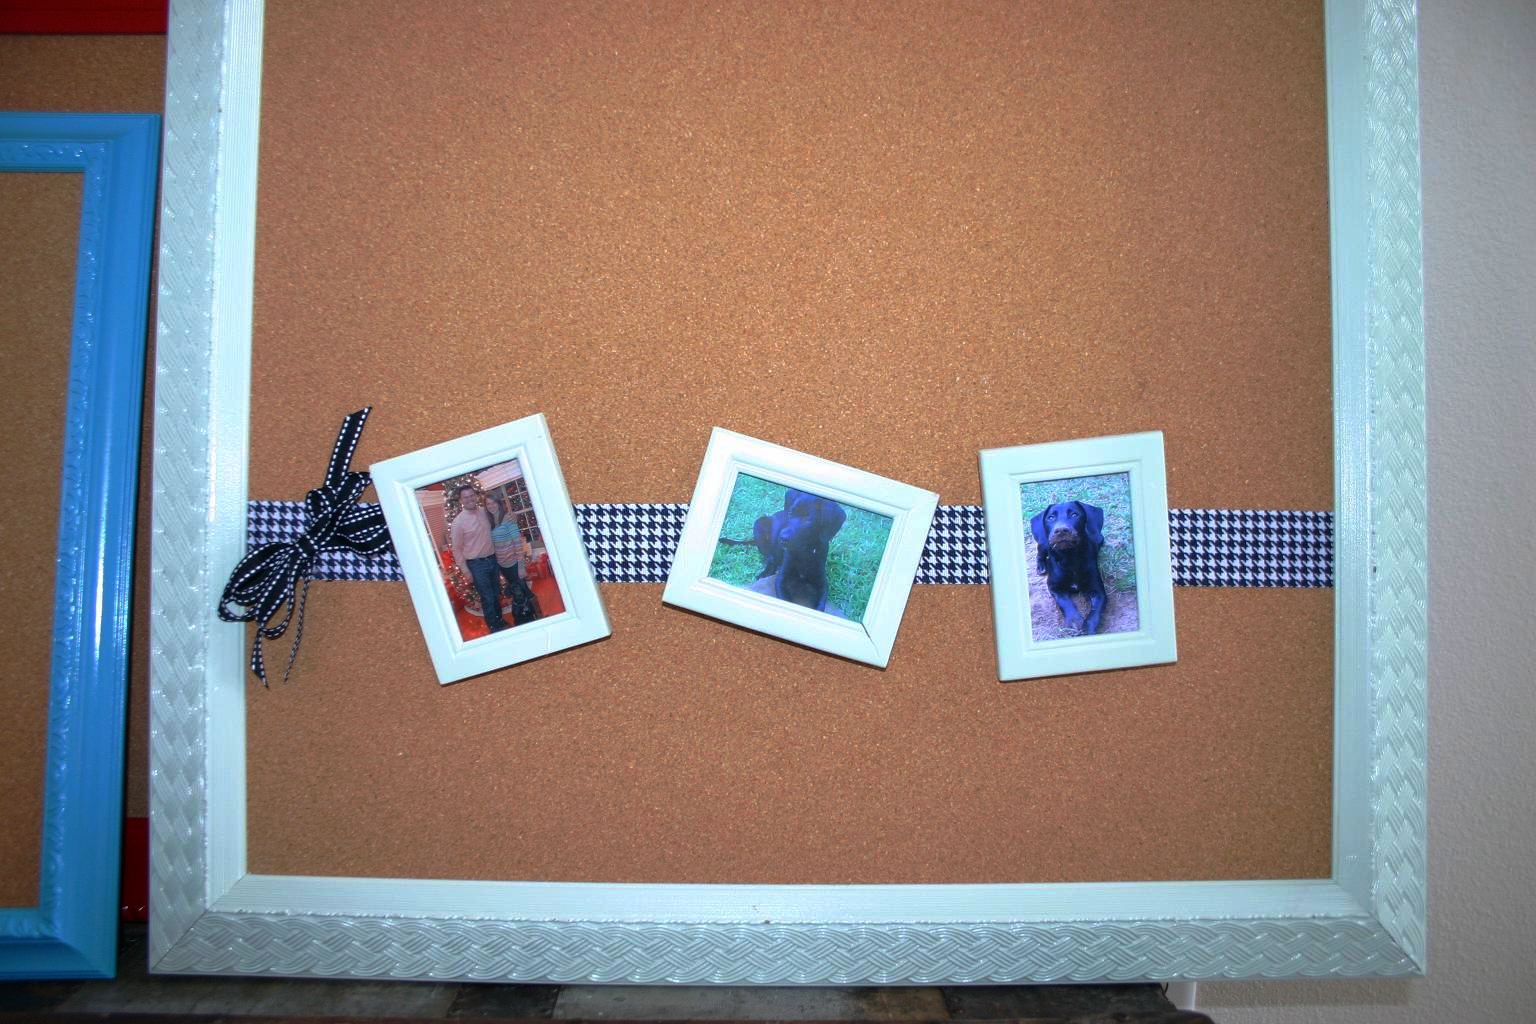
Now, here is where I ran into a "design" problem.  When you run into a design issue, or your "best laid plans" aren't panning out, do what I do....wing it.   My PLAN was to put a strip of magnetic tape across the board, cover with the cute houndstooth ribbon and then stick the magnet photo frames on it.  No dice.  The magnetic tape was crap and NOTHING would stick to it and the magnets on the frames weren't any better.  To top it off, I soon found out that hot glue is NOT a good medium for cork board.  ​

So, I used regular glue to attach the ribbon onto the board, glued 3 super powerful magnetic "dots" on the ribbon, hot glued magnetic dots to the back of the frames, and PRESTO....we have take off!!!  Or at least we have some cute little frames that can easily be changed out from time to time!​

There are soooo many things you could do to spruce up a cork board.  Cover the cork in fabric, attach vinyl lettering or even paint on the cork, cover with ribbons and bow....just so many ideas...Google cork board imagines and you will be surprised at the ideas that are out there. ​

I have some old window panes I took out of an old house...they have three divides in them and I am going to put cork in one, metal for magnets in one and chalk board in the one....I'll post that if I ever get to it....but before I do that project, I am bound and determined to get some of the others completed!​

Little Ms. Tammy's tuffet....

My friend Tammy is always in awe of all my little projects.  And I tell her the same thing I tell everyone.  YOU CAN DO IT TOO!!  But she always says she can't....​

So I was a bit surprised when she sent me a text last night with a picture of an ottoman she paid $10 for and a note saying she was going to recover it.  Honestly, I assumed she was fishing for help, so I was quick to reply that JR's funeral was last night....to which she replied "Who's jr?"​

SERIOUSLY!  I know she is not THAT much younger than me.  We are both "girls of the 80s."  Who's "jr"?  What, were you raised in the rain forest girl?​

Imagine my surprise when she sent me a picture of her completed project 3 hours later.​

YOU GO GIRL!!!  I am sooooo proud of her....she proved my point....YOU CAN DO IT!  ​​

IMG_1205.JPG
IMG_1206.JPG

Beautiful job Tammy!

Ode to Joel....

I try to come up with clever post titles....Lindsey at Betterafter.net ​always has the most clever titles for her blog posts.  Just too much brain effort on my part.  Sometimes I am funny, but it is just because I say and do stupid things...not because I am necessarily "witty."   Besides, if you aren't over the age of 45, you wouldn't get the title of this post.  (Ode to Billy Joe....not so great song...even worse movie)

Anywho, it was one of those days I had a million errands to run, one of which was to Hancock Fabrics to pick up some piping for the pillows I am making (another post for another day...if I ever get around to it!) Always on a hunt for a bargain, (i.e. digging around on the back shelves)​ I found some 90% Christmas clearance.  CHRISTMAS IN MARCH!!! LOVE!!!   I love Christmas...I love decorating for Christmas.  And every single year I proclaim "THIS IS IT!!!  Not another thing!"  But then I find the bargains....

IMG_8640.JPG

Seriously, who wouldn't love boxes of ornaments and gingerbread cookie cutters for .59 and strings of silver beads and pearls for 1.49 a strand!!!  And those cute little metal trees for 1.69!  Seriously, who wouldn't love finding this stuff in MARCH!!??? If I didn't love spring and fall so much I would be antsy for the Christmas holiday!!!

Anywho, taking this picture reminded me of how much I LOVE MY UNDER COUNTER LIGHTING....which brings me to my "Ode to Joel."  My FAVORITE son in law in the whole wide world.  Now, he will be quick to remind me that he is my ONLY son in law, but honestly, that is not the point.  He is my favorite.​

And not just because he is an electrician who is gracious enough to work during his visits.  See, I always have some electrical issue that is just a tad over my head...or rather one that I know would take him 4 hours to complete when it would take me 2 DAYS!  And who has time for that during the holidays...seriously! ​

So for YEARS I have wanted to put can lights in my kitchen.  I just thought they were so cool looking AND my kitchen felt a bit "dark" and "smallish" because of the lack of decent lighting.  But the "in" can lights right now are a little pricey and I knew I wouldn't be happy with the ones like I  have in my den...because, after all, those are not the "in" lights right now.  The "in" can lights are like the ones Joel installed in ​my bathroom last summer...that I love...but rarely turn on because you could land a jet in there now when both the vanity and can lights are on!

So last fall,  I went to Lowes (again, my fav) and started looking at lighting options.  I have never been a fan of the little "pot" lights that go under cabinets...kind of thought they were silly looking...but I did like the LED strip lighting they had...and while an 18" strip was around $60, I only needed three!  ​And they last "a lifetime" and you never have to change the bulbs.  Hum....that is right up my alley. 

So that is what we bought.  Long story short, we created a new switch next to the disposal switch (that required adding a larger box and second switch and some unanticipated tile repair....good thing I keep spare everything!) The lighting was hardwired to the switch and Joel was able to run the wires behind the microwave and refrigerator so the wiring wouldn't show.  ​

Oh, My. Goodness!  I swear my kitchen doubled in size!!!​

IMG_5011.JPG
IMG_5009.JPG

It is just sooo difficult to appreciate what a difference this makes with pictures.  Joel installed them the day before Thanksgiving last year, and I swear my kitchen prep space doubled in size!  It made a huge difference in my usable space because the two corners were just always so dark and impossible to use as prep space. ​

Again, he only installed three...one over the coffee pot (far left), then ran the wiring behind the microwave to the left corner cabinets and installed one there, then ran the wiring behind the refrigerator to the corner in the right.  AMAZING!!  ​

I installed new granite counter tops two years ago (talk about the steal of a lifetime...for another time!) and these new lights just made them POP!!!  Seriously, it has "sparklies" in it I didn't even know were there.  Like little pieces of quartz all through it...I knew it was beautiful granite...but with the added lights, it is breathtaking...seriously! 

But the biggest difference, again, was the amount of usable counter space, which in a small kitchen is a huge plus!!!!​

So....Ode to my SIL Joel...not only is he a wonderful husband and father...but he is a pretty handy dude to have around when there is some serious electrical work to be done!  Is this a "DIY" project?  Yes...it very easily could be and I have no doubt I could have done it myself.  But honestly, he did it in a quarter of the time it would have taken me to do it, at a time when I was a bit busy making pies and stuffing.​

So in my book, that makes him the BEST SON IN LAW IN THE WHOLE WIDE WORLD!!!​

IMG_1204.JPG

Little house projects...

When you get your miter saws this year, let me know and we will start on the bookcases and fireplace surrounds.  I built all these over the years and have NO doubt you can whip one up in a matter of days....lol!  Just kidding...I would never expect the average person to tackle this size of a project...but my point is, if I can do THIS, you CAN do the smaller, simpler projects! 

And I will let you in on a little secret...when I had to do the "inside corners" of the large crown molding on the den fireplace, I went over to a house being built down the street and paid the trim guy to do it.  I know there is a trick to cutting inside corners on crown molding...something about backwards, upside down, stand on you head...but I haven't ever gotten the hang of it.  Outside miter cuts on crown...no problem.  So when I do the tutorial on building up your door trim, not a problem.  But maybe we can get a "guest"  to help us learn the art of cutting inside corners on crown molding!  Or better yet, I'll just teach you how to build those cool little corner doodads that look so classy!

In the next few days, I will post some pictures of my staircase...stripped the carpet and put in new treads and risers...seriously, it isn't THAT hard.  And when you get your new tools, you CAN do it.  I will also posts pictures of my master bath...with just a teeny effort, you can completely change the look of your bathroom.   And I promise to show you before and afters on my kitchen under counter lighting...seriously, you can't imagine the difference it makes in your kitchen!  

Until then....

My den...I painted this wall 12 years ago when I built this room...perfect example of "paint it a color you love and you will always love it!"  It is true!  I've never had any desire to change this color!   Now the TV stand...that's another story and a project I look forward to doing in the VERY near future...just have to find a piece that speaks to me...


IMG_5015.JPG

I built these built-in bookcases in my living room when the house was under construction.  Originally, there were just two walls with weird windows.  Had NO idea how to place furniture or decorate around them so I did the next best thing...just built some bookcases around them! Perfect spot for the Christmas tree, and I love decorating the arch window in the fall and at Christmas!

IMG_5021.JPG

Can you tell I read...A LOT...these are just a few!     

IMG_5025.JPG

Someday I MIGHT get around to putting up curtains...they are all the decorating rage. For now, I just enjoy waking up to the view...and the sun, if it is up before me...rare! 

My nasty little secret....

I have a nasty, dirty little secret...my friends and family know nothing about this and I never share.  It is embarrassing and something I try to ignore...once a year, I try to deal with it. Just minimally...but honestly, nothing has solved my problem. 

For a person with a touch of cleaning OCD, this is a distressing thing to have to admit.​

The tops of my kitchen cabinets are NASTY.  I don't mean "a little dirty"...I mean greasy, dirty, nasty.  And honestly, usually around the holidays I make an effort to take all the stuff down, clean it or run it through the dishwasher, and wipe down the tops.  But the gunk and grime is so bad I usually just say forget it and put the clean stuff back up on the nastiness.  Gross, I know.  Now keep in mind, I am the kind of person who pulls my stove, fridge and dryer out every so often and sweep and scrub beneath!  Seriously!  (The washing machine is a front loader...that sucker doesn't budge...God knows what is under there!) But the tops of my cabinets...well, lets just say...oh, what can I say to defend myself....nothing really.

​So when I saw a nifty little tip on Pinterest, I said to myself (and my cats) "Hey, I can do THAT!"  Clean and put down WAX PAPER!  And every so often, just change out the wax paper and the grime is gone!  SWEET!

The PROBLEM was getting the serious coating of grime OFF the cabinet tops before I put down the wax paper.  That took rubber gloves, straight ammonia, a mask, several rags and some serious elbow grease.  But I'm pretty sure I got 99% of the grime (and scorched my lungs) before I put down the wax paper.  ​

(BTW, being a "couponer," I bought several jugs of ammonia at Target for .12 each...yep, you read right... TWELVE CENTS.  Target's website has Target coupons...right now you can print a $2 off 2 Up and Up cleaning supplies.  Print one, make 4 copies and take it to Target.  Their jugs of ammonia are only $1.12.  So you can buy 8 jugs with your 4 coupons for .96!  Sweet deal...especially considering it took well over a jug just to clean my cabinets!! I don't use ammonia a lot, but when I need something to cut some serious grime, it's my go to..... ​)

Anywho, here are a few pictures.  Honestly, it took me less than an hour....and I know it will save me some embarrassment in the future. (I have this fear that my family will find this stuff when I die and think poorly of me...it is one reason I make my bed EVERY day...God forbid I have an accident and my house is a mess when the family comes in...forget clean undies...seriously, who's really going to notice that! But a dirty house...oh my!)

IMG_8635.JPG
IMG_8636.JPG
IMG_8638.JPG

Seriously, the camera flash does not do justice by the dirt on the rags...it was seriously nasty!​

IMG_8639.JPG

How pretty is that!  And when the holidays roll around and I climb up on the counters to get my turkey platter (ohhhh, I forgot to put that in "my favorite things"...it was my great grandmother's and we use it every year!) or the crystal tea pitcher, I will just take up the dirty wax paper, put down some clean and PRESTO...I am good to go!  ​

Come to think of it, I might even have one of my kids climb up there to get the stuff...just so they can see what a clean person Mom is  ;)​

It's a Pooh Bear day....

When it is a warm, windy day it reminds me of the Winnie the Pooh movie...it's "blustery" out!  It is also a reminder that spring IS right around the corner.​ And the storms blowing through tonight are definitely "spring showers."

Unfortunately some sick individual decided it was a good idea to move Day Light Savings up a few weeks.  Wears me out...I am a "dusk to dawn" kinda person which means I think I ought to be out "working" as long as it is daylight out.  Kind of liked shutting it down around 5.​  The next week of adjustment is going to be killer....

But today it was warm and I was able to start working on the nasty dresser and 3 legged table I brought home.  I sold a DIY project that has been in my garage for months...untouched...a Zenith console stereo.  I had big plans for it but I just have too much to do that NEEDS to be done.  The dresser is going to someone who needs it...not sure what will become of the 3 legged table but it will speak to me eventually.​

Funny thing...furniture speaks to me (so do my cats, but that's another story).  When I first brought my desk home, I had no doubt I would be painting the entire thing white.  But when I began to strip all the nastiness and abuse away, and discovered the beautiful mahogany lurking beneath, it was clear it did not want to be painted....same with the nasty little desk chair I pulled out of the attic. I had NO doubt I was going to sand and paint the entire thing...but when I stripped the nastiness away, again, it was clear it did NOT want to be painted.​

So when I saw this little table at the thrift store, I knew it was a nice little table.  Laminate top definitely could stand painting, but the legs and frames where beautiful and sturdy.​ Who doesn't need a nice little table!

IMG_8282.JPG

​But it spoke to me...."I want to be a beautiful bench now."  

And that is exactly what it is....

IMG_8302.JPG

Curses on the moles....

spring moles (3).JPG
spring moles (2).JPG

Spring is almost here and the daffodils are blooming.  I went to take pictures of a few beautiful blooms in my front flower bed, only to find the dreaded "mole runs" scattered about.  I know the little creep is in there...I have seen evidence of him in the last few weeks...mole runs...even saw him "bumping" along one time but even with my well honed, quick mole reflexes, I somehow missed him.  I believe there is a deep cavern under my front flower bed where they can quickly retreat.​ I expect my entire front porch to disappear into it one day.

If you are unlucky enough to have been cursed with moles, you completely understand my frustration, and subsequent obsession, with the little monsters!​ I spent years, and hundreds of dollars, pouring poison peanuts down mole runs, only to find out they are carnivorous and don't even eat that crap.

Myth buster #1...Nothing but a spade shovel (or pitch fork...I have both) and quick reflexes will kill the little monsters.   I have tried every old wives tale out there, mole traps, and treatments for grubs...you name it, I've tried it. Forget it...you are wasting your time and money.  And the more time you waste, the more time they have to construct an underground nation below your yard.

So I have found there is only ONE sure fire way of killing the little boogers.  Mind you, you will NEVER rid yourself of the creatures...once runs are established, you won't get rid of them...kill one, another moves in.  But on average, I kill 10-12 year.​

This process requires a great deal of skill and patience.  First, about an hour before you have an hour or two to spare (hahahaha!) smash down all the fresh mole runs. 

Myth buster #2...moles are NOT nocturnal and basically run all day.  So it doesn't matter when you do this.​

I use to take my coffee, cigarettes and paper outside every morning...walk down the runs, grab a lawn chair and my spade shovel, and settle in...in my bathrobe...and watch...and watch...and watch.  And when I saw the little booger "digging" I would pounce on him with my spade shovel, screaming and cursing at the ground.  I wasn't aware of what a sight that must have been until my new neighbor cautiously mentioned my frightening ritual.  She had NO idea what I was doing.  She thought I was "watching my grass grow" but had no idea why I was spearing it violently with a shovel while cursing at it. ​

I use to just pounce, spear the area where I knew the mole was digging, and leave it be.  The thought of digging up a bloodied corpse was more than I could stomach...but I discovered that sometimes even my best aim MISSED!!!!  So I started digging to make sure it was infact dead...only to find that sometimes it was only injured or worse, completely unscathed.  At first, I would humanely "relocate" the moles to large pastures where the only damage they could do would be to someone's livestock (JUST KIDDING! I took them out to the woods away from homes and livestock). ​

But honestly, after awhile I was so fed up with the creatures that it didn't bother me to pop them out of the ground alive and beat them to death with a shovel.  Problem solved...until their friend moved in.​ But I was waiting for them!  I was certain word would get out and they would stop coming to my yard.  Obviously they don't communicate with one another.

Myth #3...Lots of "runs" means tons of moles.  Nope.  They are pretty much territorial and usually there is only 1-2 moles per acre.  That means that one mole is tearing up your entire yard...seriously...one.  They can dig 100 or more feet in a day...so they are fast and constantly on a hunt for food.  As a matter of fact, the "runs" you actually see in your yard and flower beds are their "feeding runs."  They actually have other runs deeper and entire little caves even deeper...which is where they hang out in the winter (told you, an entire underground nation).  But they must eat a tremendous amount of food, thus the reason for their very active digging.​

Myth #4...Get rid of the grubs and the moles will go away.  WRONG.  Moles love grubs but they also eat a lot of earthworms.  And you DON'T want to rid your yard and beds of earthworms.  Several years ago I put down Milky Spore in my yard....it has made a HUGE difference in how much the moles run in the yard...usually they stay in the flower beds.  Well nourished soil, easy to dig.  Lots of worms and grubs. ​

Myth #5....​Moles kill your plants.  Wrong...again, they are carnivorous.  They eat meat, not plants.  If something is eating your roots, it is probably a vole or other rodent, not a mole.  Moles may inadvertently kill a plant by disturbing the roots, but most well established plants won't be bothered by them.  If your hostas or bulb plant roots are being eaten, you have a completely different problem.

I have a friend who has a few little Jack Russell terriers...there are some dogs who will hunt and kill moles.  I have a cat who I think is hunting them.  And if you have an animal that is proficient at hunting and killing them, you probably won't have much of a problem.  But then you have a problem with a dog who digs and big holes in your yard from that activity. 

If you ask me I think you should just use the mole hunting ritual as a way to take time to relax while enjoying your coffee and quiet time, communicate with nature (your grass) and work off some serious frustration.  After all, how often can you legitimately beat something to death without it being frowned upon by law enforcement. 

Off with its head...or upholstery...either one!

wingback_before.jpg

I promised to tell you the story of this sad little chair.​

I bought it YEARS ago at an estate auction.  I paid to have it reupholstered...​lots if I remember correctly.  And 15-20 years ago, the green fabric and the style was to my liking. 

But over the last few years, I have matured a tad and my taste has become more refined.  Okay, so I changed my mind about what I like and don't like.  Regardless, I didn't like it any more and I didn't want it.​

So, on Craigslist it went.  But for some reason, this pathetic little chair didn't seem to appeal to anyone...not even a little nibble. So one day in one of my manic "I CAN'T TAKE THIS CRAP AROUND HERE ANY MORE" moods, I picked it up to haul it to the curb.  See, in my neighborhood, if you set something on the curb of ANY value, it will be gone within an hour...I have done that with cabinets, vanity tops, light fixtures, furniture.  Gone.  Awesome.  Until you realize you could have taken it to Goodwill and gotten a tax write-off...but whatever.​

But then I got to thinking...if I can sew on a button and make a decorative pillow, why can't I upholster a chair?​

HAHAHAHAHAHAHAHAHAHAHA!  Seriously, what sane person thinks like that.​

Obviously ME!  Because that is exactly what I did.  I stripped the little thing naked, taking hundreds of pictures along the way, bought the amount of upholstery the little chart told me to buy for this style chair, Googled "how to upholstery a chair", found a great tutorial...and settled in to complete a project I was certain would take me a day at the most.  Lets just say, it took me MORE than a day just to get all the stinking nails and staples out of the thing.  I can't even remember how long it actually took to finish the job entirely. (My youngest daughter agreed to help initially but quit when her hands began to bleed...not me, I'm a trooper!)

office corner.jpg

This is now my little reading corner in my office...okay, so its really the cats' chair, but it looks good.  And a few side notes on the other items...the table is one of my Lane Acclaim tables I truly LOVE and adore...and buy whenever I can find one affordable. Hard to see, but on the bottom shelf are old wooden tape measures and a wooden level that were my great grandfathers and an old hand tooled leather briefcase that was my grandfathers. The wall is adorned with "things I love" as well....two original works of art by very talented artists (okay, my kids, but they are beautiful), my college diploma (nice to know it has some use) a cross stitch picture I did for my dad 20 years ago for Father's Day, and a picture of my BFF (my better half, Brian) and me on one of our first ski trips together! Things I love!​ The neeto mirror was a clearance at Hobby Lobby and the sweet little crystal lamp is a TJMaxx find!  And the red lantern was $1 at the thrift store and is filled with sea shells I picked up in California! 

Oh, and the pillow?  It was a lady's houndstooth jacket I bought at the thrift store for $2 and cut up for a pillow....sweet!​

And now you know the story of the sad little green chair that was headed for the curb when a demented women thought she could actually turn it into something beautiful....see, this stuff isn't hard...it just takes a bit of imagination and a tad of insanity! ​

My home office....

I will try to post "before/after" projects as I muddle along and try to figure this all out.  I always have something new in the works, but a lot of the "old" projects are fun and interesting....and hopefully inspiring! 

Last year I decided I was fed up with my old office....big clunky desk, big clunky dresser, big clunky mess.  The problem is, when I first bought this house 13 years ago, my "style" was more traditional...now I am to the point where I want sleek and more "mid century."  Honestly, if the only cleaner I had in my house was windex, I would be happy....which might explain why I put glass tops on all my furniture! 

Anywho, I was digging my way through a little "junk" shop one day and stumbled upon a desk and a dresser with distinct "mid century" flare.  I couldn't get it in my truck fast enough!  This led to a complete transformation of my entire home office!!


desk.jpg
desk after.jpg

Once I got the desk home and stripped down the nastiness from the top, I knew I couldn't paint it. Less one little cigarette burn (a reminder of WHY I shouldn't start smoking again) it was beautiful!  So I coated it with 4 applications of my favorite tung oil and kilzed and painted the bottom of it.  I had the "modern" hardware leftover from my masterbath remodel, so I slapped it on there to save my nails.  The desk chair has been in my attic for 13 years...and honestly, I have NO idea where it came from or how long I have had it.  But again, after stripping it down, there was no way I was painting it....solid mahogany under all the dirt and grime!  So it too got a few coats of tung oil and a new seat cover.   

IMG_8171.JPG
IMG_8647.JPG

One of the things you will see I do through out my house, is decorate with things I love.  The large diploma on the wall (to the left) is my great grandmothers University of Arkansas diploma from 1920.  The little bulldog statue on the desk (left corner) is one that sat on my great grandfather's desk umpteen years ago....both worthy of display! 

I will feature the dresser, refurbished paddle fan, and the sitting area (including the antique wingback chair I was literally carrying to the street when I decided to experiment on it)  in later posts....this room is loaded with "charm" and almost every piece has been refinished, reupholstered, repurposed or reinvented....stay tuned!!!