How to build a shop or garden cart...

I’m kinda bad at posting “tutorials.” There are SOOO many tutorials online for just about anything you want to do and my motto is to FIND THE ONE THAT MAKES THE MOST SENSE FOR YOU!!!!

That being said, I am going to TRY to post a tutorial for building a cart…for either your “shop” or maybe a deck or garden cart…or even a little portable kitchen island.

I shared here how I took an old shop cart I bought at an auction and cleaned it up for use as a kitchen island.

The function will dictate the materials you will want to use. If it is something that will be outdoors, you want to use pressure treated wood or even cedar. If it is something that will be in your garage or “shop” you can use plain ole’ pine…if you want something a little fancier, like maybe a kitchen island, you want to find some nicer wood that can be stained and oiled and used in food prep.

In this case, my daughter Katie, wanted something she could put her chop saw and tools on and roll in and out of the house. Kind of like my old shop cart….

…another auction find that I fixed up a tad to use in my garage. It holds my chop saw so when I need to use it I can just wheel it outside so sawdust doesn’t get all over the garage. And the bottom shelf holds many of my tools! Not pretty but super functional!

Since her cart won’t be stored outside, I decided to build the bulk of her cart out of pine 2 x 4s. The tops are 1 x 6 treated decking, but only because it is the perfect sizing…not because I necessarily needed the pressure treated wood.

So my shop cart is my “inspiration.”

The next thing I did was “make a plan.”

Again, whether you are building something simple, refinishing a dresser, or giving a room a makeover, you have to first find your inspiration, then make a plan.

In this case, “the plan” is a simple little drawing with dimensions and a material list.

Originally the plan was based on my cart dimensions…but Katie decided she wanted her’s a tad smaller, 20 x 30, so that altered the dimensions and materials just a tad. I ended up using only 1 of the 2x4x10s and 3 of the 1x6x8s.

Important reminder: a 2 x 4 is actually only 1 1/2 x 3 1/2…2x6 material is actually only 1 1/2 x 5 1/2….only the length is actual. This is important when designing any build so make sure you know what the actual dimensions are of any wood you buy. This chart can be super helpful….

I could have bought 4x4 material to make the “legs” but decided to just “stack” two 2x4s…personal preference. If you decided to use 4x4 material, skip this step and buy 2- 4x4x6 posts and cut them down to 31” each.

The legs will be 31” because I wanted the height of the finished cart to be around 35”. The wheels I used are 3” high and the top is 1” thick.

Again, I used 2 x4s to construct the legs….

I cut 8 pieces 31”, glued (SUPER important to glue ALL joints)….

….stacked, nailed with my new Mother’s Day gift (LOVE!)….

…then screwed them together with 2 1/2” screws.

I nailed them first just to hold them in place…then I added screws.

After each leg was built, I attached the wheels to one end of each using 2” screws!

Next I built the top and shelf “frames.” Since Katie wanted it to be 20” x 30”, I cut 4 boards 29” (the face) and four boards 16”….the 16” boards are the sides. (1 1/2” thickness of each of the face boards = 3”…basically a 19x29 frame allowing 1/2” for overhang on the top)

IMG_6447 copy.jpg

I used my kreg jig to construct the tops….

…if you don’t have a Kreg jig, get one! Or you can just glue and screw the top together.

Then it was time to attach the frames to the legs.

I used screws and glue to attach them and since I wanted the screw holes on the front to be a tad fancier, I used my little “hide the screw” trick.

In this case I used 3/8” wood plugs to cover each screw hole…first I drilled a hole with a 3/8” bit about 1/4” deep, then I used a 1/16” bit to finish drilling all the way through the board.

TIP: Predrilling holes will keep the wood from splitting when you use screws!

I attached the legs to the frames using 3” screws through the “predrilled” holes and glue (GLUE IS IMPORTANT! USE IT!)

On the sides, I just used screws…no fancy holes or plugs!

I added the little plugs…just a dab of glue in the little holds, then popped them in…super simple but a nice detail!

After the frame is constructed it is just a matter of adding the tops…again, I used 1 x 6 pressure treated decking boards. I cut them to fit, glued and nailed. Simple….

I added a little handle made from galvanized pipe and fittings….

You don’t have to add a handle or you can keep it simple by using a cabinet pull…I just like the “industrial” look of the galvanized material….

I also attached a power strip to the back…again, not something you have to do!

Super simple build! Seriously, this is not hard!

That being said, you do want a little chop saw and cordless drill to construct this project (nailer and kreg jig are option!).

But if you took my advice, you have these tools…and now you have a nifty place to store them!


Wall planters....

My counter tops will be installed tomorrow… I AM SOOOO EXCITED!

I will share those next week but until then I wanted to share a simple little addition to my kitchen decor.

For some time I have wanted to grow herbs for cooking but I really don’t have the space for planters on my counters. I guess I could put some on the deck, but I just have this vision of reaching over and pinching off a fresh herb while I cook!

(Keep in mind if I have garlic, salt, and pepper, I’m good. And trust me, when these herbs croak, the planters will be filled with fake greenery.)

When I posted this picture last week, I realized I have the perfect spot for herb planters….

On the side of the upper cabinet!!!

So I went searching for wall planters on Amazon.

I found two…these

And these….

I wasn’t sure which I would like better, so I ordered both.

I like the diamond ones better…

As you can see I only used three….Katie took the “spare.” I had planned to return the other set but she liked those as well, soooooo.

So far I have planted rosemary and thyme…I would like to plant cilantro as well, but in the meantime I used a little fake greenery I had on hand.

This window doesn’t get direct sunlight so I am not sure any will thrive. No biggy…the faux greenery looks pretty decent.

Time will tell!

I worry that the little planters make that space seem kind of “cluttered.” Maybe when the plain white tops are installed it won’t seem so busy…we’ll see BECAUSE THEY WILL BE HERE TOMORROW!!! YEAH BABY!


Maintaining a positive attitude during these uncertain times....

I am fortunate…my life has changed little since the entire nation went on lock-down. I own rental property so I have to go to work. Brian is in the grocery business so he has to go to work.

We tend to be “home bodies”…we rarely eat out, the last movie we saw in a theatre was “Shrek,” we bike and have a home gym so we don’t “go” to a gym…our favorite hobby is fly-fishing and that is a pretty solitary hobby. After raising 5 kids who participated in baseball, football, choir, band, softball, theatre, etc…we are enjoying our “down time.”

Little has changed. A few tiny sacrifices…we can’t go to our favorite breakfast restaurant on the weekends…but I cook at home. We kinda miss our weekend run to Starbucks but that is a habit we probably need to break anyway. I don’t go to the grocery store with Brian anymore, but trust me, not something I miss!

The biggest sacrifice has been our family Sunday dinners…I miss my kids and our grandpuppies terribly. I am hoping we can all have a big Mother’s Day celebration next month…fingers crossed!

But let’s be honest…regardless of how little my life has changed, the “negative” and “fear” is all around.

This is one of those times when we all need to dig deep to find SOMETHING to be grateful for and really focus on that…because if we don’t keep a positive mind set, it is going to be too easy to mentally dive into a pretty dark place.

There are so many negatives that can consume our minds…unemployment, finances, basic necessities, home schooling, your future retirement… just your future in general.

Here are my “tips” for not letting the “negatives” overwhelm you

1) Edit your social media. Get rid of any “friend” who is always posting anything political or negative. If they don’t post fuzzy kitty videos or dog memes. delete them. Be VERY selective about who and what is allowed into your brain! Critically limit your “online” social time in general.

2) Seriously limit your news consumption. Personally, I would limit it to maybe one national and one local segment a day…if that. It is one thing to stay informed, it is another to let it take over. This includes your “online” time….social media is chalked full of “news” links…AVOID THEM!

3) Get out and get some exercise and fresh air. Seriously, GET OUTSIDE!!!! Even if you have to bundle up or carry an umbrella. Here is a good swap…for every minute you watch the news, you walk. That will cure you from sitting around sucking in the neganews. Walk, ride a bike, pull some weeds, plant some flowers…do something outside every day!

4) Only read uplifting and positive books, magazine, and articles. This is not the time to amp up your “fear level” by reading scary books…this is not a time to read doomsday crap. Keep it positive and uplifting.

5) Eat right. Sugar and carbs mess with your body and your brain. Again, not the time to be chowing on empty calories that don’t do anything but hurt you. Eat healthy if for no other reason than you need to be in top shape if you do get this nasty virus!!!

6) Keep a set sleep schedule. Go to bed, WITH THE TV OFF, at a decent hour and get up at the same time every day. Make your bed so you aren’t tempted to crawl back in it during the day.

7) Make a list of everything you want to accomplish the next day. I’m not saying you WILL get it all done…you may have to carry something over to the next day and maybe the day after that…but at least it is in writing and you know what you WANT to accomplish!

8) Take a shower, fix your hair, and get dressed. Sitting around in your pajamas all day is just an invitation to waste the day away.

9) Do something kind for someone else. Run an errand for a neighbor, volunteer, buy UPLIFTING books online and send them to neighbors and friends, go be a dog walker at the local animal shelter, clean out your closets and donate stuff you really don’t need! Leave your own pity-party and DO SOMETHING for someone else.

Stay focused on the positive. You may have to really dig deep to find it, but trust me it is much easier to dig deep to find a positive than it is to dig yourself out of a negative “pit.”

A friend posted this on Facebook…I stole it because it is exactly the kind of thing you need to print off and post on the fridge and bathroom mirror!!!! Positive affirmations!


I’ve posted this before and I will post it again….

And remember, EVERYONE around you is experiencing loss and fear…they are GRIEVING just like you…so be kind and respectful and patient.

Remember, AND UNDERSTAND, that fear, frustration and hurt are the catalyst for ANGER!!! Everyone is fearful and frustrated right now.

Not an excuse for bad behavior but knowing this may help you deal with your own feelings and understand the emotions and behavior of those around you!

Stay safe and healthy!

My soap box...to pay or not to pay your rent.

Today I want to use this blog platform as a soap box.

I know everyone is suffering right now…physically, psychologically, emotionally and especially financially.

But people, you need three things in life to survive and as a landlord I provide two of those things…shelter and water.

I am a landlord. I am the person who many believe is one step above (or below depending on your personal experiences) a used car salesman. I do want to point out that my apartments are “affordablet” units…so they are not expensive to live in and have very few frills. For those of you who live in areas with higher rent or who live in “high dollar” rental dwellings, this “rant” may not apply to you entirely…but PLEASE consider the underlying message.

I am a good landlord. I make sure maintenance is done when needed and the grounds are well maintained. I make sure units are SUPER clean before new tenants move in. I make sure there are no bugs. I work hard to keep the area safe and crime free.

And more importantly I work with people when they can’t pay rent for REASONABLE reasons. Not “I lost my job”…you literally can walk two blocks from my complex and get a job…even now. “My car broke down”…I am 1/2 block from a bus stop.

My favorite…an excuse from a stripper… “I couldn’t work this week because I was….” Let’s just say it was “her time of the month.” I kid you not.

Right now, times are tough…but I live in a state that is not under a “shelter in place” order and we haven’t been hit terribly bad with the virus. Heck, Lowe’s parking lot was jam packed Sunday afternoon.

Yes, companies and businesses, large and small, are laying people off…but there are also companies who are begging for workers. Brian works in the grocery business and they are hiring like crazy.

Also, it is tax season and most people have gotten or will get their tax return. The government just sent out a stimulus payment to tax payers (the amount would cover two months of rent in my apartments) and unemployment is paying more than your average hourly worker makes in our state.

So what has my panties in a wad….

I have a real beef with the people who are TELLING people not to pay rent. I heard it just this past week on the Bobby Bones show…Barbara Corcoran, Shark Tank panelist and NYC real estate tycoon, telling people to NOT pay their rent…landlords can’t evict you so just don’t pay it.

Okay, first….WRONG. The federal government has stopped evictions on HUD housing and properties with HUD loans…but I am not a HUD housing project and I do not have a HUD or government backed loan. Nor do many landlords. So yes, we can evict.

Here is the catch…an eviction process is costly and time consuming. While it may sound simple, it is not. I personally have to hire an attorney because the properties are in a corporation…while I could do the filing myself, I cannot legally.

I would rather work with a tenant than go through the hassle.

So, here’s my soap box…

First, you have to have shelter. It is a necessity. In my case, I also pay all the utilities and water is always top on the list of “have to haves”…that is why I say I provide two essentials to life.

Second, NOTHING should take priority over your housing expenses. Except maybe food…and there are places that literally give it away. Car loan? Defer it…the banks are working with people. Court fines? Defer it…courts are working with people. Student loans, credit cards, furniture rentals…all things that can be DEFERRED for the time being.

Don’t even get me started on cigarettes and booze. If you can still buy either and not pay your rent…wow…just wow!

Your landlord still has things they HAVE to pay even if you don’t. A mortgage…most of us have a mortgage on that property. Property taxes…the state isn’t going to let that one slide! Property insurance…haven’t gotten anything from State Farm saying I don’t have to pay insurance for the next few months. The bug guy…that reason should be obvious! Utilities…yes, some are “deferring” utility payments…but I still owe it and will still have to pay it! And then there are all the taxes and fees I have to pay yearly, quarterly and monthly…holy crud!

Maintenance…if your water heater/stove/HVAC/refrigerator goes out…you want it fixed. If a water line bursts or the sewer line breaks (both happened this past year to the tune of over $5K) you want them repaired. If your roof leaks, you want it fixed. If your window gets busted out, you want it replaced. Yes, things still break and still need to be fixed…imagine having to pay for a new water heater, refrigerator, and stove all in one month…welcome to my world…plus some!

The sad thing about this “just don’t pay mentality” is that it really hurts the elderly and disabled. They are going to get a check every month…and they are going to pay their rent. But because the other tenants don’t pay I can’t afford to replace refrigerators or fix stoves or repair the HVAC for the elderly and disabled.

Because you don’t use every resource you have to pay your rent…your tax return or stimulus check, unemployment, car loan, dig ditches…whatever…THEY SUFFER!!!!

Also, I would like to point out that NO ONE encourages you to just walk into grocery stores (or Wal-Mart or Target or any convenient store) and just TAKE what you think you need or want. Food, shoes, personal products. No, that is theft…you can’t just walk in and take what you need just because you don’t have any money…you can’t just drive up to a gas station and fill up your car and drive off without paying because you don’t have a job. They, just like landlords, have overhead and expenses. They, just like landlords, don’t have the ability to just GIVE everyone things they need.

If you still resent the hell out of your landlord and think all are just a bunch of money grubbing thieves, here is my suggestion…go buy your own house. You take on the financial responsibility of owning a home…you take on the responsibility of paying the taxes and insurance…you fix or replace the refrigerator or stove or HVAC or water heater. You replace the roof when it leaks. Mow and maintain the yard.

Go get a loan, buy a house, and take on the responsibility.

If you cannot or will not do that, then maybe, just maybe, you should be thankful that there are people out there willing to take on the RISKS AND RESPONSIBILITIES so you can have a roof over your head.

In the meantime, remember you have a responsibility to do EVERYTHING in your power to pay your rent. You have a responsibility to make it a PRIORITY!

In spite of what some people spew irresponsibly on national radio.

I wish I had the financial ability to just “give” everyone a place to live, free of charge. I do not. I am living week to week just like everyone else. I am still going to work every day to make sure my tenants have what they need.

I will stand down now…

All that being said, I do have a very “uplifting” post prepared that I had originally planned to post this week…so I may post it tomorrow. Just a few tips on staying positive during these trying times…stay tuned!


Bedroom step repair with gel stain...

About six years ago I installed laminate flooring in my master bedroom. I haven’t regretted it for a second.

One thing I did to save a little money was use gel stain on the oak thresholds and tread rather than buy new that matched the laminate. As I mentioned, laminate thresholds can be VERY expensive!

I sanded the finish a tad on each piece and then applied three coats of General Finishes gel stain and a coat or two of poly.

Usually gel stain holds up a tad better. I can only assume it has not on this step because I didn’t put enough top coat on it to protect if from constant foot traffic.

I decided the only way to fix this issue was to strip ALL the finish off the step…down to bare wood.

This entailed using my 1/2 mixture (1/2 acetone, 1/2 lacquer thinner). I didn’t want to get the stripper on the painted trim so I made sure to tape it all off with 3 layers of tape and put plastic down to catch any drips.

After stripping all the finish off, I lightly sanded it, wiped it down with a tack cloth then applied stain. I had to apply three coats to get a deep color that matched the floors. I let the stain dry well. This time I used hard-core poly specifically for flooring…three coats( lightly sanding and tacking between each coat)!

Niiiice….

A tiny boo-boo…seems some of the stripper managed to sneak through the tape and muck up the paint…oh well, another “honey do” on my list..

I used the same gel stain process on my bedside table tops when I painted them a few years ago. Brian’s has held up fairly well but mine has not…to many glasses of water and cups of coffee without a coaster!

My plan is to strip all the finish and gel stain off the tops of those as well and refinish them…someday soon!

I ordered new black door knobs for all the downstair doors. I painted the door knobs years ago, then painted the doors black…still LOVE! I used a good metal primer and paint on them and they have held up fairly well but I found relatively inexpensive knobs on Amazon so I decided to order them.

I have installed passage knobs and I am still waiting on the privacy knobs!

Just a few little projects to kill time during my home quarantine…projects I have been avoiding. Maybe I’ll clean out a few closets upstairs. Who knows…I do have a pile of good books I could work through as well!!

I’m kind of a homebody so I am use to being home…but when someone tells me I CAN’T leave, the 5 year old in me comes out!

Guest bath makeover....

I’m trying to complete a few small projects…a few weeks ago it was my laundry room.

This past week it was my guest bath.

The guest bath is right across the hall from the laundry room…since I painted the laundry room a pretty “sagey green” I decided to tone down the blue in the guest bath. While I was at it, I decided to change out the counter top and backsplash.

I installed a glass vessel sink, a super awesome faucet and new lighting when I gave the room a little makeover a few years ago (probably a decade ago!) and I still love them so I didn’t need new ones.

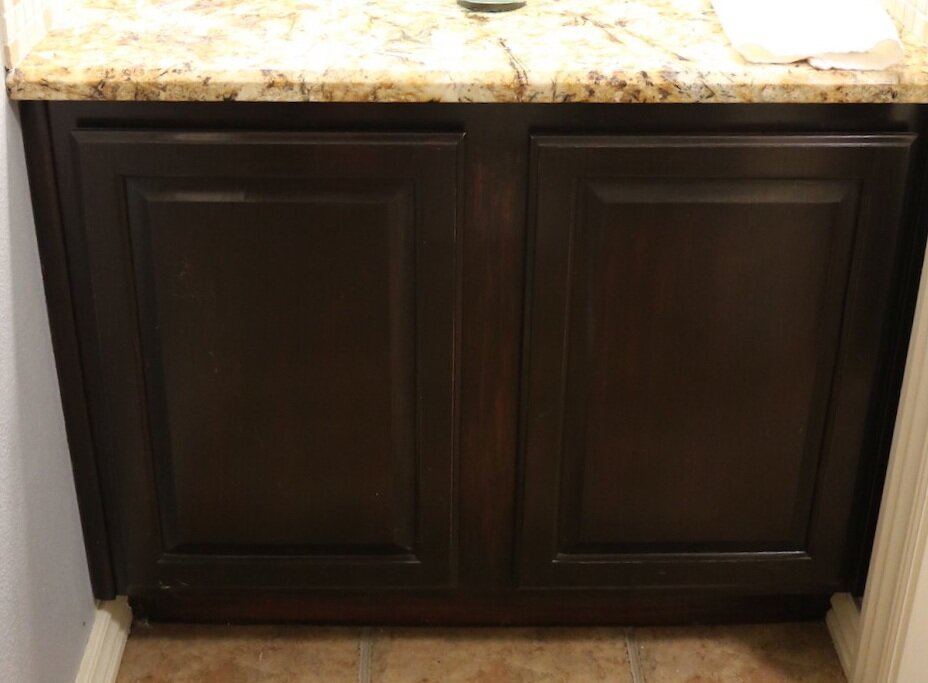
(My dismal attempt to photograph dark cabinets with no natural light!)

The wall decor over the toilet had yellowed a tad because I sealed it with poly. (Yes, poly yellows…to avoid, use polycrylic or a clear coat sealant)

My “plan” was to paint the walls and trim, change out the top and backsplash, strip the cabinet and mirror frame for a “lighter” wood stain and repaint the wall decor.

After painting the room a lighter color and installing a lighter top (white quartz) and white backsplash and lightening the wall decor with a fresh coat of white chalk paint, I decided to stick with the vanity cabinet and mirror “as is” for the time being. I had stained the vanity “java” with gel stain years ago and I think it looks fine (but impossible to photograph!)…the mirror has a “java” stain finish, so it coordinates well with the vanity.

Just these few easy changes made a huge difference…the paint really lightened and brightened it.

Still love the Devoe prints I added two years ago!

One of my favorite little projects…a TP cubby! Super simple!

Fresh white chalk paint with a tiny bit of distressing…this time I sealed it with a clear coat so hopefully it won’t yellow again!

I would like to mention my trim paint…I painted it the same color as ALL the trim in my house. White would have been great but I decided to stick with the color of the trim throughout the house…just my personal preference.

Paint.

A must when you want to change a room! Whether you paint the walls or furniture, JUST DO IT! Paint is relatively cheap (only took 1/2 a gallon for this room) and if you don’t like it, you can always change it!

I love this little makeover. I have been coveting white quartz for my kitchen tops and this tiny bit has REALLY stoked the fire.

Who knows….

ANOTHER laundry room makeover!

One nice thing about blogging is I can go back and know exactly when I did something…case in point, the laundry room.

Here I shared how the laundry room went from this….

…to this….

…in 2014.

I raised the cabinets to the ceiling and painted them. I painted the walls, stenciled the little birdie murals, installed a new light fixture, purged and added a little storage cart. Nothing earth shattering but enough to dress it up a tad.

The most dramatic thing I did to the laundry room was installing reed glass in the door. Here I share a tutorial on how I turned a plain ole’ hollow core door into a really awesome feature!


One thing I debated and am now glad I did not do…put a solid “top” across both the washer and dryer. I worried some day I might go back to a top load washer. Sure enough I did! The shelf is perfect and it is an element I kept!

The only other changes over the last few years was a little kitchen cabinet I removed in one of my kitchen makeovers and put in the laundry room and I moved the sewing machine to a little portable table.

When I painted the walls I was a tad frugal and used some paint I had on hand. I decided to go for broke and actually buy an entire gallon of custom color paint this time. Gasp! I wanted a soft “sagey/greenish” color so I did what I always do…headed to my favorite DIY store, picked up about 15 paint samples and brought them home. Took me all of 2 minutes to pick the perfect shade! Seriously, I think this is the perfect “sagey/green” color…I wish the photos did it justice!

THIS is the process I use for any “makeover”…whether a room or a piece of furniture. Find your inspiration, make a plan and execute the plan.

Inspiration came from cruising Pinterest. As I said in the first makeover, I don’t have the laundry room of my dreams but I have a space I want to be pretty and organized. I knew exactly what I wanted (the plan)…paint, storage, lighting and tile!

First step….PURGE! Empty out the entire space.

Yes, you are going to make a mess…there is just no way around it!!!

My goal is to NOT put back most of the stuff I take out. Now in my case, I am a pretty good “habitual purger” so I have very little “stuff”….but there are always things lurking that have been untouched for years and can go!!!

Next, remove the old light fixture, paint the ceiling (with a flashlight) and install a new fixture. It wasn’t that i disliked the old fixture, but it had fluorescent bulbs that got really hot and one of the three sockets evidently had a short or something because I could never get it to work right. I tried to change out the sockets in the fixture to accommodate LED bulbs, but the wiring was too short and I finally said “FORGET IT” and bought a new fixture.

Remove switch plates, shelving, and stuff on the walls.

Wipe everything down with a damp cloth….don’t paint over dirt!!!

Build storage shelving. I have lived here long enough to know what I need and how I want a space to function.

Caulk the new shelving.

Paint the trim, then walls.

A new shelf…I went with poplar sealed with a clear finish…no stain. I may or may not stain it or paint it in the future…for now, I like this look!

Then a debate. Do I or don’t I stick with my original “plan.”

So my original “plan” called for tile on the wall behind the washer and dryer. I really gravitate towards that look and every time I see a picture of it on Pinterest, I really love it. Yes, that would mean losing the birdies…

HOWEVER, as I have mentioned many times before, NOTHING is “timeless.” And I know me well enough to know that in 5-6-7 years I will not like whatever tile I pick out today…which means that sometime in the future I will have to remove the tile, repair sheetrock and do something else.

NOT something I look forward to. A huge reason why I didn’t put wallpaper in this house 20 years ago, even though it was still a “thing.” I had removed enough wallpaper in my years to know I never wanted to do it again.

So…no tile…for now! I painted the wall and added a little “farmhouse” mirror. The light fixture and the mirror add a touch of “farmhouse fad” without breaking the bank. This is a small room so the mirror is a huge plus!

The storage shelving is THE BOMB!

Love it…it is something I have wanted to do for years! And again, since I have lived in this house for 20 years, I knew exactly what I need. A place for doggy towels, some simple baskets for light bulbs and dust rags and plenty of room for my detergent stockpile! I designed the shelving so I would have the perfect spot for my sewing cart (See how I “upcycled” an old typewriter cart to make a portable sewing table HERE!) At the last minute I added a shelf above the sewing cart so I would have space for a sewing machine if I ever did away with the cart in the future…right now it holds my little coupon box.

Keep in mind that the cart between the washer and dryer I built on the last makeover holds a ton of stuff…dryer sheets, MORE detergent, the iron, spray starch, etc.

The back of the cubby is perfect for storing paints…remember, STORE YOUR TOUCH UP PAINT IN THE HOUSE!!!! Not in the garage or storage building!

Since I now only do laundry for two, my laundry room isn’t near as chaotic as it was when I was raising kids. But whether you do 8 loads a week or 30, there is NO reason to have a disorganized and blah laundry room. Get it organized. Make it a space that is beautiful…it won’t take the sting out of doing laundry but maybe it will make the experience a little more enjoyable.


Today I muse...about health and wellness.

Brian was down with a bronchial virus last week so he was struggling to do anything active. I even had to do his vacuuming chore.

This past Saturday was a relatively nice day so I decided to take Cleo for a brisk walk.

I got to thinking.

In my 20s, 30s and really even into my 40s I really took my health and physical well-being for granted. Yes, I had my aches and pains…I’ve always had a crappy back and this thing with my fingers and toes when it is cold. I wasn’t the least bit thrilled when I had to start wearing reading glasses in my 40s. But for the most part I have been relatively healthy and able bodied most of my life.

I took it for granted. I griped about small aches and pains and didn’t cherish the fact that I could pretty much do and eat what I wanted without care or concern. I never really had an issue with excessive weight or having to really watch what I ate. I could work all day on a project or in the yard, and other than being “worn out” at the end of the day, I didn’t suffer too much. I remember a time when I could rake all the flower beds, compost and til, mulch and plant all in one weekend.

Now it takes me MONTHS to get my yard dressed for summer! Now I look at a cookie and gain 5 pounds. Now I project til noon and feel like I have been run over by a truck.

“Taking advantage” meant I didn’t really focus at all on eating healthy and getting REAL exercise. Let’s be honest, running crazy to ball practices, band performances, choir concerts and school functions isn’t really exercise and picking up a Sonic wrap verses eating a ballpark hotdog isn’t really eating healthy.

So I MADE A CHOICE to start taking better care of the most precious commodity God has given me…my body. I have started eating better. We have started biking and we make a real effort to stay active even in the cold months!

More importantly, I am GRATEFUL for what I CAN do right now!

As I have become less comfortable with slinging 80 pound bags of cement around I am more willing to ask for help. Rather than load heavy sheets of plywood myself, I ask for a loader. Rather than wrangling large privacy fence panels into place, I call my son and ask for a few hours of his time! Rather than feeling like I have to get my entire yard done in one weekend, I have learned to enjoy getting out and doing a little at a time. Rather than eating a huge bowl of ice cream or plate of cookies, I grab a handful of nuts or a piece of cheese.

I have come to terms with my limitations.

So I make adjustments to what I can do and eat, and DO NOT FOCUS ON WHAT I CAN’T!!!

No matter what your physical limitations or health issues, there are always CHOICES you can make to do better and eat better.

I remember one time talking to someone (no names) about what they could do to be more active…can’t ride a bike cuz my back hurts, can’t walk cuz my feet hurt, can’t swim cuz the cold water hurts.

I gave up…it was apparent that no matter what suggestion I made, they were going to focus on what they COULD NOT do verses finding something they COULD do!

Focusing on the negative verses finding a positive. NEVER a good thing!

Rather than focusing on the unhealthy things I CAN NOT eat, I focus on all the great things I CAN eat.

Rather than focusing on the things I CAN NOT do, I focus on all the great things I CAN do.

Because, sadly, we can’t go back and change the bad decisions we made in our youth that resulted in the wrinkles (thank GOD they don’t hurt!), the extra pounds and the aching joints!

Brian and I started zip-lining…IN OUR 50s! It is sooooo much fun. I have a horrible back and I was really concerned it would not be something I could do…but I did it and love it.

We fish….we bike…we walk…we work in the yard.

We get out and enjoy the things we CAN do rather than focus on the limitations of our age and a life time of “body abuse.”

Recently I have had a few opportunities to sell my apartments.

Sweeeet! That was the plan…build them up and sell them.

But here is the problem…as much as I really dislike having to paint and repair and mow and haul and blah,blah,blah,…what am I going to do with myself? Those apartments have not only afforded me the ability to make a comfortable life for my family, they have kept me active! Yes, the years of throwing around bags of grout and sheets of plywood, hauling abandoned furniture and scrubbing floors has taken a bit of a toll on me, but I have accepted my limitations and now know when to call in help.

No matter what your physical limitations are, there is always something you CAN DO to stay active. And keep in mind “active” is a subjective term. For some walking to the mailbox and back may be all the activity you can muster…but BE PROUD OF YOURSELF!!

When Brian and I first started riding bikes we were lucky to ride 5 miles and we often had to walk small “inclines.” Now, we can regularly bike 15-20-25 miles and while we still grumble at the “inclines,” nothing feels better than making it to the top!!!

We didn’t focus on what we COULD NOT do when we first started.

Do NOT be discouraged about what you can’t do or what you can’t eat. Give yourself a break!

Focus ON THE POSITIVES…what you CAN do…what you CAN eat. No, it’s not what “it use to be”…but that really is all a part of “life’s journey.”

Hey, here’s a positive. Not only can I no longer eat what I want or do what I want, but I am also not making the same stupid decisions and choices I made 20 years ago!


New vinyl windows and a little window seat makeover...

This is one of those “needs” with a little “want” thrown in.

Any time I think about buying something or doing something I ask myself “Is this a need or a want.” Wants are okay…as long as you don’t go into debt for them or harm another person in pursuit of your “want.”

The “need” was new living windows. The old arch window was cracked and had condensation between the panes.

I have managed to ignore it for some time because in the hot months I have a temporary shade in it and in the fall and Christmas seasons I have cute little vignettes that block it…but this time of year it just consumes this room and it is near impossible to ignore!

The lower window was the original aluminum window and that thing might as well have been wide open on a cold blustery day. It leaked cold air like crazy!

So…a need.

As you will notice I changed up the “configuration” of the window…I went with a fixed window in the middle with two crank-outs (technically called “casement” windows) on each side. I have a crank out in my bathroom and I LOVE it…super easy to open and close!

When I measured for the new window I measured the outside opening…that is because the new window was going to be installed from the outside and I had to make sure it would slip between the brick.

While it fit snug between the brick…

… it had 1/2 “gaps” on the inside…

Usually the new window would slip in right behind the sheetrock that butted up to the old window…not the case here. I suspect it is because whoever bricked this house did not brick over the old window properly.

No biggy…it gave me ample room to put in A LOT of insulation! Silicone caulk around the outside…a must for ANY window! There is NO air coming in around this puppy!

It did mean I had to trim out around the new window. Again, no biggy. I used 1x4 pre treated boards and flat molding…good as new!

One issue I had was the existing seat cushions…they were not going to work because of the window crank….

The cushions are really not an issue for several reasons

I only added the cushions to help block some of the air leaking in around the old window. Second, the fabric has faded over the years and I needed to recover them! And lastly, nobody but the cats sit in this space so comfort is really not an issue.

So the cushions can go…but then I am left with the stark white of the faux marble…ick. Again so 90s!

Sooooo….I decided to remove the faux marble and add stained wood “bench” type seating before I put up the new trim!

Course I wanted walnut…but finding walnut boards proved to be impossible. I ended up using oak boards…NOT my favorite wood, but it was either that or poplar (too “green”) or pine (too ick).

The marble was super easy to pop off….heavy as crud but simple to remove. It was just siliconed in.

I bought 1x6 and 1x4 oak boards. I like the “plank” look so I used the router to add a VERY small groove on the top edge of each board. On the board that would be on the outside edge , I used the router to round the edge.


Again, I did not take pictures of the “process” or make a tutorial…I am a HORRIBLE teacher/blogger! Just sharing what I did!

After cutting each board to the proper width and routing the edges, I stained them with brown mahogany stain and sealed them well with poly BEFORE installing them.

Once the finish was dry, I finally got to use the biscuit joiner Matt got me for Christmas two years ago! I love this little tool. Because of the layout of this bookshelves, I couldn’t make the entire seat in one piece. I had to lay in each board one at a time. The biscuit joints allowed me to get a tight, even fit without having to nail into the top of the seat! Love!!! I just glued the “biscuits” and edges, and slipped them together!

After the new wood seats were done, I trimmed around the new window.

I removed the blind from the side window…after 20 years of neglect that thing was pretty nasty.

I will eventually replace this window as well since it is one of the original aluminum windows.

I haven’t decided what to do about window dressings. I have lived without a blind in the big window for years…we live at the end of a cul-de-sac and I don’t roam around in this room “indecent” and this window faces south so it doesn’t get a ton of sun in the summer months. The side window faces the fence and there is little view to the inside of the house so for the time being, I think I’m fine without a window covering!

I love the new look…again, I think stained wood always adds a little warmth to an area and this big sucker could use some “warmth.” And the new windows are AMAZING!!!! We have winter weather this week and not a drop of cold air can be felt around the window…and I CAN NOT WAIT to crank these babies open on a warm day!!!!

This photo of the outside reminds me of how “blah” the house looks in the winter compared to a summer view…

This one reminds me that we desperately need to power wash the brick this spring!!!!


I haven’t painted the trim just yet…truthfully this entire built in needs to be painted. I haven’t painted it in 20 years and I know it was originally painted with alkyd (oil-based) paint.

When we painted Matt’s bedroom a few weeks ago, he found a new “hybrid” paint…an acrylic alkyd paint they SAY will go over oil based OR enamel paints. I know the paint went on like an alkyd…leveled beautifully….and cleaned up like an enamel (with soap and water!)

While the paint went on well and cured well, my biggest concern is durability. This area gets a lot of wear and tear and I don’t want a paint that dings easily. Oil based paints are outstanding for furniture and wood pieces…super durable!

So I am going to wait a bit and see how Matt’s holds up…in other words, let him be the test monkey…lol! If his trim holds up well, then I will use the hybrid paint. Or I might just bite the bullet and use an oil-based. I know me well enough to know that a bug can bite me at any moment!


Making the prefect photo frame....

I don’t consider myself a “crafty person” but I do know how to use a hot glue gun!

I have the coolest photos of Matt and me when we went to New York, and of Katie and me when we went to New York…all taken at the Top of the Rock in Rockefeller Center. Seriously cool pictures that I want displayed. But I could not find a frame that worked for all four photos!

I bought four 5x7 frames, trimmed the photos to fit and then hot glued the frames together to make one big frame for all four pictures.

The frames I used are actually desk top frames so I just popped the little “stands” off.

Super simple and a great way to make one frame out of four different frames. You could do this with different colors of frames, different sizes, just about any combo of frame you can imagine!

Simple and inexpensive.

A TIP: I like these little sawtooth picture hangers but the tiny little nails always give me grief…I just can not hold them and hammer them in at the same time. My trick is to use needle nose pliers to hold the little nails.

You are welcome!