A new "before and after" by SIS....

Man oh man...what a difference a day...or just a few hours...can make in NW Arkansas.  Beautiful and warm this morning and now it is too cold to even work on my dressers.  Suppose to be in the 40s tomorrow, with a chance of snow...craziness!​

Anywho, since I can't project outside and I really don't want to do what I NEED to do IN the house because of this "spring fever" bug I have, I thought I would share one of Sister Sarah's projects.  As I have mentioned, Sarah (my oldest daughter) likes to "project" but with two active boys it is tough.  I remember (and MISS) those days!!  That time in your life when you want to be in the garage sanding and painting, but while you are doing that your youngest is locking himself in the dryer or taste-testing your sleeping pills (yes, that would be my youngest grandson!) 

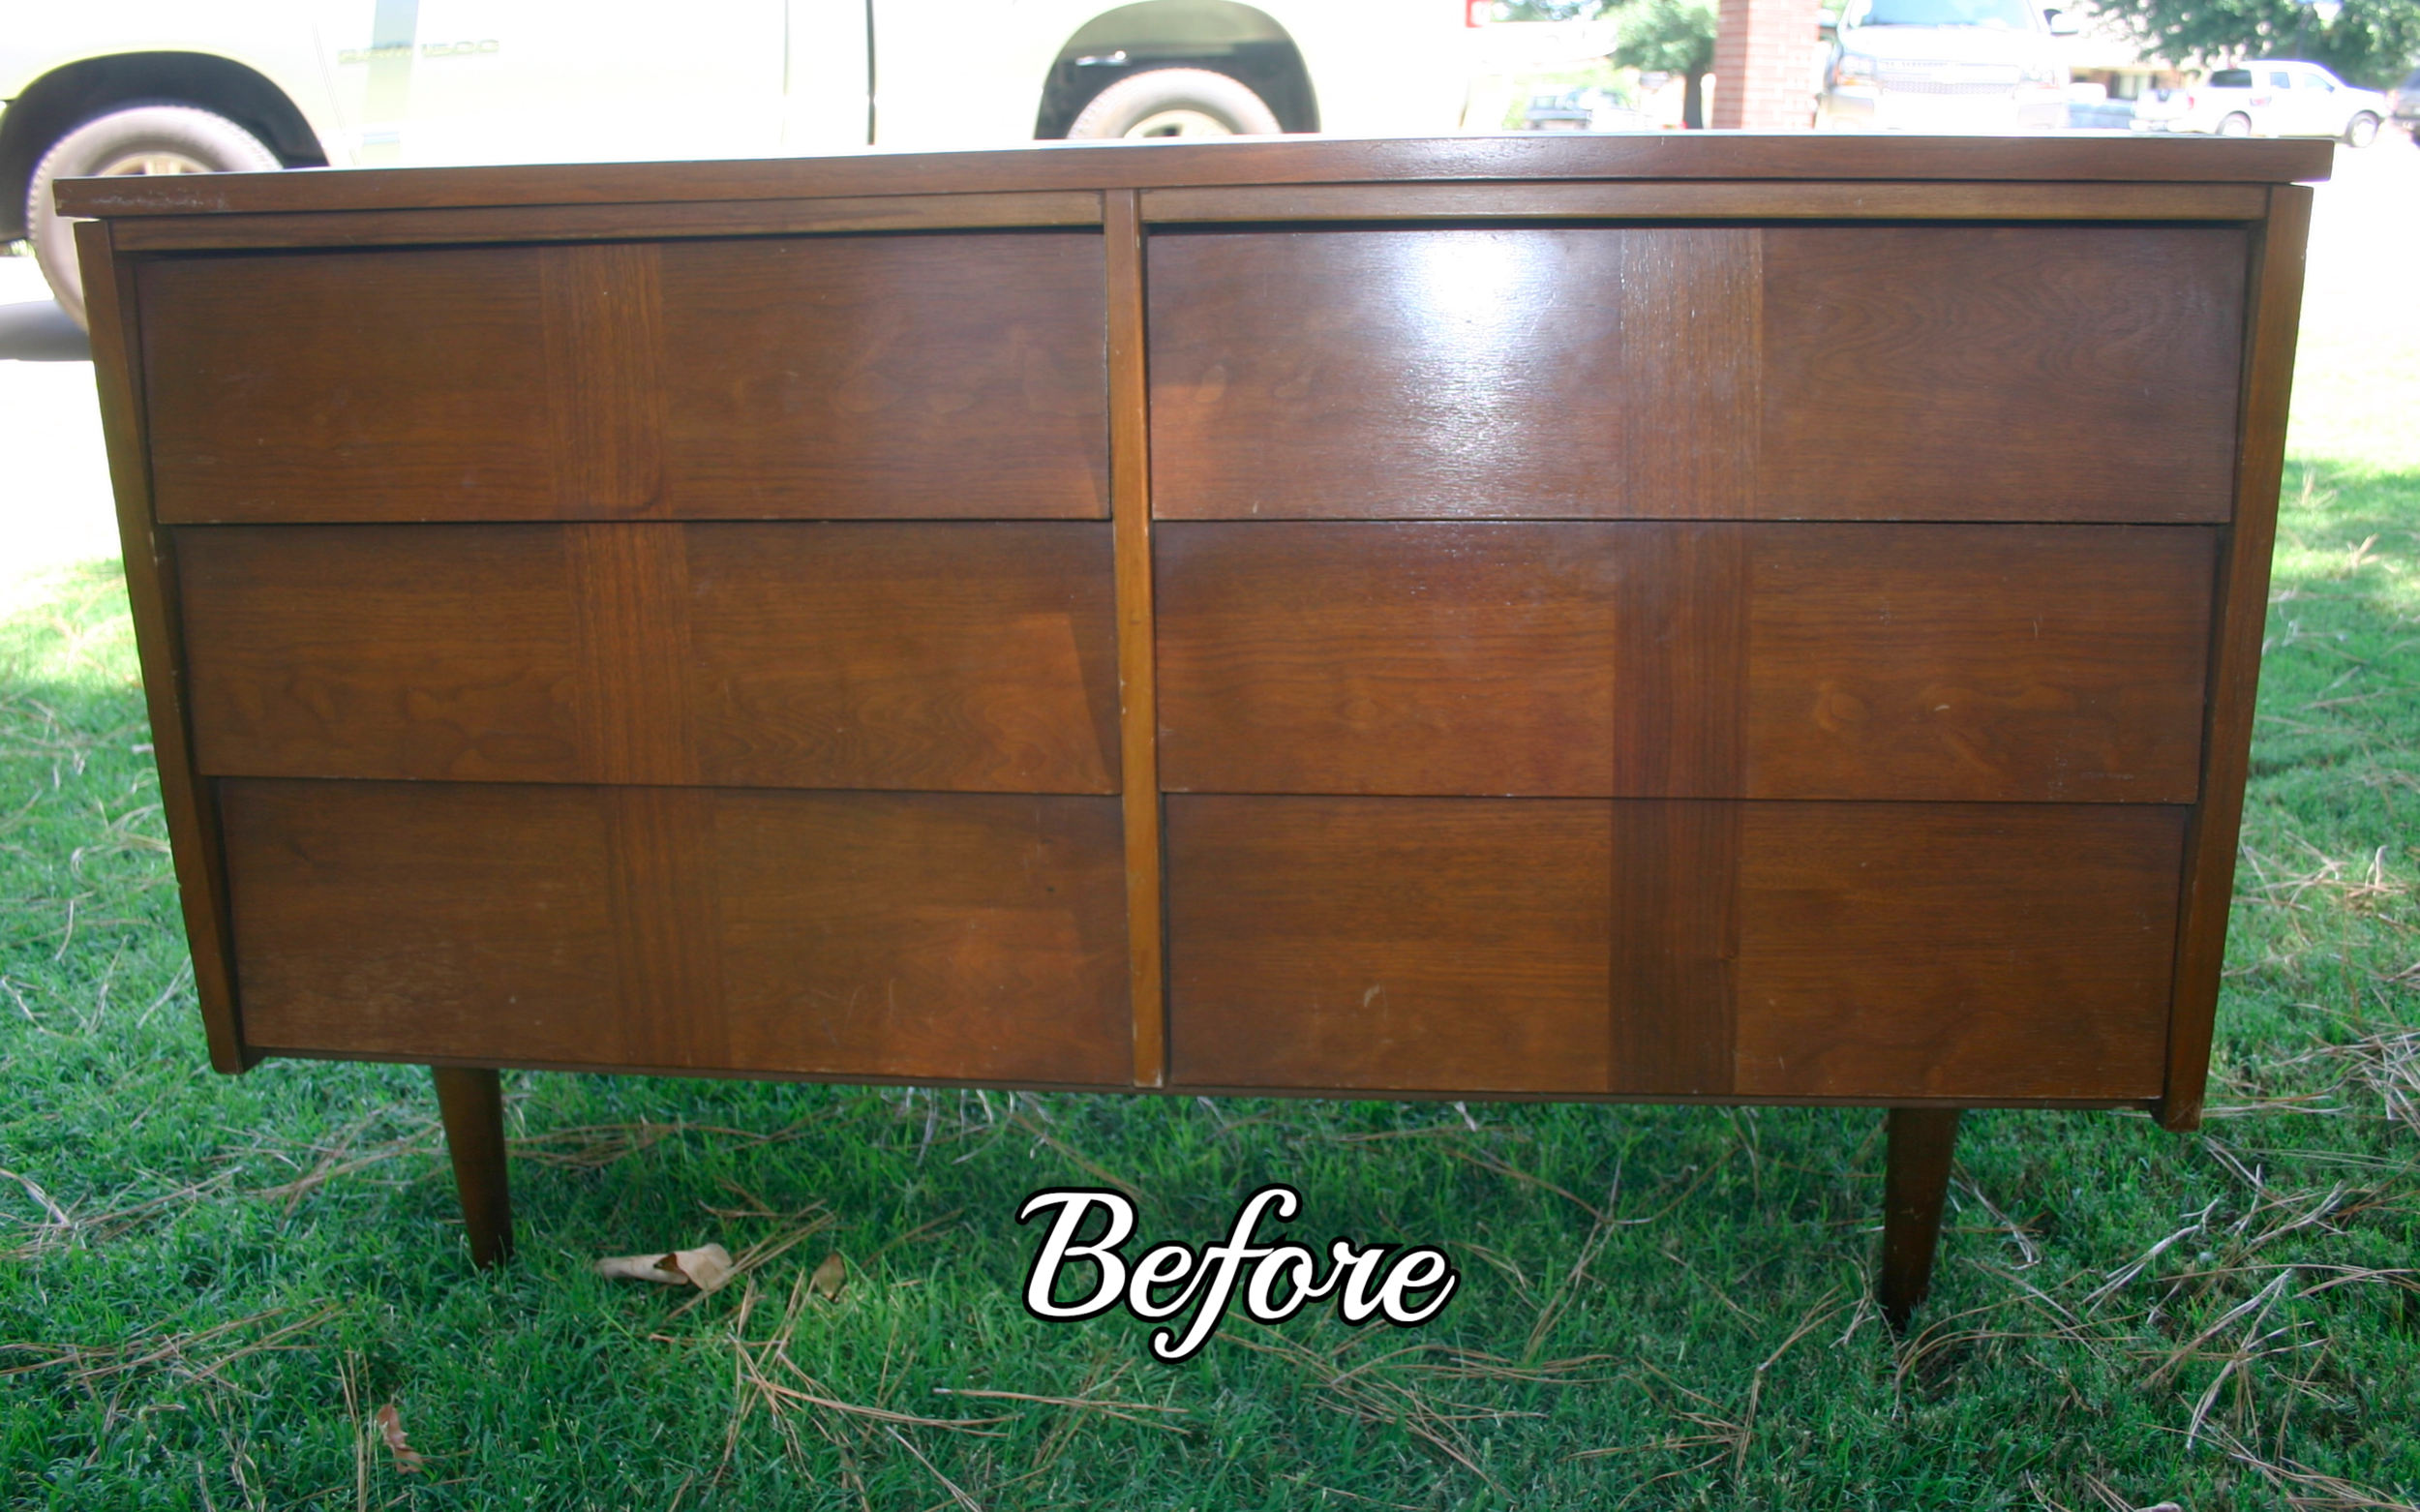
But she does manage to get in a project or two...so I thought I would share this darling little nightstand she did...​

NIGHTSTAND BEFORE.png
NIGHTSTAND AFTER 2.jpg

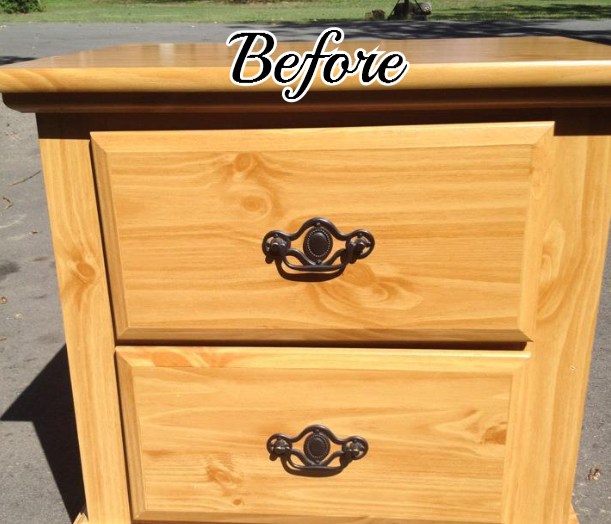
See how a little Kilz and a little paint can make a world of difference!  ​

Great job Sis!!!​

She also used the gel stain I told you about on her bathroom vanity and wall cabinet (see here)...totally awesome transformation. 

Sweet dreams...

I am soooo annoyed.  This is the 3rd or 4th time I have written a witty post, only to accidentally delete it...grrrrrr.  Seriously, this stuff can not be THAT hard.​ So here we go again...only I am certain it won't be near as witty as it was the first time!

​I am always a tad envious of the beautiful bedding displays in magazines and on HGTV....but seriously, who has time to do all that fluffing and stacking and staging in the morning!

As I have mentioned, I have this huge fear that I will be in an accident and people will have to come into my home.  So I make my bed, religiously, every morning.  I sometimes wonder if I was running really late if I would skip making the bed or feeding the dog.  (JUST KIDDING....but it wouldn't hurt her to miss a meal!)​ Good thing I am an early riser!

So I struggled between a desire to live in "Better Homes and Gardens" world, or find a way to have pretty but realistic.  ​I live in a real world...it wins every time!

So I took my grandmother's advise...keep it SIMPLE!  And simple it is.  Super comfy sheets, a down comforter, a pretty blanket and of course the "throw" blanket at the end of the bed for the kitties.  ​

IMG_8764.png

I sleep with FOUR pillows...and I never had decorative throw pillows on my bed until I made all those pillows a few weeks ago and had no where else to put them (here)​ But I keep it simple...no fancy, frilly shams or froofroo-crud.  Seriously, those things just end up on the floor every night! 

Simple is better...I just get out of bed, straighten up the blankets, fluff and stack my pillows and throw the decorative pillows on there (that added an entire 5 seconds to my routine!)​  Seriously, I bet it doesn't take 1 minute to make my bed.

And of course there is Pickles...my panda.  Every girl should have a stuffed critter on her bed ;)​

Down comforters are awesome...super warm in the winter and cool in the summer!  Just make sure you buy one that doesn't have to be dry cleaned.  Any woman with animals, children or a husband should not have ANYTHING on her bed that requires dry cleaning!  I just throw mine in the wash every month or so (or when a cat erps on it) and then dry the heck out of it.  I do the same with my feather pillows!!!  And both my blankets are not only pretty, but very functional and can be tossed in the washing machine!  ​

When my kids were little, they had a fitted sheet and a nice, washable blanket.  No fuss, no muss.  Simple.​

In life and parenting, one of my mottos is "PICK YOUR BATTLES."  I want the bed made, and of course I want it to look nice, but am not willing to "fight a battle" every day to make it all "picture perfect." ​

It is not a battle my kids, or I, are willing to fight....but at least when people come into my home after my accident, they will be impressed that my bed is made!​

If you don't think making your bed makes a difference...try it for 2 weeks....seriously, make yourself make your bed EVERY morning for two weeks.  Trust me...it sets a tone!  And if it takes more than 1 minute, you have too much fluff and froofroo!​

It's OFFICIALLY April!!!!

Only 2 more weeks until the last freeze...and inspite of the numerous storms that rolled through, it turned out to be a pretty great weekend.  I managed to get my pond cleaned out and the rugs to the car wash and we colored eggs and I even started on my newest projects...two more "nasty" dressers!  Not sure what I will do with them, but I think they want to be nursery dressers...so I am going to pretty them up fit for a new baby and then find expectant parents who NEED nursery furniture!!! ​

IMG_8759.JPG

I managed to get the drawers repaired and put a coat of Kilz on each...but it is Easter and the few who are still here expect a "holiday" dinner.​

So I stuck a ham in the oven and prepared my "go to" holiday casserole...you can find the recipe HERE!  Totally awesome and super easy.  And since we have the eggs we colored yesterday, we have plenty for deviled eggs...a family favorite! ​

I can't even complain about the rain because we need it!  ​And after all, it is SPRING!!!

Hope you had a wonderful and blessed weekend!!​

April showers....

Okay, so it's not quite April....yet.  But today is a reminder that spring brings unpredictable weather.​

I had SOOOO much I thought I needed to do today.  Clean out the pond and install a new pump. Take my area rugs to the car wash.  Finish putting down mulch.  Begin working on the two nasty dressers I brought home (don't ask me what I plan on doing with them!) ​

Nothing that requires being inside on a rainy day.​

Oh wait...yes there is!!!  HAPPY EASTER!  And for the first time in I don't know how long, I have a "want" to color eggs.  Probably the influence of that evil Pinterest...always something sooo cute that I just have to try it.​

Like the "crackle" eggs...or the colorful whites of deviled eggs (a family favorite!)​

So after my teenage daughter returns from mass this afternoon, ​we are going to color Easter eggs. 

And the weather cooperated perfectly with the thing that is MOST important...spending time with my teenager doing something we haven't done since she was a little girl.  ​

I love spring!​ 

And again, HAPPY EASTER...may this weekend be a reminder of what is REALLY important!​

Mulch time!!!

It's getting closer to "spring" so there is soooo much to do before perennials wake from their winter slumber and it is time for the beautiful annuals.  

Perennials are plants that return every year....annuals are just what it says...annual.  You have to plant them every year.  Over the years I filled my beds with perennials (hostas, liriope, vinca minor) and have plant most of my annual flowers into pots and containers. ​

But before they wake or I can plant, there is much to be done!  This year I put compost in the beds.  Many people don't realize that most cities actually sell or give away compost.  It pays HUGE to check with your city and see if they provide compost soil.  I bought a truck load for $20 just for showing proof that I am a resident.  That is MAJOR cheap compared to buying it by the bag.  I try to put compost in my beds about every other year...just to enrich the soil.

I also buy all my mulch in bulk, by the trailer or truck load.  Today I paid $25 a yard for mulch. (A pickup will hold 1-2 yards)

Now here is where I will give gardening advise...skip the pretty red or black mulches.  Years ago my impatiens would grow to 2-3' tall...absolutely beautiful.  About 6 years ago they really started struggling and I started having trouble with "crown rot" on my beloved hostas.  After a little research I found that many gardeners were pointing the finger at the "dyed" mulches that are so popular.  Seems it MAY have an adverse affect on the soil, which in turn affects the smaller annual plants and possibly the tender perennials like hostas.  So now I stick to straight up natural cedar mulch.  To each his own, but honestly, I'm not taking any chances.  And since I  witnessed a significant problem with my plants since I started using red mulch, I decided not to risk it again.  ​

It is still too early to put tender annuals in the ground, but it is NOT too early to start preparing your beds!  Get busy!​

And don't forget...pots and containers are a great way to add a little color to your yard, big or small, without a lot of work or maintenance!​


Swing into spring...

NOW is the time to do this project...too stinking hot in the summer and you will want to enjoy it during the lazy days of summer!​

I have built 5 of these swing pergolas...two at my house, one at my daughter's first home, one at her current home and one for a neighbor.  It is not a difficult project to built but one that requires two sets of hands and a little muscle!  ​And with everything, patience!!!

I have posted a tutorial HERE​.  It is not a terribly difficult project and one I think most DIYers could easily manage.

This is the SUPER sized pergola I built onto my house about 11 years ago...I won't even begin to tell you how it is constructed...but I can promise you, if the house is blown away, it will probably still be standing!  And notice the wisteria canopy...seriously, that stuff is CRAZY!​

Container planting!!!

Snow was blowing yesterday but we are less than a month from the last freeze date in our region....I CAN'T WAIT!!!  ​

Tomorrow I will be sharing a VERY long tutorial on building a perfect swing pergola for your yard...but today I wanted to share my container plantings...you could actually start these inside, if you have space, and transfer them outside once the risk of freeze has passed!​

Last year I decided my days of crawling around in the dirt planting flowers were over.  So I began collecting pots and anything I thought would make a great planter...be creative!!!  Think outside the box!  Pots are great but so are wash tubs and old patio grills and crocks!  As long as it has a little drain hole in the bottom, or can have one added, it will work.  I fill the bottom 2" with rock (yard rocks are great), then add "cheap" soil, then put the more expensive "planting soil" in the top 4".  Most annual plants don't root much deeper than that!​

This is by far my favorite!  Ferns with impatiens and caladiums.  Any ole' fern, punch a few little impatiens in the soil around it and then stick some caladium bulbs into the soil.  By June it will be in full bloom and super easy to water and maintain.  If the planters are small, you can actually hack the fern in 1/2 or 1/4 and split it among several planters. 

Here are a few pictures of a few other planters!  ​On old tea server, old pots I sprayed with colorful spray paint, new pots in interesting shapes...use your imagination.  I found an old grill that is very odd...but will make a perfect planter this year.

If you have looked at my Yardscapes page, you know I love flower gardening...especially hostas.  But I love the color of annuals so rather than fill my flower beds with tender plants that take a lot of time and water, I am filling colorful planters with an assortment of flowers and scattering them around my flower beds...beautiful! And sooo easy to maintain when the weather turns brutally hot!

Oh. My. Goodness....I can't believe I found one....UPDATE!

Okay, I told you about my absolute obsession with the mid century Lane Acclaim tables.  So in my quest for all things "mid century" I stumbled upon a line of furniture that literally makes me drool....Brasilia by Broyhill.  Manufactured in the 60s, this line of furniture is absolutely one of the most beautiful and desirable mid century designs floating around right now!   I have always wanted a piece of this line, but honestly I could never find one in my budget!

So when I found a Brasilia hutch online for an unbelievable price, I just knew something had to be wrong with it it!  It was at one of my favorite flea market haunts, White Elephant. Even though I was exhausted and already in my pajamas, I called my son, who lives a few blocks from the flea market, and told him to go stand guard in front of the hutch until I could get there and inspect it. 

Beautiful.  Near mint condition, less a few bumps and bings...but honestly, that is to be expected from someone in their 50s!  And even though I really don't NEED or even want a dining room hutch, I just couldn't pass it up!  Maybe I can trade it for the bedroom hutch I REALLY want!

I took a few days off this week but Monday morning, that puppy will be on it's way to my house! 

3I33Ma3pc5Fe5H45M9d3c9afd4fd51c4e17e5.jpg

It is now in my garage...it ended up costing me about $1200 damage to my truck!  The hutch is still in mint condition...the trailer I used to bring it home can handle a lot of abuse...but the truck...not so much! 

Today's lesson....do not forget you have a trailer on your truck and back out of the drive way.  The corner of the trailer can do some serious damage to a side panel.  Just another helpful hint. 

Dressing up an old dresser....

I'm tryin' here! Smarmy comes easy..."witty"...not so much! 

But it dawned on me....I have never posted my dresser makeover! 

I use to have this HUGE hulking dresser in my office/dressing room.  It was a "matchy-matchy" to my bed and highboy...which I love, but the dresser was seriously huge and just seemed to shrink the entire room.  So when I was out digging around for the desk (featured earlier) I found this sweet little dresser and said to myself "Why not!" 

I LOVE the style.....kind of a mid-century modern with walnut veneer.  The top was laminate, so I knew I was going to have to paint the entire thing...and I did.  But later I found a picture online of an identical dresser and they had painted the top and sides, but refinished the wood veneer drawers...GORGEOUS! And you know how I loooove anything wood, especially walnut!  Live and learn...maybe next time! 

As with most of my furniture, I had a piece of glass cut for the top...lets me clean it with Windex! 


IMG_8157.JPG
IMG_8522.JPG

Jewelry shine....

I found this awesome recipe for jewelry cleaner on line...wish I could remember where I saw it but it was one of those things I printed off and keep in my recipe scrapbook (awesome idea for all those "pinterest recipes"...I will share sometime!)  

It is super easy and a great way to shine up your rings!  ​

Boil 1 cup of hot water in the microwave.​

Put a piece of aluminum foil in the bottom of a bowl.​

Pour in hot water.  Add 1 tablespoon of salt, baking soda and dish detergent. Put jewelry on of the aluminum foil and let it soak for 5-10 minutes.  Then rinse and dry with a soft cloth.  If mine are really dirty, I take an old toothbrush to them...then rinse and dry!

HINT:​  DO NOT TRY TO RETRIEVE THE RINGS FROM THE BOWL OVER YOUR KITCHEN SINK!  ​Again, I do not tell you these things because I THINK something bad might happen.  After unsuccessfully trying to dig a family heirloom ring out of the garbage disposal, I finally had to take the entire thing apart....and of course the disposal was 13 years old so while I had the entire thing disconnected I might as well put in a new one...and of course all the hoses were old...those needed replacing.....

All because my rings were a tad dingy.  ​

Live and learn!​