Another antique chest makeover...

I promised last week to share all the dresser and chest of drawer makeovers I have been working on. This time of the year it is tough to get a lot of work done over several days because of the temperatures…fortunately this dresser was one I could work on inside.

Takes a little “strategizing” to figure out what I need to do outside on warm days and what can be done inside on cold days.

I knew I was going to paint the cabinet so I managed to get it (and a few others) Kilzed on a warm day. I try to avoid using Kilz inside because it is SUPER stinky…and I like to use the spray kilz on smaller pieces and that can’t be done inside. Sanding and wiping with tack cloth can be done when it is a tad colder so no biggy. I had to strip the drawers and top outside, but that can be done in the cold as well. I was able to bring everything inside to oil the drawers and top and paint the cabinet!

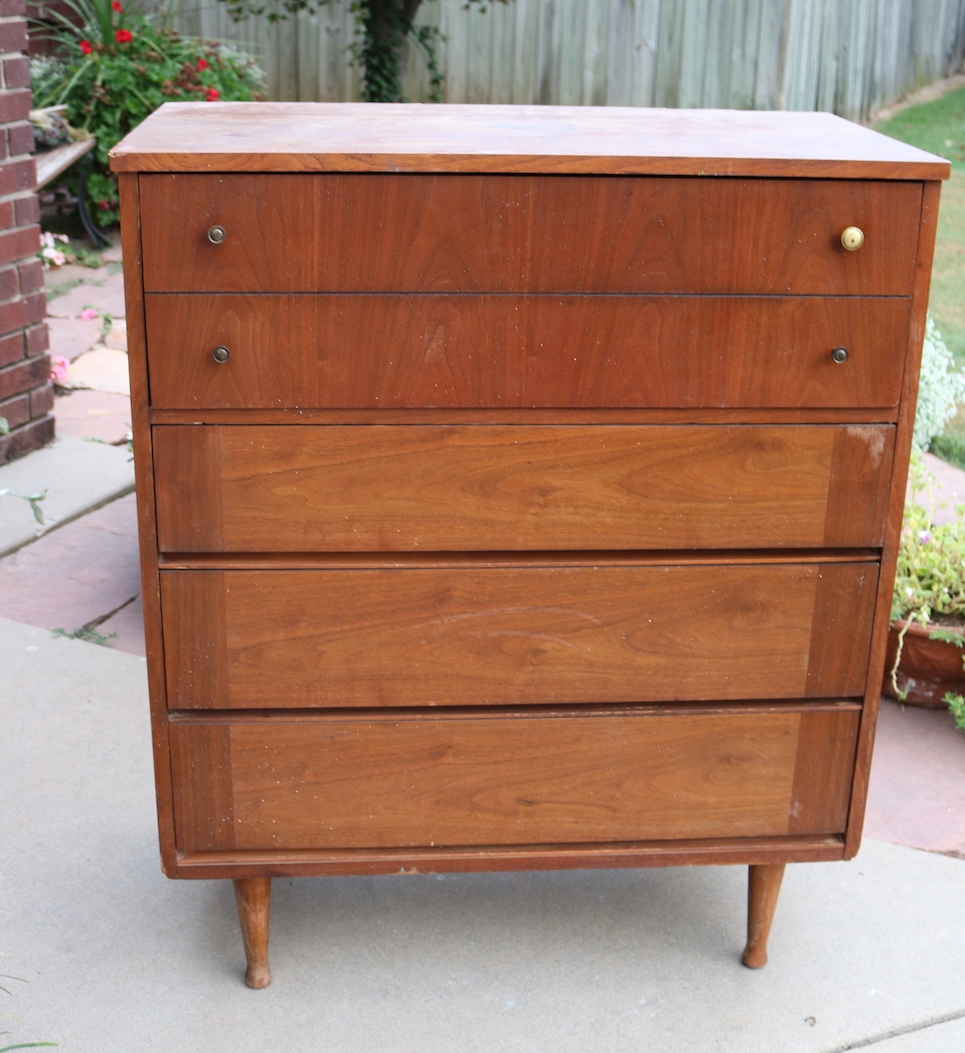
Again, this one didn’t need any major repairs…the only real boo-boo was one missing handle. This hardware was one of the most unique I had ever seen….not only the style but the fact that it was installed “vertically” vs. “horizontally.” Different…I like…so I was determined to use as much of the original hardware as I could.

I removed all the hardware. First I primed them with “metal primer” then I sprayed them with black lacquer.

Since one of the handles was missing and I knew there was NO way I was going to find a replacement, I decided to remove the handles on the top two drawers and replace them with knobs.

That meant the holes in the top drawers had to be puttied…and there is no good way to “disguise” putty holes without painting…but the wood on these drawer fronts was so pretty I really didn’t want to paint them!

The drawer on the right has been stripped…the drawer on the left has not. I just love how “clear and clean” the wood looks after removing the old finish (I used THIS process! Super easy!)

I decided the best way to disguise the puttied holes was to paint a stripe down the drawer fronts. I did this BEFORE applying the tung oil finish.

The stripe needed to be pristine…absolutely NO bleed through…and we all know how tough that is! I read a few tutorials on preventing that…some suggested using modge-podge…one suggested using caulk. I went with the caulk suggestion and it worked like a charm.

I used blue painter’s tape to tape off my stripes, then I ran clear LATEX (NOT silicone) caulk along the edges of the tape….

Then I used my finger to “mash” the caulk along the edge of the tape and wipe off any excess. WORKED LIKE A CHARM! Zero bleed through! I used clear caulk so any caulk that bleed through didn’t show!

I painted the stripes and cabinet. I used a grey latex I had on hand. I added Floetrol…ALWAYS add a paint additive…Penetrol for oil based paints, Floetrol for latex. I use a 4”foam roller and a high quality brush to minimize brush strokes and roller marks. And again, always apply 2-3 LIGHT coats to avoid drips and runs. I oiled the drawer fronts and top with 3 coats of tung oil finish (sand and tack between coats), drilled new holes for the knobs and reattached all the hardware and PRESTO!

Cute as a bug’s ear and super simple!

I just love bringing these pieces back to life!!!!

Antique dresser makeover....

It’s no secret that this antique dresser is really not “my style.” But I knew it could be beautiful with just a little work…

Okay, so it needed A LOT of work!

One of the first things I do when I buy an old piece like this is really examine it and figure out what, if anything, needs repairs and what is “salvageable.”

It would have been super easy to just slather the whole thing in paint, but I love the combination of paint and wood tones…and if I can salvage any of the wood by refinishing rather painting, I’m going to.

The drawers were in excellent condition…they were intact and they did not “stick.” The only real issue was the missing veneer on the front of the cabinet….a little wood filler and sanding fixed it right up.

The top was in relatively good condition…it did have a few “blemishes.” I have “fixed” blemishes using oxalic acid and it works wonders on solid wood surfaces. But this top is a wood veneer and I haven’t had as much luck on veneers…so I just “embraced” the blemishes and let it be what it is…an old piece with a history.

The drawer fronts were in mint condition…just super yucky. The top and drawer fronts were easily stripped using the 1/2 acetone and 1/2 lacquer thinner mixture. I scrubbed them with #2 steel wool and the mixture, wiping with old rags from time to time. After all the old finish was removed, I “washed” them with mineral spirits and applied three coats of tung oil finish, rubbing with 0000 steel wool and tack cloth between each coat. No stain, just a clear finish!

Rather than refinish the “cabinet” I chalk painted it with homemade chalk paint. My recipe for chalk paint is 5 tablespoons of Plaster of Paris and 3 tablespoons of water, mixed well. Then I add 2 cups of flat paint. I painted two coats and distressed, then sealed it with polyurethane. Again, I do not wax over chalk paint…I just don’t think it is a durable finish.

I was SUPER pumped that ALL the original hardware was there…even the top drawer knobs. They had been replaced but the original knobs were in the drawers…major score! They are just so unique and authentic!

Often the stain is mixed into whatever finish is applied. They did this to make the piece look “uniform.” When you strip the original finish, there is a good chance you are going to strip the original stain color…you WILL see the wood grain and there is a good chance the “color” of the piece will be different. For example, the drawer fronts on this piece were a different tone than the top when all the old finish was stripped away…personally I LOVE this look! But if you want that “uniform” look you need to be prepared to stain the piece…and since different woods stain differently, I would suggest using a gel stain application…that is the only way to ensure a “uniform” look. Or in this case, you could paint the top and only leave the drawers original. To each his own!

This is just one of many I shared on Instagram…and there are even more that aren’t pictured here. Over the next few weeks I will share how each dresser’s makeover!

Each one required a different process to bring it back to life!

Stay tuned!

Building a cat shelter and a new dresser....

I don’t normally share “life hacks” but I just have to share this Kitty shelter. I hope the video tutorial stays up but just in case it doesn’t….basically you take a large storage tub, put a styrofoam cooler inside it…cut a little opening in the tub and cooler…”insulate” around the cooler with blankets (or insulation if you have it) and put a warm blanket in the cooler.

If you have followed along you know I am somewhat of a “cat person.” I have two indoor cats, Litty and Mr. Jinx, one indoor/outdoor cat, Ms. Kitty and then there is Finley. I truly believe Finley is autistic. He isn’t “mentally challenged” he just has “severe social anxiety.” He is terrified of everyone but me and now he will barely come to me. Occasionally I can entice him with food and get him close enough to snatch him up, but he pretty much avoids ALL human contact.

I have had him for 8 years. Before Cleo, he would come in the house but only appear after I was snuggled in bed…then he would get in bed with me. But when Cleo started sleeping with us, he went outside and will not come in the house. Last year when we had a week long deep freeze, I managed to grab him one day only because he was dang near frozen. I brought him in the house to warm him up but he was obviously terrified and spent the entire time hiding…as soon as he could bolt outside he was gone…and there he remains to this day.

Needless to say I worry about him constantly. I have no doubt he has found a cozy spot under the storage building to avoid the elements but I still worry.

When I saw this kitty shelter I immediately bought the stuff to make one for him.

It took a few day, but he eventually moved in and seems quite content in his new warm bed! I placed it in a spot I believe is sheltered from the cold wind and next to the dryer vent so the warm air can blow on it.

I insulated mine with actual insulation because that’s what I had on hand. I put my snuggie in for his bedding…I don’t wash it so it will retain it’s “smell.”

IF you can entice your kitty to come in the house when it is super cold, that is always best. If not, this is a perfect “hack” for an outdoor kitty or stray kitties.

MORE DRESSER MAKEOVERS….

I spent most of last week working on a few dressers. I have finished those up but now I have another batch to start on. It is super tough to find good days to paint outside during the winter months. Dang, I need a heated shop!

This was a teaser I posted on Instagram…

They all turned out super cute but each got a different treatment. So over the next few weeks I will share each one and explain what I had to do to each to bring them back to life!

In the meantime I want to share one that has been lurking in my garage since summer.

When I bought it, it was a nasty mess….

Someone had “stained” it and changed out the hardware. Eck! I think I remember that it had a few wonky drawers. No biggy but AGAIN, make sure you make any repairs BEFORE you make it pretty!

I removed all the hardware and gave it the old KSTP treatment (Kilz, sand, tack, paint)

New hardware….

Again, I’m stuck on white…blah. This weekend we took four dressers into 410 Vintage and ALL of them were white! B.O.R.I.N.G.

I have vowed to use a little color on the dressers I am working on right now!

Stay tuned!


Just another little makeover....

You are probably asking yourself “WHY?”

Why would she even mess with something so hideous?

Because I knew I could make them pretty…that’s why!!!

Truthfully these pieces didn’t have a lot going for them…but what drew me to them was the really cool hardware and they are pretty sturdy. Ugly, but sturdy!

The hardware is obviously “reproduction”…made to look like the hardware of years gone by.

They aren’t REAL flush mount ring pulls, but they are real brass so I knew with a little scrubbing, they would shine right up!

The top…fake leather…ewww!

But it was in good shape!

The front of the cabinet and drawers were solid wood but the sides were particle board…and it had some minor “water issues.” Some of the particle board had started chipping and “bubbling.”

Rather than use wood filler I decided to add a little trim piece to the bottom. Glue and trim nails…simple!

The trim covered the chipped areas and beefed up the base a tad. The minor “bubbling” on the particle board sanded smooth.

The bottom of the drawers had that “fake print” thing going on but they were in great condition. Ugly, but solid and sturdy.

I decided to disguise the “cheaponess” with paint.

First I removed all the hardware and spend a few hours scrubbing it. Again, I have no deep dark secrets for easily removing years of tarnish on brass. SOS pad and brass cleaner…and a lot of elbow grease!

I Kilzed the entire dresser…even inside the drawers.

Sanded everything smooth.

Tack cloth…always!!!!

I painted the inside and sides of the drawers with a sample pot of latex navy blue paint. (I recommend priming and painting the inside of drawers if they are “cheapos” or if you can’t remove offensive smells with a good cleaning and vinegar!)

Again, I am kind of obsessed with the white lacquer finishes especially with bright brass hardware.

The repaired sides painted beautifully!

Told you I could make them pretty!

Remember the MCM chest of drawers I featured here? I finally got the brass cone hardware from China…worth the wait!

A mid century chest of drawers makeover...the reveal!

When last we spoke, I shared a little “step by step” tutorial for repairing and prepping this “less-than-desirable” chest….

I can not stress enough the importance of “prep work” on any project. Again, if you don’t take the time to make repairs and properly prep (regardless of whether it is a dresser or a wall or a floor) all the “pretty” is going to be wasted.

(BTW, while cruising Pinterest I found this super awesome tutorial for repairing chipped corners with wood filler! Great suggestions!)

Make proper repairs, sand patches smooth, use the right tools and materials! Do the repairs and prep or you are wasting your time and resources making it pretty.

After all the patching and repairs, the next step is properly priming! (I had already stripped and oiled the drawers and set them aside!)

I primed the cabinet of the chest with Kilz. That is usually my go-to primer since it sands smooth and holds up well. Primer is a SUPER important step on most paint projects…unless you are chalk painting! Since this was a relatively small project I used the spray Kilz…one can.

TIP: I know a lot of paints SAY they are a “paint and primer” in one…I may eventually change my tune but I don’t believe them. I ALWAYS use a primer…always!

After the Kilz had dried well (usually overnight but several days is best), I sanded it smooth with 220 grit paper.

After sanding I checked all the areas I had repaired…there were a few little spots that needed additional putty and one I missed on the first go round…

…no biggy….I just filled them again, let it dry, sanded smooth, spritzed on a little more primer and then sanded it again after that had dried.

Tack cloth…it is an absolute necessity on any paint job. I see tutorials all the time that recommend wiping the piece with a damp cloth or even mineral spirits. Forget about it! USE TACK CLOTH! It will pick up the finest grains of whatever and will make a huge difference in the final look and feel of your paint job!

I’m kind of obsessed with white lacquer these days. i just love the high gloss finish. Spray paint is always a great option for smaller projects and you can find a multitude of colors and sheens! Just make sure you use a quality brand! You can also brush and/or roll alkyd (oil based) or latex (water based) paint. ALWAYS use an additive and use a high quality brush and 4” foam roller to apply the paint. Pay attention to the manufactures recommendation for temperature and application…it matters!

Regardless of whether you use a spray paint or lacquer, latex or oil, always apply 2-3 THIN coats, allowing dry time as recommended. Thinner is better. If you try to get a one coat finish, you will likely be disappointed and make a HUGE mess!

Spray, roll, and/or brush on the paint…a thin coat…let it properly dry, lightly sand the boogers AFTER it has properly dried with a fine grit paper (IF needed), tack and recoat. Regardless of whether you need to sand between coats, always use tack cloth before applying additional coats. I usually apply at least two coats and sometimes three.

Most paints do not need a top coat but if your piece will be getting a lot of use, I recommend a light coat of polycrylic. Polyurethane is some good stuff but it tends to “yellow” so polycrylic works great.

So…before….

…and the oh-so-better after….

You may have noticed one little missing element. The hardware! Why? Well because I didn’t pay attention when I ordered new brass cone knobs and they are coming from CHINA!!! So I should have them someday…maybe…who knows! The hard work is done…knobs are no biggy!

One of the patched areas after paint…

Dry time…IT MATTERS. I cringe when I watch DIY shows and they immediately stage all the pretty pieces they just painted. There is a huge difference between “dry to touch” and “dry to USE.” Truth is, paint and finishes need time to cure before you put all your pretties on it. You can move it in place, but give latex paint AT LEAST a week or two to cure and oil based paints a good 3-4 weeks. Otherwise you may find that your heavy lamp or knick-knacks will stick to the finish or leave a mark!

This is another dresser I finished up a few weeks ago. It didn’t have near the issues the first had, but the refinish process was the same…KSTP the cabinet and refinish the drawer fronts…presto-bingo…

Again, I know this sounds like a daunting and time consuming task…but if you take the time to do it right, you will have a piece that will last another lifetime and one you will be proud to use in your home!

Next week I hope to share my bathroom remodel. In the meantime, you can check out Cristina’s master bath…it will knock your socks off!

Until then….

A mid century chest of drawers makeover...Part one!

While my master bathroom remodel is still progressing (yea!) I finally found time to tackle an amazing mid century dresser I found!

This chest of drawers was pretty shady. Nasty finish, chipped veneers, busted veneers, mismatched hardware…just not something you really want in your home!

It had many of the problems you may encounter with old pieces so it is the perfect project to share a little “step-by-step” tutorial on turning a trashed dresser into something you will want front and center in your home!

First, there was a busted drawer! (Which reminds me, ALWAYS number your drawers on the underside as you take them out!)

This is NOT a huge issue.

I can not stress enough the importance of making proper repairs to any piece before you start making it pretty. Glue and clamps people…NOT silicone, not screws, not nails…just plain ole’ wood clue and clamps.

This one really wasn’t too bad…there have been some I had to completely tear apart and rebuild!

One drawer was missing the wood slide like this one…

Kinda necessary if you want your drawer to not be all whomper jomped. Again, no biggy. You can buy slides online but I used some scrap 1/4” plywood and scrap trim to make one. Again, glue and clamps and good as new!

TIP: If you have a drawer with wood slides that seems to be difficult to pull out, try rubbing a wax candle on the wood slide. If you have a metal slide, make sure it isn’t bent…if it is, just take a pair of pliers and manipulate the metal.

Also, if you find the drawers to be a tad smelly, first wipe them down with ammonia and water, then spritz them with vinegar water and let them sit. Truthfully, I have found a few that smelled no matter how well I cleaned them….in that case I taped off the fronts and painted the interior and exterior of the drawer with Kilz and latex paint (here is an example!)…sometimes you have no choice!

Next up chipped and scratched veneer.

A lot of the older furniture is veneered. If it is chipped or scratched, take the time to remove any loose veneer and repair it with a little wood filler.

The first few coats don’t have to be pretty…you just want to make sure you fill all the boo-boos well. Don’t rush this process…it may take two or even three coats to get a smooth repair!

In this case it took two coats (sand between each coat) and a lot of sanding with a fine grit paper (220) to get a smooth repair, but in the end it will be worth all the effort!

I have found that after I prime and sand, I can often see how well the “patch” will look and can add more filler and do more sanding if needed. If it looks and feels rough after priming, it’s going to look bad with paint…so do a little more work on it after the primer if needed!

My plan originally was to strip and oil the top since it is a walnut veneer, but I did a number on it dragging it out of my truck…so repair and paint it is.

I would like to stress (again!) the importance of sanding and FEELING! You want it smooth to the touch. If you can feel it, you will see it when you paint it! So sand it smooth.

The veneer on the drawer fronts were in mint condition…the finish just looked old and “muddy.” I removed the mis-matched hardware and then stripped the old finish (using this process). It took me less than 30 minutes to strip all four drawers.

The two on the right have been stripped…the two on the left have not…as you can see, they weren’t THAT bad, but this quick step brightens the color and really allows the grain to shine.

On veneers it is important to use chemical stripping as opposed to sanding. Veneers can be very thin and if you sand through the veneer there is no salvaging it…you will have to putty and paint!

After stripping them I applied three coats of Formby’s tung oil finish. I love this stuff and it is my “go-to.” No stain, just a clear finish!

(It was pointed out to me by a kind reader that the original Lane Acclaim tables came with a “toned lacquer” finish….true of many mid century pieces. That may be the case but again, this is the process that works for me and the one I prefer…do your research and do what works for YOU! I prefer the “easy to wipe on and freshen in the future” tung oil finish over lacquer)

I also stripped and oiled the legs since they were in pretty good condition. Same process, same finish.

If your drawer fronts have MINOR chipping like this one did, I would suggest carefully removing or glueing any “loose” veneer (I use a toothpick to slide a bit of glue under any loose veneer and wipe the glue residue with mineral spirits) and then apply the finish. As my daddy use to say, you will never notice it on a passing train! Any time I can salvage and feature a beautiful walnut veneer, I do!

Again, my apologies…this will have to be one of those “to be continued” posts. We had rain and a cold front roll in (yea! it really is fall now!) and since I don’t have a nice cozy shop I am at the mercy of the elements.

Priming, paint and reveal will have to wait until next week!

This process may SEEM daunting and time consuming but in the end it is all worth the time and effort to bring these sturdy old pieces back to life!

Take your time and do it right and you will have a piece fit for another lifetime of use! Hopefully next week you will get to see the results of all this prep work!


Vacation and the bathroom renovation!

We returned from our vacation last week….AMAZING! One day of floating and fishing the Gunnison Gorge, one day of fishing the Colorado River and five days of beautiful Aspens in all their glory! Sadly, Brian nor I took our phones into the Gorge or I would have some breath taking pictures of some of the most beautiful landscapes this country has to offer. All I can tell you is to go see it yourself! It will not disappoint!

I knew I would have to hit the ground running when we came home. I have an apartment that needs tile repair, a cabinet rebuild and paint. And I found an amazing mid century dresser that has all the problems one might encounter with a dresser and I was excited to do a step-by-step tutorial on properly repairing busted drawers, fixing chipped veneers, stripping and painting.

But Monday the tile guys called and they are ready to start on my bathroom. Since I am too cheap to pay someone THOUSANDS to demo the old tile, I decided to tackle that chore myself with the help of my son, Matt.

And chore it was!!!! My plans to take out the wall tile in sections only worked about half the time…the other half we were beating out little chunks of tile and durrock. My plans to “pop up” the floor tiles went by the wayside when we discovered it came up in small slivers with a mere chisel and hammer.

One of the things I learned from my dad…build it to last a lifetime…and since I installed the tile 19 years ago, it was more than a booger to get up!

Thank goodness for tool rentals. This little “tile-buster-upper” thingy saved us about 2 days of work! Seriously, it was the best $60 I ever spend.

I still had to replace some insulation, add a few studs, do some floor scrapping by hand and I had to hire plumbers to move the drain and rebuild the shower valves. But all in all it is coming along nicely and HOPEFULLY it is ready for the tile guys.

As with all “best laid plans” there is one small snaffu in my plan. I had intended to do a shower niche on each side of the shower head…two shelves in each…like the one in my “inspiration picture.” Unfortunately the layout of the studs and plumbing messed up that whole plan….

…so now I can only put one on the right…que sera! Sometimes you just have to drop back and punt!

I can tile. Not a problem. Here I showed you the new backsplash I installed on the vanity! But I am glad I decided to pay someone else to tackle the bulk of this project. After two days of demo, I’m not sure I could lift a box of tile if I had to!

This is where I want to reiterate the importance of doing what YOU love! Not what is “in”, not what Pinterest says is all the rage, not even what your friends and family think you should do! I am all for “finding inspiration” for home decor and improvement projects, because let’s be honest, sometimes we just can’t find a vision for the changes we want to make. But doing what YOU love is important because otherwise you may find yourself hating an expensive change in the not so distant future!

I still love the wall tile and floor tile I picked out 19 years ago…but I know the day will come when stepping into a big ole’ whirlpool tub we NEVER use may be a major feat…a walk in shower will be, some day, a necessity!

So find your inspiration but do what you truly LOVE!

MAYBE next week I will have time to get started on that amazing dresser and I can share how easy it is to turn a trashed piece of furniture into something you will be thrilled to use in your own home!

Live edge tile backsplash and a dresser makeover reveal...

In my quest to make changes in my master bath, I FINALLY decided on the a sliced white pebble tile for the shower floor and niches. One decision down...too many more to go!!!

When I first remodeled the master bath, I did a glass tile backsplash on the vanity...I like it, but honestly I am no longer in LOVE with it.

And to be honest, I think the glass tile backsplash craze is running it's course. In other words, it is a fad that is fading...at least in my opinion. Besides, it had brown in it and I am moving away from browns!

Since it is such a tiny bit of tile, I decided to change it up a bit.

AGAIN WITH THE DECISIONS!!!! But I got to thinking...I love live edge wood countertops, coffee tables, benches..."live edge" wood anything is just beautiful! If you don't know what I am talking about, google it!

Why can't I make a "live edge" tile backsplash?

The pebble tile I picked out for the shower floor has a "live edge."

In other words the pebbles are laid on the sheet in such a way that the edges of each section of tile are "natural."

This vendor carries a tile border but it is only 4" tall. You can also remove each individual tile from the netting and place each individually...nah, way to much work for me!

Since I have a small backsplash, I cut each 12x12 sheet of tile in half with a wet saw. I only needed 3 sheets of tile...less than $40!

Then I had to set it on the vanity for a few days to see if I was really going to like it!

LOVE!!!

So here is a tutorial for making a "live edge" tile backsplash...

First, I had to remove the old tile. There are times when the easiest thing to do is to cut the sheetrock along the tile down to the studs and remove the whole kit-and-kaboodle! That was an option, but I decided to remove the tile and scrape the old mastic....

Since that tore up the sheetrock AND the new tile wasn't going to cover the entire section I removed, I had to do some sheetrock repair.

No biggy!

If you decide to cut the sheetrock down to the studs, here is a super simple way to "patch" the section you remove!

I didn't have to do any patching, but the basic rules apply...mud, sand, texture and paint!

Apply a coat of mud, let it dry overnight, then sand. Then another coat, let it dry and sand again. I can not stress the importance of sanding sheetrock mud smooth...FEEL IT! If you can feel it, you are going to see it when you paint it! Sand, feel, sand, feel! I used an 80 grit paper. You are better off sanding too much and having to apply more mud!

This product is one of my favorite little DIY "hacks." Sheetrock texture!

If you have properly sanded, this stuff will blend old with new! Just make sure you shake it WELL and always test spray it before you start spraying your wall. On more than one occasion I have had to wipe off the wall and start over because the texture came out to thick or too thin...so take time to test it before you start spraying it on your wall! The knob adjusts for different "textures." Follow the directions on the can.

Let the texture dry WELL before you paint!

And again, I can not stress the importance of keeping spare paint on hand. Fortunately, I just repainted my bathroom a few months ago so I had fresh paint on hand...

So, on to the fun stuff...tiling!

First, this is a "natural" stone tile (if you don't know if your tile is a "natural stone" vs. ceramic or porcelain tile, ask!) The very first thing you want to do is seal it with an "impregnator sealer." Ask...they have it at most home improvement and tile stores. Super simple to apply...brush it on...let it sit for about 5 minutes, then wipe it with a clean cloth.

I would suggest doing this before you cut it with a wet saw, but definitely before you install it and grout it!!!

Since the top edge of the backsplash is going to be the "live edge" it was important to remove any "netting" from the edge...

The net backing is what is holding all the little pebbles in place so you don't want to get carried away...just trim the netting away from the edge that will be exposed!

I used a utility knife and my little sewing scissors (and I wonder why I can't keep a decent pair of sewing scissors!)

I used a premixed tile mastic. Mastic is for small tiles...thinset for large tiles. Always use the adhesive and trowel recommended by the tile manufacturer. I coated the back of the sheet with mastic using a properly sized trowel. I used a small craft brush to apply mastic to the edge pebbles...it is okay for the mastic to "squish out" between the pebbles a tad, but you don't want it squishing out on the edge pebbles...I kept Q-tips on hand "just in case." Just make sure you get enough mastic on the back of the edge pebbles for good adhesion. 

TIP! Never set a tile backsplash directly onto the countertop...always use spacers and then after you grout you will run a small bead of caulk between the backsplash and the top. In this case I wanted a very small space so I used dimes as spacers! Thank goodness we keep a change jar and I was able to fish out a few bucks worth of dimes!

Let the mastic dry over night before grouting! 

Now this is where I tell you to "tune in next week" for grouting instructions. Why? Well because as I mentioned I needed 3 sheets of tile to complete this task and I only had the two I ordered as samples. So now I am waiting on the other sheet to be delivered so I can finish this little project. 

I know...it's annoying to get engrossed in something only to be told "to be continued." But I promise...next week I will share how simple it is to grout, seal and caulk the new tile backsplash.

Until then, I will share something I promised last week I would share!

(The grouting tutorial is up…take a look!)

A DRESSER!

I shared last week that I have been in "dresser mode" recently. I currently have FIVE dressers and chests sitting in my garage ready to roll! 

Last week I took a dresser in and it sold that day! I think it has been in my garage for over 6 months...I just never took the time to work on it.

It wasn't in horrible shape...just a really bad paint job (you could see all the brush strokes) and the hardware was pretty chippy!

I didn't change it up too much...KTSP...kilz, sand, tack and new oil based high gloss white!

The hardware got a little makeover...I primed it with metal primer and sprayed them with high gloss black lacquer.

Again, not a huge change but enough to give it a new life!

Maybe next week I'll share another one...if I can dig them out of the garage!

Well, that and the "to be continued" of the tile saga! 

Simple "before and afters"...

Some of the simplest "befores" turn out to be my favorite "afters."

Which explains why I often don't have decent "before" pictures...I think "oh, that's no biggy" and dive right in to giving them a simple little makeover. Then they turn out so stinking cute I wonder why I didn't take time to take "before" pictures.

They are a reminder of why do this blog...to show you how easy it is to take a simple, boring, out-dated, dark piece of furniture and turn it into something you will want in your home rather than in your yard at the next garage sale!

We DIYers live for those hidden treasures...pieces of furniture that people want to get rid of... they drop them at their local thrift store or sell them for pennies in garage sales or just set them out on the curb...we take them home, clean them up and work a little DIY magic. 

The worst...you live with the ugly, dark furniture because you can't afford to replace it!

I get it...you paid a small fortune for your "matchy-matchy" bedroom furniture so you can't bring yourself to get rid of it.

I've shared "makeovers" hundreds of time...too many times to link ALL the pieces I have "upcycled" over the years. But I would bet money you still have a few pieces lurking around your house that serve a purpose or are "family heirlooms" or you paid too much to get rid of it...so you just live with it.

Don't fret...take the plunge...buy some primer and some paint AND CHANGE IT!

LIFE IS TOO SHORT TO LIVE WITH UGLY FURNITURE!

This shelf was your typical Target cheapo...dark finish...no I did not take a picture of it "before." Honestly, I think it was a piece someone left at the apartments so I loaded it up and brought it home.

I removed the back panels...primed and painted the frame and shelves with one of my "sample" pots of white (KSTP). I painted the back panels with a sample pot of teal and then reattached them.

Super simple and too stinking cute!

This little bedside table came with a set I bought at an auction. Someone bought the dresser, chest and bed but didn't want this little table.

Meh....

Simple makeover! I removed the drawer and simply brightened it up with some Restorafinish. I primed the cabinet, sand, tack and white gloss paint. It was missing a knob so I ordered two new ones...

....again, SUPER SIMPLE and so stinking cute!

This old oak dresser...the finish and the little applique' really dated the piece.

I popped off the appliques using a chisel...lift carefully...chances are they are applied with a little bit of glue and a few tiny nails.

... sanded the old glue, stained the top with gel stain (no need to strip the old finish) and chalked painted the rest of it....distressed and sealed the whole thing with poly...

Too stinking cute!

Simple...simple...simple! 

Nothing earth shattering on any of the pieces...just super simple little makeovers that updated the pieces and gave them new life! 

Walk around your house...what simple little piece can you haul out to the garage and work a little "DIY magic." Trust me...if you don't like it when you are done, you won't get any less for it at a garage sale! 

And another campaign dresser makeover...

I shared the "before" of this Dixie campaign dresser here....

A very desirable piece that I knew needed the perfect makeover.

I spent hours cleaning the brass hardware. One of the little doodad brackets was missing so I had to order two on Etsy....they didn't match the original hardware exactly but as my Daddy use to say "You'll never notice it on a passing train!"

A few minor repairs but all in all, it was in outstanding condition for a 50+ year old piece!

A KTSP treatment...kilz, sand, tack cloth and a high gloss oil based paint!

Gorgeous!

This was a tough one to let go! I took it to 410 Vintage at around 3:00 Tuesday afternoon and they texted me at 5:00 that it was sold....I'm so glad someone else loved it as much as I did!

These vintage pieces can be brought back to life with a little elbow grease...if you can find one, don't let the grungy old finish and dingy hardware deter you! You won't be disappointed!