Building a cat shelter and a new dresser....

I don’t normally share “life hacks” but I just have to share this Kitty shelter. I hope the video tutorial stays up but just in case it doesn’t….basically you take a large storage tub, put a styrofoam cooler inside it…cut a little opening in the tub and cooler…”insulate” around the cooler with blankets (or insulation if you have it) and put a warm blanket in the cooler.

If you have followed along you know I am somewhat of a “cat person.” I have two indoor cats, Litty and Mr. Jinx, one indoor/outdoor cat, Ms. Kitty and then there is Finley. I truly believe Finley is autistic. He isn’t “mentally challenged” he just has “severe social anxiety.” He is terrified of everyone but me and now he will barely come to me. Occasionally I can entice him with food and get him close enough to snatch him up, but he pretty much avoids ALL human contact.

I have had him for 8 years. Before Cleo, he would come in the house but only appear after I was snuggled in bed…then he would get in bed with me. But when Cleo started sleeping with us, he went outside and will not come in the house. Last year when we had a week long deep freeze, I managed to grab him one day only because he was dang near frozen. I brought him in the house to warm him up but he was obviously terrified and spent the entire time hiding…as soon as he could bolt outside he was gone…and there he remains to this day.

Needless to say I worry about him constantly. I have no doubt he has found a cozy spot under the storage building to avoid the elements but I still worry.

When I saw this kitty shelter I immediately bought the stuff to make one for him.

It took a few day, but he eventually moved in and seems quite content in his new warm bed! I placed it in a spot I believe is sheltered from the cold wind and next to the dryer vent so the warm air can blow on it.

I insulated mine with actual insulation because that’s what I had on hand. I put my snuggie in for his bedding…I don’t wash it so it will retain it’s “smell.”

IF you can entice your kitty to come in the house when it is super cold, that is always best. If not, this is a perfect “hack” for an outdoor kitty or stray kitties.

MORE DRESSER MAKEOVERS….

I spent most of last week working on a few dressers. I have finished those up but now I have another batch to start on. It is super tough to find good days to paint outside during the winter months. Dang, I need a heated shop!

This was a teaser I posted on Instagram…

They all turned out super cute but each got a different treatment. So over the next few weeks I will share each one and explain what I had to do to each to bring them back to life!

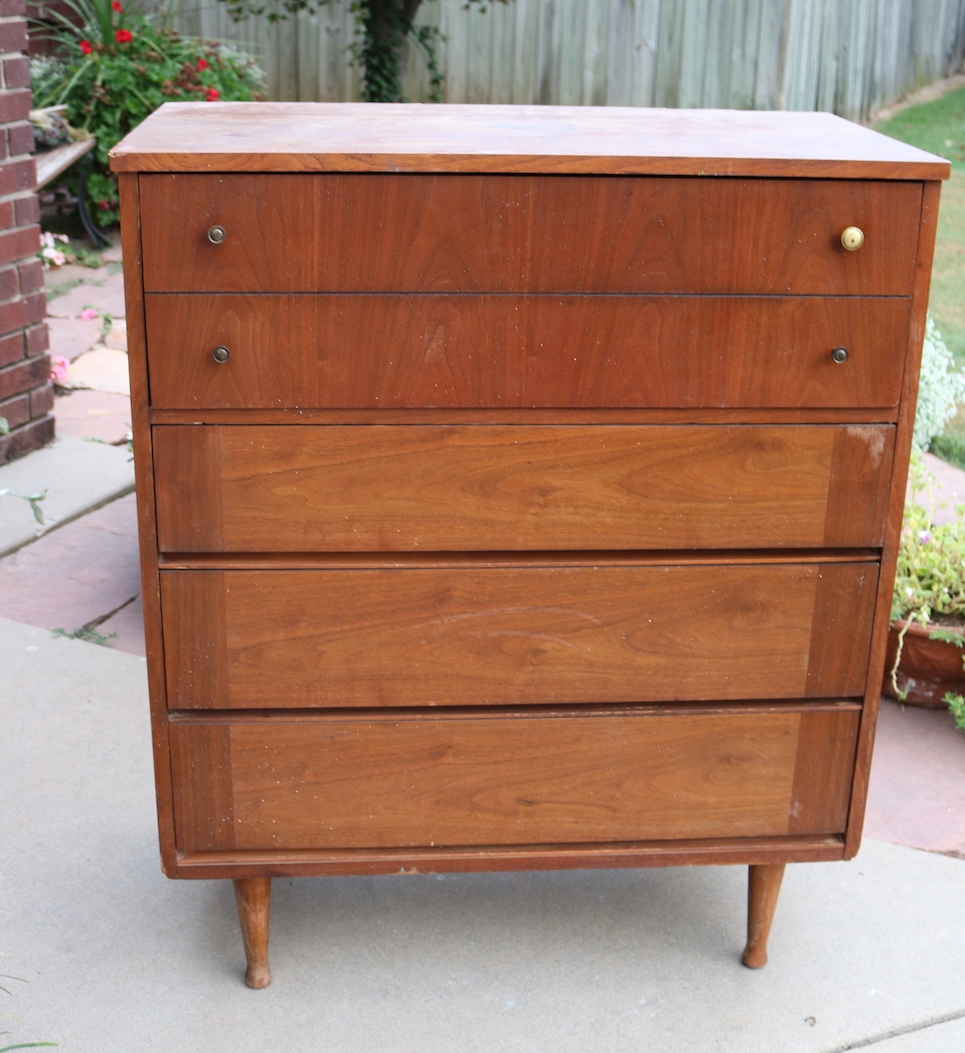
In the meantime I want to share one that has been lurking in my garage since summer.

When I bought it, it was a nasty mess….

Someone had “stained” it and changed out the hardware. Eck! I think I remember that it had a few wonky drawers. No biggy but AGAIN, make sure you make any repairs BEFORE you make it pretty!

I removed all the hardware and gave it the old KSTP treatment (Kilz, sand, tack, paint)

New hardware….

Again, I’m stuck on white…blah. This weekend we took four dressers into 410 Vintage and ALL of them were white! B.O.R.I.N.G.

I have vowed to use a little color on the dressers I am working on right now!

Stay tuned!


Modifying a Dillingham MCM dresser....

So often I buy mid century pieces fully intending to clean them up and sell them. But then, well, I don’t. Inevitably I fall in love with them or one of my kids does (just search mid century on this site…you will see)

Such was the case with this mid century walnut Dillingham dresser….

It did have a few boo-boos…a broken corner piece I was able to fix with a little wood glue…

A tiny bit of chipped veneer I decided to ignore…

And of course the finish was a little worn and tired looking and needed some freshening. First I tried a little Restor-a-finish….

You can kind of see the difference…the right side has been wiped down with Restor-a-finish.

It helped a tad but in the end I scrubbed it down with mineral spirits and steel wool and applied 2 coats of tung oil finish…brightened it right up and blended all the scratches and wear…after all it is a 50+ year old piece…it’s gonna have a few nicks and dings. But again, nothing terribly glaring.

Even though the issues were relatively minor, I hesitated to sell it. I considered painting the sides to disguise the biggest issue…the broken corner.

Enter my kid! Matt absolutely LOVED it and wanted it for an entertainment cabinet!

The dark walnut matches his vintage Lane tables perfectly and like me he has a real affinity for MCM pieces.

So I went to work modifying it for his needs..specifically he needs a place for his turn table.

(Side note…I get tickled at the newest generation of vinyl lovers. People my age remember how thrilled we were to get away from bulky old record players and vinyl records that scratched and skipped. Cassette tapes and walkmans and boom boxes…life changing! Now the younger generation have circled back around to “vinyl” and think they have discovered the greatest thing since sliced bread…HA!!! See, if you live long enough, it all comes back in style!)

So…how to modify this dresser without changing it too much.

I decided to make the bottom two drawers one deep drawer. That entailed removing the face front of the middle drawer and attaching it to the black face frame and bottom drawer…creating what appeared to be two separate drawers…but is actually just one deep drawer.

Confusing I know…let me see if I can show you what I mean in pictures.

First I had to cut the face frame in half to detach it from the cabinet.

Since it is a laminate material, I knew I needed to tape it first to keep it from “splintering.” ALWAYS tape laminate before you cut it and draw your cut mark on the tape!

I could have used a skill saw with a trim blade to make the cut. But I knew a skill saw wouldn’t work to cut the little shelf inside that separated the two drawer spaces. So, darn, I had to buy a new tool…I hate that when that happens! (NOT!)

I have a small Dremel that has similar functions but this little guy is pretty heavy duty…and it worked like a charm!

Next I used my Kreg jig and glue to attach 1x2 pieces of oak to both edges of the face frame. The drawer fronts and face frame only over lapped by about 1/8”…attaching the oak allowed me to secure the face frame to the drawer fronts with glue and screws.

We used a hole saw to cut a hole in the back of the cabinet to feed electric wires through.

That was pretty much all the modification this dresser needed to turn it into the perfect entertainment cabinet!

In the photos you get a peak of a few of the changes Matt has made to his house since he bought it a year ago…the painted fireplace I shared here and the new tile I haven’t shared yet.

I have promised for A YEAR to share a few of the projects he has completed on his house…he opened up the entry, painted his kitchen cabinets and installed glass cabinet doors, built open shelving in his kitchen and laid new tile in the entry and around the fireplace. He has even built a little storage shed! I am so proud of his “projecting” so while I was there taking pictures of his new entertainment cabinet, I snapped a few of his entry and kitchen and I PROMISE to share those next week.


Today I muse...about smoking...

I have several DIY projects lined up to share but I decided I want to “muse.”

Or rather lecture.

Let’s just say I want to share a “journey.”

I hesitate to say “I WAS a smoker.” Truth be told, I still am a smoker…I just CHOOSE not to smoke now.

Six years ago I stopped smoking. I smoked for most of my adult life. I can still remember my very first cigarette. I was 20…it was a Virginia Slim menthol…on a road trip…with a friend who smoked.

Notice I did not say “I quit smoking.” To me, that would imply I will not do it again. I can’t make that promise.

I have “quit” many times. Many times for years at a time. I tried gum, mints, hypnosis, drugs, cold turkey. I quit when I was pregnant. Every time I would quit I would go out and make a big ticket purchase…like new furniture or a new car. After all, smoking is an expensive habit and if you “quit” smoking you have all that extra money to spend on other things!

Inevitably I would end up with a car payment AND the cost of a carton of cigarettes every week!

I can honestly say this is the longest I have ever gone without smoking. But it is a daily CHOICE I make. The physical addiction is LONG gone, but the psychological craving for a cigarette still blindsides me on occasion.

A therapist once told me that smoking was one of the hardest things for a woman to give up because we use it as a “reward.” Kids down for a nap, smoke a cigarette…mopped the kitchen floor, smoke a cigarette… laundry all washed, folded and put away, smoke a cigarette.

And you know what…he was right. When I looked at my “pattern” of smoking it was pretty predictable.

I see the effects of smoking almost daily in my work. I own apartments and every time I have to clean and repair an apartment a smoker lived in I have to Kilz the walls and ceilings before I paint.

This is what “white” walls (seriously, they were WHITE!!!) look like after a smoker lived in this unit for about a year…you can see where I have rolled white Kilz….the “yellow” is pure nicotine on once white walls and ceilings. (This is AFTER we had wiped the walls and ceilings with ammonia water!)

I have found that oil based Kilz is the ONLY thing that will seal nicotine (and water stains!) so it does not bleed through the paint.

Don’t even get me started on the SMELL!!!! Kilz is some nasty smelling stuff but stale cigarette smoke is just fricking gross!

You don’t smoke inside you say? Good for you…and your spouse…and your kids…and your pets!

But what about YOUR insides…if one year of smoking inside can do this to a wall, what is it doing to your lungs?

For me, I developed a chronic cough and congestion and honestly I was pretty low energy.

Not to mention the other downsides to smoking. It stinks…sorry but all the perfume and breath mints in the world can’t cover the smell of cigarette smoke!

It RULES your life….seriously, you have to plan every activity around cigarettes…when you go out to eat, when you fly, when you go on a long drive, when you go to the movies, when you go to a play, when you go to a sporting event. When and where you can get your nicotine fix completely controls every activity.

When I was traveling, I only booked layovers in airports that had smoking lounges…seriously! And OMG if my flight was over 2 hours long!!!!

Same with long car rides…it is one thing to stop every 4 hours to stretch and pee…but to have to stop every 2-3 hours to smoke a cigarette was a fricking nightmare!!!!

So…how have I managed to not smoke for the last six years you ask?

I want to say I am NOT an “addiction specialist.” Like my weight loss journey I can only share my experience…what I did and what has, to date worked for me!

What I DID NOT do? I didn’t set “a day to stop,” I didn’t tell my friends and family I wasn’t going to smoke anymore, I didn’t have some big “ripping the pack up” ceremony, I didn’t toss all my lighters….

First, I “bad talked” the cigarettes. Before I ever “stopped,” I made myself really focus on all the negatives of the nasty habit…you make me stink, you make me feel bad physically, you made me leave the restaurant early, you made me freeze to death at half time or during the commercials, you made me miss my son’s touchdown pass/homerun/last minute game winning shot, you make it hard to afford groceries/a new couch/a vacation, you make me dry clean my sweaters every time I wear them!

Notice I said “you” rather than “it.” See what I did there?

Just like focusing on “the positives” in your life can change your attitude for the better, focusing on the negative can change your attitude about smoking.

It is no longer just something you do, it is a “baaaaad” thing that is literally controlling your life!!!

By the time I put down my last cigarette, I was a tad ticked!

Good…you want to be (and should be) ticked off that the nasty, expensive habit has such a negative impact on your life…stay focused on that!

Second, I had to change up some routines. Rather than going out for a smoke after I got all the laundry done or the floors mopped, I would go file my nails, or brush my teeth, or pick my nose….ANYTHING other than what I use to do. I no longer sit outside on the porch and drink my coffee in the mornings…because that was my “cigarette time.” (Be careful to NOT substitute food for cigarettes!)

I use an ecig (an Ecig…NOT a vape…this is the brand I use but I am NOT endorsing it….just saying). Okay, so I know there is conflicting data on whether these things are bad for you. But you know what…there is hard core proof and data that smoking cigarettes is super bad for you. So until there is some hardcore proof that these little ecigs are harming me, I will use them.

Why? Because as I said, the “craving” to smoke a cigarette will literally blindside you…you will desperately want a cigarette for whatever reason…you’ve had a bad day, you got a whiff of cigarette smoke and it smells sooooo good…for me, it is seeing it on television…when I can’t smell it, it looks sooo relaxing.

The ecig gives me the ability to “smoke” without going out and buying a pack of cigarettes and having to start all over!

I also stay hyper-focused on the positives of NOT smoking! My car/home/clothes/breath smell better, I feel “healthier,” I don’t have to wash or dry clean my clothes every time I wear them, I have a few extra bucks to spend on positive things (like manicures and facials!), I can sit and gossip with my girlfriends after dinner rather than run outside and smoke, I can sit through an entire game/movie/play/flight/car trip without a “smoke break.” So many great things when a nasty habit isn’t controlling your life!

Which brings me to my final point. You may have to start over…repeatedly. Whether you use mints, gum, Chantix, hypnosis, stop cold turkey, get pregnant…whatever…there is a pretty good chance you may have to start, or rather stop, again.

But that is okay…DON’T BEAT YOURSELF UP! Seriously, DO NOT turn the negative onto yourself! If you want to think negative, again focus on how bad the cigarettes are…not what a failure you are.

Because you didn’t “fail.” You stopped…for a day, for a week, for a month….maybe even for years. And if you can stop once, you can do it again.

There are absolutely NO good reason for smoking….but there is a lifetime of great reasons to stop.

No excuses.

YOU CAN DO IT!

That, my friends, is my soap box for the day!

A mid century chest of drawers makeover...Part one!

While my master bathroom remodel is still progressing (yea!) I finally found time to tackle an amazing mid century dresser I found!

This chest of drawers was pretty shady. Nasty finish, chipped veneers, busted veneers, mismatched hardware…just not something you really want in your home!

It had many of the problems you may encounter with old pieces so it is the perfect project to share a little “step-by-step” tutorial on turning a trashed dresser into something you will want front and center in your home!

First, there was a busted drawer! (Which reminds me, ALWAYS number your drawers on the underside as you take them out!)

This is NOT a huge issue.

I can not stress enough the importance of making proper repairs to any piece before you start making it pretty. Glue and clamps people…NOT silicone, not screws, not nails…just plain ole’ wood clue and clamps.

This one really wasn’t too bad…there have been some I had to completely tear apart and rebuild!

One drawer was missing the wood slide like this one…

Kinda necessary if you want your drawer to not be all whomper jomped. Again, no biggy. You can buy slides online but I used some scrap 1/4” plywood and scrap trim to make one. Again, glue and clamps and good as new!

TIP: If you have a drawer with wood slides that seems to be difficult to pull out, try rubbing a wax candle on the wood slide. If you have a metal slide, make sure it isn’t bent…if it is, just take a pair of pliers and manipulate the metal.

Also, if you find the drawers to be a tad smelly, first wipe them down with ammonia and water, then spritz them with vinegar water and let them sit. Truthfully, I have found a few that smelled no matter how well I cleaned them….in that case I taped off the fronts and painted the interior and exterior of the drawer with Kilz and latex paint (here is an example!)…sometimes you have no choice!

Next up chipped and scratched veneer.

A lot of the older furniture is veneered. If it is chipped or scratched, take the time to remove any loose veneer and repair it with a little wood filler.

The first few coats don’t have to be pretty…you just want to make sure you fill all the boo-boos well. Don’t rush this process…it may take two or even three coats to get a smooth repair!

In this case it took two coats (sand between each coat) and a lot of sanding with a fine grit paper (220) to get a smooth repair, but in the end it will be worth all the effort!

I have found that after I prime and sand, I can often see how well the “patch” will look and can add more filler and do more sanding if needed. If it looks and feels rough after priming, it’s going to look bad with paint…so do a little more work on it after the primer if needed!

My plan originally was to strip and oil the top since it is a walnut veneer, but I did a number on it dragging it out of my truck…so repair and paint it is.

I would like to stress (again!) the importance of sanding and FEELING! You want it smooth to the touch. If you can feel it, you will see it when you paint it! So sand it smooth.

The veneer on the drawer fronts were in mint condition…the finish just looked old and “muddy.” I removed the mis-matched hardware and then stripped the old finish (using this process). It took me less than 30 minutes to strip all four drawers.

The two on the right have been stripped…the two on the left have not…as you can see, they weren’t THAT bad, but this quick step brightens the color and really allows the grain to shine.

On veneers it is important to use chemical stripping as opposed to sanding. Veneers can be very thin and if you sand through the veneer there is no salvaging it…you will have to putty and paint!

After stripping them I applied three coats of Formby’s tung oil finish. I love this stuff and it is my “go-to.” No stain, just a clear finish!

(It was pointed out to me by a kind reader that the original Lane Acclaim tables came with a “toned lacquer” finish….true of many mid century pieces. That may be the case but again, this is the process that works for me and the one I prefer…do your research and do what works for YOU! I prefer the “easy to wipe on and freshen in the future” tung oil finish over lacquer)

I also stripped and oiled the legs since they were in pretty good condition. Same process, same finish.

If your drawer fronts have MINOR chipping like this one did, I would suggest carefully removing or glueing any “loose” veneer (I use a toothpick to slide a bit of glue under any loose veneer and wipe the glue residue with mineral spirits) and then apply the finish. As my daddy use to say, you will never notice it on a passing train! Any time I can salvage and feature a beautiful walnut veneer, I do!

Again, my apologies…this will have to be one of those “to be continued” posts. We had rain and a cold front roll in (yea! it really is fall now!) and since I don’t have a nice cozy shop I am at the mercy of the elements.

Priming, paint and reveal will have to wait until next week!

This process may SEEM daunting and time consuming but in the end it is all worth the time and effort to bring these sturdy old pieces back to life!

Take your time and do it right and you will have a piece fit for another lifetime of use! Hopefully next week you will get to see the results of all this prep work!


Grouting the live edge pebble tile backsplash....

Last week I shared the installation of my "live edge pebble tile" backsplash. This week I will continue that little tutorial...specifically the grouting and caulking!

Remove all your spacers and clean off any excess mastic that might have squished out or is on the face of the tile. Run a piece of tape along the counter, slipping it a tad under the tile.

It is important that you NOT get a lot (if any) grout in the space between your counter and the backsplash...again, you will run a small bead of caulk in that space when the grout is dry...caulk is flexible...grout is not. If you barely slip the tape under the tiles, it will pull out any grout that might slip in that gap when you pull up the tape.

Grouting is not hard! Quick tip...in general SANDED grout is for floors with larger grout lines...UNSANDED grout is for backsplashes and small tiles. Here is a good outline of the difference between the two...but as always I would suggest going with the manufacture recommendation for your specific tile or the advice of a PROFESSIONAL (not the kid at Lowes!)

In this case I used sanded grout. Why? Well, because that is what I had on hand and there are some pretty substantial gaps between the pebbles and it is in a wet area. But if you have small, uniform spaces between the backsplash tile or a tile that would scratch easily, I would go with unsanded grout.

Mix your grout the consistency of say, really thick peanut butter.

TIP: A little water goes a long way with grout so add a little water at a time and mix well. I used my shop spatula. I never dump ALL the grout in...save some in case you add too much water...otherwise you will have to go get more grout...trust me, been there, done that. 

Use a grout float to mash the grout between the pebbles/tiles, then wipe off the excess with the float. Make sure you fill the gaps well. I even use my fingers to mash in the grout in hard to reach areas. Again, TRY to avoid getting grout in the gap between the tile and the counter! Fear not...if you get grout in this gap it will pull out when you pull the tape up while the grout is still wet!

After you have filled all the gaps well and removed the excess with your float, use a tile sponge to gently wipe the pebbles/tiles. DO NOT use a plain ole' kitchen sponge...they "shed" and you will get little flecks of sponge in your grout...from experience. Buy a sponge specifically for this purpose.

TIP: I set aside a "gloob" of wet grout just in case I need to go back and fill in little spots here and there...just smash it in the gap, then wipe it with the sponge. 

On your first wipe, your goal is to get rid of the excess grout on the tiles...if you "gouge" the grout between the tiles just smash some more in and wipe.

After all the excess is removed, peal up the tape...it should remove any grout from the gap between the tile and counter. I take a utility knife or toothpick and "flick out" any that is still lurking. Then wipe again with your sponge!

I have found that using a "swirling" motion tends to "buff" the grout and give it a smother, more uniform finish.

Wipe well, let it sit for about 30 minutes, then go back and wipe again...keeping your sponge clean. You will want to do this repeatedly, every 30 minutes or so, until there is no more "grout film" on the pebbles/tile. 

I personally think grouting is one of the things that sets a “professional look” install apart from a “DIY” job…so take your time with this process. You want the grout to be uniform, smooth and even with or just a hair below the edge of the pebbles/tiles. You don’t want it on the face of the tile. Again, it never hurts to go back and add wet grout, then wipe again. Once the grout is dried and set, it’s a little tough to make adjustments…so take your time and do it right!

TIP: Just from past experience...don't rise your sponge in the sink...not saying it WILL clog your sink, just saying. Use a bucket, changing the water often!

After you have finished removing all the excess grout and the pebbles/tiles are sparkling clean, and you are happy with the grout lines, let it dry overnight.

After the grout has dried, put down another fresh line of tape to protect the counters and coat everything with the "impregnator sealer" (if you have natural stone) Brush on, let it dry for about 5 minutes, then wipe with a clean cloth. That will seal both the stones and the grout. Or apply a grout sealer (per the directions) if your tile is ceramic or porcelain. Let that dry well.

Then caulk...here I give you a pretty decent tutorial on caulking! Super important so make sure you do this one final step! 

Again, silicone caulk can be tricky for a novice and really not necessary in this area. I am a pretty proficient caulker, but if you are a novice I would suggest using this tape trick.

CAREFULLY tape both the tile and the counter...only leaving the "gap" exposed.

Apply the caulk, smooth away all the excess with your finger, pull the tape, and then smooth again with a clean, damp finger...you SHOULD get a nice smooth grout line.

I used white grout so I used white caulk. Most grouts have a matching caulk and you want your caulk to match your grout...worth the small investment.

And presto-bingo...a live edge pebble backsplash!

I LOVE it!

I know not everyone will love the "natural" look of a live edge backsplash...so many seem to prefer the structure of a "straight line" application. But as I look around my house I realize I really gravitate to a "natural" and random flow....

The dry stack fireplace tile....

The "randomness" of the tile kitchen backsplash...

Maybe it is all a part of my "go with the flow" attitude! I would like to think that in a world of structure and symmetry we all need a little randomness in our lives!

My son said it looks very "Coloradoish!" BINGO! That is exactly what it kind of reminds me of!

We leave next week for our annual fall trip out west! I finally get to check “a float trip down the Black Canyon" off my bucket list...we have a guided fishing trip scheduled! And then we will do our annual guided trip on the Colorado River with Cutthroat Anglers. This is a trip I look forward to every year!

I'll break out all the fall decor before we leave so I will be ready to kick back and enjoy the fall season when we get home! Hopefully the summer heat will have gone away and I will be able to pack up the shorts and flip flops for the year.

Cleaning and sealing the deck...

I rarely share mundane chores...why? Well, because they are mundane. But this week I thought I would share our weekend chore only because I think I might have found a new product I like.

I say "I think I might" only because I suspect it will take a few years before I come to a conclusion as to whether it actually works. As far as "ease of application," it's a winner!

The back deck is on the north side of the house so one half gets no sun and had a good build up of black and green gunk. The other half gets a lot of sun so most sealants with stain tend to fade over time! For years I have just scrubbed it annually with bleach and Dawn.

Years ago I used a high power washer to clean my deck...not only did it clean it, it literally chewed the wood! Curses! (I suspect it was more "operator error") I sealed it with an oil based stain/sealer and it was a real pain in the rear...dry time was unreasonable when you have cats who like to sun bathe on the back deck.

Clean up wasn't a huge deal because I usually just tossed the applicator! But it made it near impossible to "start and stop" the project...I pretty much had to do it all at once!

And honestly, it was pretty stinky!

Time flies and while it feels like I just did this whole tedious chore a few years ago, I think it has been more like 10...so it was time once again to power wash and seal the deck.

This time I borrowed my neighbors power washer...only 2700 PSI but it cut right through the black gunk and dirt. 

Then I went on a search for a water based deck sealer. I'm all about oil based anything...and while I know it may not hold up as well, "ease of application" is a biggy these days!

I started researching like I always do...I googled "best deck sealant." I found a product on Amazon with five star stellar reviews...even says it right on the bottle...#1 Deck Premium Wood Stain.

I ordered the "Light Walnut" and tested it on the little deck off the master bedroom.

(Yes we neglected to clean the sides of the steps, hence the "green gunk.")

I was a little freaked out at first because it was kind of a "purplish haze" when I first brushed it on but it dried to a pleasant cedar color that blended well with the old stain color. I was able to clean the brush and bowl with soap and water so I didn't feel the pressure of getting it all done at once!

So, what do I LIKE about this product. First, it does not stink! Pretty much odorless. Second, it dried in 1-2 hours as promised so I didn't have to worry about the critters. I poured it in one of my "work bowls" and used a cheap 4" paint brush to apply it....it was like brushing on water! It was super simple to clean with soap and water.

I wish I had taken "before" pictures of the deck so you could see just how nasty it was...but again, I usually don't share mundane chores so I didn't even think about it. This is a picture I snapped with my phone after I potted my summer plants...you can kinda see how bad it was!

This is what the deck looked like after cleaning but before applying the stain/sealant. 

It had been a few days since we powered washed the deck, so before I applied the sealant I hosed it down and let it dry....as you can see, the water just sits on the deck...no "beading."

This is "after" the sealant...looks amazing and the water beads right up which tells me the wood is sealed...for the time being!

The "side by side" comparison...again, it dries fast so I will be able to move everything over to the done side when I finally get the energy to finish it!

Why do I "think I might" like this product? I have no idea how long it will actually "seal" the deck.

Check back in a year or two!

Gel stain tutorial on table makeovers...

I did it again...dove head straight into a project without taking a "before" picture. But at least this time I got an "inbetween" picture!

These little tables were simple makeovers. I picked up the side table at an auction a few weeks ago. Got it for a few dollars because, well, it was nasty, the color is pretty putrid AND the top had come unglued.

No biggy for me. I glued and clamped the top, then I sanded off the old finish on it. Yes, you heard me right, I sanded it. Two reason...first, I got glue on the top when I repaired it and stain will not adhere to glue. Second, it is solid wood and I knew I couldn't do a lot of damage to it. Light sanding...220 grit! Just enough to remove the old finish and glue residue.

I got the drop leaf table from my neighbors. I told you I am the dumping ground for neighborhood furniture...it just "appears." Again, the top is solid so I gave it a light sanding.

I knew I wanted to paint both tables but as always I have to have my fix of stained wood. So I used gel stain on both tops. 

Gel stain is SUPER easy to apply IF you use the right technique and product. As I have said before the ONLY gel stain I will use is General Finishes. It is not a brand the big box improvement stores carry so I usually order mine on Amazon. I have tried other gel stains and have not been happy with the results. The General Finishes brand never disappoints. I have used both the Java and Brown Mahogany colors.

I am going to share how I gel stain...it is a super easy application process and perfect for real wood or even that cheapo fake stuff you find on the ends of cabinets. Since it goes on fairly translucent, the wood grain (real or fake) will show through.

I have used this process on cabinets, tables, dresser tops and drawer fronts....some I have stripped down to bare wood, others I simply applied it over the existing finish.  It is a great process to use on any project where you want "stain" but know you might not get a good result by completely stripping the piece and applying penetrating stain!

First step for ANY makeover (after repairs of course)...give the piece a good cleaning. In this case, since both tops were solid wood, I also gave them a good sanding. Sanding is NOT necessary but you want to make sure that any old finish is stable and somewhat smooth. So if your old finish is flaking or a bit rough, sand it smooth with 220 grit paper.

You will need....

The gel stain...again, I ONLY use General Finishes. A quart will cost you around $30+ but it seriously goes a loooong way!!! If you just have a small project, get a pint. I have found that it doesn't store well.

The gel stain top coat...in this case I used the GF Poly wipe-on top coat. But I have used a spray on Polyurethane and Polycrylic and they work just as well. 

Disposable rubber gloves. I always have those on hand. Just the cheap latex gloves you buy in a box so you can toss when finished.

Old athletic socks. Again, I keep a stash on hand. Any time I find old socks at thrift stores or garage sales I buy them. They are perfect for applying any type of stain or finish and I can toss them when I am finished.

That's it...a relatively short list of supplies!

The trick to applying gel stain is to remember it is suppose to be somewhat "translucent." Put on a rubber glove, then an old sock over the glove...dip you finger tips into the gel stain and wipe the gel stain on the piece with the grain. The first coat will look like crud so don't try to get perfect solid coverage! Just wipe it on LIGHTLY WITH THE GRAIN....do not "glob" it or apply it thick...it is NOT paint. I usually wipe it on, then use the clean side of the sock to give it one final wipe WITH THE GRAIN...working edge to edge. 

THE FIRST COAT WILL LOOK LIKE CRUD!!!! I can not stress this enough...you are better to go light than to try to make the first coat look decent. It is not going to! If you can't see the grain through the coat of stain, it is WAY to thick.

Now, let that dry over night. Then do it again. New glove, new sock. Wipe on a second LIGHT COAT! The second coat will look a tad better, but not great. THAT IS OKAY. Keep it light and translucent! 

Let the second coat dry over night. Then with a new glove and sock, apply the third coat. NOW it should look good. The stain should allow the grain to show through!

If you feel like you have messed up....too thick, too streaky, just don't like it...you can still wash this stain off with mineral spirits if you haven't applied a top coat! 

Let the third coat dry overnight. If you are happy with the look, apply your top coat. Again, I used the GF gel wipe on poly on these tables...super easy to apply. Rubber glove, sock, wipe on. As simple as it sounds. You may want to apply 2-3 coats of the finish...especially on tops or cabinets that get a lot of use...just make sure you wipe it down with 0000 steel wool and tack cloth between coats. You will get a nice smooth finish that way!

Presto, bingo! This really is an easy application IF you don't overthink it and try to get a decent looking finish on the first and second coat...if you do, you will put the gel stain on too thick and I promise you won't be happy with it! My neighbor, Tammy, tried this process on a little side table...and sure enough she put the stain on too thick...it did not turn out well! Each coat should be light and "translucent." 

After I let the top coat dry well for a few days, I painted the rest with chalk paint...a light distressing with 220 grit sand paper and sealed with a spray on polyurethane. Again, sometimes I use polyurethane, sometimes polycrylic. I find that the urethane tends to "yellow" and give the piece a bit of an aged look...which is kind of what I was going for here. The polycrylic is a true clear coat and won't alter the color of the paint or yellow with time.

(As you can see the sun was very bright the day I tried to get decent pictures of these two tables...trust me that was the ONLY day this past week that it wasn't dreary, raining or cold as crud. I even had to cover my hostas this week to protect them from a freeze...and they are predicting another freeze this weekend...grrr!)

My recipe for chalk paint is 5 tablespoons of Plaster of Paris, 3 tablespoons of water, mix well then add two cups of flat latex paint. I usually paint two thin coats, then sand and seal.

Cute as a bugs ear and ready for another generation of use!

This week I decided I am getting too old and tired to paint my own house. I actually hired someone to paint my living room, kitchen and den! Ten years ago I would never have paid someone to do something like that! 

But just the process of getting ready to paint creates a mess and is exhausting!

This, my friends, is the reality of home improvement...normally we bloggers only share the beautifully styled and perfect "after." Truth is, most projects make a mess!

I'm a pretty clean person...or so I thought until I moved things that haven't been moved in years...yuck! 

I'm painting my living areas the same color I used in the master bedroom and guest room....SW Nuance. I'm a little nervous about painting these rooms a different color...I told you, change is hard for me. But I have lived with this color in those two rooms and I THINK I will like it! The painter will be here around 10 so there is no turning back now!

Hopefully the weather will take a turn for the better and I can finish and share a few fun projects I have waiting in the wings next week!

Until then....

The breakfast nook table and chairs makeover

When Matt decided to buy his first home (details here), I knew my love for "making old new again" would come in handy!

I love the dresser and chest I found and refinished!

He was able to use the farmhouse trestle table I featured here

And of course this "cute as a bug's ear" vintage chair makeover!

But he didn't have a table that would fit in his breakfast nook...a relatively small space in his kitchen.

I knew it needed to be a round table since the space is only about 9x9.

I found this round oak table at a flea market...a tad dated in it's original condition but I knew exactly what I wanted to do with it.

Normally these oak tables are around 48" in diameter but this one was only 32" so it is the perfect size...just not the perfect finish.

I honestly didn't want to strip and restain the top so I decided to go with gel stain...again, I ONLY use the General Finishes brand. It really is the best!

Rather than go with my usual Java color, I decided to go with the Brown Mahogany.

As I have said in other tutorials, the first coat is a bit stressful....

...you really question whether this stuff is going to work. 

Patience...wipe on a coat with an old athletic sock...let it dry overnight...then wipe on a second coat, then a third....

I promise, by the third coat you will see the results you want. Then just seal it with the General Finishes wipe on top coat. 

Sunlight streaming through the windows is awesome in the morning...not so much for photographing furniture...but hopefully you get the idea....

After staining the top, I chalk painted and distressed the table base. I picked up a couple of oak chairs at an auction and chalked painted and distressed them as well...then recovered the seats with some leftover fabric from my club chair makeover!

Perfect fit for this small space.

One tip...this little table came with a leaf...while this space really isn't big enough to expand the table, it is always smart to refinish table inserts just in case want to use them in the future! 

Also, just a reminder that I do not seal my chalk paint with wax...I use polyacrylic. Someday this whole "distress" thing will go out of style and he will want to paint this furniture...wax would have to be stripped before he could repaint the piece!

Next week I hope to share Matt's first big project...painting the brick fireplace. If you are debating whether to tackle yours, you really want to see what a little bit of paint can do...impressive!

So tune in for the big reveal.

A proper guest room...

I have three empty bedrooms upstairs. Three empty rooms that my heart still feels are "the kid's" rooms. Truthfully, Mitchell hasn't lived in his room in 12 years. Matt has moved home on a few occasions since he graduated, but he just bought a home. Katie is still in college 15 minutes down the road, but she has made it clear that she has no intention of moving home...she will graduate next year and I have no doubt she will set out to set the world on fire.

So while my heart feels those are "the kid's" rooms, I know in my head that it is time.

Time to paint over the big "fail whale" in Katie's room.

(In case you are wondering, those are the photo albums...for the three youngest...I know, I have issues!)

Time to replace the baseball paddle fan in Matt's room. 

Time to purge a few more things in Mitchell's room.

I've made small changes to each room over the years...Katie's room is now our "home gym." But honestly, throwing a weight bench and elliptical machine in a room doesn't really make it a "home gym." 

I have boxed up MOST of Mitchell's plaques, framed certificates and trophies...but it is still "his" room.

Matt took much of his furniture when he moved into his new home, but he left his junior high jersey and his high school diploma and senior picture, so I immediately rearranged the few pieces of furniture (a bed and chest) and put his personal momentos back on the wall. 

But it is time to make some serious changes...and as always I found the little push I needed and a bit of inspiration on another website. J. Cathell ...a site that showed up on my "Bloglovin'" feed. I also found this tutorial at Today's Creative Life that outlined a few essential "must haves" in a proper guest room.

And this super handy checklist here...a great list to make sure I have all the bases covered if I want to create the perfect guest room.

I don't intend to put the bath items in the bedroom...the bathroom is rarely used so I just need to make sure it is organized, clean and stocked with "guest necessities." 

Inspiration...the first step to making a plan for any project, big or small. 

The room featured on the Jess's site is a tad "over the top" for our needs. Truthfully we don't have a lot of guests...the kids come home for the "momdatory" holidays and occasionally my uncle will come for a visit.

Inspiration none-the-less...and a push to get the ball rolling.

A plan...right now the plan is in my head and relatively simple. 

This week I tackled the first step in "the plan." Since Mitchell's room was the most recent makeover, little will change in there. I boxed up a few more things...VHS movies, books, etc. It will still function as a guest room but it will be a room where I can still display the important stuff like diplomas and such.

Katie's room will still be our "home gym" but it needed to be purged and neutralized...in other words, it was time to paint over the fail whale.

Since it is our "home gym" we think we MIGHT eventually move all the diplomas, framed jerseys and trophy's into that room. It has the largest tv so it is also ideal for the grandkid's game room when they visit.

The paint in Matt's room is not bad, but I want to eventually coordinate all the colors in the three rooms. I painted Mitchell's room BM Rivere Pewter but I wanted to go a tad lighter in Katie and Matt's rooms...so the plan was to paint them SW Nuance...the same color I painted my master bedroom. It appears to be a shade lighter than the Revere Pewter. (As you can see, I managed to get Katie's room painted but after two days of painting and purging, I decided Matt's room will just have to wait!) The trim in Katie's room was the original trim color so it was a tad "yellower" than the Swiss Coffee I have used in the rest of the house...so that was painted as well. 

Brian replaced the baseball paddle fan in Matt's room...not a huge deal.

I wasn't thrilled with the amount of light the new fixture put off. I moved a little wicker side table from Mitchell's room and the lamp from Katie's room and I think guests will have sufficient light!

A major "purge fest" in all three rooms...boxed up the keepsakes that will go in the attic and filled four boxes to donate. I made sure the bathroom was free of expired products and used toothbrushes. I gathered up all the spare blankets and pillows and stacked them in the closet.

Purging, paint and a paddle fan. Seems like a small step but those things made the biggest mess, the biggest impact and set the tone for the rest of the plan.

Eventually I want to paint the walls and change the bed frame in the Matt's room (the REAL guest room). I want to replace the chest of drawers with a nice dresser. Eventually incorporate all the little things Jess featured in her guest room makeover...a comfy rug, a chair or bench, new curtains and wall decor, a charging outlet, a cute wifi passcode sign, a jar with little guest necessities, a luggage rack, nice alarm clock and all the little homey nick-nacks that make a guest room comfortable and inviting. 

Truth is the most important elements of any guest room is that it is clean and clutter-free and has a comfortable bed and bedding....I can check that off my list of "things-to-do." The rest of the checklist will come with time and patience.

Thank goodness we are not expecting over night guest anytime soon!


Photographing pets for Christmas!

I say it every year...I am going to learn to use my grossly expensive digital camera.

But I never get around to it, so often my pictures are "less than perfect!"

I read a tutorial one time about taking pictures of your Christmas tree. Not sure I remember everything about how to do it properly, but one thing I did remember is to use my tripod. In low light situations, it is a must!

One thing I always like to do is take Christmas pictures of my pets...that seems like a near impossible thing to do since the shutter speed is slow and getting an animal to sit perfectly still is almost an impossible task! 

This year I managed to get a few half way decent pictures. My trick? Well, again, a tripod...gotta use it.

The other is to get them when they are "low energy." For my animals, that is early in the morning when they are still a bit sleepy or late at night. Since I don't function well after about 8 in the evening, I decided to try to capture them (almost literally) early in the morning.

Mr. Jinx is the toughest to photograph...but I did manage to get a fairly decent one this year....

Getting Cleo to "sit and stay" is another challenge. She cooperated somewhat this year....

You can tell she wasn't at all thrilled with this process.

Litty the spaz cat is down right impossible...she rarely sits still. I did manage to catch a glimpse of her under the tree...

Animals and little kids...good luck!!!