Eastlake chair makeover!

Years ago, the "wood purist" in me would never have painted an antique anything!

But slowly I have evolved and my snobbishness has taken a back seat to reality...some "antique" pieces have little use in today's world of decor trends. The rich color and grain of walnut, the depth and beauty of rosewood, the vibrate color and delicate grain of mahogany...zip, zilch, nada.

The day will come when those who followed the decor trends of today will glare at their painted furniture and shiplap walls and growl...it happens. NOTHING is timeless. Honey oak cabinets were timeless...8x8 tile floors were timeless...white appliances were timeless. 

The fact is decor trends come and go and we realize that which we thought was timeless, really isn't.

(There are still some who cherish antique pieces...and of course, as always, do a lot of research and make sure the piece you want to paint is not a valuable antique "as is!")

I have no doubt that this piece I slathered in chalk paint and covered in buffalo check fabric will catch the eye of someone looking for a great side chair...but it will someday be stripped down and refinished...exposing the amazing walnut grain and delicate incised carvings. Someday...but not today.

That was my original plan. Strip the old finish to expose the beautiful walnut grain and intricate carvings, reconstruct, seal with oil and reupholster in a fabric worthy of an antique walnut Eastlake piece.

Knowing all that hard work would garner little favor with my "target market," this chair sat in my garage for YEARS. Seriously, I'm not sure when I bought it but I can't remember a time when it wasn't lurking in the back of my garage.

(If you are a "purist" or antique lover, turn away NOW!)

Some would look at this and think EEEWWWWW!

Yes, it was pretty "eeewwwy." And yes, this is pretty much the shape it was in when I bought it. I think I remember removing the original rotted fabric and a few thousand upholstery nails and I did start stripping it using this process. But I eventually shoved it into a corner of the garage where it languished until I got over my snobbiness. 

I constructed a new seat out of plywood...not even close to the original but then again furniture no longer sits in the parlor only to be used by tea sipping adults. 

The richness and beauty of oiled walnut has fallen out of favor for the "farmhouse" chalk paint and distressed everything!

New foam padding and batting...the old horse hair of yesteryear just doesn't cut it these days. (Thank God...that stuff is nasty!)

The crushed velvet or needlepoint fabric that would have originally ordained this piece was a no-go. I went with the trendy buffalo check that I suspect will be as popular as chevron was a few short years ago!

A bazillion metal upholstery nails...no way Jose! Hot glued gimp is the way to go!

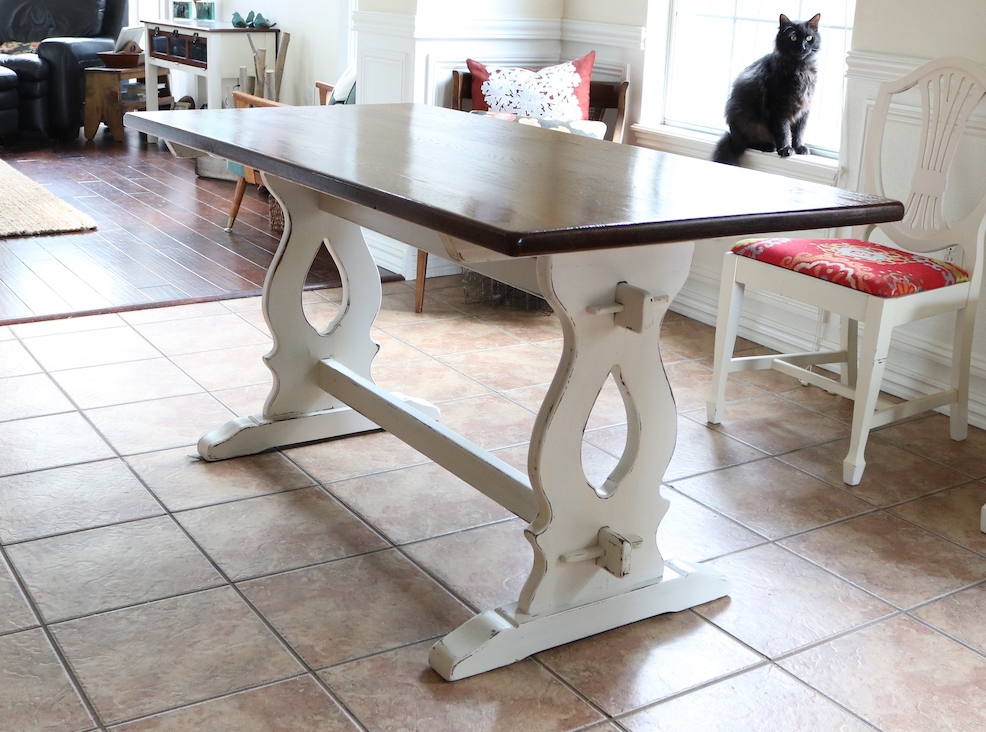
Don't get me wrong, I think it is as cute as a bug's ear! I have no doubt someone will LOVE it! It would be a precious side chair or even a dining chair paired with a farmhouse table that are all the rage!

And as always, it is Litty and Mr. Jinx approved....

As much as I would like to think of myself as a "purist" I can certainly appreciate the desire to fill our homes with pieces we love or suit our desire for "going with the flow" without breaking the bank! 

C'est la vie.

The breakfast nook table and chairs makeover

When Matt decided to buy his first home (details here), I knew my love for "making old new again" would come in handy!

I love the dresser and chest I found and refinished!

He was able to use the farmhouse trestle table I featured here

And of course this "cute as a bug's ear" vintage chair makeover!

But he didn't have a table that would fit in his breakfast nook...a relatively small space in his kitchen.

I knew it needed to be a round table since the space is only about 9x9.

I found this round oak table at a flea market...a tad dated in it's original condition but I knew exactly what I wanted to do with it.

Normally these oak tables are around 48" in diameter but this one was only 32" so it is the perfect size...just not the perfect finish.

I honestly didn't want to strip and restain the top so I decided to go with gel stain...again, I ONLY use the General Finishes brand. It really is the best!

Rather than go with my usual Java color, I decided to go with the Brown Mahogany.

As I have said in other tutorials, the first coat is a bit stressful....

...you really question whether this stuff is going to work. 

Patience...wipe on a coat with an old athletic sock...let it dry overnight...then wipe on a second coat, then a third....

I promise, by the third coat you will see the results you want. Then just seal it with the General Finishes wipe on top coat. 

Sunlight streaming through the windows is awesome in the morning...not so much for photographing furniture...but hopefully you get the idea....

After staining the top, I chalk painted and distressed the table base. I picked up a couple of oak chairs at an auction and chalked painted and distressed them as well...then recovered the seats with some leftover fabric from my club chair makeover!

Perfect fit for this small space.

One tip...this little table came with a leaf...while this space really isn't big enough to expand the table, it is always smart to refinish table inserts just in case want to use them in the future! 

Also, just a reminder that I do not seal my chalk paint with wax...I use polyacrylic. Someday this whole "distress" thing will go out of style and he will want to paint this furniture...wax would have to be stripped before he could repaint the piece!

Next week I hope to share Matt's first big project...painting the brick fireplace. If you are debating whether to tackle yours, you really want to see what a little bit of paint can do...impressive!

So tune in for the big reveal.

The miracle chairs...

Even after years of proving I can turn just about any "trash" into a little "treasure," I think Brian still raises an eyebrow from time to time.

Such was the case with these chairs....

We went to a farm auction and these chairs had been tossed into an old barn, only to see the light of day when the auctioneer dug them out and sold them...to me!

What would possess me? They were literally caked with nastiness and two were in pieces. But I saw the potential (and of course the old mud dauber nests and spiders and bugs!). 

Rarely will I take a hose to a piece of wood furniture...but I had no choice. Even then I had to scrub them with a strong detergent and steel wool.

Then I pulled nails, scraped old glue, cut out broken spindles and removed splintered veneer.

Then I had to clamp and glue everything back together. One chair was missing a side apron so I cut a new one and secured it in place with glue and my Kreg jig! 

My original plan was to prime and paint them. They still had a few rough spots and I knew I wouldn't get a pristine finish I would be happy with so I decided to do a chalk paint and distress finish on them! Always a good choice for a piece that has a few "boo-boos!" 

I think the boo-boos and the distressed finish give the chairs "aged character." After recovering the seats on the two Duncan Phyfe style chairs and making a new seat for the other, I think they turned out pretty sweet.

My plan is to stage them with this trestle table I will be taking into 410 Vintage this week, just in time for the holidays! 

Just in time for Brian and me to take our annual trek to Colorado! I can't wait...two days of fly fishing, several days of sight-seeing and maybe even a day of gambling in Central City! The forecast shows the temps in the 50s and 60s so I will be packing my coat and Uggs! One thing is for sure, I always come home recharged and ready to enjoy my favorite season

I made a few changes to my fall decorating this year...one being these little pumpkins...

I added a few silk sunflowers, a fall garland, fall picks and deer antlers (yes, my kids killed them....ick!).

Not sure I am loving this little vignette but I have a few more months to make changes and additions!


Change is a coming...again

As much as I like to think everything stays the same around here...things do change!

Change came when Brian and I combined households. One of the many additions when he took up residence was his very large and very brown leather couch....

I featured the club chair makeover here

BB (before Brian) I had a light and bright couch....this couch went to the den....

(My daughter now has this living room...the couch, the leather chair and the rug!)

...after I gave away the hulking "mustard" couch! 

The simple yellow couch went to my daughter's so for now the big brown couch has moved to the den  ....

...to make room for the NEW couch I ordered two months ago...

...and as you can see, it has still not arrived.

There was a time when I probably would have ordered off the floor because I was too impatient to wait. But wait I have...and waited and waited and waited. Fortunately, it is due to be delivered today.

The biggest problem I have right now is the "matchy matchy" of the big brown leather couch and big brown leather chair in the den...

....so the new couch may go to the den and the big brown leather couch may go back to the living room. 

Who knows...all I know is I am grateful for furniture movers and Brian's strong back and endless patience!

One disadvantage (or advantage, depending on your perspective) to going to auctions and having a resell outlet is the never ending supply of relatively affordable furniture. This Duncan Phyfe table was a fixture in my dining room for 15 years....

Then I found this really nifty antique table and shared how I refinished it here....

Then I found a really nifty trestle table and shared it's little makeover here....

I held onto this table for a time only because I thought I might follow the "farmhouse fad" and try to infuse a little in my dining area. But truth is, it always seemed a tad big...and honestly, it just isn't "my style." 

A few weeks ago I snagged this cute little antique draw leaf table at an auction....

Not sure I am in love with it, but it suits the need for a smaller table nested against the wall and it can be expanded once a year for Thanksgiving dinner. 

So, change is coming...when the couch gets here. It has been over two months since I ordered it so I hope I still LOVE it when it is delivered. Couches are one of those things I really need to love...because they are big and they are expensive and for me they are the anchor for the room. Rugs, pillows, tables and wall decor can easily be changed out to completely change the feel of a room...couches, not so much! 

Oak trestle table makeover...

I bought a table at an auction this past weekend that may be difficult for me to sell...

Hang with me...I know it didn't look like a winner when I brought it home, but the vision was there.

The reason it may be difficult to turn loose of is because I have been contemplating giving my dining room a little "farmhouse" flare.

Again, that is not "my style." But if I can infuse a little bit of the current craze into my decor without a lot of expense and time (like I did here with my bed), I am willing to give it a shot.

For 17 years, my dining room has basically been a "walk through"...from the living area, to the kitchen, to the den....we always use the bar for meals. The table (that got a makeover here) is pushed against the wall for 364 days out of the year and only comes out for Thanksgiving dinner. With the inserts added it easily seats 6-8 with the addition of a few chairs and a bench

But the antique trestle table fits right into my "I think I might" plan. It is the perfect size and style, just needs a little face lift.

The first draw back is it is oak. Again, NOT my favorite wood, but honestly oak is a great "farmhouse" wood to work with.

Second, I like my toes...they aren't the greatest toes, but they always seem to find anything that is out of place...vacuum cleaners, chairs, tables, an animal...whatever is NOT suppose to be there, the toes will find it. One of the reasons I am super careful moving furniture around.

The fact that there has not been a table in the middle of this room for 17 years may pose a problem for my toes.

To complete my vision, I would need the perfect chairs...not a huge deal because I see awesome chairs all the time at auctions. I may have to find a buffet for the wall...had one a few years ago and I kind of liked having a place for a little "fluff." And then there is the whole window, wall, rug, trim detail thing...hum. 

Regardless of what I do in my own home, I know the table needs a little love and attention. So that was the project this week...give this little table a makeover as if it were going into my own home. Then if I decide to actually move forward with my vision for the dining room, I have the table...if not, someone else will get a beautiful antique dining table!

I easily stripped the top using this process...not a lot of finish left on this old beauty but it did have dark "water rings." 

Several months ago a very wise reader commented on another table project and suggested using oxalic acid on water rings. I have never tried it and always just "embraced" the imperfections on antique pieces since nothing I tried worked well. But I did order the acid and had it on hand.

WOW!!!! Just wow. Worked like a charm. I made a paste with the acid crystals and water, dabbed it on the ring, and within 30 minutes, gone! I was a little miffed at first because it "bleached" the wood, but I scrubbed it with my 1/2 and 1/2 mixture and that disappeared as well!

I stained the top and applied three coats of tung oil finish...my favorite! I painted the base with homemade chalk paint, distressed a bit and sealed with polycrylic.

Just beautiful....for now I am going to take my daughter's advise...set it in place and mull it over. Maybe see how many times my toes find it!!!! No harm in letting it hang out for the time being (except for maybe a few toes!)

Right now my den is in disarray and I am trying to decide what I want to do. I gave my couch to my daughter so now I have no choice but to buy a new couch...part of the "den makeover" plan that started several years ago (remember, if you can't "see" it, get rid of what is there and live with a blank slate for a time) Since the reveal, the club chair has been reupholstered and moved to the living room to make room for Brian's big leather chair. The coffee table is laying on Mitchell's bed because we needed more room for Cleo and our grandpuppy, Zoey, to wrestle! There is a new rug...

The jury is still out on it...doesn't seem to be wearing well and not real comfy...hum. I like the look, just not sure I like THIS rug!

So taking on a dining room makeover just isn't on my priority list right now. I know if I am ever going to do it, I should probably hang onto this table since they cost a pretty penny new. But I also know that if I take the plunge I will have a sizable project on my hands...and my hands are pretty full right now.

Maybe it can just hang out for the time being! Never know when a bug attack!

Until next week....

Eastlake chair makeover....

A few weeks ago I questioned the need to paint an antique....seriously, is it a cardinal sin?

Most "purists" would never take a paint brush to a walnut chair or mahogany dresser...I get it...I was one of them. 

But sometimes I have to bite the bullet and go with the flow! 

I bought two Eastlake chairs at an auction a few months ago. Naturally, I neglected to take good "before" pictures because, again, I am a bad blogger.

One had arms, usually referred to as the "caption's chair"...you can get a peek of it next to the old couch (finished the couch last week...hope to share soon!) 

The other does not have arms. It has been at 410 Vintage since I bought them. 

I decided to give the caption's chair a little makeover, knowing that a true "antique purist" would stroke. But my general rule is...if changes will enhance the piece and give it another life, go for it! Keep in mind, I always do as much research as I can to make sure I am not slathering paint on a valuable piece. Eastlake pieces have some value, but right now the market in their original condition are pretty slim in our area. (Now MCM pieces...that's another story!) 

These two old chairs didn't have much of a life as they were, so...

I chalkpainted the frame....

....distressed it a tad to highlight the Eastlake detailing, applied a clear coat, reupholstered the seat and back with drop cloth and added a little graphic from The Graphic's Fairy for a touch of whimsey!

The seat of the chair was in pretty good shape, but the back needed new upholstery weaving and padding. And as with most old chairs the arms needed to be glued and clamped. No biggy, but again, ALWAYS make needed repairs before investing your time and money on paint and upholstery!

It sold the day I took it in.

I've decided to give the other chair a makeover as well....fortunately warmer weather is just around the corner!


Waterfall armoire makeover....

This week's project is a classic example of "OMG, can I really paint an antique!!!???"

This is a pretty little vintage waterfall armoire I picked up at an estate auction a few weeks ago. It wasn't in terrible shape, but it really didn't have a lot going for it aesthetically...kind of plan and boring!

It did have some really pretty bakelite hardware, which is classic on waterfall pieces. The problem was the condition of the hardware. One was completely missing the bakelite, and the other three were broken and chipped....pretty much unsalvagable! 

The "design" on the top drawer was not a true inlay...and the general construction was pretty simplistic. I did a little research online to make sure it wasn't something of great value! Sometimes, when there are no makers marks, you just have to make a judgment call on the value as a "restored antique." 

In the end, I decided to give the piece a little KTSP treatment and give it a new life. Hopefully it will make a perfect little dresser/storage cabinet for someone! 

I removed all the hardware, taped and papered the drawers and insides and sprayed it down with Kilz. Since one of the pulls was toast, I puttied the holes so I could add a single pull. After sanding it smooth and wiping it down with tack cloth, it was time to paint.

Unfortunately, it is that time of the year when temperatures don't always cooperate. So I had to haul everything into my dining room and use a brush and roller instead of spray paint. 

No biggy IF you do it properly...make sure you use a quality brush, a 4" foam roller and add Floetrol to your latex paint! (Penetrol for oil based) The additive will give your paint a longer dry time and more time to "level," eliminating brush and roller marks. 

I found a pretty blue and tried it on the drawers..ummmm...no. Too babyish. So I mixed a little black in some green and came up with a greyish-green I kind of liked.

I removed the broken bakelite from the pulls and sprayed them with metal primer then sprayed them with gold paint. Kind of pretty!

All in all, it turned out kind of cute. While it was a nice "vintage" piece, I think the paint and new hardware gave it a nice little "update" and a chance at a new and useful life....

If you are certain a piece is not a valuable antique, don't be afraid to give it a little face lift! 

As I mentioned last week, I have been working on reupholstering the club chair and ottoman in the living room. Unfortunately I had to order a little more fabric so HOPEFULLY I can finish it up this week and share next week! 

Until then....

Super simple DIY wall decor....

As I look around at my wall decor, I realize that MOST of it is thrift store, garage sale, vintage market pieces that I have collected and "upscaled" at some point in time.

Here I shared a quick update to my little gallery wall of favorite family photos....

Simple, inexpensive frames spray painted and new matting. I didn't even have expensive "custom" mats made...I cut bulk matting to fit the frame and then mounted the pictures on top of it!

I spent a fortune on these dining pictures 17 years ago and in my quest to transition from "dark and dank" to "light and bright" I gave them a little make-over....

I did spend a little more on custom matting, but I chalk painted the frames and deconstructed and changed it all out myself. A tad more expensive but faaaaar less expensive then going out and buying new matted pictures! You can pick up frames like these for pennies at thrift stores! Maybe the picture is ugly and the frame is "dated" but it really is a simple little DIY project that can make a huge impact! 

This super cool mid century dresser mirror was another DIY project I shared here

I love the fact that I can change out the wreath for the holiday seasons...I have one for fall (pictured) and Christmas, a Valentine's wreath and a cool little metal thing for the 4th of July! For "off-season" I have a simple boxwood wreath!

Now this is where I admit that I am a bad blogger....because AGAIN I failed to take any "before" pictures. So close your eyes and imagine...inexpensive little brown frames with pictures of a goose...or something stupid like that.

Again, a little KTSP treatment, a tiny bit of spray paint, a little inspirational quote printed on stock paper and PRESTO....

When I was at an auction last week I picked up two unfinished oak cabinet doors. Here I shared how easy it is to turn them into cute little chalkboards...perfect for a kitchen, mud room or the kid's room! 

Chalkpaint, chalkboard paint, a little cup pull to hold the chalk and again, PRESTO! 

(I even painted the cabinet doors in my garage with chalkboard paint so I have a place to write down supplies I need to pick up or projects I need to work on!)

My point? If you don't like your wall decor,  change it! Paint it, change out the mats, change out the picture. 

Make it pretty! Cuz life is too short to live with ugly wall decor! 

An old table made new!!!

A few months ago I received an email from a reader asking for a few more details on my refinishing technique. And I think she may have been looking for just a little "push!" Sometimes all a person needs is a little encouragement...and of course a good tutorial!

This tutorial for stripping old finishes is by far my favorite post and there have been many who have benefited from the information and encouragement! 

If you are like Chantelle, you may be looking at your table (or dresser or desk or heirloom cabinet) and wanting desperately to make a change. You see the potential...you just aren't sure how to get there.

Her biggest beef was the "heavy" orange finish.

The table is amazing but I agreed...the "orange" finish was pretty bad and as she noted, it really didn't go with their "new" kitchen.

But a cruddy old finish should never be a deal breaker for a solid piece of furniture with good bones....it is not a difficult thing to change with a little know-how and encouragement.

Sometimes all we need is someone to tell us YOU CAN DO IT!!!

She emailed me this week with pictures of her finished table...."The first picture shows the table how it was originally, the second picture shows how it was once I had completely stripped it and then sanded it down (you were right, it hardly needed any sanding) and the final picture shows how the table is now, after I applied my finish!"

Absolutely stunning!!!

I asked her what finish she used...

"It's called Osmo Top Oil. Really good stuff, someone left a ring mark on the worktop from a hot cup, and it just wiped straight off. Really impressive. "

Impressed I am...so I immediately started doing a little research on the product. Definitely something I will try in the future.

I am always open to new products. Just recently another reader posted a comment on this same tutorial about the use of oxalic acid to remove dark stains on raw wood. 

"....after the table was stripped, some ugly black spots remained on the top. Google told me that it was probably water damage, if water penetrates through the finishing, some woods with high tannin content (oak) can develop such spots due to a chemical reaction between the tannin and the traces of iron in the water. They can be removed with oxalic acid, and some sources advise to use distilled water to dissolve it. The guy from the specialized wood finishing shop, where I bought the acid laughed at the idea and ensured me that tap water would do. Instead of dissolving, I just sprinkled the acid (it is crystals, looks like sugar) on the spots, and then added several drops of water just to turn the crystals to paste. I wasn't sure how long it was going to take, so checked from time to time and could see how the spots were getting lighter and then completely vanished after maybe half an hour. Sorry for the long description but maybe it would be useful for some of your readers. I myself was unsure and a little bit scared that it could damage the table but it was very straightforward."

I have used numerous processes to remove dark stains on raw wood, with little success. So I immediately ordered the acid from Amazon and will give it a shot when I run across this problem again. 

I think the best advertisement for any product is the success stories of others! The processes and products I use may not necessarily be the best process or product for you, which is why I always encourage others to do their own research and use what works for YOU! 

I'll make sure I report in on my experiences with both products. Until then, if anyone else has had any experiences with these products, I sure would like your take on them. I emailed my blog-friend Cristina at Remodelandolacasa and she had not used the acid but is anxious as well to hear the results since she just recently ran into the "stain" problem on a table she refinished!

Until then.....

Farmhouse table....

Today I want to share a farmhouse table I put together using some "mismatched" pieces I picked up!

Sometimes I find things at the apartments and drag them home "just in case."

This ugly pine table top is a prime example....

(No, I have no idea what the black stuff was...paint maybe?)

It hung out in the garage for MONTHS because I knew I would have to find the perfect legs for it...and honestly it wasn't on my priority list.

Just so happens I snagged some nifty old table legs at an auction a few weeks ago...

By themselves they didn't amount to much!

I stripped the top using this process and stained it with gel stain. Chalk painted and distressed the legs and attached them to the top. Sealed it all with poly. 

Cute as a bugs ear.

I even managed to drag it into the dining room and stage it for a few pics. Okay, honestly it was cold outside when I decided to work on it so I brought it into the dining room to stain, paint and assemble! (NEVER strip furniture in the house...the chemicals are just too strong! I stripped it when it was warmer outside last week!)

You may notice that one of the wood castors on a leg was missing. I keep spares around but didn't have one the right size or four that matched so I just removed them all...no biggy!

Just another example of how easy it is to take something destined for the dumpster and create a beautiful piece!

I still love my dining table so this one is off to 410 Vintage! If you are local you should really drop in! Even if this table isn't your style, I PROMISE you will find something you will love! 

Next week I am going to share a few things that make my holidays soooo much easier!

Until then....