Drop door cabinet makeover....

Enough about my entry makeover FOR NOW! I'll get there eventually but I'm at the "wait" and "hum" stage...waiting on tile and stair treads and not quite sure what I want to do about trim and lighting...hum....

So in the meantime I thought I would share one of the wash stands I rehabbed. I went to an awesome auction several weeks ago and brought home 5 potentially beautiful dressers and wash stands. One just needed to be cleaned and oiled but the others needed some serious work.

On these older pieces I just can't bring myself to slather them entirely in paint. I always have to restore a little bit of the original wood. I know in today's world of home decor, paint is all the rage, but I need a good balance of paint and the "warmth" of wood. So no matter the condition of the top, if it is solid wood, I am going to strip it and refinish it. 

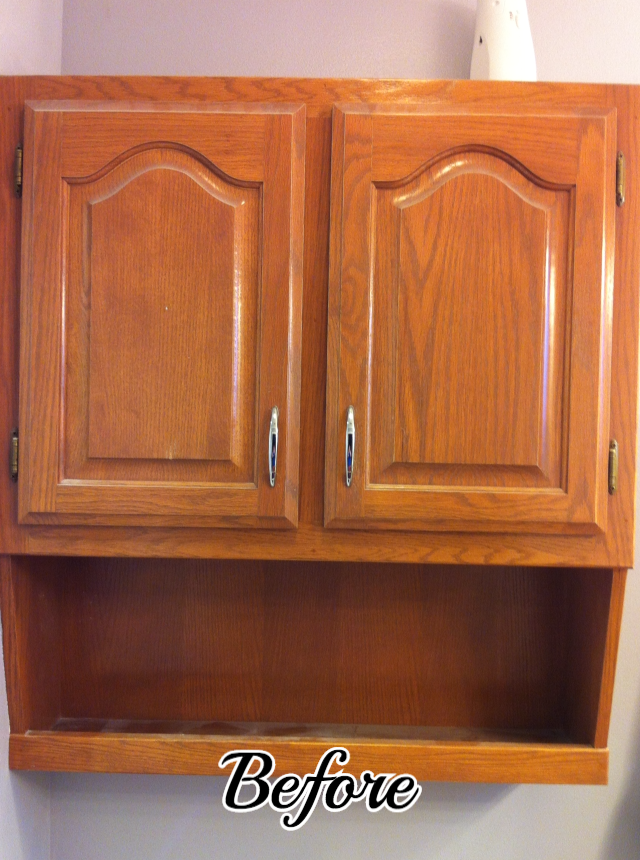
This little cabinet was originally a "wash stand." It wan't in terrible shape but it had seen better days!

It had a little mirror on the back, which when removed left a  "gap" along the back edge.

If I was going to paint the top, I could have filled it in with a strip of poplar and been done with it. But I knew I wanted to refinish the top so I added a piece of oak...

...just routed the edge, then attached it with glue and trim nails. I stripped the top with this process, applied a little walnut stain and sealed with poly!

I chalk painted and distressed the base and sealed with poly. The little drop front REALLY distressed, but sometimes I just let furniture do what it wants to do! A little update on the hardware and it is good to go!

The drawers on most antique pieces have some issues....remember GLUE AND CLAMP when repairing drawers! Not nails and screws! And since the drawers were pretty ratty and stained, I gave them a little KSTP treatment! (sorry, no pictures!) They look and smell much better if you will take the time to paint the inside of the drawers of these older pieces!

I think this would make an awesome bedside table or entry piece! Or even a tv cabinet!

I tried to "stage" this little piece with some of my auction finds....

....an old cheese box, some awesome scales and a wood duck decoy. But again, I am not the best photographer and I am definitely more about doing and less "froo-frooing." 

I have several dressers and another wash stand to share, so stay tuned!

A simple TV cabinet makeover...

This is the second year in a row I have been sick around Christmas. Fortunately, last year it was AFTER Christmas. This year it was BEFORE Christmas. Not good when I have so much to do the week before Christmas! I knew I felt bad Tuesday when I was out building fence (the wind did a number on my privacy fence at the apartments) but I didn't realize how bad I felt until I came home and sat down.

Now I have a list of things to do...presents to buy, a few things to return, wrapping boxes to hunt down, presents to ship, grocery shopping....and I feel to cruddy to even drag myself into the shower! Fortunately I THINK the worst is over so hopefully I'll feel like getting around later today!

In the meantime, I thought I would share another simple little makeover.

Remember all that dated, uninteresting furniture I keep harping on you to paint or do SOMETHING with! Well, this is just another example of a piece of furniture that no longer has a place or a purpose in our homes...unless you roll up your sleeves and give it a little makeover.

The dreaded old "tv cabinet" ...or "hutch"....or whatever you want to call it!

Here I shared how I acquired this less-than-interesting piece and how I used beaded craft board to start this simple transformation!

I gave the inside a KSTP treatment with my "go to" off-white and gave the outside a little plaster paint/dristress treatment. But it still lacked "character" so I wiped down the entire cabinet with walnut stain. That changed the color from a soft "teal" to almost a "greenish" color but it also added depth to the finish! Kind of a "patina"....

I sealed it all with poly and changed out the hardware. Actually I painted the original round knobs black and added black cup pulls to the bottom drawer! Remember, if you are changing out hardware, you may have to patch some holes BEFORE you paint. In this case I had to do just that since the holes on the bottom drawer were 3" apart and the holes for the cup pulls are 2 1/2"...no biggy! Just patch them with wood filler, sand and then paint....then just drill new holes for the new hardware!

It would be simple to reinstall the doors...but in this case I decided to go with an "open shelf" look! 

Simple little update! Now this little cabinet is ready for another season of life! 


"Blah" to "BAM" cheap furniture makeovers...YOU CAN DO IT!!!

This past week I have been working on my kitchen (I told you the "small" projects wouldn't squash the urge!) I still have a few little trim details to hunt down and then I will try to do a feature next week. I had to construct three different types of open shelving and I rewired an 80 year old Westinghouse fan...AND IT WORKS!!! I'll share all that as well!

This week I want to share a few little projects that YOU can do! Do you have a piece of furniture (or two or ten) that is just "blah?" A cheap little shelving unit you picked up at the big box store and put together with the little allen wrench that came with the screws. Maybe a few ancient bedside tables you inherited from your mom. A particle board table that has seen it's better days.

I know I have harped on this before, but seriously it bares repeating! If you are just starting out, are on a tight budget, feel the need to keep furniture given to you by family, or just want to change things up a bit, you NEED to be able to do simple makeovers!

Before you toss a piece of furniture to the curb, think about "updating" it a tad. Even the cheapest, most basic piece can be saved with just a tiny bit of time and effort! As I have said time and again, the worst that can happen is you still hate it and it still only brings $1 at your next garage sale. 

I find pieces like this all the time at my apartments. I drag them home, clean them up with ammonia (stinky but gets the old gunk off!) and then give them a little facelift!

This was one haul out of one unit....

The little bedside tables are the old orange maple...ugly as sin but super sturdy and solid wood! The little coffee table is one of those inexpensive "fake" wood things that comes with the little allen wrench tool for the bolts! And the spindle shelf had particle board shelving. All in all, pretty dated stuff!

This little shelf came out of another unit...

It was missing a drawer and it had a few loose bolts, but whatever...still salvageable!

I find these things in my apartments, but you can find them at thrift stores and garage sales for next to nothing! 

All I did to the little shelf with reeded drawers was give it a little KSTP treatment (Kilz, sand, tack cloth and paint!

Perfect for added storage in a bathroom, kitchen or kid's room!

I decided to do something a little fancier on the coffee table and bedside tables. I striped the tops with the acetone/lacquer thinner mixture, added a little java gel stain, then sealed them with spray on poly (if stripping and staining is beyond your skill level, just paint the tops!)

The bases are simple KSTP treatment. New hardware on the bedside tables and these pieces are perfect for updating any space! 

The spindle corner shelf got a simple KSTP treatment! 

I don't have a "before" picture of the little chalkboard shelf. Basically it was a stained wood frame with an ugly picture of a teddy bear! Ewwwww. Gave the frame a chalkpaint and distress treatment (spray paint would work too!) and I painted the board backing with chalkboard paint. Super simple "upcycle!"

Years ago I scrapbooked all the boys athletic pictures. A chore considering they both played football and baseball their entire childhood! (I strongly suggest you do this every year rather than try to find time to do all 15 years at once!)

The square frames were a perfect fit for a 12x12 piece of scrapbook paper and would be perfect for someone who wanted an easy way to display their kid's sports pictures. I applied the scrapbook paper onto the foam backing with a spritz of spray adhesive, used a glue stick to attach pictures and KSTP the frames. This would be the perfect way to "scrapbook" photos...then you can take them out of the frame and just slip them into an album when it is time to change out the pictures next year!

Before you paint a piece, make sure all the "bolts and joints" are tight and the piece is sturdy. If tightening a screw or bolt doesn't solve the wobbles, take time to GLUE AND CLAMP whatever ails the piece. No sense in making it pretty if it is going to collapse the first time one of the kids leans on it! 

All these projects have one thing in common. Spray paint. Seriously...a little primer, a little sanding and a little spray paint...and you have changed the entire look! 

I have shared many of these simple little makeovers in the past! A few dressers here, here here and here. Several coffee tables here, here and here and Lord knows how many frame makeovers (herehere, and here!)

Challenge yourself. Pick out ONE piece of furniture or a frame in your house you really don't like. Go to Lowes and pick up a can of Kilz, a little sandpaper, a package of tack cloth and a can of your favorite color spray paint (total under $15) and give it a go! YOU CAN DO IT! 

I promise!

How to install a window in an interior door!

I told you...when I am trying to avoid ripping into a MAJOR project, I start little ones.

I haven't had a lot of time to "project" around the house. Between the apartments and the furniture makeovers for the flea market, I've been a bit swamped. But I keep walking into my kitchen with a tape measure and graph paper and that is dangerous!!! 

So I decided to tackle a small project I have been mulling over for some time. I checked Pinterest and there weren't any tutorials for this project so I had to make it up as I went!

I wanted to add a window to my laundry door. It is a small room and while I am RARELY in there with the door shut, I thought it might open up this hallway a bit. And honestly, if I really like it, I may do all the doors. (I painted my interior doors black and shared that project here. It has been over two years and I STILL love them!)

As with many projects, I mull and plan and think and draw. I finally just took the door into the garage and cut a big ole' hole in it with my skill saw and jig saw. Solved the big problem...procrastination. Now I kinda had to do something with it...lol! 

I did make one critical error on this project. I neglected to get an estimate for the reeded glass I had fallen in love with. When I did call (AFTER I cut the hole!) I found out the glass was going to cost me THREE TIMES more than I "guestimated." To the tune of $160. Lesson learned...before you fall in love with an "idea," FIRST make a plan and get estimates! I could have gone with a cheaper decorative glass, but I wanted THIS glass.

Reeded glass!

My interior doors are typical "builder grade" six-panel, hollow core doors. When you cut into them you will find they are exactly what they say they are...hollow. Truth is, the only real wood bracing is around the edges and where the hardware attaches. 

So after cutting a big ole' hole in the door, I had to install wood bracing for my window frame. 

The bracing needed to be 1 1/8" thick to fit between the "skins." If you are familiar with wood cuts, you know that is not a standard cut. I could have stopped in the local door shop and asked for some wood strips to use for bracing around the cutout but I decided to use some wood I had on hand and rip it down to the width I needed.

Therein lies one of the problems I have when DIYing. I don't own a table saw...and never will. My father (who grew up in construction!) had 3 brothers and a brother-in-law...and he was the only one of the 5 who managed to get through his life with all his fingers intact. And someone once told me that if the wood got bound up in the saw, it would kick back and hit you in the face. Now I have never been on the cover of People Magazine's "most beautiful woman" issue, but I kind of like my face. One time I stupidly tried to use a utility knife to cut through vinyl siding...the knife slipped and the blade whacked me square in the nose. At the time my daughter was in diapers so I drove to the ER with a diaper on my face and demanded to see a plastic surgeon. After inspection in the bathroom mirror, I determined that it was a fairly superficial cut (dang, noses can bleed a lot!) and quietly left the ER without ever seeing a doctor (I do still have a scar!)

So I won't use a table saw. When I build cabinets or shelving, I have the awesome guys at Lowe's cut my plywood. But I have found a way to cut fairly straight lines for most projects.

I drilled little holes in a large metal yard stick. I measure for my cut and mark the line on the board, then I secure the yard stick with screws 1 1/2" from the cut line...this basically creates a "guide" to run my skill saw along and allows me to cut a straight line. 

Problem solved! Now if I could just figure out a way to get a flat tire changed since my father is no longer around and my favorite tire shop closed. Thank God I haven't had a flat in 20 years! Cuz I don't do that either!

Anywho, after cutting 1 1/8" bracing strips, I cut four pieces the length I needed for the four sides of the opening. I applied wood glue and slipped the strips between the door "skins." A little trick...set a screw on each end of the board before putting it in the door...that way if it slips to far into the door, you can use the screws to make adjustments. Then just back the screw out when you have finished clamping.

I measured from the inside edge of my strips to the outside edge of the door...all the way around....and adjusted the bracing strip so that I had the same distance from edge to edge.  My cutout was NOT the exact distance from the edges, but the strips need to be since I would be attaching my "frame" to it. I also measured the opening to make sure it was the same width and height all the way around.

After making adjustments to each strip and making sure each was in the proper position, I clamped them and let the glue dry.  

No need for nails...wood glue will do the trick if you let it dry well!

After the glue dried, it was time to add the "inside" framing. Fortunately the width of the strip and the skins combined was 1 1/2". That worked out perfectly for  1/4" x 2 (really 1 1/2") craft board (available at Lowe's) as my frame! 

I measured and cut them with my chop saw. I pre-primed my trim pieces with Kilz and sanded and then I installed them with glue and trim nails. 

Yes, I noticed the bottom frame piece was a tad off...my bad. I ended up "lifting" it, removing the nails and repositioning it so it was flush with the side piece!!! One of the many stupid frustrations of DIYing...the dreaded "oops."

I wanted a very simple and small trim since the real focal point of the entire project is the window! I thought I could use the 1/4" x 2 craft boards but they only came in 3' lengths and the height of the window was over 36". I ended up buying what is called "door stop" material....the piece of trim on the inside jamb of a door that actually stops the door. It is 1 1/2" wide and 1/4" thick and it comes with or without a decorative profile on one edge. I ended buying the one with a little decorative edge, just for a tiny bit of detailing! I trimmed both sides of the opening. (Forgot to take a picture after the trim was placed, but you can see it in the next picture! I secured it with glue and trim nails). 

I found a teeny tiny little decorative trim to use as a "frame" for the window. It's really tiny...1/4 wide. Since my frame is 1 1/2 wide, I marked the center (3/4") and then 1/8" on each side since glass inserts are usually 3/8 to 1/4" thick.

I cut and CAREFULLY glued and tacked the tiny trim on one line. 

I went ahead and caulked everything, puttied the holes, gave it a light sanding and painted it all. I did this so I would only have to tape off and paint one side of the window trim after I got the window set in place! (Mistake alert! I didn't prepaint the backside of the tiny trim I put on last...so you can see the white primer through the window now that it is installed! Paint the backside of your trim before you put it on!)

(Then I had to wait a week because I didn't think about the fact that they might just have to order the glass...which took "3-5 business days." Then I had to wait ANOTHER "3-5 business days" because they ordered the glass wrong...delays are inevitable!)

After the paint dried (and the glass FINALLY came in!) I applied a SMALL bead of silicone caulk all the way around the inside of the tiny trim and set the window in place. The silicone is important because it holds the glass in place and creates a "soft bed" for the glass so it won't rattle around in the frame.  Then I glued and tacked the tiny trim on the other side of the window. (Do this VERY carefully...if you hit the glass with a nail it WILL shatter!)

TA DA!!!! I absolutely LOVE it. The glass (reeded glass...google it!) is absolutely perfect. But it was NOT cheap. 

This is "rain" glass and it is about 1/3 the cost....

...a very pretty glass and a much cheaper option. But it wasn't the look I fell in love with so I paid the price for the glass I wanted. However, the odds of me doing the other doors is slim!

If you are installing glass in a door, I would strongly recommend getting a piece that is "tempered." It is about 4x stronger than "plain" glass and if shattered, it breaks into a bunch of tiny, relatively harmless pieces vs. the super sharp shards of regular glass!

Tempered glass really isn't that much more expensive...especially when you consider the safety factor! 

Also, the glass will be much heavier than the "hollow" door...so this is the time to replace the short hinge screws with longer screws that actually go into the framing of the door. You can buy longer hinge screws, but I just used black sheetrock screws. I will probably change them out next time I make a run to Lowe's. This is important because the weight can cause the door to "drag" or stick on the knob side. For that matter, if you have a door that drags or sticks, try replacing a few of the short hinge screws with longer ones! This door was sticking even before the new glass and using the longer screws worked like a charm! (In the picture above you can actually see where the black paint rubbed off on the door jamb!)

There you have it. A tutorial for dressing up an otherwise boring interior door! There are so many other things you could do with this same process...maybe a chalkboard insert or fabric or even a MUCH less expensive glass! 

You are only limited by your imagination!


Reflecting on 50 years of "decorating" life....

I started a post entitled 'Reflecting on 50 years of life."  I thought I might share all my "pearls" of wisdom. Really?  I, of all people, do not need to be giving life lessons...I'm 50 and still learning something new every day! Although I think if others would learn from MY mistakes, their lives would be a lot easier and pleasant. But truth is, everything you need to know to live a fulfilling life is either in the Bible or on Pinterest. Choose wisely (that is ONE of my "pearls"...ALWAYS choose wisely)

Anywho, I decided that I would be better off giving advice on how to make your home a place you will love. I'm not going to give you "decorator tips" because I am not a decorator...I am just a mom who has found a balance by trial and error. Besides, you can find REAL decorators all over the internet who will tell you how to decorate a room!

So here is some of what I know about "home interior decor".....

1) You won't ever wake up and say "THIS is perfect."  Your home is ever changing...families grow, kids get older, stuff gets out of date or worn...so embrace the ebb and flow of your changing life and go with it!

2) I give the same advice about major home decor purchases as I do cars...if I show you a stock and tell you that you will pay $40,000 for it today and I can GUARANTEE you it will be worth $20,000 next year, would you buy it?  Nope.  So why would you buy a brand new car or brand new anything? Personal property (furniture, cars, appliances) WILL depreciate.  Keep that in mind when making a home interior purchase.  Let someone else take the depreciation "hit" unless it is a piece you are madly in love with and you KNOW it will be in your home until...well, forever!  Here is a little trick I use sometimes...take the purchase price, divide it by the REAL number of years you think you will use that item...for example, my living room couch cost me $1500.  I knew I loved it and would use it for years...so far, I am going on 10.  So basically I paid $150 a year for this couch.  Yep, that is reasonable in my book! But the fact I have had it for 10 years is VERY unusual! Most people don't keep couches that long! Do the math...spend your money wisely!

3) With that advice in mind, whenever you can, buy used and make it your own!  Learn to paint...learn to refinish...learn to reupholster.  And if you just don't want to do that...or feel you can't...learn patience! Because I can promise you, that "vision" you have in your head for a new tv cabinet or bedroom set or chair will be out there at a garage sale or on craigslist or at a flea market....or seriously reduced at some point! 

I have wanted a coffee table like this for...well, decades.  But I never could find the EXACT coffee table I had in my mind...and when I did finally find it, it needed some attention!  But my patience and ability to DIY paid off...big time!

4) And with that in mind, NEVER BUY IT OR BRING IT HOME IF YOU DON'T SERIOUSLY LOVE IT! Or will love it with a little "tweeking," Because if you can look at it and say "Wow, I really love that!" there is a good chance it will be something you will still love years from now...you won't ever regret that purchase! My rule...if I have to think about it for more than 10 seconds, I don't need it! 

This tv cabinet was expensive...but I love it...it is 8-9 years old and I have NEVER regretted it or questioned the purchase. Great story. When I first fell in love with it, I really couldn't justify spending what they were asking...HOWEVER, they had one that was a "customer cancellation" and had a few VERY minor dings...at HALF the price of a new one. SOLD!  And the great thing was they had one of their experts fix the "dings!"

5) Use "fads" sparingly. Pillows, rugs, inexpensive pictures... basic accessories...can all be easily changed. So use "accessories" as a way to infuse "fads."  The big stuff...primarily furniture...should be something you LOVE and something you know you will probably love 10 years from now.  The only time I break that rule is if it is a second hand piece of furniture that is free or cheap that I am going to "repurpose" or "refinish"...knowing that next year I will pass it along to someone else, or repurpose or refinish it again!

As you can see in my living room I use pillows, framing and the rug to infuse the "blue and brown" that is currently all the rage.  In my den, I bought this little inexpensive side table at Salvation Army and stained and painted it.  

All can be changed or given away when I "change my style" without breaking the bank!

6) Keep "collecting" to a minimum.  Seriously, if you collect more than 1 or 2 things, choose one. Otherwise, it just becomes "clutter."  I collect hard back books.  And Lane Acclaim table...but those are part of my "timeless furniture" so I don't count them as a "collection." My point, "collections" can quickly become "clutter." 

7) If someone offers you a "family heirloom"...china, photos, knick-knacks, furniture...take it! Find a way to infuse it into your decor!  And if you just can't right now, store it away.  But take it!  My grandfathers' tools and leather case...my grandmothers' china...just a few heirlooms and THINGS I LOVE! and decorate with!

8) Pictures.  Photos of you, your family, your ancestors...surround yourself with them.  Find frames at garage sales and thrift stores and paint them...glue things to them...display them in groupings!  They are the people you love...surround yourself with them!

9) Pay attention to tips from designers.  There is a proper height for hanging pictures and a proper size rug...know them and follow those hard fast rules! I have a rug that is too small in my living room...I know it is too small and it bugs the heck out of me...which is why I just ordered a new, larger rug...can't wait to share!!!

10) Make your bedding a part of your "bedroom decor" and make it beautiful. You can buy beautiful, inexpensive bedding on Overstock and at T.J. Maxx and Marshall's. But more than anything keep it simple...and make your bed EVERY DAY! Simple is the key because if you have too much froo-froo and too many pillows you might be tempted to NOT make it because it is a tiresome chore!

IMPORTANT TIP!  Make your bedroom a "haven."  It should not be the room where you do book work, sew, fold clothes, scrapbook, etc...you should never go to bed or wake up to "work."  No matter how small your house is or how cramped you are for space, make it the one room in your house where you can "escape!"

11) Don't be afraid to TRY IT!!! If you see something you like on Pinterest, give it a shot! And if you just aren't the crafty/buildy/DIYER kinda person, find a few awesome flea markets and second hand stores to cruise through every so often...trust me, others are doing the DIY/Pinterest thing and usually you can find what you are looking for...but be PATIENT! 

12) Paint...there are so many tips and tricks to painting....again I could type a hundred posts on how to properly paint anything and everything...but they are already on the world wide web! But my best suggestion is to CHOOSE WISELY. And the only way to do that is to buy the samples pots and paint BIG swatches on your walls...then look at it...for days...or weeks...or whatever it takes to KNOW it is the color you want! I think I have shared how I choose my paint for my bedroom fireplace wall.  I THOUGHT I loved one color...but I kinda liked another too.  So I bought little samples of both, painted one half of the wall with each...and looked at it...for days.  Turns out, I liked the one I "kinda" liked better.  Had I gone with the one I thought I loved, I would have never been happy!

13) Shop thrift stores, flea markets, second hand stores, garage sales, auctions...be picky...be patient....you WILL find what you really love eventually!!!

14) DECLUTTER!!!  Clean out your closets, drawers, cabinets, pantries...GET RID OF STUFF! Don't have "stuff" just for the sake of having "stuff."  A few years ago, I opened up the cabinets under my book shelves...seriously, I bet I hadn't looked in there in 10 years.  You know what I found?  A lot of STUFF...and spiders...lots of spiders! I got rid of the stuff AND the spiders!

And before you bring more stuff home, or order it off QVC or Amazon, ask yourself..."Do I REALLY need this." Learn to distinguish between "need" and "want." And if it really isn't a "utility" item that you need, do you truly LOVE it? 

I watch those "hoarder" shows on TV and I don't get the sheer magnitude of it...because I can't understand the "mental illness" aspect of the whole thing.  But I do understand that we can get soooo caught up in the "wanties" and "gimees" and "Igottahavees" that we surround ourself with STUFF we really don't need. Or even want at some point.

It is one reason I strongly suggest using "fad" stuff sparingly in your decor....trust me, Chevron and burlap WILL go out of style...and your house will look like someone puked 2013 in your living room! It's cute...it can be fun to accent with...but use it sparingly and don't invest so much money in it that you don't feel like you can't get rid of it when it does go out of style!

EVERY SINGLE ITEM in your house should somehow enhance your life or have purpose...if it does not, get rid of it.

Am I guilty of breaking my own rules?  Are you KIDDING?  I'm just like everyone else...I make, and hopefully learn from my mistakes. I know that if I buy really expensive bedroom furniture because I just HAVE to have it right this minute, someday I will be stuck with furniture I don't really like but can't bare to part with because I paid a fortune for it! 

What do I love?  Heirlooms, furniture I was patient and waited for until I found THE perfect piece and the right price, stuff I paid little or nothing for and won't feel guilty kicking to the curb when I don't want it any more. I love my home because I have been very careful about surrounding myself with things that are timeless, things that have meaning (pictures, heirlooms, etc) and things I love. I still have a few "warts" here and there...and honestly, they are things I bought "on a whim" and/or paid too much for. But slowly I am trying to weed those things out!

ALWAYS keep your receipts.  And if it is something you can't return (from a garage sale or thrift store) make sure you pay so little you won't think twice about turning right around and donating it! 

And the NUMBER ONE RULE OF DECORATING YOUR HOME SO YOU WILL LOVE IT...get it clean and organized. Amazing how much more enjoyable your home will be when it is clean, decluttered and organized! 

signature.jpg

Bathroom makeover on the cheap....

I told you earlier in the week this time change thing would be the death of me. I. AM. DYING.  It makes me work too late in the day.  Today I started rebuilding my storage building door and painting the shutters...a project I will share when I am done.  Funny thing is, with all the work I do, I threw my back out this morning WASHING MY TRUCK!  Immediately went the chiropractor, came home and started taking down shutters and building a new door...and I wonder why I feel like death tonight!!!  Geez.

But on to something fun!!! Since I didn't get today's project ready to share, I'll share an oldie but definitely awesome!​

When I first bought my 1800 s.f. 4 bedroom, 2 1/2 bath home it was plenty for my family then.  After a year I added a den and a year later I added a "master suite."  But I have always known that a big master bathroom was something I could easily live without.  I basically shower, primp and do "other" business in there...rarely do I have time to lounge around in my whirlpool tub with candles and a good book.  As a matter of fact, I think I have tried out the whirlpool maybe twice in 13 years.​  When my house was under construction I added a glass block window over the tub before I tiled. (I bought the house while it was being built but did a lot of the finish work myself!) The mistake I made was not adding an operable window at the time.

While they were installing the GOLD shower doors, I was thinking "EWWWWW! What was I thinking when I picked THAT!" I disliked it from day one...but I attempted (unsuccessfully) to decorate around them for 12 years!  ​I also tried to add much needed storage by adding a little white cabinet.  But try as I might, I could never get the bathroom to "feel" and work the way I needed it to.  The ONLY thing I liked about it were the beautiful maple paprika cabinets I have throughout my house...to this day I still love my kitchen cabinets!  But in the bathroom...not so much!

master before.JPG

So last year I decided to do a "semi" makeover in my bathroom.  I had just bought some beautiful granite at an auction...enough for my kitchen and all three bathrooms (again, I promise to tell you about that ubber sweet deal!) This is what I ended up with....​

IMG_5034.JPG
master after.JPG
IMG_5038.JPG

​Okay, where do I start.  Very tight budget so I had to spend wisely!

Paint, that is a given in any room makeover...light, clean...gallon at the most! I did paint the ceilings but after 13 years, it was time!​

​All the tile was fine. Thank goodness because that can be costly!  But the shower doors HAD to go...gold...seriously, what was I smoking?  Removing old shower doors is seriously the EASIEST and one of the biggest changes you can make in a bathroom.  Remove the doors. Just lift up and tilt out.  Take a hammer and carefully knock the top bar "up."  Be careful that it doesn't hit you in the head (yeah, I really do learn these things the hard way).  Now, MOST shower doors have just 3 little screws securing the side brackets to the wall/tile/insert.  So take the little screws out and "pop" the side rails off the wall.  Usually silicone is used as an adhesive, so you may have to do a little prying on the side rails and the bottom rail, but they will come up.  After all the rails are removed, take a razor blade and gently scrap the silicone off the walls/tile/tub.  The three little holes...just take a little bit of silicone and "fill" them.   Haul the entire insert to the curb and say "bye, bye!" Buy a pretty rod and spa curtain and say good bye to soap scum and that nasty black crud that grows in the rails!

Cabinets.  I bought new cabinets. Big expense. But in a bit, I am going to share a way to change the entire look of your cabinets and bathroom without spending a lot of money!!!​  Seriously...you WANT this!  

I was going for "modern" so I decided to go with brush nickel fixtures and hardware.  I priced the cabinet hardware at a local home decor store....$28 A PIECE...​I only needed 7 but really...$28 for a stupid little handle?  That is when I discovered myknobs.com  Found the hardware for around $8 a piece....SWEET!

Originally I was going to put in two mirrors...but I bought this one on sale at Hobby Lobby for the hall bath and  it didn't work in there so I hung it in the master bath and loved it....so I put in the totally awesome pendant light fixture instead! Well, okay, my totally awesome son in law installed it when he put in the recess lights (not pictures)! 

There is only me...and it's a small bathroom...so two sinks was a waste in my opinion. I decided to add much needed storage and just have one sink.  I got the sink and faucet on Overstock.com!  They have great prices on bathroom fixtures.  Always check them before you buy any fixtures or lighting!

Again, great deal on the granite top.​ Glass tile back splash...yum!  A small amount of glass block in a bath back splash can add A LOT of style and class for very little! (That will be a great tutorial...it's super easy!)

The biggest change was the new window.  That required some pretty serious construction and vinyl and sheetrock repair but it was doable.  ​And having an operable window in a small bathroom is a must have in my opinion!!!  I put in one of those nifty "crank out" kinds and I loooove it!!!  It is so nice to be able to air out the bathroom on nice days!

And of course when you do a "remodel" there are always those "little surprises."  Like the wad of pine needles and leaves I found in the HVAC vent....no air was getting through those vents....but some critter obviously had during construction.  I also discovered that when the plumber installed the wall plumbing behind the cabinets (tech term, rough in) he tore out the sheetrock and insulation, and then the cabinet guys just set the cabinets right over the gaping hole in the wall....you could literally see daylight when I removed the vanity.  I always wondered why the floor was soooo cold!!  And I never could figure out how water pipes I KNEW were in the floor managed to freeze when it was bitter cold. ​

So I promised an inexpensive cabinet makeover....a process that will change the entire look of your bathroom and is ubber easy!!!​  Seriously, it is soooo easy that it totally offended my "craftsman" senses.  Keep in mind, I just came to terms with painting wood furniture...so "refinishing" cabinets with this process really offended my senses.  But I tried it in my kid's bathroom and my guest bath and I LOVE it!  My daughter has refinished her bathroom cabinets, I have used it in the kitchen in my manager's house, and one of my friends just refinished her entire master bath!  It is amazing!

I found this process on Pinterest....which linked me to "Monica Wants It."  Monica gives a GREAT tutorial on refinishing cabinets...follow it to the T...do not deviate. ​(Monica used this on oak cabinets...I have maple...worked great on both! I also used it on unfinished oak and it worked just fine!)  I have used it three times, and it has never failed me!  Nor my daughter nor my friend!  Totally awesome.   (I wish my photography did it justice...but it doesn't!)

guest bath after.JPG
kids bath after.JPG
SARAHS CABINET AFTER.jpg

If you need to make an inexpensive change in your bathroom, use this tutorial to refinish the cabinets (don't forget the hardware!), get rid of that nasty shower door, give the walls a fresh coat of paint and update your lighting!  You would be surprised what a few little changes will make!  ​And YOU CAN DO IT!

Oh, and one personal tip...over the years I have changed all my towels to WHITE!  Why?  Because I can bleach them and they always smell fresh...no more musty towels.  And they look awesome in my new bathroom!​ Very "spa" like!  And TJMaxx or Marshalls always have great prices on shower curtains and bath rugs!!!

Bathrooms are a great place to learn to DIY.  You can go big and do big, or you can start small and do a little at a time!  ​Budget, time and desire dictate!  

Have questions on how you can "change" your bathroom...email some pictures and I will give you some suggestions!​ beckcampbell@cox.net

TDC Before and After