The calm AFTER the storm....

We have all heard the expression "the calm before the storm." For DIYers, we live for the calm AFTER the storm.

Before the storm we are searching non-stop for "inspiration," driving all over town or burning up our computers looking for materials... measuring, planning, pondering, stressing. 

Then the day comes...the dreaded "demo day!"

Unless you have the luxury of starting from scratch there is always a little bit of "demo."

As you probably know I have spent the better part of three years "sitting on my hands," doing everything in my power to NOT paint my kitchen cabinets. I just know that someday in the future the "white cabinet craze" will come to an end and I will be stuck with painted cabinets.

SOOOO...in that quest, I have "reset" my entire kitchen, built open shelving, installed glass doors...and now? Well, after much measuring, planning, pondering and stressing, I have decided to take two more steps to a "lighter, brighter" kitchen WITHOUT painting the cabinets. 

Hence, the "storm." 

This is my kitchen shortly after the "reset".... "at peace." 

I decided to install a lighter backsplash. It is time. The tile has been there for 17 years. Truthfully, itwas still the right style, just not the right color....everything was so "orange." 

I went online and searched for some inspiration...I was pretty sure I wanted travertine but I wasn't sure what style...subway, tumbled, split-face...just so many options. One of the problems I ran into is that "painted cabinet craze." It seems so many kitchens that feature travertine backsplashes also have painted cabinets...mine are stained. 

But I found a few "inspirations" that allowed me to see what the different types of tile would look like...again, I put the pictures in my "inspiration file" and didn't bother to save a "link." So my sincerest apologies if this is your kitchen or picture and I do not give you proper credit...just know that imitation is indeed the sincerest form of flattery! 

These are just of a few of the MANY photos I put in my "inspiration" file.

So off to the tile stores I went. Honestly, I have been looking for new tile since I installed new granite over four years ago...to no avail. I finally found one I  loved! I brought home a sample...looked good. Played with it in different lights...all good. So I ordered it!

Here is one small problem with even the simplest change around here. If I am going to install a new backsplash, now would be the time to install the larger window I've kinda been wanting. Bigger window, more light... "lighter and brighter." Right?

But do I want one that raises up like the existing window...or maybe one that slides to the side and has a screen that slides so I can hand stuff out to Brian while he grills.

Hum....so off to the window store. Remember, I DO NOT like to shop...so "shopping" for new windows and tile for a kitchen I know I will have to live with for MANY years is not really what I call "fun." 

Finally settled on a larger sliding window and a travertine tile and after everything was ordered I started the dreaded "demo." 

First, I removed the 9" cabinet to the left of the window. Honestly, the only thing in that cabinet were long expired cold medications and eye glasses my 28 year old son wore when he was 14! The cabinet didn't go to waste...I removed the door, painted it to match the laundry room cabinets and installed it between the two cabinets above the washer and dryer!

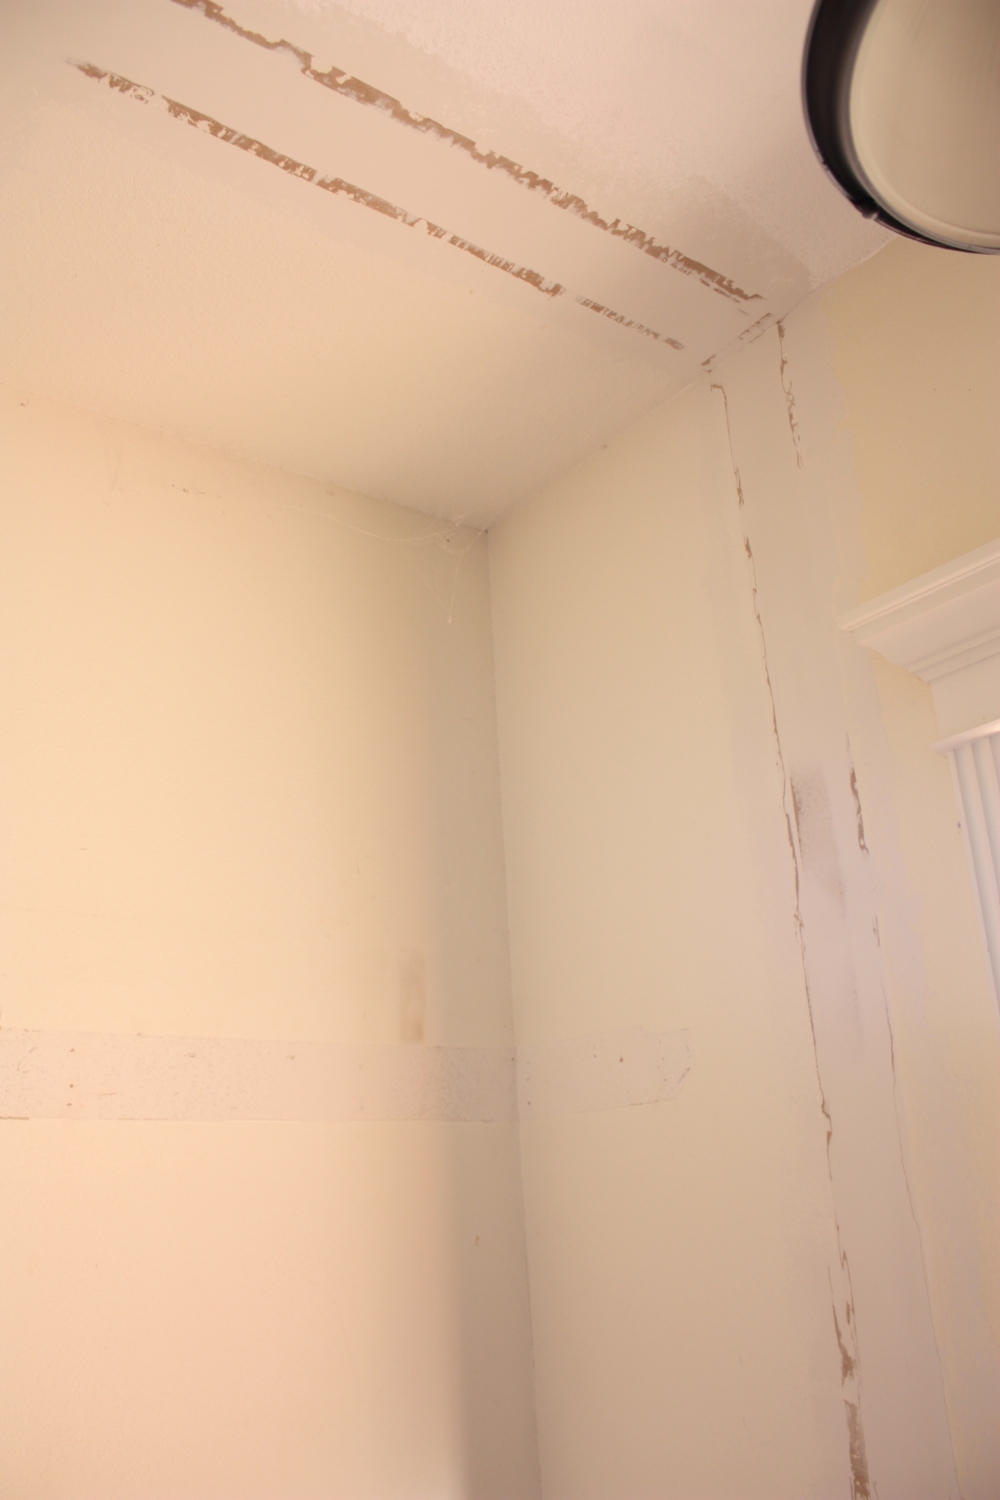
I can still tile, so I started removing the old tile...which means removing the sheetrock because, well, you ARE going to tear up your sheetrock when you remove ceramic tile. No way around it.

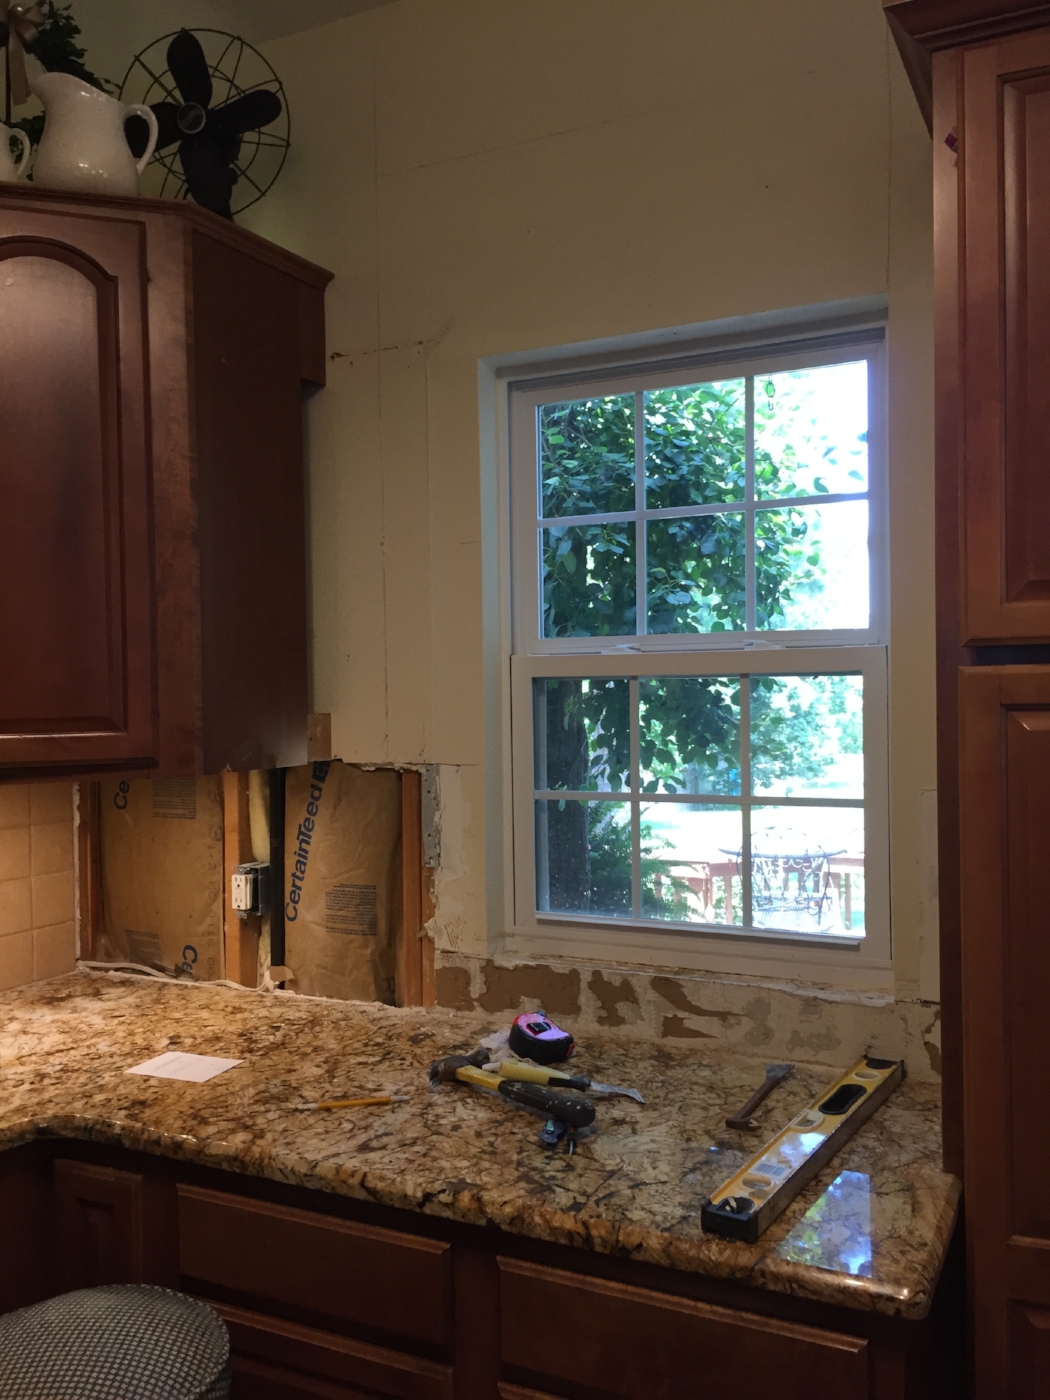
Now this is when I admit that I am no longer super woman. When I changed out this window the last time (no, this is not the first time I have changed out this window!) I did all the work myself, except the siding (I don't do siding). I removed the old window, framed in the opening for the new window and installed it. 

But that was a few years ago and this time I decided the cost to reframe and install the window was equivalent to what I would spend at the chiropractor. So I hired it done!

After tearing up one wall of tile and sheetrock, I decided to do a little research about tiling over tile.

Now I am one who NEVER paints over paper, or papers over paper, or tiles over tile. I'm a firm believer in removing the old before installing the new. But after a lot of research and talking with a few "experts" I determined that there is no reason I could not tile over the existing backspash...it was sturdy, the tiles were all firmly attached to the wall and I didn't have any mold or mildew issues. So rather than remove ALL the tile around the entire kitchen and then have to replace ALL the sheetrock, I broke my cardinal rule and tiled over the existing tile on two walls.

After a day of window installation and several days of tiling, grouting, sheetrock repair, trimming, painting and cleaning, this is what I ended up with!

I also took the opportunity to add two more glass front doors. I had added several when I did the original "reset" a year ago, and I loved them. So I ordered two maple doors for the cabinets on both sides of the refrigerator, stained them to match the existing cabinets and added reeded glass...love!

My next big goal for this kitchen are new appliances...but as I have said before I can't bring myself to buy new when the old still works just fine...so someday! Honestly, it is a good thing I didn't do it a few years ago when I got a bug for stainless...because now I love the "black stainless." See...it's a good thing I didn't follow the fad then!

For now I am enjoying the "lighter and brighter" of the new backsplash and larger window!


Sofa/entry table makeover....

Another simple makeover on a table...gel stain, chalk paint, a little paint on the hardware.

I picked up this little table at an auction a few weeks ago and it really was a relatively simple update.

Gel stain can easily be applied right over existing stain but the top of this table had some serious issues so I used this proess to strip the top...then I applied gel stain.

Okay...I ave  t quit tping nw eause my key oard is otally fried and half y letters won't rkw...enjoy the pitures while I go uy a new mputer...

Little projects that can make a big impact!

While my garage is packed with projects I should be working on, the heat and humidity are just too much. This past week I worked on a few little projects inside!

The first is a "not so little project" but one I have been putting off for a loooong time! I shared the new living room chair I reupholstered here. I also had a little MCM chair and fabric ready to go but I could not bring myself to start the project. Upholstery is one of those things I do ONLY because I like the final results.

I was hoping duck egg blue and mauve would miraculously come back into vogue so I wouldn't have to mess with it, but that's probably not going to happen anytime soon! (Those who remember the 80s will understand this!) 

A teal club chair was one element of my den makeover plan I shared over a year ago. As I mentioned in the reveal post, not all elements of a makeover happen overnight...some may take years. Case in point!

Anywho, this wasn't technically a "little" project. I pretty much had to deconstruct the entire chair, strip and reoil the wood (beautiful!) and then reupholster. 

Once it was done....BIG impact.

But I really did accomplish two relatively "little" projects that have been on my "to do" list and that made a big impact.

The first was changing this little "gallery" wall....one of my "Things I Love" features. Family photos.

Honestly, these have not changed in 16 years but I want to change it up in my quest to "lighten and brighten" elements in my house. Since I am transitioning from the "warm" blacks and burnt reds to "cooler" reds, off-whites and teals, I decided these frames would be easy little elements to update with a little paint and new mats. Still love the pictures...just not how they are displayed

Here I shared the changes to the pictures on my dining room wall....

Just painting the frames and adding new mats made a HUGE difference in this space and cost very little.

I removed all the matting, photos and glass from the frames (good time to REALLY clean the glass!) I had mounted these pictures ON TOP of the matting so all I had to do was cut new teal matting using the old mats as a template and then reattach the photos using double sided tape. Frames are super easy to paint...a little primer and a little spray paint (Valspar Riviera Dune...my favorite off white spray paint) 

Perfect! (Um...yeah...I need to do something about the nasty looking thermostat!)

The other little project was super easy as well. I have wanted "modern" type house numbers for some time. I even painted some on my front door several years ago.

The actual house numbers that can easily been seen from the street are in the gable above the garage door...just cheapo, boring black numbers. Right now they are covered up with the "ivy" that is creeping all over the front of the house and at Christmas they are covered with a huge wreath (that warranted a visit from the code enforcer one year!) 

In my defense, this stuff usually doesn't get THIS out of control. Brian usually pulls it down every year when he puts up the Christmas lights. But last year we used one of those "star shower" thingies and didn't put any lights on the house...so...well...it is out of control! 

I have a plain "ho-hum" brick column on my tiny front porch that I thought might be perfect for a number display!

I ordered the "modern" style 4.5" numbers from Amazon. 

Somewhere along the way I picked up a plank of walnut. I've kind of been hoarding it for the last few years waiting for the perfect project and this was it.

I laid out the numbers on the board, measured and then cut the board the length I needed. Not sure how well tung oil finish will hold up outdoors, but that is what I used to seal the wood (3 coats).

Then I measured and marked where each number was going to go, drilled holes, secured the numbers using hardware screws, and then mounted it all on the brick column.

I used masonry screws to attach the board to the column. Since I didn't want the screws to show, I drilled a hole 1/4" deep with a 1" paddle bit, then pre-drilled in the middle of that hole for the masonry screws and then covered it all with hardwood plugs.

Dabbed a little tung oil finish on the plugs....cute as a bugs ear!

Doesn't look like the heat is going to let up any time soon so I have hauled several pieces into to the dining room to chalk paint! Maybe I can get a little bit of projecting done and get some room to breath in my garage! Maybe....

Flagstone repair.....

It's no secret, I love flagstone. I literally have TONS of it in my yard. Last year I shared my new flagstone "patio" in the front of the house. Still love it! I did add a HUGE stone under the roof valley so a heavy downpour of rain water didn't cause so much "settling" on the smaller rocks. 

As beautiful and natural as flagstone is, it does require occasional "maintenance." There is always the occasional weed and sometimes a rock, or rocks, will settle a tad. The rocks on the backside of my pine tree row have shifted and settled over the years (roots and moles), but honestly I don't really care...kind of gives it a "natural" look. 

But when the rocks in my walkway began to sink as a result of the stupid moles, something needed to be done.

First, I killed the mole. (Knowing full well another will take over his territory...whatever! Here I shared my "mole hunting" ritual!)

Second, I needed to remove the rocks and put in a new "base." 

Before I moved the rocks that needed a little shoring up, I snapped a picture of them with my phone....

I know me well enough to know that I will never be able to remember how they were laid out...lesson learned the hard way! 

After removing the rocks, I packed down some top soil, primarily to fill the mole runs.... (if I really wanted to mess with the moles I would have put down a gravel base...but I used what I had on hand! No doubt I will have to do this again!)

...and then about two-three inches of sand.

Then I let it sit. We were forecast to have several days of rain, and several good steady rains is the best way to make sure your base is packed down well!

If you don't get a good rain, you can water the area down with a hose and pack it. They have special "packers" but I figure my @%# pounds of person stomping around on it will suffice! At least in this small area...

After a good soaking (yippeee, it actually rained!) it may need a little leveling so just add a little more sand and then water and pack that well!

It was a good thing I took a picture of the "before"...otherwise I indeed would have had issues placing the rocks.

After laying the rocks and making sure they are level (if not, just lift and throw a little more sand under it), I top them with a sand/soil mixture, sweep it into the cracks and then water again. You may have to do that several times as the mixture settles between and under the rocks!

As you can see, I finished up just as the rain started again! That is actually good because it will allow the sand/soil mixture to settle naturally and I can fill it in as needed!

Ahhhh....one chore down, many more to go! Finally finished up Katie's headboard and got that set up....so I hope to share all the fun little projects we did for her condo! I'm working on a chair that has been sitting in the corner of my den for over a year and I have several other little projects to share in the next few weeks.

Including a big change in my kitchen! Materials are ordered!


Lazy days....

This heat is brutal...I hate to gripe because my son reported it was 120 degrees in Phoenix a month ago and I usually we are in triple digits by now. But seriously, this heat and humidity is brutal.

Because of that I get a tad lazy.

First, I want to hibernate...seriously, go inside and not come out until October. Second, I tend to do stupid things....

Like take this little mahogany bookshelf in without doing anything to it....

Not horrible and I really thought just MAYBE someone else would take a risk on it. But it did have several issues.

First, the overall original finish...kind of cruddy!

Not horrible, but not great either.

The biggest issue was a "burn" on the veneer,. Seriously, how does this happen?

I have no idea!

I brought it home after it sat in my room at 410 Vintage for a month or so...evidently no one was willing to do their own DIY on it. So it was up to me to make it presentable...curses!

First, I had to repair the burned veneer (again, what the heck?) I used the same process I used on the old dresser and shared  here. 

I really wanted to save a little bit of the wood feature, so I used this process to strip and oil the top. Didn't take but a few minutes!

Plaster paint, distress and seal. 

I want to admit one little glaring error in this little makeover. Mahogany has a tendency to "bleed" through any paint. The BEST thing to do when painting mahogany is to first seal it with a clear lacquer or primer, then apply your paint. 

I, sadly, did not do this. And while my little "repair" job on the veneer is darn near perfect, the fact that the mahogany bled through makes this little oversight a little more glaring.

You can clearly see where the patch is and where the original finish bled through...I'm blaming this one on the heat too! I know better.

Oh well...guess I'll just drag it back in the house and give it ANOTHER little makeover...curses!

"New" barstools and a few dresser makeovers!

Last week I shared the prep work on the "chest of drawers from hell."  

This week I was able to get it painted and the hardware installed! Precious!

I kept the paint treatment fairly neutral with one of my favorite off-whites...."Swiss Coffee." The white and teal combo has been selling VERY quickly, but I decided to stay simple and neutral with this one! Partially because I absolutely adore this hardware and I didn't want to do anything to distract from it!!

As I mentioned last week, I painted the interior of the drawers to seal in the "funk" and make them look a little better! I used some leftover paint I had from another project...takes a few extra minutes but honestly, well worth the time and effort!

As you can see, the extra time I took to repair the damaged veneer on the top and the side really paid off!

I took this little chest to 410 Vintage...it lasted all of about 4 hours! Confirmation that all the hard work was well worth it!

I did paint one old dresser I had with the teal and white combo...

Just one of those old maple dressers...a little paint, a little gel stain on top, some new hardware and this baby sold within two hours of taking it in! (I didn't even bother to take a photo before I delivered it...this is one I snapped with my phone!)

 I also finished up another little project waiting in the wings...these old bar stools!

Certainly not something you would want in your kitchen which might explain why I was able to pick them up for a few bucks each at an auction. Pretty ratty!

But with a little KSTP treatment and a simple reupholstery job on the cushions, beautiful!

After I disassembled them, I cleaned them up, sprayed them with Kilz, sanded smooth, wiped with a tack cloth, and then I sprayed them with a satin white spray paint. I had some leftover grey herringbone material from Sister's tufted chair project (will share that soon!) so I used that to recover the seats.

Recovering barstool seats and dining room chair seats are one of the simplest "reupholstery" jobs a DIY newbie can tackle. And it can completely change the look of a stool or chair. Again, TONS of great tutorials online for this simple project!

Again (and again and again) if you have a "ratty" piece of furniture that just doesn't trip your trigger any more, CHANGE IT! Life is too short to live with ugly furniture!

YOU CAN DO IT!  

The chest of drawers from hell...

Last week I told you not to be afraid of a sturdy piece of furniture that needs a little repair.

I think the key word is "little."

THIS monster needed more than a little!

Here is how this happens. I want something at an auction. They open bidding on one item, like this HORRID old dresser. I don't want it but neither does anyone else...so they add something...I don't want that either...neither does anyone else...so they add something...I don't want that either...neither does anyone else...so they add something...I WANT THAT! But in order to get it, I have to take all the other crud. So I ended up with this ratty chest of drawers, a disgusting trash can, a burnt orange smelly couch, and the ONE item I really wanted. I started to leave this chest, but I noticed it did have MOST of it's parts, and some stunning hardware.

It also had a serious case of ugly and some water damaged and splintered veneer on the top and at the bottom.

Hum....I can fix that...all because I thought the hardware was kind of nifty!

Seriously, what was I thinking?

I loaded it up and brought it home and went to work...and work it was. But this is a great opportunity to show you how to make the best out of the worst!

The first thing I did was remove all the drawers (and pieces of drawers) and the hardware and set those aside for the time being. The drawers needed some repair and the hardware needed to be painted. But I had bigger issues to deal with and unless I could deal with those issues, spending time on the drawers and hardware would be a waste of time!

The top...wow. Normally I would have just removed and replaced the entire top, but structurally the frame on this one solid. It just needed a new plywood top.

So I removed the old plywood top. Not a biggy...it pretty much popped off. All I had to do was take a chisel and scrape off a few chunks that stuck and some adhesive residue.

I took a piece of 1/8" oak plywood and laid it on the top, face DOWN, and marked the outline of the top with a pencil.

Veneers and plywood WILL "splinter" when you cut it...so the trick is to ALWAYS score it with a sharp utility knife. Once you score it, you will use the appropriate tool (in this case I used a jig saw since the front edge was curved) to cut on the OUTSIDE of your score line. 

I scored on my pencil mark, then cut on the outside of that mark.

Once I had it "rough cut" I applied it to the top frame with wood glue, set some heavy items on it, clamped the edges to the top frame and let it dry over night.

After the glue had dried well, I took a belt sander with 50 grit paper and sanded the edges of the plywood. When I got within 1/8" of the edge, I used my mouse sander with 120 grit to finish up flush with the edge of the frame.

I used my thumb to "putty" on a little wood filler along the edges, sanded smooth, then I primed it with Kilz.

The other issue with this chest was the "veneer rot" at the base. I scored the veneer with a utility knife above the highest point where the veneer was "loose." Then I just peeled the loose veneer off. No need to remove all the veneer if it is secure!

I nailed a 1x4 board along the bottom to improve the stability. I used scraps of the veneer I had removed to "shim" it. I did this on both sides, even though only one side had issues.

Now it was time to "fill in" the missing veneer. For that, I used wood filler and a broad knife. This is where a little creativity and patience comes into play because you will NOT accomplish a smooth finish with one coat! In my case it took THREE shots to get a nice smooth finish. I applied a coat of wood filler, let it dry, sanded, wiped, and then applied another coat. Same process...three times before I was satisfied with the results! 

Once the last coat of wood filler was sanded smooth and I was satisfied with those results, and ALL the other little repairs were made and I had cleaned it all well, it was time to give the "box" the old KSTP treatment...Kilz, sand, tack and THEN paint. 

The drawers...all but the top drawer were present and accounted for but they all needed a little glue and clamping! Remember, WOOD GLUE AND CLAMPS are your friend...not nails and screws. I pulled a few of those as well as scraped off silicone someone had used to "fix" the drawers!

I only had the front and the bottom of the top drawer. My initial plan was to make a little open shelf in that top space, but I decided to build and replace the drawer! Not a biggy for me since I have built drawers before, but you may want to consider making an open shelf if you are missing a drawer, or one is too difficult to repair. 

I primed the inside and sides of the drawers and will paint them as well. This is the best way to "kill" the smells that sometimes penetrate drawers and hide years of use and abuse!

I was super excited about the hardware...very unusual! But it was pretty cruddy so I decided to paint it gold. It is NOT hard to update hardware with paint! First make sure you reinsert the hardware screws. This is important so you don't get paint on the threads of the screws or in the screw holes of the hardware. Second, PRIME!!! There is primer specifically for metal, so make sure you prime with the proper primer. I prime both the back and front of the hardware. You may want to sand a tad after you prime just to knock off the "crumbs." Then just spray on whatever paint you want to use. In this case, I used a gold metallic paint to give them a nice gold sheen! 

(You may notice I am missing one of the smaller pulls...I noticed that too! Found it in the yard...not primed or painted...curses!)

If you are going to change the hardware on a piece of furniture, you will want to use wood filler to putty the existing holes and sand smooth BEFORE you prime and paint (again, it may take 2-3 coats) That way you are not limited by the size or placement of the existing hardware! Then just drill new holes for the new hardware!

The repairs were pretty extensive on this ratty old dresser but in the end, it really was worth restoring! At this point it is repaired and primed and ready for a final coat of paint.

The sky is the limit! I will probably paint this dresser the same color as a few other projects I am working on, so right now it will sit until I am ready to paint several things. Part of the "assembly line" process! 

Again, don't be afraid of doing a few little repairs...in the end, the process will always be worth the effort if you take the time to do it right! 

Remember this process...make ALL necessary repairs first and clean the entire piece! Then KSTP! Kilz (or whatever primer you prefer), sand, tack and paint!

I will share this piece once I get it painted. But even at "base neutral" it's looking pretty good!

Another mid-century chair....

I don't know too many people who would see this ratty old chair and swoon....

...but swoon I did. And to make it even better, there were TWO of them! Yes, two.

Katie TRIED to claim them both but I had to keep one for myself! 

The cushions are the original black naugahyde, which is super common on mid century chairs. Fortunately they were in pretty good shape...not perfect but close enough! 

All I did to both chairs was strip and oil using this process, scrubbed and applied Armor All to the cushions, and BAM....BEAUTIFUL!!!

I told Litty to move so I could take pictures and even nudged her with my foot. One thing about cats...they don't mind well! (A friend told me they had mice...I told him to get a cat...he told me he didn't like cats...I told him the cat wouldn't care!)

Someday I will actually learn to use my camera so you can really see the amazing grain detail in these pieces!! Beautiful!

One of the chairs had a little "boo-boo" on the back...a little glue and some clamps fixed it right up! No biggy! DO NOT be afraid of a sturdy piece of furniture that needs a little repair...if you take the time to do a little "google" search and watch a few Youtube videos, you can pretty much repair anything properly! 

Soooo....I kept one and one went to Little Sister's new condo. Next week I hope to share the desk I made her, the tufted chair we upholstered and a super cool coffee table she refinished! Her first place is shaping up to be super cute and this little chair was an awesome addition!

Until next week....

Heirloom stool....

I know I probably sound like a broken record, but I don't decorate with just anything...the "stuff" I decorate with has to be things I love or heirloom pieces! 

A few years ago I picked up a couple of stools and dolled them up a bit and featured here.

The one I liked most was the one with the birdies...but every time I wanted to open a kitchen drawer I had to move it. So I sold that one and have been using the yellow stool.

But this past Christmas, when I was hauling decorations out of my packed attic, I spied an old stool that had belonged to my great-grandfather. I believe it was the stool he used at his drafting table. I have had it for years but it was in pretty bad shape, so I had stuck it in my attic and pretty much forgot about it.

I finally hauled it down to the garage and decided to give it a little makeover. The first thing I had to do was strip and oil the oak base using this process.  

I had a little leftover fabric from this chair project so I decided to use it to recover the seat. 

Did I take a "before" picture...um...no. Just imagine...old, dated, well used.

The upside is it fits perfectly under the kitchen drawers. Now I can use this precious family heirloom! 

Oak is not my style...but anything that belonged to family is...another "thing I love."

HAPPY BIRTHDAY KATIE!!!!

I want to take a minute to wish my precious, beautiful, smart, funny, talented youngest daughter a very happy 19th birthday...I can't believe you are entering your last year of teenhood! I have no doubt this next year will be as amazing as the last 19! You make a mama very happy and proud! 


Entry and stairway makeover reveal....

I started my entry way makeover here when I shared the "demo" of the coat closet! I did not realize this "weekend" project would drag out for TWO MONTHS....but that is pretty much the speed I work at around here these days!

Time flies when you are having fun! 

I had intended to post this project last week but Brian had to have shoulder surgery so his care has taken up a bit of my time. (Someone explain to me why a 53 year old man feels the need to bench press 275 pounds...even if he can!) 

Truthfully, it is not fun to demo and construct in a house you are living in. I put up plastic when I did the major sanding on the sheetrock...

... but there always seems to be a little spot here and a little spot there that needs just a little bit of sanding...before you know it it looks like a dust storm has blown through your house! 

Truth be told, this "makeover" actually started YEARS ago when I removed all the carpet from my stairs and put down oak treads and risers. I knew the day would come when I would not want to haul a vacuum cleaner up and down the stairs (that day is here!) so I wanted hardwood stairs!

My house had the typical "rough construction" stairs with pine treads and risers, covered in carpet...you can kind of see how they were constructed, and what I discovered when I pulled the carpet, in this picture....

It really was not that difficult to install new treads and risers. The biggest "hum" was finding that the 2 x 12 tread (the horizontal board you step on) lipped over the riser (the vertical board facing each step) by 1/4". To solve for that, I just applied strips of 1/4" board to the bottom of each riser and then faced them with new oak boards, cut to fit. Most home improvement stores carry prefab oak treads. I cut each to the width I needed, stained and sealed them, applied construction mastic and then nailed them into place. I applied one final coat of poly after I had installed them. Obviously I did a good job, since it took me TWO HOURS just to remove TWO of the stinking things! 

Since I was installing new travertine tile in the entry, I decided now was the time to also make some changes to the newel post and bottom steps. 

As with EVERY project, the first thing I did was "find my inspiration."  That was not difficult since I knew from the minute I laid eyes on Cassidy's stairs on Remodelaholics.com that this was what I wanted....

One of the things I really love about her staircase are the colors...the stain and the paint. Sadly THAT little detail is going to have to wait at my house. My staircase was stained to match the living room floors, which are going to be here a tad longer ...and while it isn't "technically" honey-oak, the "butterscotch oak" isn't really my cup of tea these days. But again, it is going to have to wait for now...the thought of taping and staining and painting everything right now is more than my brain can process! 

This is one of the important keys to remodeling any space...identifying what you can do (physically and financially) NOW to enhance the space...and patience! I knew I wanted the "openness" of the bottom two steps and a larger newel post. Those are things I needed to do before I installed the %$(@# travertine tile (Honestly, don't ask how much it cost. I have NEVER in my life paid THAT much for tile, but I wanted it and it is a small space...so I splurged!)

While I had intended to post a "tutorial" on this project, I realized it is like many home improvements...a puzzle that will probably differ depending on how your home was constructed and what materials were used.

So let's start at the beginning...what WAS there.

A tight entryway that required us to lift anything over 28" wide over the newel post!

A coat closet that was NEVER used and was basically just a dumping ground for anything and everything! Hardwood flooring...NOT a material one should use by an entry door. Over time wet feet will do a real number on it!

An anemic newel post that pretty much screamed 1999!

So were does one begin a sizable project like this? Again, how do you eat an elephant? One bite at a time!

So the first thing I did was demo the coat closet and remove the smaller built in bookcase...gut wrenching details here.

After the closet was gone I had to deal with moving electrical wires...a major chore for me and I would honestly suggest most call a professional. My electrical professional is my son-in-law, but since they live 2 1/2 hours away, this is another project he talked me through over the phone! After all the electrical was moved and I could move around in the space without whacking my head on dangling switch boxes, I removed the existing baseboards and hardwood flooring. 

Easy right? Um, no! First I had to mark and cut a line with my skill saw where the new flooring would meet the existing hardwood. Dust storm number one! Then I had to scrape up all the old flooring and mastic...seriously, I think you could safely attach wings to a plane with that glue! 

Next, I tackled the sheetrock repair and texture...hence the tarp to prevent a MAJOR dust storm! 

Since I was basically "patching" the sheetrock where I had removed the closet walls, I used this process! I can not stress enough how easy sheetrock repair can be if you follow these steps. Since the area I needed to texture was much larger than just a little patch, I used a "sheetrock hopper" to blow texture on the walls. I actually had a painter friend come over and help me with this step since he is a master at using the hopper and could "blend" the old with the new seamlessly! 

Then paint! I can't say it enough...there is a huge plus to knowing the exact formula for your paint. Someday soon I really want to repaint my downstairs....someday! Again, can't wrap my brain around that chore! But knowing exactly what I painted the walls with 8 years ago allowed me to paint the new patched areas and blend it with the "old." 

After the walls were repaired, textured and painted, it was time to tackle the BIG project...the staircase. That had to be done before the new tile could be installed because I was moving the existing newel post that sat at the bottom of the stairs and extending the bottom step, which changed the layout of the flooring. 

The first challenge...matching the existing stain color (as much as I dislike it!)  David, at our local Sherwin Williams, usually does a bang up job of matching existing stain. He did an AWESOME job on my kitchen stain! This time even he struggled. I think the biggest problem is that the original clear coat is poly...and poly "ambers" over time, which deepens the color. I ended up using David's "match" mixed with a premixed stain and final got a decent match. I stained and sealed all the pieces before installing!

The next big head-scratcher for me was figuring the exact angle and method to cut the existing bannister, trim and bottom rails without removing it all. After much hymning and hawing and measuring and drawing, I drug out every power tool in my arsenal and made the cuts! And did a little sanding to get a good tight fit! MAJOR dust storm!

I also had to build a new "base" for the wider bottom step. As I said, it's a "puzzle" and sometimes you just have to measure, figure, plan and execute as you go...when you are meshing new with old it can be a little more challenging than starting from scratch! 

Again, I could post a long drawn out tutorial...but honestly Google and youtube are all you need. You will find much better videos and tutorials than I could ever provide.

And this is pretty much how it sat for another week. Why...because the old adage "measure twice, cut once" only works when your brain computes properly at least once...if it computes improperly BOTH times, you will cut your special order materials wrong and have to wait on them after you reorder them! 

As soon as my special REorders came in and I was able to finish up the two steps and newel post, I installed my travertine tile. Then...it sat...AGAIN!

Why...well because I couldn't decide whether I wanted to add a little trim detail. I contemplated shiplap...maybe a decorative wainscoting...or maybe board and batten.

In the end, I went with the board and batten. I'm not totally swooning over it, but it is a nice little touch (again, find a GOOD tutorial if you plan on adding this...there are hundreds of great ones out there in blogland!)

Soooo....drumroll......get ready for a lot of pictures!

Okay...you may notice that other than a funky rug and the little walnut table, there isn't any "froo-froo" yet. As I have said before, I don't decorate for poops and giggles..."stuff" has to have some meaning or be something I truly love...and so far I haven't found either for this space!

Eventually I also want to change/add lighting... I'll know it when I see it!

I seriously love the travertine tile. I laid it in a "brick pattern." It is a 12x24 tile so I staggered it 8-16-24". I also sealed it both before grout and after, which in my opinion, is a must for travertine! 

I still need to put one more coat of poly on the bottom two steps and the newel post but I am waiting until Matt is gone for a few days so I don't have to worry about anyone going upstairs!

HUGE difference!

While I was making a few entry changes, I thought it was about time to order a new rug for the living room. The old one was only two years old, but with the addition of the new living room chair and post-Cleo-puppy, it was time! I decided to go with simple and neutral this time! 

Aside from the wall paint I want to change, and the "butterscotch oak" I would like to restain, and the new hardwood floors I want to install and the new lighting I think would look good in the entry, I'm pretty darn happy with the changes. 

One upside to the "dust storms" this project created was it forced me to "purge" ALL my bookcases, even the ones in the den and my room....dust goes EVERYWHERE when you project! I had to pull all the books to clean so I decided it was time to get rid of 30 years of collecting! I saved two collections of my favorite authors (most notably my autographed John Grisham collection...thank you Matt!) and a few of my favorite books, but over 150 hardback books will soon be finding a new home...right now they are packed in egg boxes in my dining room! Now most of my shelves are scantly decorated with antique books, framed photos and a few family heirlooms!

Ahhhhh....room to breathe.....