Mid century chest makeover....

On rare occasions I find a little treasure hidden among all the garbage my tenants leave when they move in the middle of the night! I found this little table years ago and it started my love affair with Lane Acclaim tables....

It did NOT look like this! I remember I picked up the nasty little thing and started to toss it in the back of my truck. But it was sturdy and I could see quality through all the "muck" so I brought it home. I googled the markings on the underside and found that it is a walnut and oak Lane Acclaim table manufactured in 1959. With a lot of elbow grease and a little tung oil, it is now one of my favorite little "treasures." Along with the others I have purchased and restored over the years. Still waiting on the desk and a round end table...but someday...

Now I look at furniture I find a little closer. 

This dresser is one of my recent finds. A true mid century piece. Completely intact and sturdy as the day it was built. Unfortunately someone had done a REALLY bad job painting it!

I cleaned it, primed it with Kilz, sanded it and wiped it down with tack cloth....then I painted it with one of my favorite flat "charcoal" greys. The ole' KSTP treatment! The drawers were in mint condition and just needed a little cleaning!

Beautiful! Because of the style, I kept the finish simple. While I hesitate to paint MCM pieces, this is a prime example of "enhancing" a piece. 

Now I am going to share a little DIY frustration because I know I make this stuff LOOK easy sometimes. I first painted this entire piece with several cans of Valspar flat spray paint. I like spray paint because I normally get a nice smooth finish. For some reason I kept getting that "stripped" look on the top and sides...the drawers looked fine. Not a problem I normally have with flat finishes when the temperature is decent. I ended up buying a quart of latex flat paint, mixed to match, (and added floetrol...a must!) and used a 4" sponge roller to get a uniform finish.  Worth the extra effort!

I know I have said it a thousand times....don't overlook those "ratty old" pieces.....neglected or abused or poorly "restored." With a little bit of your time and attention, they can be beautifully restored and ready for another lifetime of use! 

This week I will be sharing this project at...

I was featured on Remodelaholic

...love their features and their site! 


An old dresser makeover!

Occasionally I raise my hand at an auction THINKING I am bidding on one thing...only to find myself buying something I really don't want! This is what happens when you aren't paying attention or get distracted...or scratch your nose....THIS thing....

I had removed the old hardware and started puttying the holes before I remembered to take a picture....

There is nothing wrong with it...other than the fact that it is a "press board" dresser...or rather a "lingerie" dresser. Course I'm thinking if you can afford real "lingerie" (something other than cotton panties and wool socks) you might buy something a little nicer for your fine unmentionables.  Regardless, not something I really want to mess with.

But I own it...so I have to do something to make it appealing.

I decided I needed to do a little something on this piece since it really didn't have much going for it, so I looked to Pinterest for a little inspiration...and found this precious dresser on Pottery Barn Kids....

Enter the birds.

It's no secret...I kind of have a little thing for birdies...

Light fixtures....

To be honest, I did not realize how much I use birds until I started digging around for this post! I have "bird issues."

I gave the entire piece a little KSTP treatment and then gave it a touch of whimsey with some birds!

But I like the look. I had a large wood dresser I painted dark teal several months ago and it sold pretty quickly so I decided to paint the box of my dresser teal....off white drawers...changed the hardware to black and painted the birdies on the drawer fronts!

Fortunately I have the ability to look at some graphics and "free hand" my design. Not everyone has that ability. I would suggest heading over to The Graphic's Fairy. They have THOUSANDS of awesome printable pictures and graphics...and they even have tutorials for transfer methods. Awesome site! Normally I will free hand my design on paper and then use sewing trace paper to trace it...in this case I taped 5 pieces of paper together and drew the design. It allows me to play with the placement and get a good visual!

Moral of this little DIY project? Even if you have a "cheapo" piece of furniture that is as "ho-hum" as they come, you can dress it up with a little paint and creativity! 

YOU CAN DO IT!

Exploring the changes...open shelving.

I've made a lot of changes to this house over the last 16 years (Cruise around this blog a bit...you will see quite a few!) Usually I spend a lot of time looking at inspiration, planning and second guessing before I actually start a new project. I think the "indecisiveness" helps...it forces me to REALLY think about what I want (and don't want) and I really envision the process and the change before the first hammer flies! 

One of my favorite changes has been my kitchen "reset." I call it a reset because truthfully I didn't really "remodel"....I just moved cabinets, added trim and built open shelving

This was taken during my "fall decor!"

I wasn't sure I would LOVE open shelving. But I do! I love having the things I use every day in my line of sight and at my finger tips! I like being able to display my dishes and change them up for the holidays! I like that I kept the cabinets for storage for things I only use occasionally.

I LOVE the reeded glass inserts in the cabinet doors above the dishes!!!

Rhoda at Southern Hospitality posted an entire photo inspiration of beautiful "open shelf" projects...I have no doubt one would work in just about any kitchen. 

I can NOT stress enough the importance of "finding your inspiration" before you start making any changes in your home! Big or small! Start every project with A LOT of research! You may fall in love with a concept, but it may be completely wrong for your space and a paint process could be all wrong for a specific style of furniture (one time I tried to "shabby chic" a "modernish" coffee table...huge mistake!) 

Fortunately we have some great bloggers like Rhoda who can make that job super easy with their "one stop shop" posts! Also, "google" and Pinterest are your friends when the bug to add or change hits you! You can find a world of inspiration just by googling or searching "open shelves" or "teal walls" or "farmhouse decor." There is nothing new under the sun...if you want to change it, someone else has probably posted a picture of it online! Look at LOTS of photos and do your homework! That is no guarantee you won't run into problems, but if you have the "final vision" in your head, it will be a lot easier to work through those issues! 

Realistically know what you can and can not do...or even what you don't want to do. I knew I wanted under counter lighting, but I also knew it was something I did not want to tackle myself...especially since my super awesome son-in-law, Joel, is an electrician! He installed my under counter lighting in a matter of hours...it took me ALL day to add two lights when I reset my kitchen! If you can't or don't want to do something, make sure you get several bids on the cost of labor. Always know what your cost will be for materials. Remember the beautiful reeded glass I fell in love with for my laundry room door? One of my ALL TIME favorite projects, but I neglected to get a bid on the glass...that was a pretty big unexpected hit in the ole' pocket book. 

Does open shelving fall under one of those dreaded "fads" that may fall out of favor in a few years? Very possibly. But in my case, I made sure to construct the changes in a way that can easily be changed in the future! I didn't actually tear up any cabinets, or paint them, or rip out walls. (I even kept the original doors that were replaced with glass doors!) I just did a little "rearranging." If or when open shelving becomes a thing of the past, mine can somewhat easily be removed and the original cabinets moved to their proper place!

If you THINK you want to make a change, whether it is an entire room or just a piece of furniture, take time to do a little research. Look at photos, read blogs, read reviews, study tutorials, get bids. I even suggest people go to open houses to look at what is "new" in home construction if they are considering a remodel! 

It took me many years to finally know what I wanted in my master bathroom! But when it was all said and done, it was exactly what I wanted. Four years later I still love it! 

Don't fall in love with a picture of someone else's kitchen or dresser. Find a vision for what YOU have and fall in love with that...then JUST DO IT! 

A new little table project and fading fads!

Friday we had the last of a winter warm snap for the near forecasted future so I jumped on a few projects I needed to complete. (Until this week, but fortunately I bought another bunch of projects this past weekend! Yippee!)

One was this little maple corner table I picked up at an auction a few months ago. 

Pieces like this have convinced me to "embrace" the chalkpaint/distress look...very ornate legs and pretty cruddy finish. I know my "refinishing system" would work wonders, but I decided to chalkpaint/distress it and decoupaged the top with some maps I have hoarded away. 

This is also a great example of taking something a tad ugly and out dated and giving it new life with just a tiny bit of effort!

Again, I could do a tutorial on decoupaging, but there are literally hundreds online you can use...just google! 

Cute as a bug's ear.

Unfortunately, it is not a look I particularly like in my own home. Fortunately, I have a venue to sell these little projects. If I was going to keep it for my own home, I probably would have stripped and refinished it...at the very least stripped and stained the top and painted the legs a solid color.

Which brings me to my "musing" on current fads. 

I read an article this week on the Huffington Post site on current design trends that are fading in 2016. Interestingly enough, I don't have ANY of these trends in my own home....antlers, stuffed critters, acrylic chairs, chalkboard walls, and few others.  Now, one could argue that I am still stuck in the 90s and don't update my home enough. But the truth is, I often look at decorator ideas and trends and know that one, they aren't really my thing and two, and most important, it may be a "fad" that won't be around long. 

As I have mentioned before, I don't mind doing "the in thing" if it is simple and inexpensive and easy to change in the future. I like "following the crowd" with pillows, small pieces of furniture, wreaths, etc. 

But sometimes, following the crowd can be expensive and time consuming (not to mention energy draining) and while you may enjoy the fruits of your finances and labor for a few years, you are eventually stuck with something that is dated or out of favor. Something that could be expensive or difficult to change or replace!

I know from experience what happens when I spend a lot of time and/or money on something that goes out of date rather quickly! I end up with room of furniture I hate, but can't afford to change...or a kitchen full of honey oak cabinets...or rooms full of 8x8 tile!

So how do we strike a balance between keeping our home "up to date" but not saddling ourselves with a trend or fad that will fade in short order?

I have a few personal "rules" for decorating.

First, only buy big ticket items you LOVE....things like furniture, flooring, counter-tops, etc. Not sorta like or even  "looks nice" in a magazine or on Pinterest. But truly takes-your-breath-away LOVE.

For current trends and fads...keep it simple, affordable and small. I painted my interior doors black. I LOVE the look! And while it did cost me a gallon of paint and a days work, it is something that can easily be changed when the "fad" fades. Pillows and throws are a great way to "update" couches. Seasonal wreaths. Rugs. Wall paint. All relatively inexpensive changes that can be made that allow you to "get the in look" without breaking the bank!

Furniture...to paint or not to paint. As I mentioned here I had truly grown to seriously dislike (nice way of saying "hate") my bedroom furniture....so rather than sell it for pennies on the dollar on Craigslist, I painted it. Now I like it again. Maybe not LOVE, but I like it enough to not growl at it every time I walk in the room or be tempted by the newest Bassett catalogue! 

So paint walls or furniture if you think it will give it new life. Paint is a great way to add the "in" colors, like teal or marsala, without breaking the bank!

My rule of thumb for painting furniture...if you can enhance the piece and possibly salvage it for another season of use, paint it. 

Decorate with things that have meaning....heirloom pieces, family pictures, your grandmother's china....things that have sentimental "value".... the "Things I Love.

Fads and trends have a place in our homes...we all love to have the "in" look. But limit it to things that are easily and inexpensively replaced or changed...pillows, wreaths, wall colors, rugs, etc. 

According to the article I read if you have a dining room with an accent wall with an inspirational quote, a chalkboard wall in your kitchen and a wood pallet accent wall in your bathroom, a gold dear mount, a chandelier made of antlers, ghost chairs, ombre curtains and gold foil prints above the buffet decorated with a budda bust, skull and rustic metal letter....well let's just say you might as well bulldoze your house to the ground!

Unless of course you LOVE it all...in that case, ignore the experts and do what you want...obviously I do because I don't have any of these "fading trends" and I love my home! 


Happy New Year!

“The purpose of life is not to be happy. It is to be useful, to be honorable, to be compassionate, to have it make some difference that you have lived and lived well.” Ralph Waldo Emerson

I had planned to hit the ground running after a little break during the holidays...but "stuff" happens! Brian had minor surgery Tuesday and then my tree people showed up yesterday to trim my ginormous pine trees. Not that I could help, but I always love watching people do what they do...sometimes it is how we learn. (I now know how to rope and climb a 50' pine...not happening!) While I have been able to work on a few little projects here and there, I haven't really been able to finish much since before Christmas! 

So I will leave you with this thought today. And hopefully life will drift back to "normal" this next week! 

Happy New Year! 


Another Holiday Challenge!

I posted on this subject on my Facebook page and then I remembered, I HAVE A BLOG!!!

So here is ANOTHER holiday challenge!

This year we lost two precious family pets.

Ginger, our black lab....

Christmas 2014

And Molly, my beautiful Siamese kitty...

Molly was 18 and Ginger was 13.

In memory of both, Cleo donated to Hope for Paws, an AMAZING animal rescue organization (watch some of their rescue videos ...with a tissue!) We also donated some supplies to our local shelter! 

I am not rich. I can not donate "a lot." But every tiny bit helps and if everyone would drop off a blanket or old towels or food or maybe a toy to their local shelter, or take a minute and donate just a few dollars to a rescue organization, so many animals could be helped! 

I love my Annual Holiday Challenge of giving when "moved" to do so...and there is soooo much joy in giving to children and families in need. But PLEASE do not forget about all the animals who did NOTHING wrong but will spend their Christmas on concrete floors in a cage! 

Parents, start a tradition THIS year by donating to your local shelter in honor of your pet or children...what an amazing stocking stuffer! Or take your child to the dollar store and buy an inexpensive blanket or a bag of animal food and take it to the local shelter together! 

Trust me...they will forget most of the "stuff" you buy them every year...but they NEVER forget the traditions!

A simple TV cabinet makeover...

This is the second year in a row I have been sick around Christmas. Fortunately, last year it was AFTER Christmas. This year it was BEFORE Christmas. Not good when I have so much to do the week before Christmas! I knew I felt bad Tuesday when I was out building fence (the wind did a number on my privacy fence at the apartments) but I didn't realize how bad I felt until I came home and sat down.

Now I have a list of things to do...presents to buy, a few things to return, wrapping boxes to hunt down, presents to ship, grocery shopping....and I feel to cruddy to even drag myself into the shower! Fortunately I THINK the worst is over so hopefully I'll feel like getting around later today!

In the meantime, I thought I would share another simple little makeover.

Remember all that dated, uninteresting furniture I keep harping on you to paint or do SOMETHING with! Well, this is just another example of a piece of furniture that no longer has a place or a purpose in our homes...unless you roll up your sleeves and give it a little makeover.

The dreaded old "tv cabinet" ...or "hutch"....or whatever you want to call it!

Here I shared how I acquired this less-than-interesting piece and how I used beaded craft board to start this simple transformation!

I gave the inside a KSTP treatment with my "go to" off-white and gave the outside a little plaster paint/dristress treatment. But it still lacked "character" so I wiped down the entire cabinet with walnut stain. That changed the color from a soft "teal" to almost a "greenish" color but it also added depth to the finish! Kind of a "patina"....

I sealed it all with poly and changed out the hardware. Actually I painted the original round knobs black and added black cup pulls to the bottom drawer! Remember, if you are changing out hardware, you may have to patch some holes BEFORE you paint. In this case I had to do just that since the holes on the bottom drawer were 3" apart and the holes for the cup pulls are 2 1/2"...no biggy! Just patch them with wood filler, sand and then paint....then just drill new holes for the new hardware!

It would be simple to reinstall the doors...but in this case I decided to go with an "open shelf" look! 

Simple little update! Now this little cabinet is ready for another season of life! 


Another day, another project....and a new venture! And my annual HOLIDAY CHALLENGE!

My neighbors, Kenny and MaryAnn, bought a beautiful antique dresser. The problem with beautiful antique dressers is they usually need a little work. Ever watch the tv show "Botched?" I should do a show about "botched" repairs on old furniture because 9 times out of 10 someone else has already tried to "fix" little problems, only to create much bigger problems.

In exchange for a few hours of work and a few choice curse words, MaryAnn gave me this little pine cabinet....

IMG_7489.JPG

At some point Kenny had removed the back and like me, had NO idea where he put it. That is okay...I have "repurposed" little cabinets like this before and one of the first things I do is remove the back and replace it with something with a little more "character."

This tung and groove "craft board" is perfect for adding a little "pop" to otherwise boring or dated cabinets. Since I decided to remove the doors and turn this into an "open shelving" unit, I knew it needed a little something....

Rather than paint the boards a solid color, I usually do a little "white wash" treatment on them in whatever paint color I plan on using on the exterior. I painted the inside of this cabinet my favorite off-white color and plan on painting the outside a soft teal. 

The first thing I did was cut the boards down to the size I need for this project. Then I just dip my paint brush in water, then dip it in the paint, brush the boards, then wipe them with a damp cloth....

This allows the grain to show while still giving the boards a little color. After the boards dry, I spray them with a clear coat. 

I put a tiny bit of glue in the "groove" of each board. Not a lot or it will ooze out and make a mess...a little glue goes a long way...and fit them together one at a time across the back! 

I use my pneumatic stapler to attach them to the cabinet....

This board is so thin you could probably attach it with a manual stapler if that is what you have handy!

This bead board really does dress up and update these old cabinets..

IMG_7529.JPG

Now all I have left to do is paint the exterior and replace the hardware...I will make sure I share the transformation when I get it finished!

I recently used this same treatment on a huge old ugly (but very solid oak) cabinet I hauled home from the apartments. 

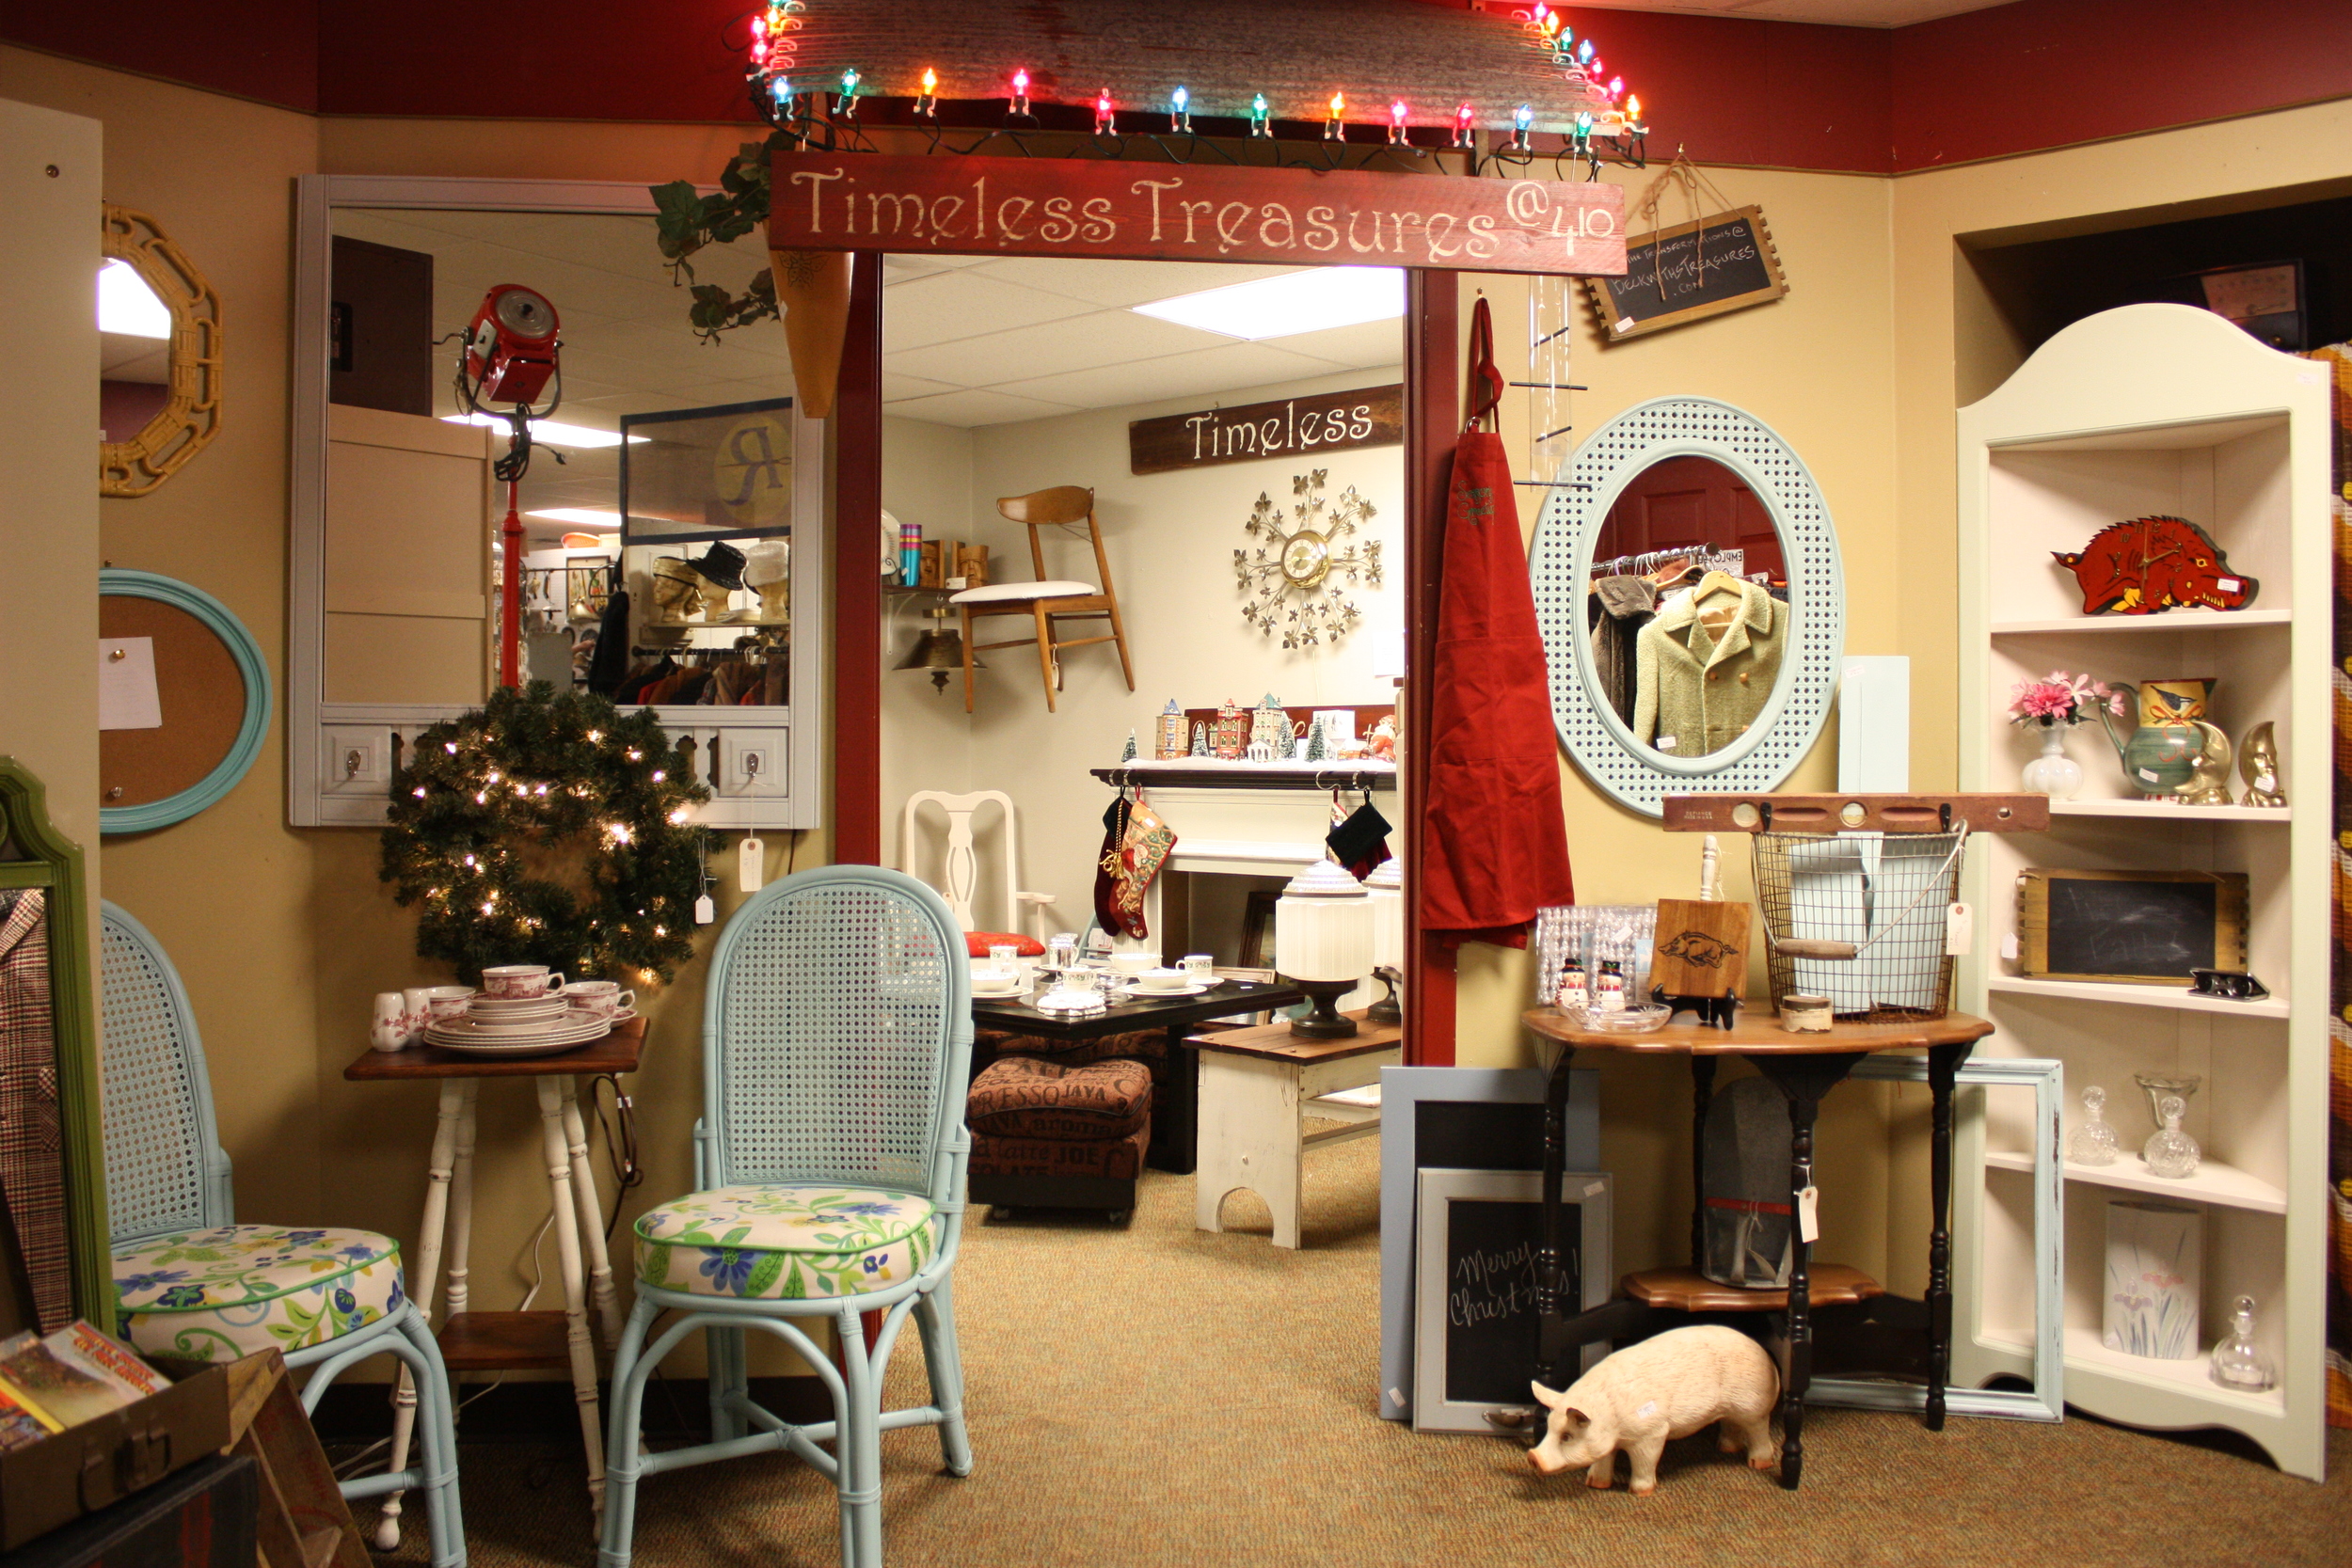
I decided to use it for display in my new "room" at 410 Vintage

Yep, this is my "new venture." An entire room at 410 Vintage, rather than just a booth!

IMG_7466.JPG

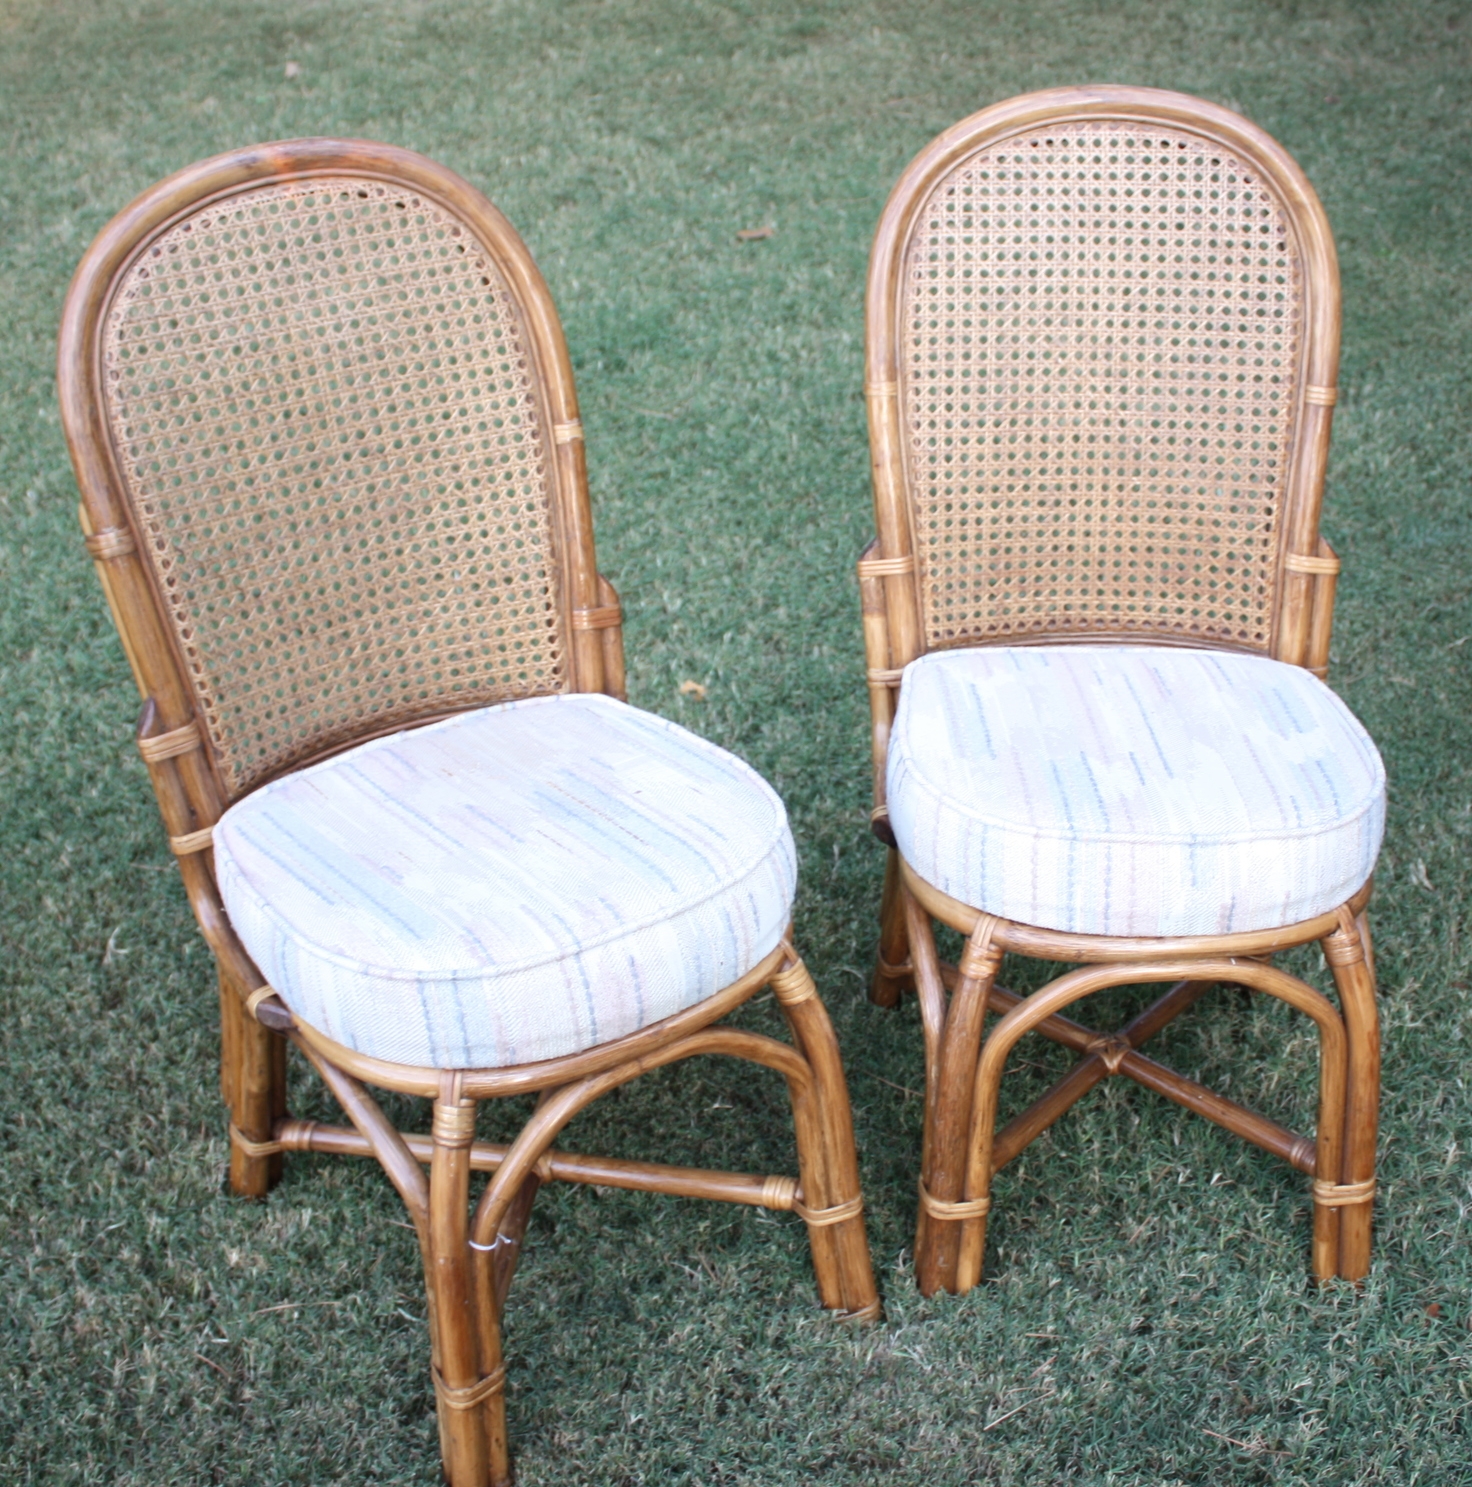
This is just a little sneak peak at my new room...you can see the amazing ratan chairs that started out in a total state of FIX ME!!!!

(I had several dining room tables that where set all pretty for Christmas...neither lasted a day!)

IMG_6625.JPG

A couple of little side tables that had a bad case of the uglies...

They both just needed a little TLC...

I have filled this room with my auction treasures and furniture rehabs...its is a fun space!

If you are local and have not checked out 410 Vintage in Fayetteville, you really should drop in! The owner has one side filled with "mid century" awesomeness and the other side of the building are spaces filled with anything and everything vintage, retro, antique and wonderful! They have an Instagram page that is updated several times a day with new arrivals. I don't have an Instagram page but if you do, you might want to check it out!

HOLIDAY CHALLENGE!

This is the time of the year when I want to remind you of my "HOLIDAY CHALLENGE!" Our family use to do the Angel Tree every year and always enjoyed buying gifts for our "angel." But as the kids have grown and have less time to shop with Mom, I have encouraged them to find their own way of giving. For me, it is random giving. Every year I set aside 5 $20 bills...and I wait. At some point during the season, I will run across someone who will have a "need." Maybe at the grocery store...or the car hop at Sonic. One time I was getting gas and I felt the person at the pump next to me could probably use gas money. You never know...if you open your heart, you will know when to give! 

If you don't have a lot of cash to give, give of your time!

We may not have everything we WANT, but we always had what we NEEDED! It feels wonderful to be able to give back...even if it is just a tiny bit! 

A little stool project and a time to be thankful!

I spend several days preparing for our family holiday dinner...shopping, baking, cleaning...the usual. 

This year I added another little project to my long list of "to dos!"

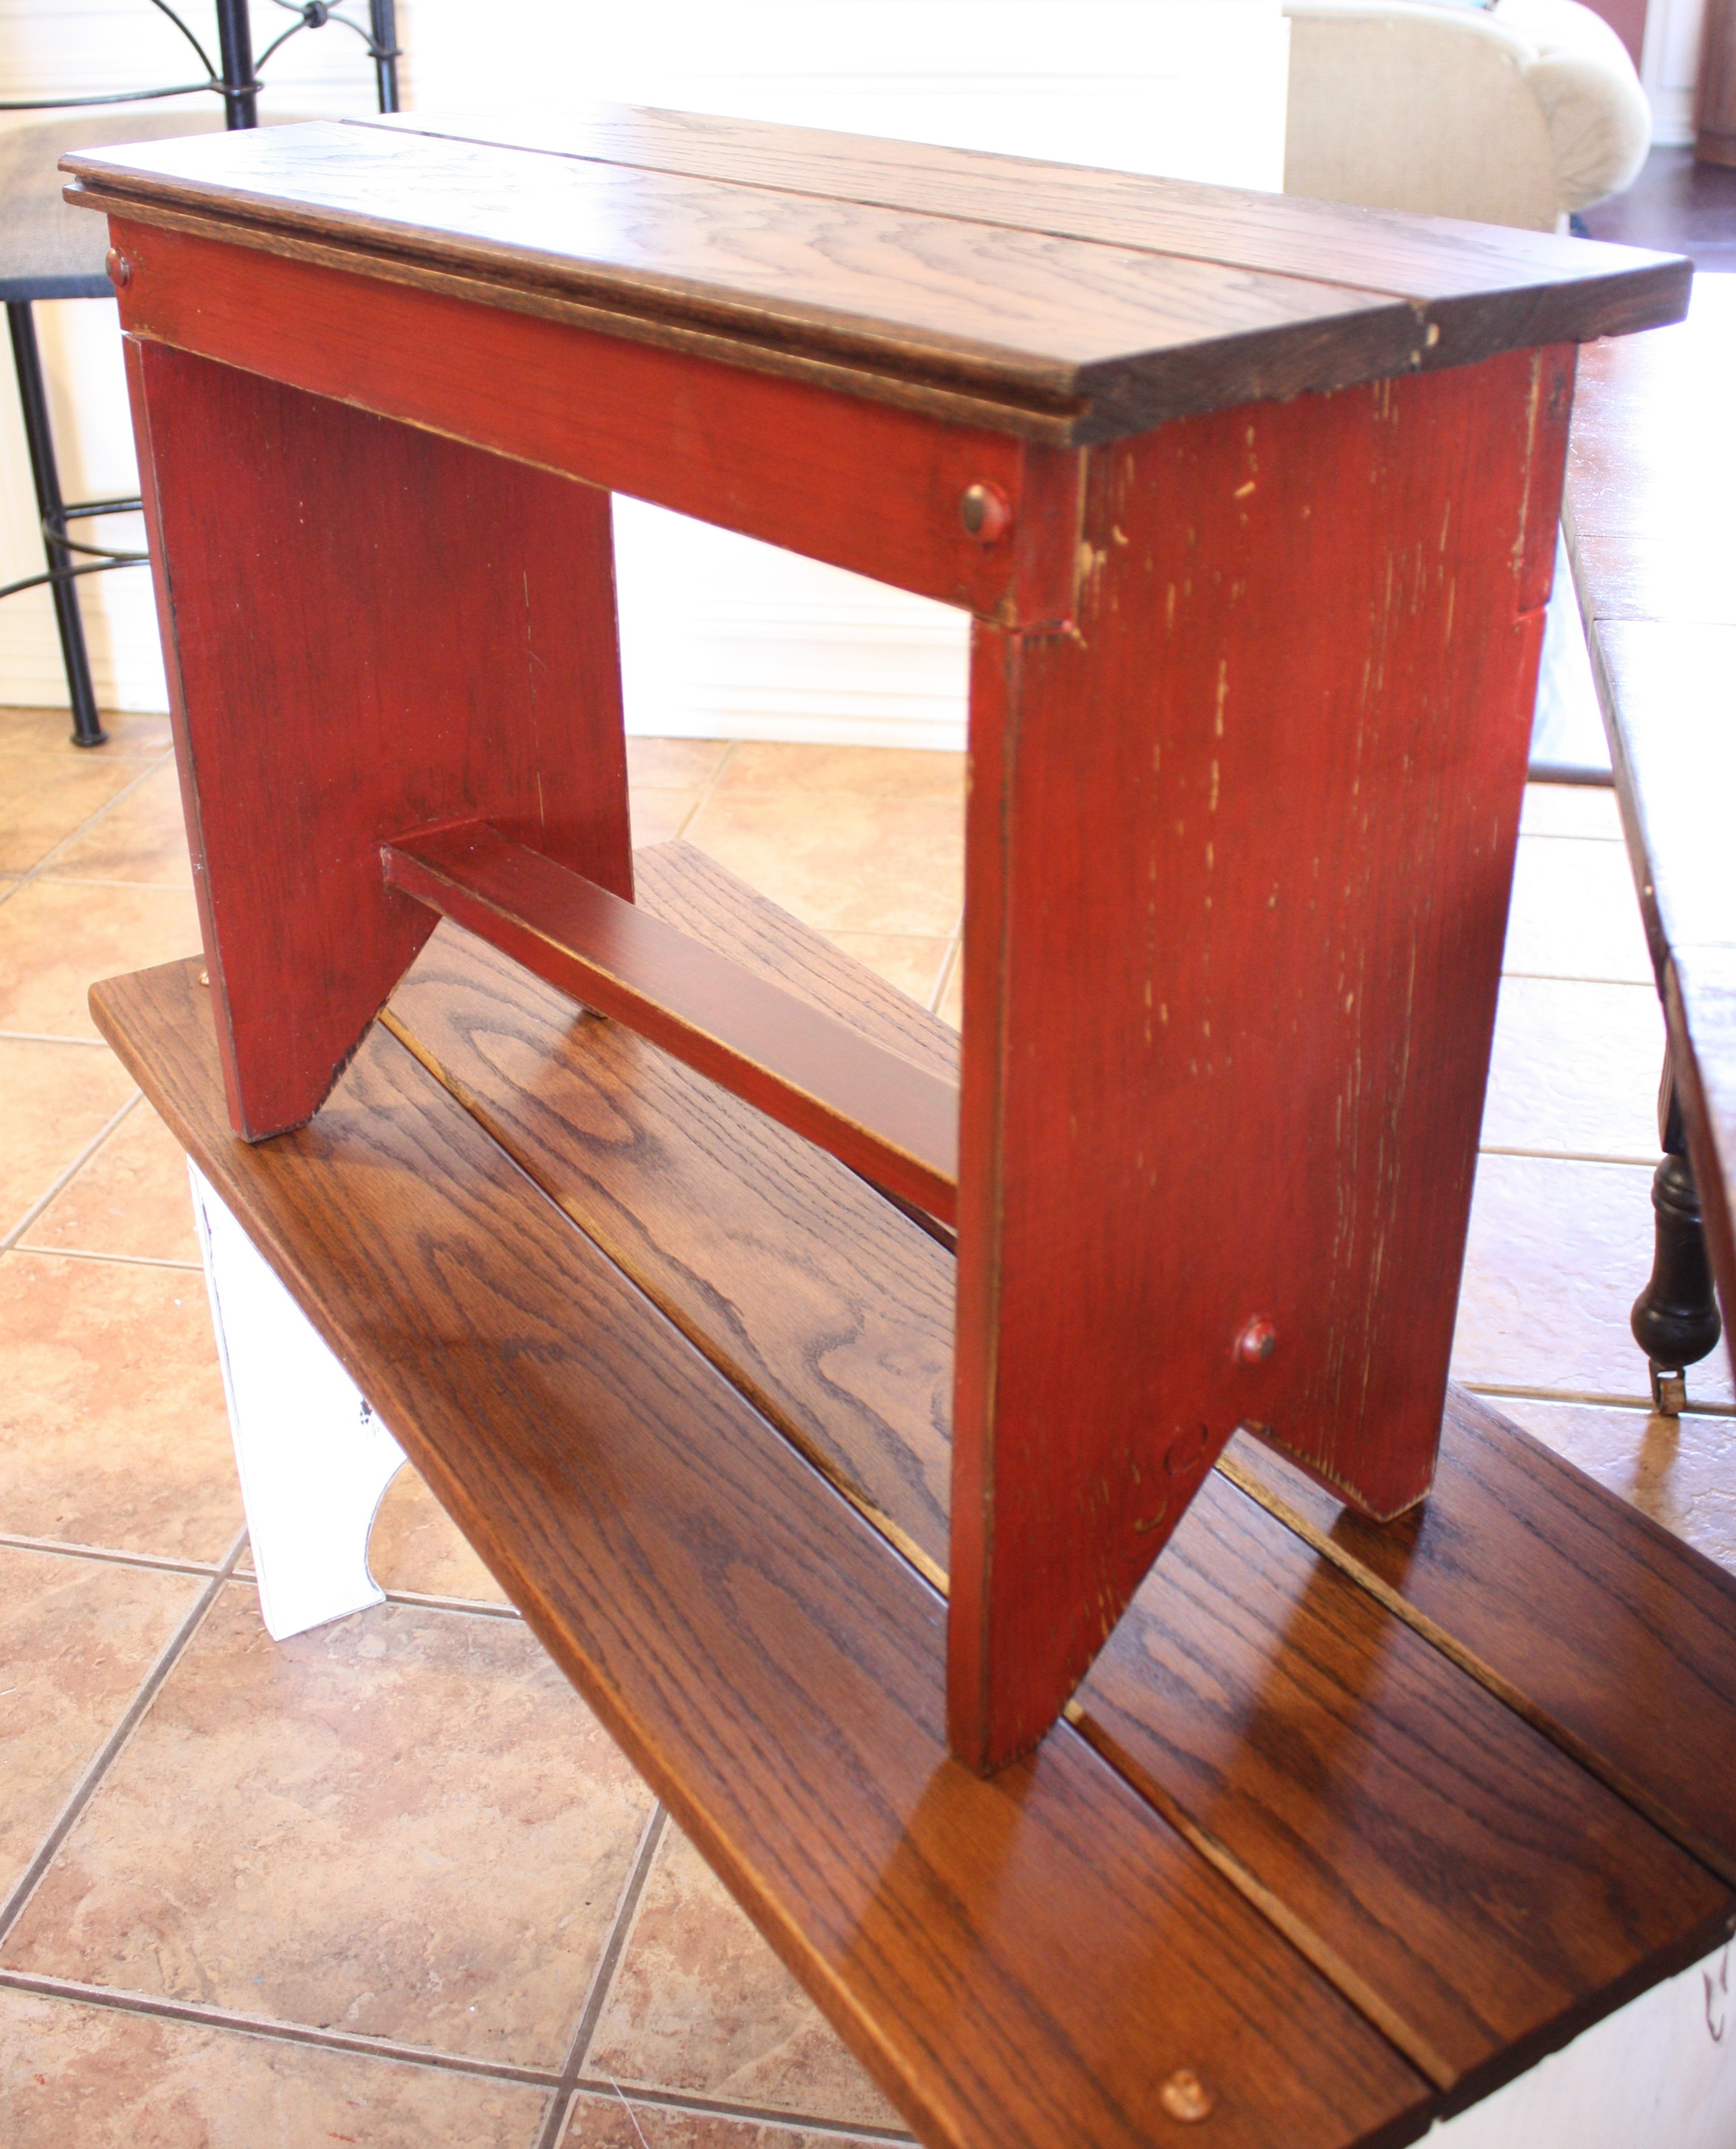
A cute little bench to add additional seating to my Thanksgiving table.

Since we have the bar and rarely use the table, it usually sits against the wall in the dining room with only two chairs. For the holiday dinner, I pull it out and add the leaves. This year I have several sets of chairs in the garage waiting to go to the booth, so I pulled one set in. I like the red, but I didn't like all four of them....

...just "too much" for a smallish table.

I decided I wanted a bench. I searched around a few flea markets, but could never find anything that was just right. 

Even though they weren't the perfect size, I took note of how each was constructed and decided to build what I wanted so I would have the perfect width and height! 

Just one of the MANY things I am thankful for, year round. The ability to make what I need...

I wanted a bench that would fit under the table when not in use so I went with 36" wide. I wanted the same height as a normal dining room chair so I went with 18" tall. The depth of the bench was determined by the material I had for the top...solid oak planking I used on these tables here and here! Although I am not a huge fan of oak, I had a few pieces and it is solid and sturdy and perfect for a bench. Since I plan on selling these little benches after the holiday, it was perfect!

I used stock pine boards for the base since I knew I would be painting it!

The first thing I did was draw out the bench so I knew exactly what materials I would need, how I would construct it and what my cuts had to be. Again, nothing fancy...just paper and pencil! 

(Two buttons looked like a "sad face" so I ended up only adding one...lol!)

Keep in mind that most stock material will actually be LESS than the stated board size...for example a 1 x 4" will actually be 3/4" x 3 1/2". Make sure you take that into consideration when drawing out your "plan." 

The width of the material I used for the legs was a true 12" since I originally planned to use "craft board" as the top. Since I was using the oak planking I had on hand, three pieces of planked together ended up being 15" wide...perfect! So I used the 1 x 12 for the legs!

I ended up with enough "scrap" material to build a smaller bench as well! No need to waste good wood!

I used my chop saw to cut the lengths I needed and a skill saw to cut out the detail on the legs...nothing fancy!

After cutting and assembling all the pieces, I stained the top and base. Even though I was going to paint the base, I knew I would be doing a "distress" treatment on it and wanted the wood that showed through to be darker than natural pine. I did not sand the boards or fill the knots before I painted them so the grain really came out when I "distressed" the painted wood!

I used glue and my trim nailer to assemble everything. I ended up adding little wood "buttons" on the joints. Super easy. Measure and mark were you want the buttons, drill a hole with a tiny drill bit, then use a 1/2" paddle bit to make a 1/8" deep hole on top of the tiny hole. Put a sheetrock screw into the tiny hole, put a dab of glue on top of that, then insert the "button." Since I already secured the joints with glue and trim nails, the screws just add a little bit of stability and the buttons are purely decorative! Not a "have to" but they give the joints a little extra "pop." 

I didn't attach the tops until after I chalk painted and distressed the bases.

I painted the larger bench I will be using at the table my got-to "off white" and I painted the smaller bench red. After I painted and distressed them both, I wiped the red one down with walnut stain...it deepened the color of the wood showing through the "distressing" and darkened the red a bit. 

After the bases were painted and distressed, I attached the tops, again using glue and trim nails. I added a couple of oak buttons to the top of the larger bench just to give it a tiny bit more flare. After they were all assembled, I sprayed them both with poly. Again, I don't wax chalk paint...I like the durability of the clear coat!

IMG_7434.JPG

Perfect.....

I planned to make a really cute little center piece for the table this year. I even went out and knocked pine cones out of my pine trees...goodness knows I have plenty!

I wanted a few additional "fallish" things to add to my pine cones....maybe some reddish berry garland or rusty red flowers to tie the red in. But when I went to the craft store Tuesday, the only "fall" things left were a few ratty scarecrow. Curses! Made me want to drop kick a Christmas ornament across the store. Seriously people, can we not get through Thanksgiving before we drown ourselves in Christmas stuff!

Whatever. I am thankful I have the centerpiece I have!

For me, being "thankful" is not just a one day deal. It is something I TRY to do every day...it is what gets me through the tough days and what I have found makes my life so much happier!

If we would focus on what we are thankful for EVERY day, our lives would be so much easier. I tell my kids often...some days you just have to get up and put one foot in front of the other and force yourself to really focus on what you are thankful for! A beautiful blue sky. The blazing reds of the fall maples. The smell of a neighbors fireplace. Your home. Your family. Your God.

When we focus on the positives, even if we have to force ourselves, there is no room in our brains for negatives. Have you noticed that dwelling on the negatives seem to wear you out whereas focusing on the positives in your life lift you up and give you energy. Yep...that's the power of positive thinking! 

This week is the week we share one day of "thanks" with our friends and family!

This week, really focus on what you are thankful for...and then try to keep those positive thoughts in your head every day, all year!

When you find yourself immersed in your own private pity party, force yourself to focus on the positive.

Being happy, being thankful, loving the life you have...it is a choice. No matter what your circumstances are in life, there is ALWAYS something to be thankful for...find it, embrace it, dwell on it. 


Updating a little chandelier...

I am almost embarrassed to admit where I got this ugly little brass chandelier....

Out of the back of a strangers pick up truck at the dump. Seriously...I was paying out at the local dump and this guy drove up in a truck loaded with trash. Sitting on top was this light fixture. So I asked him if I could have it...and he said SURE! 

Geez...I have become one of "those" people who dig through other people's trash! Crazy cat lady, annoying coupon lady...and now this...(shaking head in disgust)

Whatever...I wasn't sure what exactly I was going to do with it but I knew it could be "updated" if I could just find the right inspiration. I knew I was going to paint the dated brass, so I decided to start there until I could figure out exactly what I wanted to do with the fixture!

Originally I primed it with metal primer, then started painting it with plain ole' off white spray paint. (Remember, when you aren't sure what to do with something, take it to "base neutral.")

And that is when a little DIY project turned into a total disaster. Yes, it happens. Even to me. Even though I shook the spray paint can per the instructions, it still started spraying all "clumpy." I don't know how to describe it, but rather than a nice smooth finish, it was all grainy and rough....AAAAGGGGGHHHHH! 

Made me so mad I tossed the fixture in the back of the garage and said "SCREW IT." (Yes, I curse at innate objects!) I knew I was going to have to completely sand it down and considering the "ornateness" of it, I knew it would be a royal pain. My "vision" was just a heap of "mess." 

Then I saw this on Pinterest...

Andrea at  "Personally Andrea" took a plain ole' chandelier and dolled it up a bit by using jute twine to wrap the ugly little plastic tubes. 

Hum....just the "inspiration" I needed to dig the "ruined" chandelier out of the back of the garage and give it another shot! 

I sanded down the "grainy" finish, reprimed where needed and then painted it in my current favorite teal spray paint! (This time I shook the crud out of the can AND test sprayed it!) 

Covering the ugly plastic tubes is super easy. Andrea used tape, but I used hot glue. I ran a little line of hot glue along the tube as I wrapped it in the jute twine.

WORD OF WARNING!!! Hot glue is HOT...and the plastic sleeves are a tad flimsy so use the glue sparingly or you will actually melt the little tube which will make it impossible to slip back onto the light. (Lesson learned the hard way...fortunately Lowe's sells replacement socket covers for under $3 a pair!)  

I think painting the fixture in black or oil-rubbed bronze would have made it a little more "formal." But I was going for "fun" and "hip" and a little more casual! 

I liked the look so well I decided to do the same to my dining room fixture using the plastic covers I purchased at Lowes!

I found some glittery gold fabric/paper kinda looking stuff at the craft store that I am going to use to cover new socket covers for the Christmas holiday!  I will share that later when I do my Christmas decorating! 

Don't turn your nose up at the dated brass fixtures...as I have shared many times fixtures, lamps and fans are super simple to update with a little paint.

And of course a little inspiration! Thanks Andrea!