Making frame shelves...

One thing I always buy at auctions and garage sales when I find them is frames...frames for photographs, framed pictures, framed paintings. Don't care what is IN the frame...I just want the frame. I usually remove the backing and glass and either chalk paint and distress or spray paint them.  

A few weeks ago I went to an auction and bought TONS of frames...all types and sizes. Several were the perfect size for "frame shelves." 

I have never made and sold these so I only made a few to see how well they do. 

I picked 3 sturdy frames. Since I am going to chalk paint and distress the frames, I wanted a little "detailing."  I had both pine and MDF 1x4 material on hand...made no difference since I was going to paint it!  

I basically built a box for the shelving. I wanted the box to sit on the meatiest part of the frame so when I glue and nail them together it is sturdy. The first thing I did was measure for the box...make sure you account for the 3/4" thickness of the 1x4 (remember, it is not REALLY 1" thick!) 

I cut three horizontal pieces...top, bottom and middle shelf...and two vertical pieces for the sides of the box. I placed my horizontal pieces between my two side pieces. You can see in this picture what I mean...of course this is after it is built and painted and I have already put the glue on it...getting ahead of myself a bit, but at least you can see how it is constructed. (This is the MDF shelf)

One thing I want to address when working with real wood on ANY project...whether you are building shelves or installing a deck...CUP DOWN!

What does that mean? If you look at the cut end of any piece of would, you should be able to see the grain pattern...think tree rings because that is what they are. They may be big or small, but you should be able to see the "curve" of the grain. When nailing a piece of wood to another piece of would, you want to make sure that the curve, or the "cup," is down. Wood naturally wants to "cup" (bend) as it ages and dries out and if the cup is facing up, it is likely to pull away from your glue and staples.

After measuring and cutting the 5 pieces for each frame, I glued (super important!) and nailed them together, caulked, puttied the nail holes and then primed. After the primer dried, I sanded the box and painted it BEFORE attaching it to the frame.

A reminder. ALWAYS glue your joints before nailing them. Remember, the glue is what REALLY holds it all together! 

I use wood filler to fill the nail holes and latex painter's caulk for the joints. DO NOT use a caulk with silicone in it to caulk anything you are going to paint. Paint will NOT stick to silicone! Just run a small line of caulk in each joint and then run your finger (the one with the broken fingernail) along the joint to smooth the caulk out. Keep a wet rag handy!

After the paint has dried, run glue along the outside edge of your box, lay the frame on the box, and then use small trim nails or a trim nailer to nail the frame to the box. (Okay, I will admit I initially ran the glue on the wrong side of the box...this is the back side...I figured it out, wiped the glue off and then flipped it over! You want the painted edge of the middle shelf to show through the frame!)

Keep in mind these are small shelves. I do not intend to put anything heavy on them...so I didn't feel the need to put bracing under the middle shelf. I think the glue and nails will be enough. If I was building a big bookshelf, I would put bracing under the shelf to provide more support!

After my frame and box were constructed, I chalk painted the frames, distressed them a tad, and then hit the entire piece with a spray clear poly to seal it all! Then I added hangers on the back.

The small white shelf is painted with spray paint...I did not distress it. It is a cheaper plastic frame so I didn't think it would look good distressed. But it shows that you can take the cheapest, simplest frame and turn it into a functional shelf! 

I have a "frame collage" of simple white frames on my guest bath wall....

I have never been a huge fan of this wall but I was thinking I might take 2-3 of the frames and make frame shelves out of them just to give the entire feature a "three dimension" affect. 

We'll see...today I am working on a AWESOME mid century chair for my office. I am soooo super excited about this chair and I just can't wait to get it stripped, oiled and recovered! And of course, share! It is a tad too cold to paint but if I come in and run my hands under hot water every thirty minutes or so, I can get some stripping done! Stupid hands. 

Anywho...there is a simple little project that can make a HUGE statement. Before you toss that old picture frame, think about giving it a simple little "repurpose." 

IT'S OFFICIALLY SPRING! Start collecting your planters!

It's official!  IT IS SPRING!!!!!  

Warm weather is on it's way. It will be here before we know it!

Since I have been doing this blog thing for over a year now, I will be revisiting a few posts from the past. Especially my "gardening" posts.

It is entirely to early to plant flowers in the ground! But it is not too early to start planning. As I mentioned in my post here,  I plant little in the ground except for perennials. Most of my annuals planting are in containers. (Perennials are plants that come back every year...annuals have to be replanted every year!)

When most think "container" or pot planting, they think along the lines of traditional flower pots. Not so...you can plant ornamentals (flowers, ferns, even hostas, etc) in just about any type of container, as long as you can get decent drainage (tiny holes in the bottom).

So NOW is the time to start hunting for containers at thrift stores and flea markets....old crocks, tin buckets, old grill bases, etc. And don't forget our old friend, spray paint. You may think the pot or container is an ugly color...no biggy, just hit it with a little spray paint.

I acquired some old pots from a neighbor...kind of ugly and worn. I sprayed them with some bright spray paint I had on hand and they are perfect. After a few years of water and weather, they have begun to chip again...but you know what, I kind of like the look! 

Even if you don't have a lot of space for flower gardening, plan on one or two "statement" pieces for your patio or porch.

This is my all time favorite...

This pot is made up of one Kimberly fern, 3-4 impatiens and a few caladium bulbs. A beautiful display costing less than $15! And if you have smaller pots you can always cut the fern into 2-3 sections at the root and make several pots.

Here I discuss creating an inexpensive and easy "base" in containers and window boxes for planting. Rocks from the yard and cheap soil topped with potting soil! Potting plants doesn't have to be expensive. And truthfully, they are easier to maintain in the heat of the summer...less watering and NO weeding! 

Even if you have existing flower beds that you have planted in the past (like I do) you can scatter a few pots here and there in your beds...plant those with colorful annuals! The affect is the same and the work is minimal! Your knees and back will thank you!

Window boxes are awesome...this is one I put in my bedroom windows last year. It was really beautiful...for about a month. It just dried out to quickly and the plants didn't thrive. This year I am thinking about filling it with small potted plants.

Live and learn....

A few things I have learned over the years...

1) ALWAYS repot plants your buy. Those plants where started many months ago in a greenhouse and chances are the roots are a bit crowded...so repot it. If you can't put it in a larger pot, at least break away some of the root system and repot it with some good potting soil. And whether you are planting in the ground or in a container, add a slow release fertilizer. I like Osmocote.

2) Plant in containers. Obviously that is my thing now because of the "age factor." But even if you are young and spry, find a few unusual containers and fill them with a mix of flowers...it really does make a statement! And if you honestly don't have a green thumb but want a little "pop" on your porch or front flower bed, try the fern and flowers in a container...beautiful and super easy to maintain!

3) DO NOT ignore your regional "freeze date." And if you are really smart, add a few weeks to it...in other words, be patient. Two reasons...one, you risk loosing or seriously damaging everything you have planted if you get a late freeze...two, home improvement stores and even a few nurseries will have "damaged" plants from late freezes. SUPER cheap way to get some flowers...especially perennials which can be expensive! Trust me...a little time and they will be good as new.

4) Ask questions of someone who KNOWS about plants. Not the kid standing there watering them! Sun? Shade? How much water? When will it bloom? These are all things you really need to know. Most plants come with little informational tags...read them!!! 

5) Mulch. I have so many flower beds that I buy in bulk...like by the trailer load. I learned the hard way to use only natural hardwood or cedar. I loved the colored mulches but I read it has a negative affect on the quality of the soil and the growth of the plants. May or may not be true but I did start having trouble with my annuals after I began using it...so I don't use it! 

Gardening is trial and error. Not every planting with thrive...not every flower bed will turn out the way you want it to! I have lived here for 14 years...I still can't figure out what to do with my front flower bed!

Gardening is a great way to get out and enjoy a beautiful day. And like any DIY project, it is "trial and error." Best advice I can give is JUST DO IT! You may find you like it! 

Your yard should be an extension of your home!

IMG_9193.JPG

I'm so excited for spring this year...but our "freeze date" is mid-April and I know better than to get in a hurry. It is bad enough that I have a bazillion hostas that inevitably have to be covered at least once or twice because of a late spring freeze.

Be patient...but plan ahead! You just have to "think outside the pot." (HA! Get it...outside the pot...I amuse myself!)

Spring? Hello? Are you there?

I just can't let myself get too excited yet. I always do this...get all fired up after a few days of beautiful weather...only to get hit with another round of snow!

But I was going back through some old posts and I stumbled across a reminder of things to come...that very soon spring really will be here to stay and before you know it I will be watering every day and grumbling about the heat!

I am so grateful for the four seasons...but winter is officially over this week so I'm ready to start digging in the flower beds!

Bloglovin'.....lovin' !

I'm kind of newish to the whole "blog" thing. While doing a little research I discovered I am again only a few years behind with my newest discovery. So if you are like me, new to the blog thing or short on time or just old and forgetful (not me, a friend) my newest discovery is perfect for you! Granted, I am probably the LAST person on earth to know about this, but just in case there are others living under rocks somewhere out there....

I am like many...looking for inspiration for anything from DIY projects to a new recipe for dinner! I am always amazed at how much information is out there on the internet and how many women share all their wonderful ideas and endless knowledge! Back in "the old days" we would have to sit and watch every morning and afternoon show or endless hours of HDTV just to get a smidge of the information that is at our fingertips now! 

Pinterest is easy, but like most, I have a few favorite blogs I like to follow...and that list seems to be growing every day. When I only had 2-3 blogs I liked to look at it was easy to just pop in and look around. But as my list of favorites grew, I found myself forgetting to check out certain blogs...and inevitably I would miss something really awesome.

Then I discovered bloglovin.com.  I hate to "toot" a website for fear it will put horrible bugs on your computer...or collect your personal information and feed it to the CIA.  But so far, so good.  I haven't seen any annoying pop-ups or unsolicited emails as a result of signing up! 

All I did was go to their website, search my favorite blogs, and "follow." I even get a daily email that shows me all the newest posts on the blogs I am following! When I log into bloglovin.com I can immediately see "My Feed" which is a summary and link to all the newest posts for the blogs I am following. If I find a new blog I absolutely love, I can add it to my feed and then I don't forget to check it out in the future (I kind of do that a lot!)

You can use the drop down menu labeled "Popular" and see a list of blogs featuring your favorite subject. Then just click on the blogs you want to follow.  Or type the blog you want to follow into the search function and it will find it for you...it doesn't have to be a blog that has "signed up" for this site...if it is out there, this site will find it and you can follow it!

Simple.

As I said, SO FAR I haven't gotten a bunch of crud cluttering my computer or email from using this site. I find it soooo annoying to order something on the internet only to get slammed with a bazillion emails as a result. Since I switched to an Apple laptop, I don't have the annoying popups, but email is another thing. I can't remember what I ordered or signed up for the other day, but within minutes my email started getting hit with "crap."

So far, that is not the case with Bloglovin and it really does make it simple to keep track of all my favorite bloggers! I still sign up to get email alerts from a few of my favorite (it's super simple to subscribe to my site...just enter your email address and click "subscribe"...every post delivered to your door step!)...but bloglovin let's you keep up with as many as you like without getting a hundred different emails from a hundred different sites! One email...as many blogs as you would like to keep an eye on!

Simple! 

"Follow" me on bloglovin.com and never miss an awesome DIY project, before and after, tutorial or recipe!


BTW, not that I would mind, but I did not get paid to toot this website...I just think it is a neat deal!


Spring projects...oh wait...is that snow??!!!

I could feel it....the sun warming the ground and the vibrations of my little perennials just quivering with anticipation. I could see it...the first little buds on the ornamental trees and the daffodils all standing at attention trumpeting the coming season. Such a beautiful pop of color in all the post-winter gloom...

I trimmed a few trees, cut all the lirope, started cleaning out the pond and raked flower beds....all in a short sleeve tshirt and flip-flops!

And then it got cold and nasty again. AND SNOWED! All day...

SERIOUSLY?! 

Spring is such a fickle season!

Saturday the weather was AWESOME!! I got a little yard work done and I started reorganizing my disaster of a garage after getting my drop down table finished. I honestly didn't mean to post about it Saturday. Obviously I hit the wrong button and the post went live. But I was pretty much finished with it...and it really is a super neat project I wanted to share!

Anywho, I cut the daffodils that have already bloomed and brought them in....

They were a little cold and droopy but a little warm water and they perked right up!

Fortunately I have a lot more in my yard just waiting to bloom. So this week when it warms back up into the 60s, there will be more.

Got to love this Arkansas weather!

Building a fold down table...

I really want a heated shop. A place where I can spread out and do "my thing" without having to worry about making room for my truck when it snows.

For now I am stuck with the garage. Most of my work stuff is "organized" on the shelves I have built over the years in the garage.

This picture is a tad deceptive....

Truth be told, this corner of the garage is never this "clean." I had already moved 2 tables, about 10 cut up sheets of plywood, a few garden tools and even the trash can out of this little corner before I took the picture.

But with all that stuff "gone" (okay, so it was piled in the yard!) I decided it was the perfect spot to install a drop down work table.

For several years I have used a folding plastic table as a work bench. But every time I wanted to work I had to drag it from behind the crud I had piled in front of it and throw my back out just trying to set it up...and then there was the whole issue of taking it down and wrangling it back into place behind the piles of plywood! 

I do have a garden shed. It is perfect for storing garden tools and spare trim and plywood...things I don't NEED in the garage. Truthfully, I just get lazy and don't haul the stuff back there when I am finished because...well, I get tired. So it piles up.

Anywho, I saw this drop down table in a magazine...or on Pinterest...or somewhere. I thought it was neat and I knew this little corner of my garage, next to the shelves with all my tools and supplies (which WILL be organized...someday), would be the perfect spot.

It just so happens I had a few table legs from an old folding table. Do not ask me where I got them or why I have them. NO idea. I just know they have been hanging on the wall of my storage shed for as long as I can remember waiting for me to do something with them. 

I found this nasty little shelving unit in an apartment.

Just a simple little thing someone nailed together...no finish...pretty nasty and dirty. Straight ammonia and kilz...then a little black paint...perfect for the shelving for my drop down table. I did add two brace boards...one on the top and one on the bottom so I could mount it to the wall.

I made a table from a piece of 3/4" birch plywood, banded with 1x2 poplar and then attached one of the folding table legs to the underside. (I spray painted the leg black before I installed it!)

I attached the painted shelf to the wall using 2 1/2" screws into the wall studs and then attached the table to the shelf with three hinges.The shelves make a perfect place to store stuff I only use when I am working at my table! I can store dowel rods, the level and framing square on the top!

I even attached one of my metal yard sticks to the edge so I would have an quick way to measure things. I did this to my chop saw table too...love! You can see my chop saw table next to this table...it is actually an old grill cart that has had a top added to it. Makes it super easy to roll it in and out of the garage so I don't get saw dust all in the garage when I use it!

I also remembered that I had a cutting mat hiding in the back of my closet...I dug it out and attached it to the table as well. Now I have a place to measure and cut stuff without scarring up my table (yeah, that will last!)

When I want to "close" the table, I fold it up and secure it with the little hook. (As you can see from the holes in the wood, I tried another type of fastener first...obviously it didn't work...trial and error) 

I stained the table with a wood stain/poly sealer I had on hand. I think it is suppose to be a dark walnut stain, but birch and poplar don't stain very well so it was kind of light. No biggy...I just wanted something to seal the raw wood.

I used pipe brackets to mount the table leg to the underside of the table...worked out perfectly! 

While I was organizing, I decided to make hanging "racks" for my clamps. As I have mentioned before, clamps are a necessity when you are repairing furniture. When I had 2-3 of each size, the little screws and nails in the side of the shelving were just fine. But over the years I have acquired so many that it really was a hazard to pull one down...I have been whacked in the head on more than one occasion by falling clamps...ouch! 

I used a 1" flat paddle drill bit to drill a 1/2" deep hole into the 1 x 6" trim that runs along the wall. Then I attached an L bracket on the outside edge of the shelf. I cut a 1" oak dowel rod 3/8" longer than the width between the L bracket and wall trim so that the dowel rod could slip into the hole...then I used a 1 1/2" screw to secure the dowel rod to the L bracket. Basically I made a little "clamp rod" to hang my clamps on! Now they don't fall on my head when I take one down...yippee!

This little table is super easy to put up and down...takes no effort at all. The shelving provides space to store things I don't need handy when it is closed.

This same design could be used to make a sewing, gift wrapping or craft table inside the house if you are limited on space and don't want a table spread out all the time! You could design the shelving as deep as you want and with as many shelves and "cubbies" as you might need for your supplies. The possibilities are endless!

My next big chore is to run an electrical outlet to the wall in the shelving...sounds like a perfect project for my SIL Joel ;) 

Shutter shelving...

If you are cruising my website, chances are you are a fan of Pinterest. After all, isn't that what we are all looking for...inspiration!? Ideas? Ways to take the unwanted and undesirable and turn it into something useful and beautiful?

So today I want to share with you two totally different shelf ideas, both made from "stuff" that would otherwise have been tossed. One I made and one Moira (Mitchell's girlfriend) made!

I happened upon a single set of shutter style bifold doors (louver doors) at the auction this past week. They were poorly painted but in good shape (one busted slat...no biggy). Not something anyone really wants in their home anymore. Before I ever bid, I knew exactly what I wanted to do with them!

Shelves.

(Yes, I know they are upside down in this picture!)

I am always in need of shelving in my flea booths...but I want "interesting" and "different." It is one of the reasons I repurposed this old grandfather clock! I usually take old shelving, give it a nice makeover, and then price it high enough that someone will have to REALLY love it to make me move everything I have displayed. Sadly, they usually do and I end selling the one item in the booth I really don't care if I sell. 

But it can all be replaced! So when I spied the bifold shutter door I knew it was exactly what I needed to replace some shelving that has sold in the last few months! 

Since I didn't want to plaster/chalk paint them and "distress" them I decided to prime them. Lowe's was out of Kilz, so I stepped outside my comfort zone and gave a new primer a shot...Zinsser Bullseye. Not bad...dries quickly and sands nicely. Jury is still out on how well it holds up...guess I am getting ready to find out!  

After priming and sanding, I had to cut and install the shelves. Since this was a bifold door and already hinged, corner shelving was the easiest. All I had to do was install some bracing, triangle shaped shelves and install...always sound sooooo much easier than it is! 

I used big stir sticks from Lowe's for the bracing. I thought it looked more along the line of the louvers in the door! I could have purchased 1/4" or 1/2" flat molding, but the sticks were free and they are about 1/4" thick and 1 1/2" wide. All I had to do was prime them and cut them to fit.

I used 1x12 bullnose MDF shelving for the shelves. The bullnose has a nice rounded front edge and MDF paints up nicely. I usually use it for closet shelving. 

The width of each door on the bifold was 14" wide...so I cut triangles with TWO 13 1/2" sides...don't ask me what the 3rd side measures...I was one of those that just knew I would never use that geometry stuff! (You ought to see me try to figure out circle stuff!) I also know that corners are generally 90 degree angles (if you had a decent framer)...so the two 13 1/2" sides would be at a 90 degree angle.

(Side note: I asked my ubber smart 16 year old daughter that evening how I would figure the third side....she proceeded to give me a 30 minute geometry lesson. Again, I am in complete awe of one of my children. I went to bed with a headache.)

I decided to make 5 shelves...so I cut 5 identically sized triangle shelves from the MDF. I used my framing square and speed square to make my mark from front to back, measured 13 1/2" from the front and then marked another line from that point to the front of the shelf using my framing square. Then I used my skill saw to CAREFULLY cut the board.  (Hopefully the pictures make it clearer than my description)

For the bracing, I cut 10 (2 for each shelf) 13 1/4" pieces out of the stir sticks...I mitered one end of each stick so they would fit in the corner.

After installing the bottom shelf, I decided it would be sturdier if I had one large shelf holding the top together. Since I wanted it to sit ON TOP of the two doors, rather than inside, I measured and cut that piece and nailed it on the top! 

This shelving unit is a prime example of how important glue is...more so than nails. I glued and nailed the bracing for the shelves to the doors, and I glued the shelving onto the bracing. Since I was only using 1/4" material for the bracing, I decided not to try to nail the shelving to the bracing...just too much risk that a nail would splinter the narrow wood bracing or miss all together. I did put one little nail in the front corner of each shelf, tacking it to the door. The glue is what will hold all this together and make it sturdy once it dries. The nails just hold everything in place until the glue sets up. I use regular old Elmer's wood glue!!! But my point...if you are going to nail it, put some glue on it FIRST! 

After installing all the shelving, I caulked it and then  spray painted it with one of my favorite Valspar spring colors.

This is the REAL color of the paint...the top picture is not real representative of the actual color....

This is the REAL color of the paint...the top picture is not real representative of the actual color....

After the first coat of paint, I thought it looked a little "grainy" so I decided to sand it down and spray it again. But I kind of liked the "distressed" look with the white showing through. So I left it that way!

Totally awesome! 

My son's girlfriend, Moira, made these bookshelves. She is a law student in LA so the fact that she is "crafty" AND found the time to do something so incredible is amazing to me. 

I'm not sure what "style" you would say these are...in fondant cake lingo they would be considered "topsy-turvy." In construction terms we call it "seriously, do you not own a square?" Either way, I think they turned out totally awesome!! I love the "randomness" of the shelving! Soooo unique!

I emailed her last week to find out what type of wood she used...this was her reply...

"All of the wood used was from a warehouse in northern California...these guys have a huge supply of donated and salvaged materials from the area...they even go out to places they find out are going to be demoed to get some of the supplies. Really cool guys.

The back of the shelf is a door from a 100 year old water tower they found before it was demoed, and the rest of the wood is all old wood taken from houses in the area before they were torn down. Any paint on there was already there from however the wood was used before. None of the wood is stained but I did paint a satin finish on the entire shelf, which ended up darkening the wood just a little bit"

This girl rocks! Super smart and major crafty talent! When she first showed me the picture I asked her how she measured for the shelving...she said she just kept cutting it until it fit. 

This proves my point...if you really want to accomplish something, YOU CAN DO IT! Moira has no construction "know how" as far as I know...and she managed to create this totally awesome bookshelf.

While I was in the spray paint mode, I decided to hit a few frames and lamps I bought at the auction with paint. Still have a few hundred frames to paint and a few pieces of furniture to "rehab"...in time!

LOVIN' THIS AWESOME WEATHER!!!

Old wood cutting board makeover...

You can find them at thrift stores or garage sales for pennies...maybe even in the back of your very own cabinet.

Old wood cutting boards.

Over the years these kitchen necessities have gotten a bad rap. Probably for a good reason. They harbor bacteria so we no longer use them for the purpose they were originally designed. Instead we now use plastic boards or glass...anything that is easier to clean and sanitize while saving our counter tops.

But the wood used to make these old boards is beautiful...often oak or walnut...maybe even cherry, hickory or mahogany. So rather than toss them, or ignore them when you see them at a thrift store or garage sale, pick them up and give them a quick and simple little makeover to use as kitchen decor! With just a tiny bit of time and effort, they really can become beautiful again!

There are several great things you can do with old cutting boards. Here are just a few example. The possibilities are unlimited and I recommend doing a search on Pinterest or Google..."old wood cutting board." (Click on the photos to take you to the "source" site for these images!)

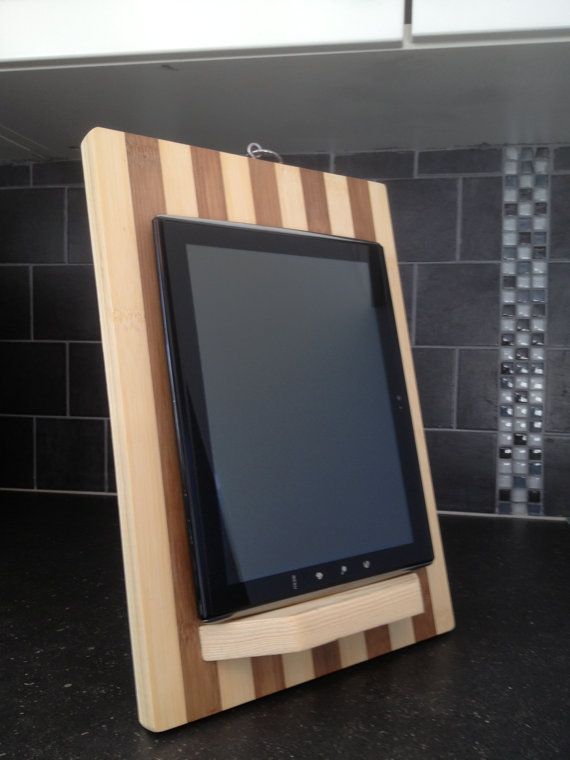
Paint or refinish and make a stand for your Ipad or cookbooks...

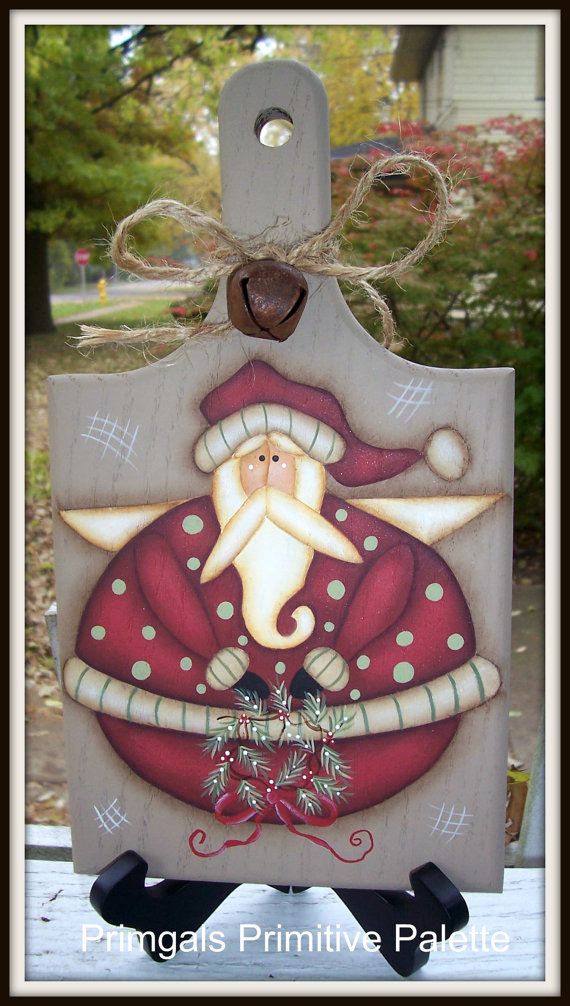
Holiday decor....

And one of my all time favorites...using vintage image transfers to doll them up!

At The Graphics Fairy you can get HUNDREDS of FREE awesome graphics and find tutorials on how to easily transfer them onto wood!

My mom gave me an old wood cutting board that had been in our family for decades and while I was out snooping through thrift stores, I picked up another old board that was pretty beat up! Both had little or no "finish" left on them and both had been used a lot...lots of "cut" marks and dings!

I used the Formby's varnish remover to strip all the old finish and clean them up, wiped them down with mineral spirits, and then applied 3-4 coats of new butcher block oil finish. Watco has a great butcher block oil finish specifically for this type of application and IF you wanted to use these cutting boards again for food preparation you could. (I personally don't recommend it!)

I sanded them with 0000 steel wool between coats and then ran a tack cloth over them. I continued to apply the oil until I got a nice even gloss finish on both! The wood grain and depth of the color on these old boards is AMAZING!!! No stain...just the butcher block oil! It completely transforms the color of the wood and really makes the grain pop!

I sanded each of the boards after stripping just a tad to remove the faintest cut marks, but honestly, I wanted the "used" look...if I wanted "new" I could go buy one. I like the "used" character!

I even picked up an old wood lazy susan at an auction months ago. The lady told me she remembered her grandmother decorating cakes on it for decades. It looked pretty old and beat up and was missing the little "ball bearings" that would have been in the channel on the base that made it turn. I just bought new little craft balls that fit in the channel, stripped it, and oiled it. Gorgeous. I put it in one of my booths and I don't think it lasted a day! Someone knew exactly what it was or at the very least knew it would make a beautiful piece to display! It made me feel good to know that I took something that appeared nasty and useless and turned it into a stunning, useful piece again with little effort! 

Next time you spy one of these old boards, don't pass it up...no matter how nasty or beat up it looks! With a tiny bit of effort they really can be beautiful again! Whether you just strip it and oil it and display it as is, or put in a little more time and doll it up, you will have a awesome piece to display in your kitchen or dining room...on a picture stand or hanging on your wall...by itself or in a grouping...the possibilities are endless! 

Auction Action

With spring around the corner (thank goodness!) auctions are starting to fire back up. There have been a few here and there over the winter, but nothing like what we see during the warmer months....2-3-4 every weekend...so many options to choose from every Saturday! Fun, fun.

We went to a living estate auction yesterday. In town, nice neighborhood, nice house. Honestly, not my favorite kind of auction to go to because there are usually a lot of people there and the prices are higher...yep, and yep. 

But I did manage to pick up a couple of truckloads of stuff. Lots of frames, lamps, a few furniture pieces to makeover, an old piano bench, some large wood ammo boxes and a few knick-knacks!

There was a lot of nice furniture and it brought a pretty penny...mostly people buying for their personal use. Little I could sell for much more than what they paid. The furniture I did get needs LOTS of work...and that's okay. 

Hopefully it will stay warm enough to get a few projects done and ready to share. Yesterday I painted a few frames and lamps. The old desk, bedside table and an old phone table will need some serious time and attention...and warm weather!

And it is ALMOST time to start prepping flower beds! My daffodils have usually popped already, but it was an unusually cold February so they are just now starting to grow. Maybe in the next week or so they will bloom. That is my green light to start trimming lirope and tilling flower beds! Can't wait!

Nasty little chair makeover...PART I!

My INTENT was to get this chair done this week so I could feature it. The weather and a bum back kind of slowed me down.  But I got it done...but I am still going to break this up into a "Two Part Series" because the work that had to be done was pretty extensive. If you just want to see the before and after, check out Part II and scroll to the bottom!

This gives me a great opportunity to stress the importance of TAKING YOUR TIME and DOING IT RIGHT! 

The simplest little makeover takes time.  You can't rush the process.  Strip it properly, sand it properly, prime it properly, paint it properly!  Otherwise you are wasting your time and money!

My newest project is very similar to a chair I did for Sis....it was one of my first "features" here. (I wish I had taken better pictures to show all the detail!) The paint part was a tad easier because it didn't have to be stripped first.  But it was one of my first upholstery jobs, and the more experience you get, the easier it is. Okay, it doesn't get easier...you just know it is going to be a challenge.

One thing I have learned about upholstery...no two pieces are the same and ALL have their challenges. You learn to be creative, take your time, and use the proper tools...more on that when we get into the actual upholstery process!

I spied this pathetic little chair sitting outside an apartment...obviously it was being neglected and unloved! And then it was abandoned! So I tossed it in the back of my truck and brought it home. As with most projects, it sat and waited for inspiration (and time).

I know many tout the virtues of chalk and plaster paint.  No sanding, no prep, no prime.  But 1) I am old school and 2) the paint on this chair was literally crumbling off and I could scrape the white paint off with my fingernail!

IMG_0214.JPG

I wasn't going to risk painting this chair only to have the old paint flake off! Besides, I have to have a nice smooth "template." So my best bet was to strip, sand, prime and paint.

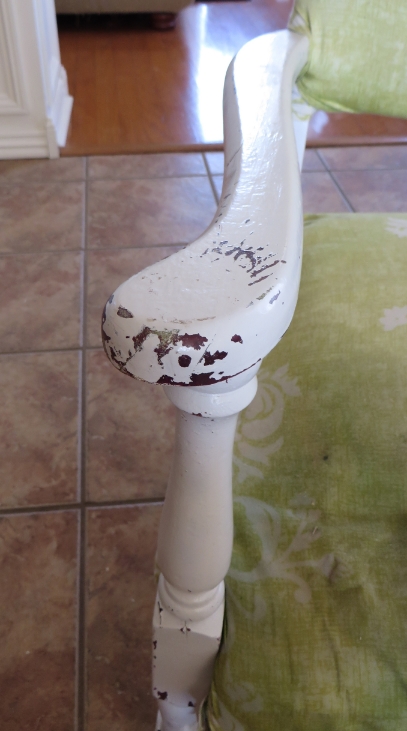
First I had to remove the old upholstery.  I'm not sure what is worse...a seriously botched attempt to "cover" the old upholstery or doing so and leaving the old upholstery intact. Which means I had to remove the 8,324 staples someone used to haphazardly attach the disgusting green fabric and the 6,352 upholstery nails (these are just estimates) used on the original disgusting fabric.

Regardless of what you are removing...good or bad...I always suggest taking TONS of pictures while you deconstruct.  You THINK you will remember how something was constructed, but you may not.  It is always good to have pictures to refer back to! When I took my first shot at reupholstering a chair I took hundreds of pictures as I deconstructed it...boy was I glad later when I got stuck on something and wasn't sure what to do! I just referred back to the picture of the original and I knew exactly what I needed to do!

After hours of pulling, prying and cursing, I was down to bare bones (both the chair and my hands!)

Once I got all the old upholstery off, I addressed the little "wobbles." This chair was in pretty good shape structurally but it is important to make sure all the joints are secure and tight. Glue and clamps! Don't move forward on a project like this until you make sure everything is in tip-top shape. You don't want to be glueing and clamping after you have a shiny new finish on!

Now it was time for a little strip job.

I used Citristrip jel to remove the multiple layers of paint! It actually took 2 applications. An old toothbrush on all the nocks and crannies. I used a mineral spirit wash to remove all the "goo." Then I let it all dry thoroughly.

I know stripping old finish and paint is a tedious, nasty, back-breaking process...and I have no doubt it is the reason someone came up with the idea of mixing plaster and paint.  But again, my "old-school" mentality just won't let me move forward without properly stripping all the old paint off.  

I don't paint over wallpaper, I don't tile over vinyl, I don't upholster over old upholstery.  I just don't. Call me crazy. 

Then I sanded....and sanded....and sanded! Getting all the old paint out of the grooves in the legs was not an easy task...but absolutely essential! This is exactly why I always keep old toothbrushes with my shop tools!

After sanding, I primed it with Kilz.  I like Kilz for several reasons.  For me, it is my personal preference after years of experience. Others swear by Zinsser. This is just one of those things you need to experiment with and do what works best for you! Regardless, I will ALWAYS recommend an oil-based primer!

Nine times out of ten I am going to prime a piece before I paint it.  I am not willing to take the risk of "bleed through", I want a smooth finish and I want my paint to stick!  On rare occasions I will not apply a primer if I am going to use chalk/plaster paint and plan to distress the piece.  But even then I prime areas I suspect might bleed through or cause problems.

Anywho, after I got MOST of the old paint off and sprayed on the primer, I let it dry thoroughly. Then I sanded, and sanded, and sanded...again. I started with a 80-120 grit, and finished with a 220.

I like to sand. Or rather I like how the piece feels and looks after it has been primed and sanded.  And in my opinion, "feeling" is the key! 

Funny story...years ago I was feeling quite smug about the fact that I had not gotten all those nasty little wrinkles all my friends had around their eyes and mouths and on their neck.  Until I put my readers on one day to pluck my eyebrows...and there they were.

Even though I finally broke down and got prescription glasses, I still don't trust my eyes to see all the imperfections...but I do trust my hands.  As I sand, I "feel."  If you can feel it, it will show through a coat of paint!!! Sanding transforms the piece and if done properly, it can mean the difference between having a piece that is beautiful and professional or one that looks like an inexperienced DIYer threw it together!

After priming and sanding, I used my compressor to blow the dust off and then tack cloth to get rid of all the little smidges of dust and debris! I know I harp on using tack cloth...I can not stress how important this step is!

My original plan was to paint the chair a "blush/salmon/coral" color and then upholstery it in black damask. I saw a chair almost identical to this one in those colors SOMEWHERE...and then I couldn't. What I could find was a lot of teal and damask...and since this is a piece that will be sold, I decided I had to go with what is obviously "in." A "pink" chair can be risky! Pretty, but risky!

So teal it is....

The trick to spray painting anything (besides the prep work) is to do 3-4 VERY light coats...let it dry for 30-45 minutes between coats. If you get a drip or run (which you shouldn't if you do LIGHT coats) let it dry OVER NIGHT and then carefully and lightly sand it with a VERY fine grit sand paper! Tack and then lightly spray it again.

After the paint dries I gave it a good coat of clear poly finish.  Probably overkill considering the Valspar spray paint I use SAYS it is an "all in one."  Again, I'm old school.  You clear coat everything. 

The key now is to WAIT.  Wait and let the paint dry and cure for a few days. Upholstery can put a lot of wear and tear on a piece so you want the paint to be cured before you begin working on the upholstery.  

And as you can see, this piece has some serious reconstruction to do before I can ever begin to put the fabric on! I'll make sure I take good pictures and share step-by-step instructions on how to reconstruct and reupholster this chair!

IF YOU WANT IT DONE RIGHT....TAKE YOUR TIME!

Stay tuned! Part II is on its way!

Nasty little chair makeover...before and after....PART II

(If you just want to see the "Before and After" just scroll to the bottom!)

Okay, so the frame is stripped, primed and painted....(see part 1 of this makeover here)

Now comes the fun part! Finishing it up with the fabric!

Before we start reupholstering, this chair had to have a little "reconstruction."

This chair had a "spring seat."  Some will have wood seats.  Those are a little easier, even if you have to cut a new piece of plywood.  But this one had springs and the twine holding them upright and in position had busted.  And one of the nails holding the brace had popped out.  So I had to reattach the brace and then restring the springs.  Not a biggy, but something you definitely want to get right or the seat will be all wonky. 

I used plain ole' twine to restring the springs and I removed the old nails and put in screws.  Just personal preference and besides, if the string broke at any time, it would be a lot easier to remove the screws and start over than pry out nails. 

If your chair has springs and they are in bad shape or you just don't want to mess with them, they are easy to remove. You can measure and cut a piece of plywood to put down in the base of the chair. Then screw the plywood on the frame of the chair and proceed with new foam and batting.

After fixing the springs, I covered them with a scrap fabric I have in my stockpile (I buy sturdy fabric at garage sales just for this purpose) and stapled it to the top of the seat frame. You can also use muslin or burlap. This fabric holds the springs in place and provides a base for the foam. Again, this is not something you would mess with if you have or add a wood seat base. 

Next, you want to measure and cut your new foam. I used 2" foam.

TIP: A few years ago I read a little tip about using an electric bread knife to cut foam.  I happened to stumble across one for $1 at a garage sale. For years I have used a utility knife and scissors to cut my foam. Man oh man....I can not tell you how easy it is to cut foam with a bread knife...it is like cutting butter and your cut is as straight as a factory cut....total awesomeness!  Why I didn't try this sooner is beyond me...typical "old school" stubborness. Live and learn!

After I cut the foam for the seat, I covered the foam with the scrap fabric and stapled it to the frame as well. Again, just to hold the foam in place and give it a smooth structure.

TIP: Many people try to reupholster using a manual or electric stapler.  Forget it. I don't care how hard you try, a plain staple gun (manual OR electric) is NOT going to work.  Old wood is just too hard for the staples to set well and you will spend half your time hammering the staples in...provided your hand doesn't fall off first. I STRONGLY recommend getting a small compressor and pneumatic staple gun. You won't regret it! It is one of items I highly recommend in my "Every Woman's Tool Box." Perfect for this kind of project!

The back of this chair is rather simple, but it needed new webbing and support. You can buy burlap upholstery strapping specifically for this type of project, but since I had some scraps of burlap on hand, I made some straps...I just folded it, ironed it and then stapled it place. Just make sure it is taunt.  Then I covered the entire back with the scrap fabric to give it a little more support....

Then I covered the back of the chair and the seat and frame of the chair with quilt batting. I use plain ole' quilt batting you can buy at the hobby or fabric store. Just staple the batting to the underside of the frame.

I picked up several rolls of batting after Christmas for 90% off...80 cents each! It doesn't have the "loft" of quilt batting but it works great on places where you want more structure than loft, like on the back of this chair. 

Now comes the fun part...actually covering the chair!

Before I began applying the fabric, I made sure I had the piping I wanted to use ready to go. I provided a little tutorial on how to make piping here but you may be able to find a better tutorial online. Use the one that you understand! I HIGHLY recommend using prepackaged bias tape rather than trying to make it out of the fabric you are using. Mainly because you have to cut your strips of fabric "on the bias" which means at a 45 degree angle across the width of the fabric...that takes a lot of work and a lot of fabric. Bias tape comes in a ton of colors! In this case I am using black pipping with a black and beige damask...nice contrast and super easy to make. You can also buy premade piping or trim, but honestly it is a tad expensive. 

Speaking of fabric.  You don't have to use upholstery fabric but you want to make sure you use a very sturdy fabric.  In order for an upholstery job to look "professional" you will be stretching it very tight and stapling it and if you use a light-weight fabric it can easily tear. The least expensive is duck fabric...you can find it at Hobby Lobby or most fabric stores.  It is the lightest weight fabric I would use. I have also used drop cloth fabric and it works pretty well!

I usually start with the back of my chair...only because in my opinion it is the hardest and I want to get the most frustrating part over first. Just my preference! 

There are a few areas that are a little tricky.  One is the arms...here is a little "picture tutorial" on how I deal with this....

To cover the "gap" created by cutting around the arms, I inserted a little "filler" piece.  I just folded down and iron the side adjacent to the arm, put a little fabric glue on the back, and stuck it on the chair and stapled. Then I wrapped the front fabric around the sides and stapled it to the back. 

I wrapped a double welt trim with fabric glue on the back around the arm and over the fabric where I cut it...and then stapled it to the back to secure it. Here is a great tutorial on how to make this welting. You will notice that the tutorial shows how to make it out of the upholstery fabric. Again, I recommend plain ole' bias tape! If you can sew a straight stitch, you can make this. If you can't, you can purchase it at the fabric or craft store! You won't need a lot for this type of project.

This may seem like a tricky thing to do....patience.  Take your time and THINK. And if you stripped the original upholstery and took lots of pictures (like I told you to!) you will have a great reference on how it was originally constructed. It really isn't as hard as it seems! The most important tip I can give at this point (other than be patient and work slowly) is make sure you keep your fabric pulled tight before you staple! 

Cover the front first and staple it to the back of the chair. After you have covered the front of the chair, you can add your piping by stapling it to the back of the chair, circling the entire edge. 

You may have noticed that this chair has a really pretty curve. There is NO substitution for PLY GRIP.  In order to upholster a chair, you have to have it. And you don't need a lot....just enough to go along the top of the chair because it is the only place you will use it.  I can tell you craft stores do not carry ply grip. When I reupholstered my wing back I stopped in an upholstery shop and bought about 5-6' for around $1 a foot. When I decided to get serious and do a few more projects I ordered a large roll online from DIY Upholstery SupplyI got 100 feet for $14.00, plus shipping.  This site is a great resource for all things upholstery! 

In this picture you can see how I stapled the trim around the edge.  Then I stapled a little batting at the edge of the trim.  Then I applied the ply grip.

This stuff "bites" so be careful. It comes with little holes in it so that you can use upholstery nails, but I just use my pneumatic stapler and staple it on, making sure that the edge of the ply grip is pushed tight against the piping. You only apply it along the top of the chair and about 1-2" down the side. It is very flexible and very easily follows the "lines" of the chair...whether it is curved or straight!

IMG_0386.JPG

I attached the back fabric along the BOTTOM first. I used upholstery cardboard tack strip to get a nice crisp line. Then I stretched the fabric to the top and shoved it into the ply grip with a putty knife.  Start in the middle and work you way to the edges...keep the fabric pulled tight as you work it into the ply grip. 

After you have the fabric pushed down into the ply grip, make sure there is no fabric ABOVE the depth of the grip...if there is, just trim it off.  Then take a hammer or rubber mallet and tap the ply grip shut. I would STRONGLY suggest putting a piece of scrap fabric between the hammer and the chair as you tap it shut. 

As I mentioned earlier, lighter weight fabrics can pose a few problems when used as upholstery.  Duck cloth does fairly well with the stress of the tugging and pulling and stapling...but occasionally even it might have a little "tear." I had this happen on the edge of this chair back. A tiny bit of the ply poked through. The only thing I could do (besides start over and that wasn't happening) was dab it with a little upholstery glue to keep it from tearing any more...and then I used a black sharpie to "hide" the little problem. (Again, I AM NOT A PROFESSIONAL!)

Before using ply grip, I strongly recommend spending a little time online googling as many tutorials as you can on how to apply it. You may be totally confused by my instructions...but completely understand another! It really isn't that difficult and seriously makes a huge difference!

"Professional upholsters" use metal tacking strip to fold over the outside edges on the back...not me. I just fold them over and use fabric glue. Probably not the smartest thing to do, but for me it is the easiest...and it holds! 

After the top is done, I tackle the seat.  In my opinion it is a tad easier. Just lay the fabric on the seat and make sure you have enough all the way around to staple it to the underside of the seat frame. You will have to cut slits on the corners to work around frame, but again, patience...take your time. And keep your fabric pulled tight before you staple. When working with a seat, whether it is a project like this or a simple dining room seat, it is always best to attach your fabric on all four sides FIRST...just put 2-3 staples in the middle of each side, and then start working your way towards the legs.

Also...PAY ATTENTION TO THE DIRECTION OF YOUR FABRIC!! Make sure it is all running in the right direction.  I used this damask on another project and discovered that I had applied it "upside down" on the seat. And one time I worked real hard to get a peacock smack dab in the middle of the seat of a chair...only to discover that it was upside down. Frustrating.  So check and double check before you start pounding in the staples! 

After my seat was completely covered, I edged the entire thing with trim...then I added a simple black fabric to the underside to hide all the innards. I use a cardboard edging on the front of the chair just to get a nice crisp line and then folded the fabric and stapled on the sides and back. 

Remember what we started with way back when....

And this is what we have today! Amazing....

IMG_0400.JPG

Before and After....

This truly is a "trash to treasure!" Now you know why I wanted to rescue the poor little thing!